This article advised by videoconvert.minitool.com mainly discusses on the solutions for Adobe Media Encoder not working problems. It elaborates on various situations and analyze on each condition and provide corresponding fixes.
Adobe Media Encoder is a video and audio media processing program that enables you to convert a file from its current type into another one. It is a tool included in Adobe Creative Cloud or Adobe Creative Suite. Adobe Media Encoder (AME) works in cooperate with other Adobe programs like Adobe After Effects (AE), Adobe Premiere Pro (PP), Adobe Audition, Adobe Character Animator, as well as Adobe Prelude.
You are able to create optimized video for any screen size and resolution with Adobe Media Encoder on Windows or Mac computers. Yet, you may encounter some problems that make Adobe Media Encoder not working. If so, you can rely on the following solutions to try to fix the issues in various situations.
# Adobe Media Encoder Not Working with After Effects
When you add an After Effects composition created by After Effects to Adobe Media Encoder, rendering may get stuck at 3 seconds. It can also take about 8 hours or longer to render.
When you encounter this After Effects add to Media Encoder queue not working issue, you are suggested to use these guides to handle the problem.
#1 Update both After Effects and Adobe Media Encoder
In the first place, it is recommended that you update both apps to the newest version or make them match each other and be of the same version. For instance, if you are using Adobe Media Encoder 2022, you’d better use After Effects 2022.
#2 Add Composition to Media Encoder from Render Queue
Secondly, you can try to add the composition to Adobe Media Encoder from the render queue of After Effects. Just go to Composition > Add to Render Queue. From the Render Queue, click Queue in AME.
#3 Change Video Rendering
Thirdly, you can alter the video rendering way to fix the After Effects export to Media Encoder not working issue. Navigate to Media Encoder CC > Preferences > General in Adobe Media Encoder. In the Video Rendering section, click the down-arrow behind Renderer and select Mercury Playback Engine Software Only. Click OK to save changes.

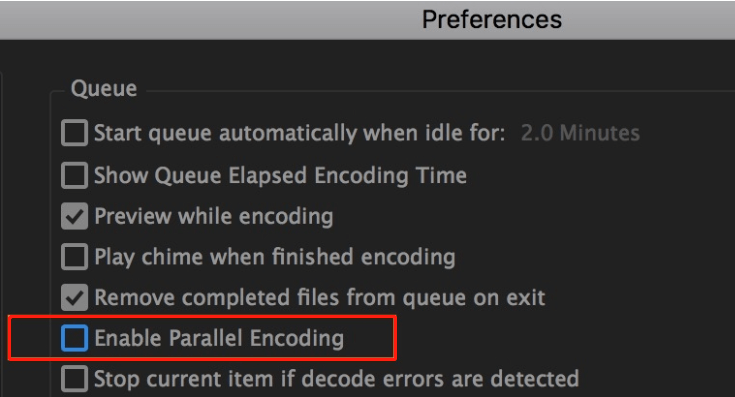
#4 Disable Parallel Encoding
Next, you can also try to turn off Adobe Media Encoder parallel encoding feature. In Media Encoder, move to Media Encoder CC > Preferences > General and uncheck the Enable Parallel Encoding.
#5 Reset Adobe Media Encoder Preferences
The way to reset the preferences of Adobe Media Encoder is different in different system. No matter which OS you are running, please makes sure that both After Effects and Adobe Media Encoder are closed before starting.
On Windows
- Open Windows Run and input %appdata%. Click OK to open C:UsersusernameAppDataRoaming address in your Windows file explorer.
- Open the Adobe
- Find the Adobe Media Encoder subfolder and rename it as Old_Adobe Media Encoder.
- Close the window and go to Documents > Adobe in file explorer.
- Find the Adobe Media Encoder subfolder and rename it as Old_Adobe Media Encoder.
On macOS
- Quit After Effects and Adobe Media Encoder.
- Open the Finder, hold Option and click Go on the menu bar.
- Select Library and go to Preferences > Adobe.
- Rename Adobe Media Encoder folder to Old_Adobe Media Encoder.
- Close the window and navigate to Documents > Adobe.
- Find the Adobe Media Encoder subfolder and rename it to Old_Adobe Media Encoder.
Hope one of the above ways can help you solve the export to Media Encoder from After Effects not working problem.
# Media Encoder Dynamic Link Not Working
Adobe Dynamic Link was first introduced in Adobe Creative Suite Production Studio in January 2006. It can connect After Effects to Adobe Premiere Pro and Adobe Encore DVD. Nowadays, Dynamic Link can be used to connect PP and Adobe Media Encoder.
However, you may encounter some problems while using Adobe Media Encoder such as Adobe Premiere Pro won’t queue media to AME through File > Media > Queue and Adobe After Effects won’t connect with Media Encoder when rendering through AME.
Why is Adobe Media Encoder not working? You may delete Adobe Creative Cloud Apps folders from your system (C) drive and move the default installation to other drive. Although all apps can work smoothly separately, you can’t connect each other and the dynamic link isn’t working.
To solve this problem, just go to File in Adobe Media Encoder and choose Add Premiere Pro Sequence/AE Composition.
# Media Encoder Watch Folder Not Working
I create preview animations in 3ds max and they output to a folder on the C drive. I set the watch folder to look there for uncompressed videos then compress to cineform onto a different drive letter and location. Sometimes it works, sometimes it doesn't. Most of the time lately though, it just stops watching. Any ideas?
The above is a user case complaining about the watch folder utility of Adobe Media Encoder not working issue. To deal with such kind of issue, you can try one of the following fixes.
- Restart Adobe Media Encoder.
- Only put media files whose types are supported by Adobe Media Encoder in the watch folder.
- Delete and re-add your watch folder.
- Change the destination of your watch folder.
- Delete Adobe Media Encoder’s preference.
- Don’t run another animatic until the conversion is finished.
![[Solved] How to Fix “Adobe Media Encoder Is Not Installed”?](https://images.minitool.com/videoconvert.minitool.com/images/uploads/2023/02/adobe-media-encoder-is-not-installed-thumbnail.png)
# Adobe Media Encoder Rendering Issue
In Adobe Media Encoder on M1 Pro, M1 Max, and M1 Ultra systems, when rendering to ProRes 4444 and ProRes 4444XQ codec variants with Alpha channel, you may encounter the below error.
Error compiling movie.
Codec compression error.
This codec may be unable to support the requested frame size, or there may be a hardware or memory problem.
Exporter returned bad result.
…
Error code: 19
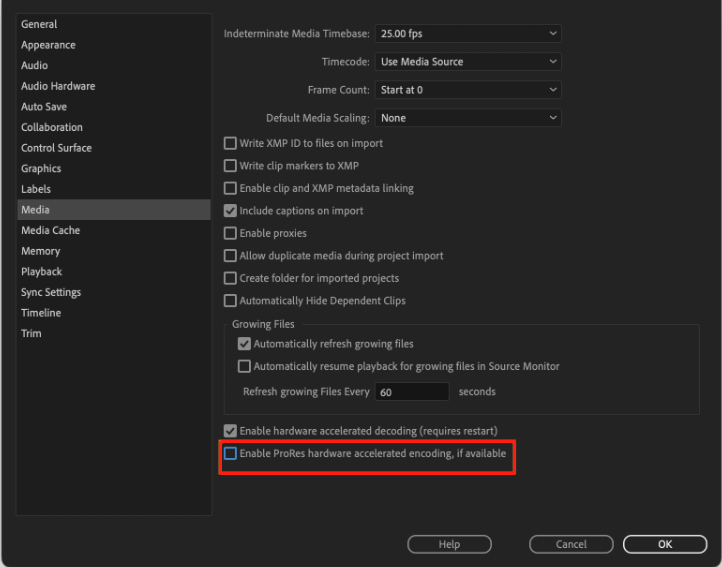
To deal with this problem, you can try this temporary workaround: disable ProRes Hardware encoding.
- Go to Adobe Media Encoder’s Preferences > Media.
- Uncheck the Enable ProRes hardware-accelerated encoding, if available
- Click OK to save the change.
This issue can also be seen in Adobe Premiere Pro.
# Adobe Media Encoder out of Memory
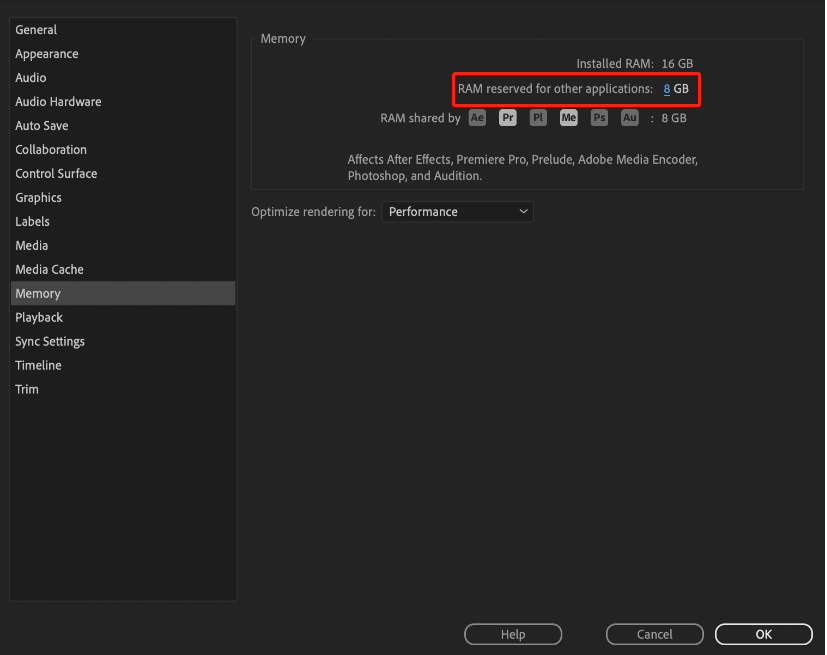
If you are suffering from the out-of-memory issue on M1-based Mac PC while using Adobe Media Encoder or Premiere Pro, you can try to adjust the amount of memory allocated to Adobe software. That may decrease or even eliminate the occurrence of the memory error.
You need to increase the amount of memory that the operating system (OS) uses to achieve a 50% balance between Adobe and other programs/OS.
- Navigate to Preference > Memory on your Adobe Media Encoder.
- Change the RAM reserved for other applications to half of the Installed RAM of your computer.
- Click OK to save the change and restart your machine to make the new memory allocation take effect.
Check if you are still with a high memory issue while using Adobe Media Encoder.
Other Adobe Media Encoder Known Issues and Their Fixes
1. Adobe Media Encoder hangs when try to close the app after pausing the queue.
Solution: Try to close Adobe Media Encoder in task manager or force close it by shut down your device after saving necessary files.
2. Adobe Media Encoder hangs when try to stop the queue after pausing it.
Solution: Try to resume the queue and then stop the queue.
3. Adobe Media Encoder fails to publish videos directly to Facebook.
Solution: The login to Facebook may fail. Even if the login is successful, the upload will be rejected by Facebook. To handle this problem, you can first export the video to your local device and then upload it to the Facebook website.
4. Unable to publish videos to Adobe Stock.
Solution: Adobe Stock is no longer available as a publish destination. You need to export the video to local device and then directly upload it to the Adobe Stock website or to Adobe Stock servers via SFTP.
Almighty Solutions for Adobe Media Encoder Not Working Problem
No matter which specific error you come across while making use of Adobe Media Encoder. There are some methods that can be applied to each situation.
#1 Update Adobe Media Encoder
First of all, you can try to update your Adobe Media Encoder app to its latest version to try to solve its related problem. In most cases, the Media Encoder issues has already been fixed in its new version. So, you can automatically get rid of the problem by sampling getting the new version of Adobe Media Encoder, especially when you are currently using an old edition.
However, in a few cases, you may suffer the issues that only exist in the new version of Adobe Media Encoder. In such a situation. You need to vice versa downgrade Media Encoder get it work again.
#2 Reinstall Adobe Media Encoder
If update or downgrade Adobe Media Encoder do not help with your situation. You may need to uninstall and reinstall Adobe Media Encoder (either the newest version or an older working edition). Sometimes, you didn’t completely or correctly installed Media Encoder. Or, you lose some critical Media Encoder files due to wrong operation or malware/virus attacks. So, you will encounter some unexpected errors while using it.
To deal with such case, you can uninstall and reinstall Adobe Media Encoder with a newly downloaded installation package.
#3 Clear Adobe Media Encoder
Thirdly, you may need to clear the app cache of Adobe Media Encoder on your computer since you have used it for a long time. The app cache is just like a coin, it has a useful side that can load the program quickly while it has a bad side that interpret some features from working properly.
#4 Use Adobe Media Encoder Alternative
Fourthly, you can take advantage of one of Adobe Media Encoder’s alternatives to replace Adobe Media Encoder to complete some file format conversion tasks. Among many replacements, MiniTool Video Converter is recommended for it is easy to use and completely free of charge. It supports most common input and output file formats.
MiniTool Video ConverterClick to Download100%Clean & Safe
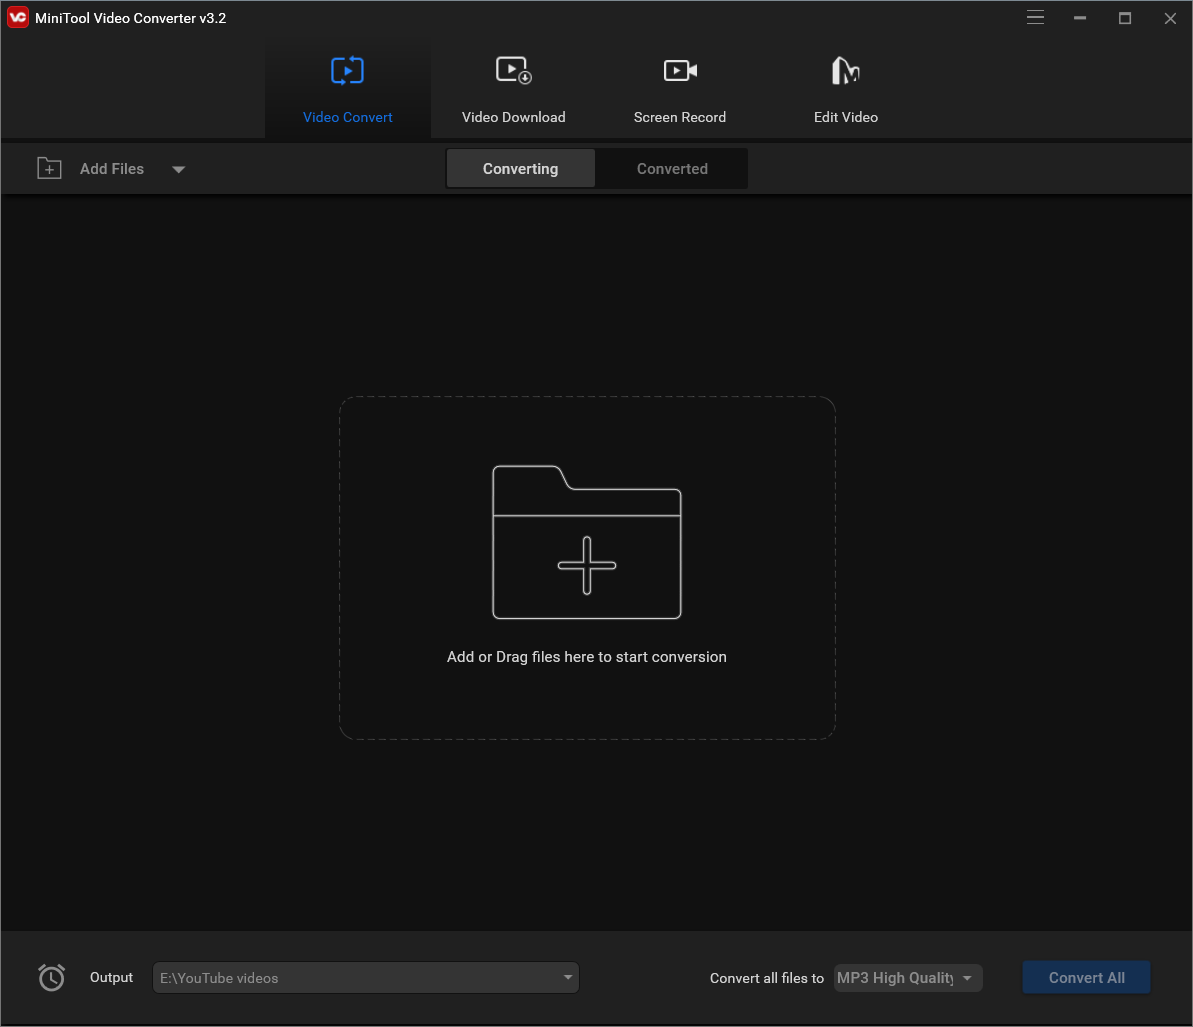
MiniTool Video Converter enables you to change a file’s type in a few steps without length limit of a video or audio. It won’t put a watermark in your file neither. Besides, MiniTool Video Converter can also record your screen without watermark and time limitation. Moreover, it can download your favorite video from YouTube to watch offline for free.
#5 Update Your OS
In addition, you can try to update your operating system to eliminate the incompatibility between your system and Adobe Media Encoder and make them work together smoothly.
#6 Scan Computer for Viruses
Finally, it is necessary that you rely on a security software, either Windows built-in Windows Security in Windows 11 or third-party antivirus like Avast, to help you detect and remove the possible viruses or malware on your PC. Thus, it may solve Adobe Media Encoder not working problem.
Related Articles
- Microsoft Expression Encoder: A Comprehensive Tool for Video Encoding and Screen Capture
- [9 Ways] Fix Adobe Media Encoder Not Connecting to Project
- [7+1 Ways] How to Fix Adobe Media Encoder Error Code 3?
- Do I Need Adobe Media Encoder & What Can Media Encoder Do?
- Fix “Adobe Media Encoder Could Not Write XMP Data in Output File”
About The Author

Position: Columnist
Helen is a tech writer with over 10 years of experience. She specializes in creating easy-to-follow guides for video editing, media file conversion, and computer performance. Helen doesn't just write—she tests every software herself and listens to feedback from users and experts. Her goal is to make complex programs simple so that everyone can solve their tech problems with confidence.
User Comments :