Read this guide to learn how to use MiniTool Video Converter to capture your computer screen in various scenarios. Whether you’re recording a tutorial, capturing gameplay, or saving a video call, this comprehensive guide will walk you through the steps to ensure high-quality screen recordings with ease.
How to Capture Screen Videos
Apart from converting media files and downloading YouTube content, MiniTool Video Converter can also help you record all activities that occur on your computer screen without a time limit and watermark.
MiniTool Video ConverterClick to Download100%Clean & Safe
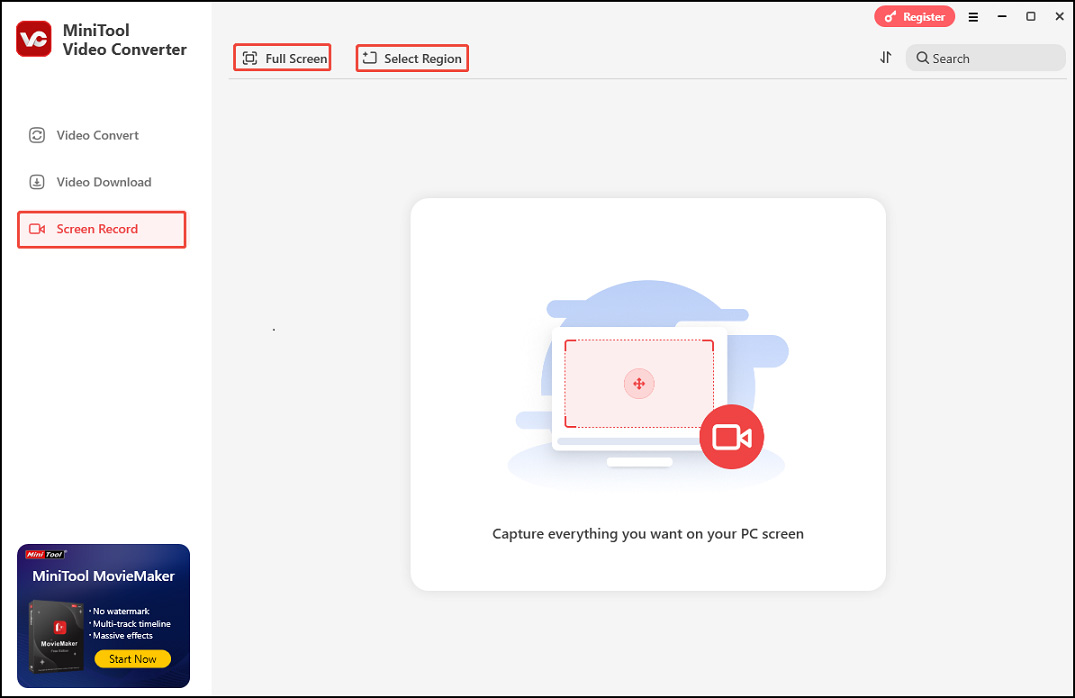
Step 1. Click Screen Record to switch from the default Video Convert tab to the Screen Record tab. Click Full Screen to capture the entire screen. Or, click Select Region, left-click your mouse, and then move it to select the recording area.
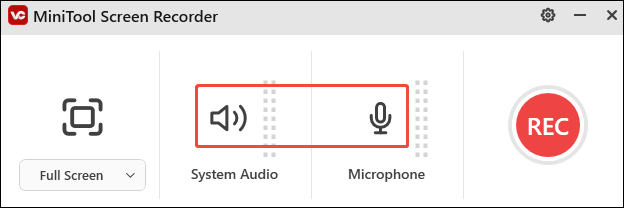
Step 2. Determine if you want to record sound from the system or microphone. Just click the corresponding icon in the MiniTool Screen Recorder panel to turn on and off the sound.
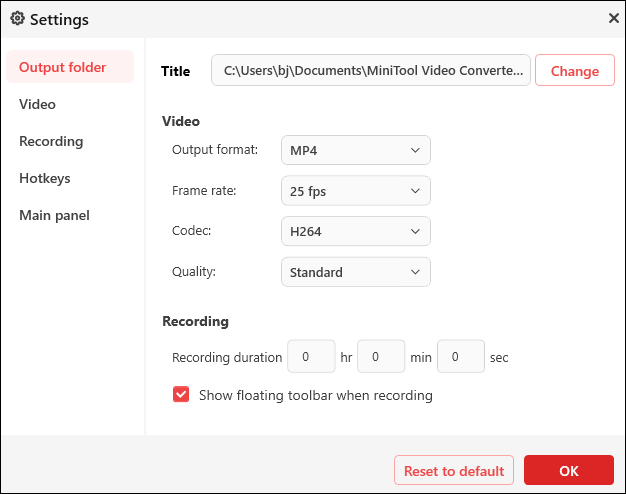
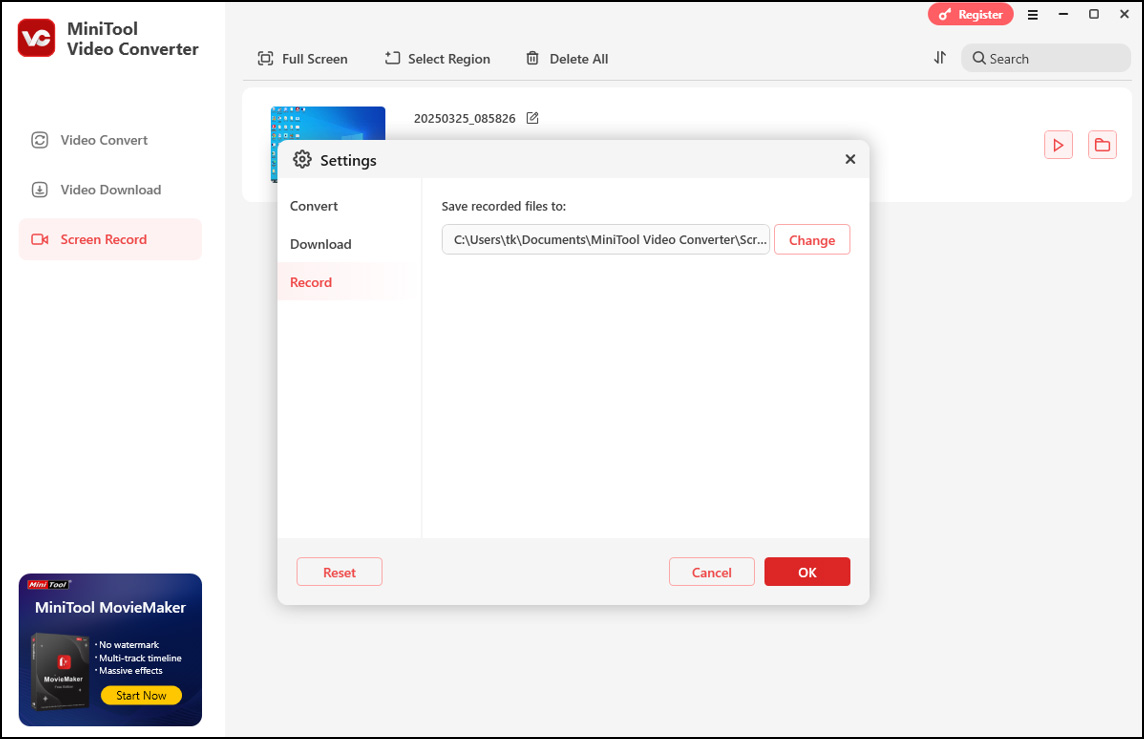
Step 3. Click the Settings icon in the upper right to enter the advanced Settings page, where you can modify the output folder, video frame rate, video quality, preset recording duration, and much more. Do not forget to click OK to save your changes.
Step 4. Click the red REC button in the panel or press the F6 key on your keyboard to start capturing your screen activity.
Step 5. During recording, you can press F9 to pause/resume recording.
Step 6. Once done, press F6 to stop recording.
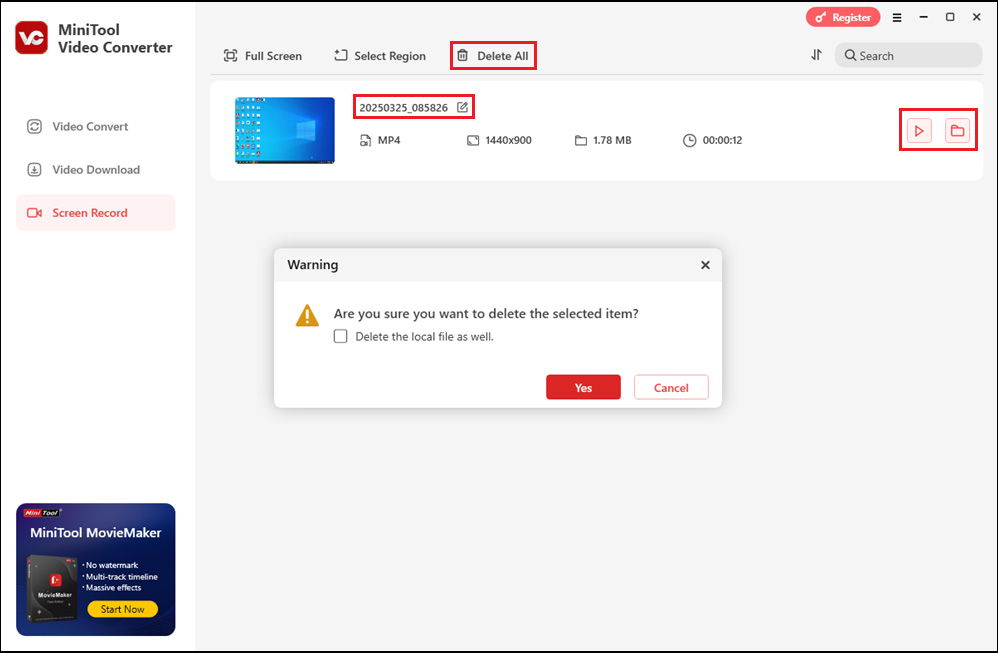
Step 7. After that, you will be redirected to the main interface of the MiniTool Video Converter, where the recording will be listed. Click the play icon beside it to watch or the file icon to locate it. To rename the recorded file, click the current file name or the editing icon next to the current file name.
If you wish to remove the recording from the tool, hover your mouse over it and an X icon will appear in the upper-right corner. Click this X icon and choose Yes in the following popup to confirm. Check the Delete the local file as well box before clicking Yes if you want to delete the local file too.
If you have multiple recordings and want to delete all at once, click Delete All in the top menu.
Bottom Line
Until now, you must have mastered how to capture your computer screen in a few clicks. Isn’t that easy and helpful?
User Comments :