This article developed by MiniTool Software Limited mainly introduces the famous video compressors for Instagram for different operating systems. It also teaches you how to operate a video compressor to reduce the size of a video.
What Is a Video Compressor
To learn what’s a video compressor, first of all, let’s see the definition of video compression. Video compression is the process of reducing the total bits that are required to represent a given image or video sequence.
Video compression is usually performed by an application that has a specific algorithm or formula to determine the best way to shrink the data size. Such an application is known as a video compressor app or video compressor software.
Audio Compression
Typically, audio is compressed for the efficiency of resource use. Video compression is also very beneficial for the efficient usage of storage thanks to the largely shrunk file sizes. Compression technologies are applied extensively across all elements of current network and computer architectures.
In general, compression is the process to pack file information into a smaller space. The tool that completes the task is named a compressor. The program that can pack a video is called a video compressor while the app that can pack audio is called an audio compressor. Yet, usually, a program that can pack a video can also pack sounds. So, a video compressor is also an audio compressor in most cases.
What Can a Video Compressor Do?
Just as mentioned above, a video compressor or video resizer/reducer/shrinker/cutter is able to reduce the total number of bits needed to display a specific graphic using its algorithm like H.264/AVC or H.265/HEVC, which reduces the raw content data by as much as 1 thousand times.
For real-time video, HD 1080p 60fps has a natural baseband bandwidth of 3 Gbps. Once it is compressed, the resultant network video stream can be as low as 1 to 10 Mbps, which enables the real-time video streams or the resultant files to be easily delivered across today’s standard Internet.
Video compression can be sorted into two kinds: lossy compression and lossless compression.
Lossy Video Compression
Lossy compression refers to that the compressed file has less data than the original file. Images and sounds that repeat throughout the video might be deleted to effectively cut away parts of the video that are regarded as unwanted. Thus, that process may finally get a lower-quality video due to data loss. So, it is called lossy compression.
The advantage of lossy compression is that you can reduce a large amount of data before a quality loss is sensible. Thus, most video files are uploaded to the Internet or online social media platforms like Instagram, YouTube, TikTok, Facebook, Twitter, etc. with lossy compression to keep a small file size while delivering a relatively high-quality image.
If you upload a video keeping an extremely high-quality (large file size), it will take forever to upload the video, and even if you finally manage to upload it online, the viewers will probably get stuck watching your video online or downloading it to local computers.
Lossless Video Compression
Being different from lossy compression, lossless compression nearly won’t remove info from the source video files. The compressed and the original files are almost identical, as is the file size. Therefore, the cases to use lossless video compression is few.
Best Video Compressor for Instagram
Just as described above, in most cases, you need to compress a video before uploading it to online social media platforms such as Instagram. What are the requirements for videos uploading to Instagram Story?
- Instagram video file size limitation: maximum 250MB.
- Instagram length limit: between 3 seconds and 10 minutes.
- Instagram video aspect ratio: between 1.91:1 and 4:5 (ideal 9:16).
- Instagram video formats: MP4 (with H.264 video codec and AAC audio codec), MOV, GIF.
- Instagram video resolution: at least 1080 x 1080p.
Knowing the video specifications for Instagram, now, let’s see some video compressors that can compress your video to make it eligible to be uploaded to Instagram.
Instagram Video Compressor for Windows
In the first place, let’s see some excellent video audio compressors that can be installed on devices running Windows operating systems (OSes).
#1 MiniTool Video Converter (Free/No Watermark/No Limit)
MiniTool Video Converter is a user-friendly and free video compressor that offers professional-quality results. It allows for quick compression by setting an estimated file size. Additionally, the compressed videos can be saved in MP4, MKV, or WEBM formats. Furthermore, MiniTool Video Converter supports batch compression, saving you a significant amount of time.

In addition to video compression, MiniTool Video Converter can also serve as a screen recorder and video converter. Moreover, MiniTool Video Converter enables you to download videos from YouTube to watch offline.
#2 VSDC Video Converter
VSDC Video Converter is a free video compression software. It supports common video formats such as MP4, AVI, M4V, and DVD. In addition to that, there is a video editor embedded in VSDC Video Converter.
#3 MiniTool MovieMaker
MiniTool MovieMaker is another video cutter developed by MiniTool Software, which is a young and fast-grossing technology company. As its name indicates, MiniTool MovieMaker is mainly a video editing software. Yet, you can make use of its video split or video trim feature to cut off the unwanted parts in your video to make it short. Thus, your video size will be reduced.
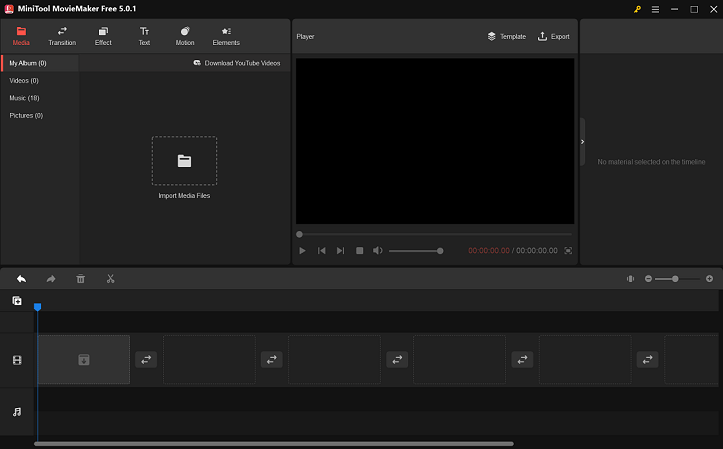
Besides, you can export your video in a smaller file format. Or, change your video’s resolution, encoder, or bitrate to shrink its size.
Video Compressor for Instagram on Mac
Then, let’s introduce a video compressor that can be used on Mac computers. That is Movavi Video Converter. Movavi Video Converter can compress your media files including videos to over 180 formats. It can do a lossless compression for your video. Yet, only the trial version of Movavi Video Converter is free. After 7 days, you have to pay to continue using its features.
Best Video Compressor App for Linux
Although Linux has fewer users than Windows and Mac, it is still worth mentioning a video reducer applied to the Linux system. Which video shrinker is able to compress a video on Linux devices? That is the VLC Media player.
Although the VLC media player is mainly a media file player, it can also convert media files to various supported formats. After the conversion to specific formats, the size of the media file can be reduced.
![[4 Ways] Fix “VLC Could Not Open the MP4A Audio Encoder” Windows](https://images.minitool.com/videoconvert.minitool.com/images/uploads/2022/05/vlc-could-not-open-mp4a-audio-encoder-thumbnail.png)
Compressor for Video for Instagram for Android
As for smartphone devices, the most popular OS is Android. Of course, there are also Android video compressors for Instagram such as Video Compress.
Video Compress is one of the well-known Android phone video compressors that can compress video files and save them on your mobile phone. With it, you can reduce your data usage. By compressing a video, it is much easier to share it on social networks like Instagram, WhatsApp, LinkedIn, etc.
Instagram Video Compressor on iOS
The last offline video compression app type is for iOS devices like iPhones. Here, we will take Compress Videos & Resize Video for example. Compress Videos & Resize Video compresses your iPhone or iPad videos and saves storage space without losing video quality. It is easy to use and watermark-free. With its compression, you can quickly share your videos with friends or upload them to social accounts.
Online Video Compressor for Instagram
Lastly, let’s offer some online websites that can help you compress your videos. The advantage of an online video resizer is that you do not need to download and install an app on your local device. The disadvantage of an online video compression service is that you have to upload the target video to the service’s platform. Usually, the source videos are large and they consume much bandwidth.
The following is a list of the best choices for online video compressors/converters:
- com/compress-video
- io/video-compressor
- com/tools/compress-video/
- com/resize-video/
- com/video-compressor
In addition to the above apps and web services, there are many other video compressors for Instagram. If none of the above satisfies your needs, you can search online for more options.
How to Compress a Video with Video Compressor for Instagram?
After choosing a proper video compressor/converter, now, it’s time to compress the designed video into a smaller size. Here, we will take MiniTool Video Converter and MiniTool MovieMaker these two different types of programs for examples to show you how to compress a video with a video converting and a video editing software respectively.
# Compress a Video by MiniTool Video Converter
Without further ado, let’s go directly to the guide!
1: Download and install MiniTool Video Converter.
Click the download button below to download and install MiniTool Video Converter on your computer.
MiniTool Video ConverterClick to Download100%Clean & Safe
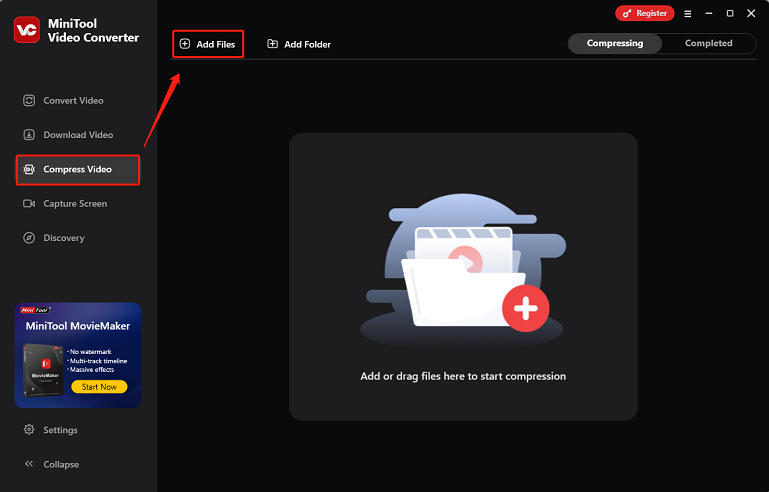
2: Add the target video.
Launch MiniTool Video Converter, head to the Compress Video section, and click on the Add Files option to add the video you want to compress.
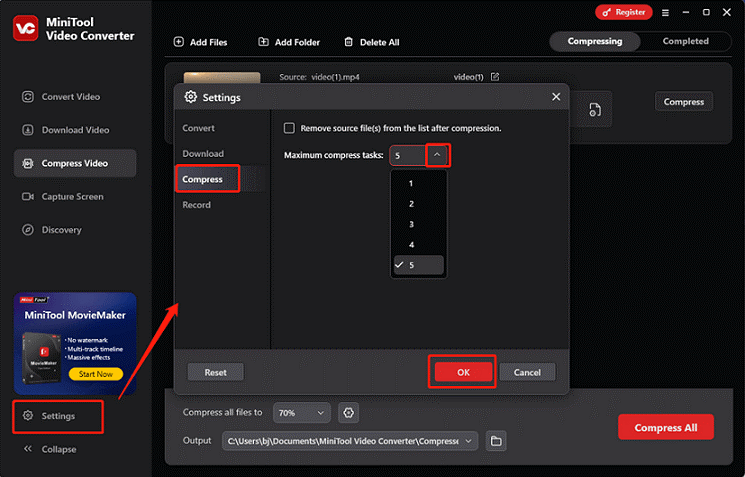
To set the maximum simultaneous compression tasks, click the Settings icon in the left toolbar to access the Settings window, then go to Compress and expand the Maximum compress tasks option to select the desired number. Then, click OK to save the changes.
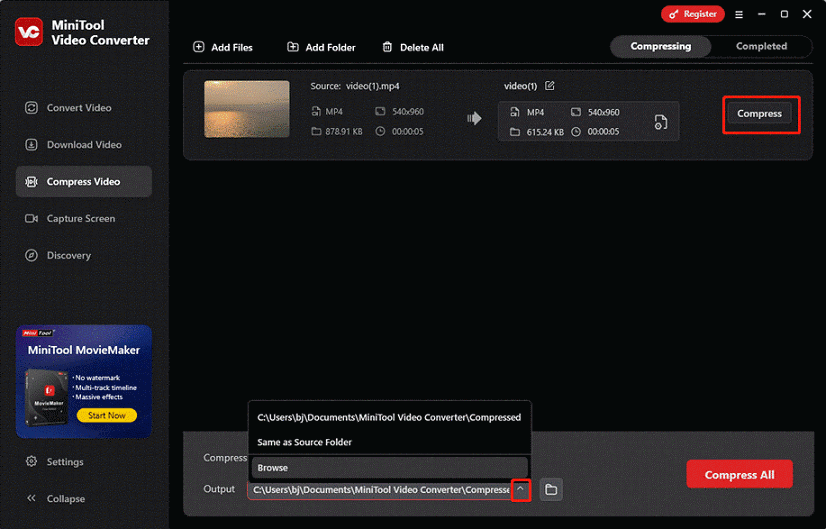
3: Set the estimated file size and choose a format.
Click the Settings icon on the imported video to access the Compression Settings window. Then, drag and move the red dot icon to select an output estimated file size. There is a recommended range. So, it's best to keep the file size within this range. Expand the Format option to choose the desired output format. After that, click on OK.

4: Start compression.
Open the Output option at the bottom and select the desired output path to save. Then, click the Compress button to begin compression.
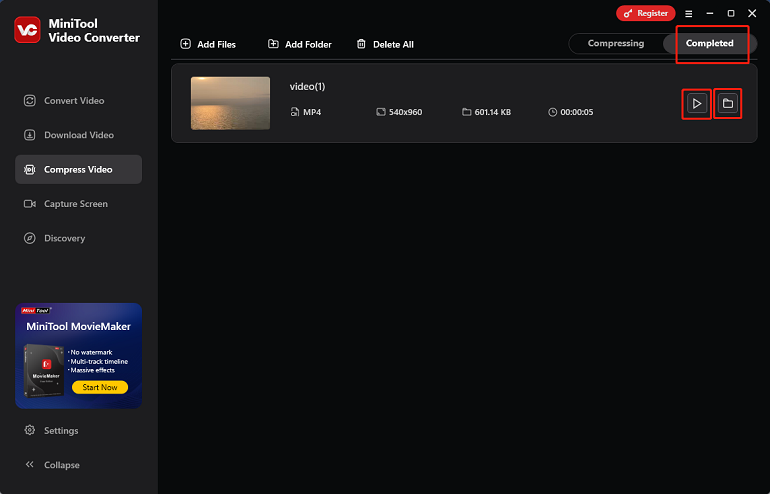
When the compression task completes, MiniTool Video Converter will automatically switch to the Completed section, where you can click the Play icon to view the video or click the Folder icon to locate it.
# Compress a Video via MiniTool MovieMaker
Similarly, let’s directly go to the steps.
MiniTool MovieMakerClick to Download100%Clean & Safe
1. Get and install MiniTool MovieMaker on your device.
2. Open it to reach its user interface (UI).
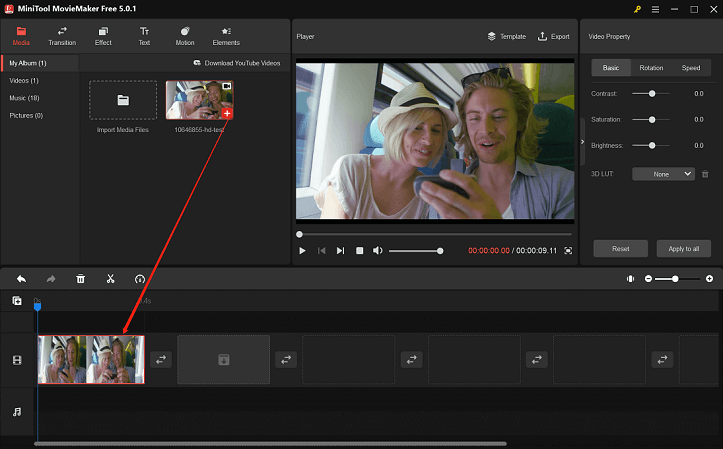
3. Click Import Media Files in the default Media tab in the upper left section of the app to add your video.
4. Then, add the video to the timeline by clicking on the + icon on the bottom right of the video under the Media tab.
5. You can use your mouse to reduce the length of the video. Just put your mouse cursor at the start or end of the video. When the mouse turns into a two-way arrow, push it toward the center of the video to remove the unneeded part.
6. Or, you can just split out the unwanted clip and delete it. Move the playhead to the specific location on the video and click the Split (blue scissors) icon on the playhead line.
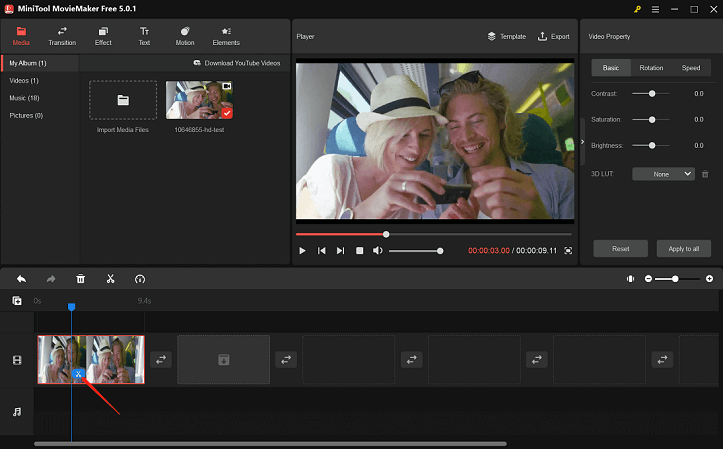
7. Or, you can take advantage of the trim feature, which hides in the Split (scissors icon on the timeline toolbar) > Full Split.
8. If you don’t want to cut off any part of your video, you can leave it without any edition to the video itself and only change its output format instead. Click the Export option in the upper right and make your settings in the pop-up window. There, you can change the file format, quality, encoder, resolution, and bitrate of the video. All those parameters will influence the size of the video.
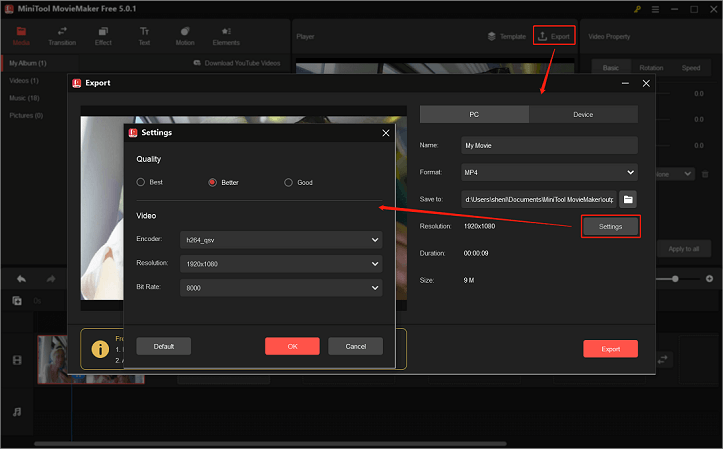
Once you have chosen a suitable format for the compressed video, click Export to get the video compressed.
Conclusion
It’s a long journey to arrive here! Yet, it is worth since you have learned much knowledge about video compressors for Instagram. Now, you must have found your way to make your video smaller to be adequate to be imported to Instagram. If you select MiniTool product and encounter a problem while using it, feel free to contact support@minitool.com for instant help.
Also read:
- How to Un-Update/Downgrade Instagram on iPhone & Android Phone?
- Happy Birthday Captions for Instagram of Different Roles or Ages
- Hashtag for Instagram Photography: Wedding/Portrait/Landscape…
- How to Crop Photos for Instagram & Why Does Instagram Crop Photos
- [New] Instagram Reel Template Uses Format from Another Reel
User Comments :