YouTube is a video-sharing platform owned by Google, which has become one of the most dominant social media platforms. Many people upload videos to YouTube for sharing, monetization, or other purposes. Do you know what video formats YouTube accepts? If your video format is not supported by YouTube, you’ll fail to upload it on YouTube. To solve the problem, you need to convert video for YouTube upload. In this post from the MiniTool free video converter, we will give you a comprehensive guide and tell you what the best video converter for YouTube upload is.
Part 1. What Are the Video Formats for YouTube Upload
Most of the new users of YouTube don’t know what video formats are supported by YouTube. They may have questions like “Can I upload MKV to YouTube?” and “Does YouTube accept MOV files?”. To answer these questions, you’d better master the video formats supported by YouTube. Meanwhile, it is necessary to learn other video specs required by YouTube.
Supported YouTube Upload Formats
You are only allowed to upload videos to YouTube but not images and audio files. The audio files can only be uploaded as extra language for your video. If you want to upload images or audio files on YouTube, you need to use a video editor or file converter to convert them to a video. What video formats does YouTube accept? The supported video formats are listed below.
- MP4
- MOV
- AVI
- WMV
- MPG
- FLV
- 3GPP
- WebM
- MPEG-1
- MPEG-2
- MPEG-4
- MPEGPS
- DNxHR
- CineForm
- HEVC
Therefore, you need to make sure that your video format is one of the above listed. If your video format is not listed above, you need to convert your video for YouTube upload.
Other YouTube Video Specs
In addition to meeting the upload format requirements, YouTube has other requirements for uploaded videos. It is necessary to master these YouTube video specs to create professional YouTube videos.
#Video Resolution
- SD: 240P (426×240), 360P (640×360), and 480P (854×480)
- HD: 720P (1280×720) and 1080P (1920×1080)
- 2K: 1440P (2560×1440)
- 4K: 2169P (3840×2160)
- 8K: 4320P (7680×4320)
#Frame Rate
- 24fps
- 25fps
- 30fps
- 48fps
- 50fps
- 60fps
#Aspect Ratio
- 16:9 (the standard aspect ratio for YouTube)
- 4:3 (it will add black bars to fit the video into the 16:9 player)
The Most Recommended YouTube Upload Format
What are the most recommended video upload specifications? MP4 is the most ideal container format for YouTube upload. The recommended video and audio codecs are H.264 and AAL-LC, respectively. There is no recommended bitrate since bitrate varies based on resolution and codec. Similarly, the recommended frame rate varies depending on the video you are sharing. What is the best frame rate for YouTube? You can read this post for reference: What Is the Best Frame Rate for YouTube Videos? Here’s the Answer
After learning what video formats YouTube supports and its detailed video specs, it’s time to learn how to convert a video for YouTube upload.
Part 2. Best Video Converters for YouTube Upload
A powerful video converter can aid you in converting videos for YouTube upload easily. Below is a comprehensive introduction to the 3 best video converters for YouTube upload. Let’s have a look.
#1. MiniTool Video Converter
MiniTool Video Converter is one of the best video converters for YouTube upload, which is a completely free file converter for both video and audio files. It supports converting various formats, including MP4, WMV, AVI, MPG, FLV, WebM, MKV, M4V, AAC, MP3, WAV, and more. It also provides you with the premade format presets for YouTube. You can use it to convert both audio and video files to formats supported by YouTube.
What’s more, MiniTool Video Converter provides you with customizable output format parameters, such as the encoder, resolution, frame rate, and bitrate of the video, and other audio format parameters. With it, you can easily convert videos to the most recommended YouTube upload format. Furthermore, its batch video conversion feature allows you to convert up to 5 files at the same time, which makes conversion convenient.
MiniTool Video ConverterClick to Download100%Clean & Safe
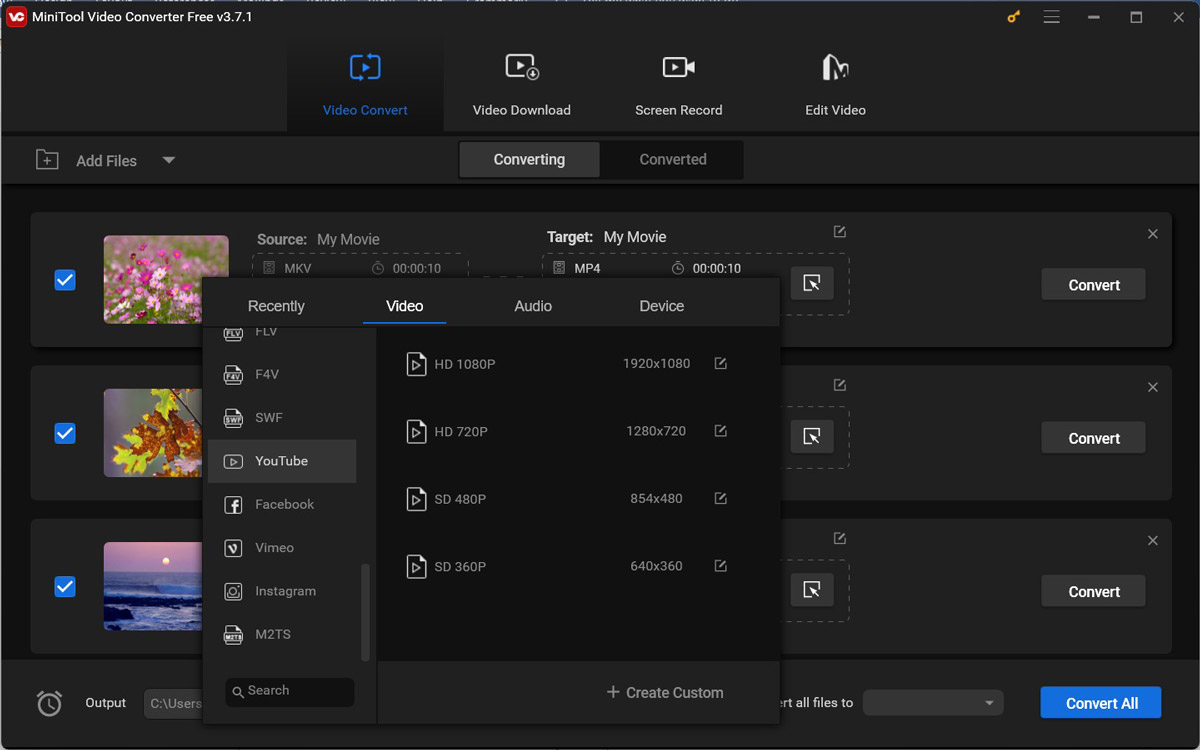
In addition to working as a video converter for YouTube upload, it also has the capability of converting files for other social media like Facebook, Vimeo, Instagram, Twitter, etc. Additionally, it can help you to upscale videos to 4K resolution.
Besides, MiniTool Video Converter is a completely free screen recorder with no time limits or watermarks. It supports recording the whole screen and selected area at standard, high, or original quality. You can choose to record the screen with or without the audio from the microphone and system. Moreover, it offers five options for recording frame rates, including 50fps, 30fps, 25fps, 20fps, and 15fps. You can use it to record any activities happening on your screen. You can use it to record video and audio from YouTube for offline viewing.
The video download feature is also one of the attractive points of MiniTool Video Converter. You can use it to get videos, audio, playlists, or even subtitles from YouTube.
#2. MiniTool MovieMaker
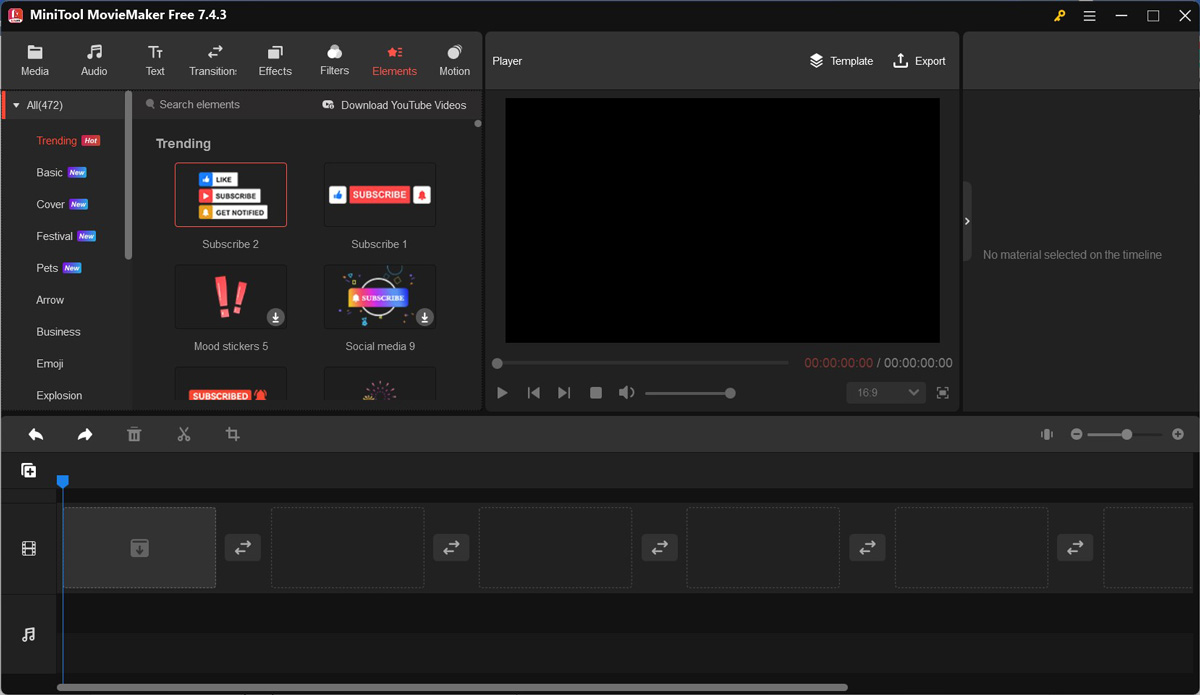
As its name shows, MiniTool MovieMaker is a video editor. It comes with a lot of useful editing features for images, videos, and audio. Meanwhile, it offers various royalty-free resources like effects, filters, animated stickers, and others. It can function as a YouTube video editor to create or fine-tune videos for YouTube. Additionally, it can help you convert videos, audio, and images for YouTube upload because it supports multiple formats. For instance, you can use it to convert M4A to YouTube with images and videos.
MiniTool MovieMakerClick to Download100%Clean & Safe
#3. Online-Convert
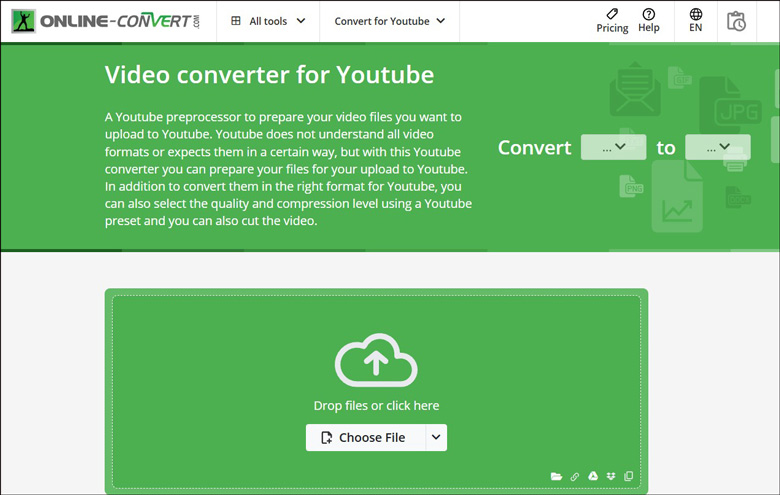
Online-Convert is a versatile file converter for audio, videos, images, documents, webservices, and others. You don’t need to download or install any software on your PC. All of its file conversions are happening on the cloud, which can save you storage space. As a webservice converter, it supports converting for not only YouTube but also Facebook, Dailymotion, WhatsApp, TikTok, etc.
This online video converter for YouTube upload has an intuitive and user-friendly interface, which makes you master how to use it for conversion easily and quickly. Online-Convert offers multiple presets for YouTube. In addition, it offers the tool to cut videos.
Part 3. How to Convert Video for YouTube Upload
Here, we take MiniTool Video Converter and MiniTool MovieMaker as examples to show you how to convert a video for YouTube.
#Way 1. How to Convert Video for YouTube via MiniTool Video Converter
Step 1. Download the best video converter for YouTube by clicking the button below and then follow the on-screen instructions to install it on your computer.
MiniTool Video ConverterClick to Download100%Clean & Safe
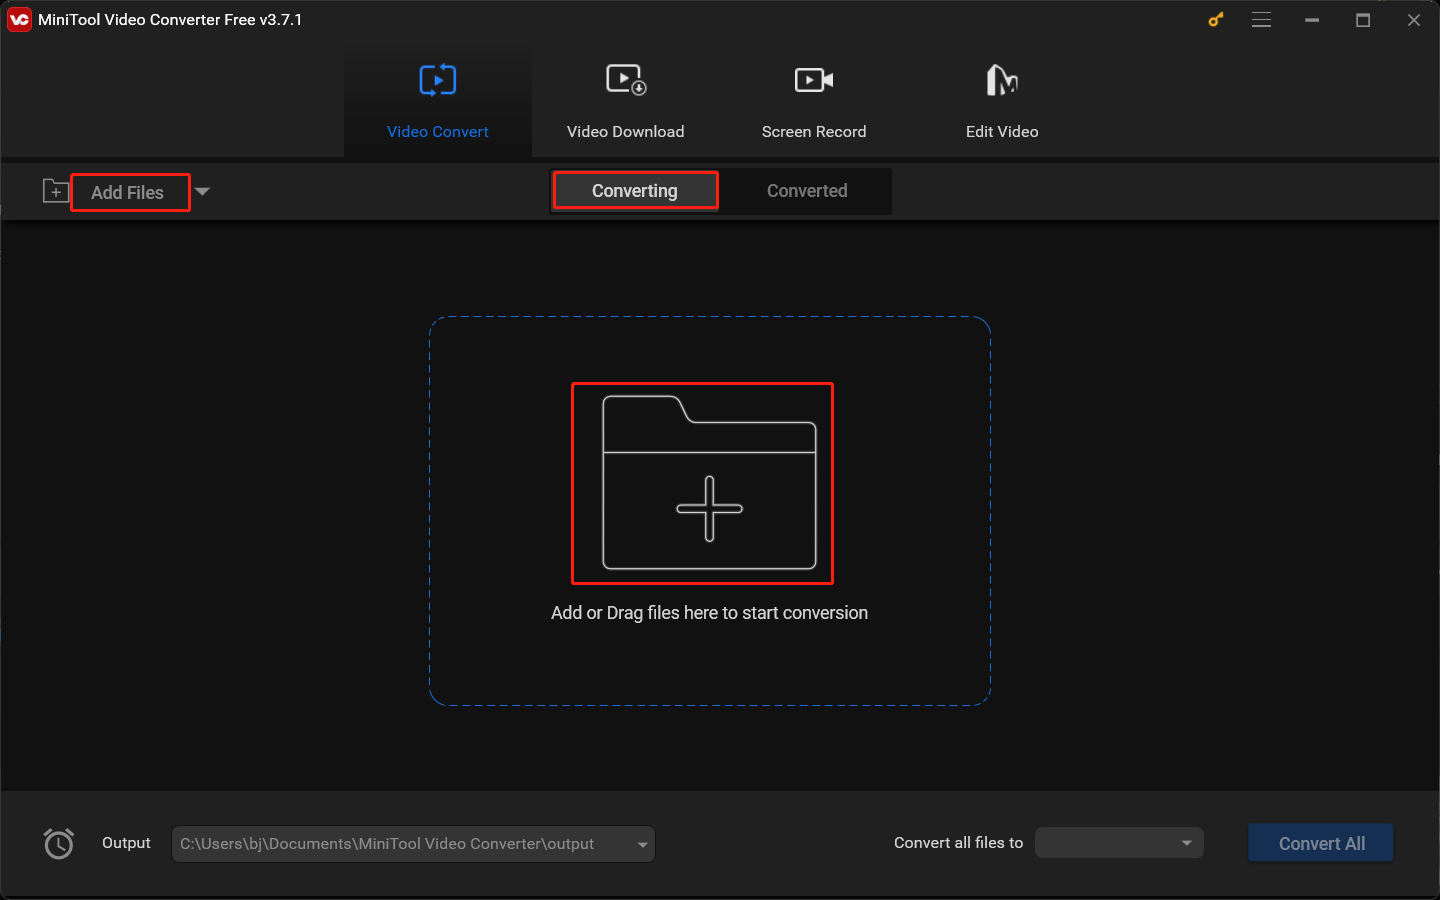
Step 2. Launch this best video converter for YouTube upload to access the Video Convert module. Under the default Converting subtab, click the Add Files button or the Add or Drag files here to start conversion option to locate the target video for YouTube upload and click Open to import it.
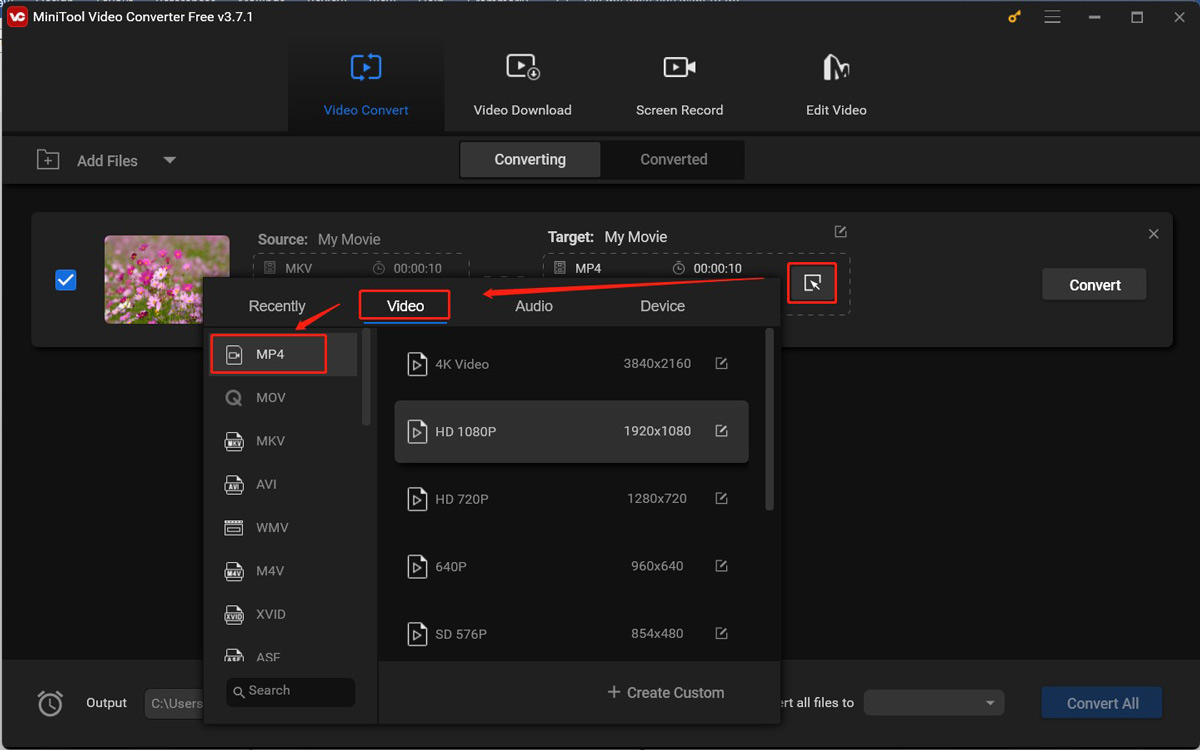
Step 3. Click the diagonal arrow framed in the below screenshot and then the output format window will pop up. Switch to the Video tab and choose a supported YouTube upload format. Here, we take MP4 as an example.
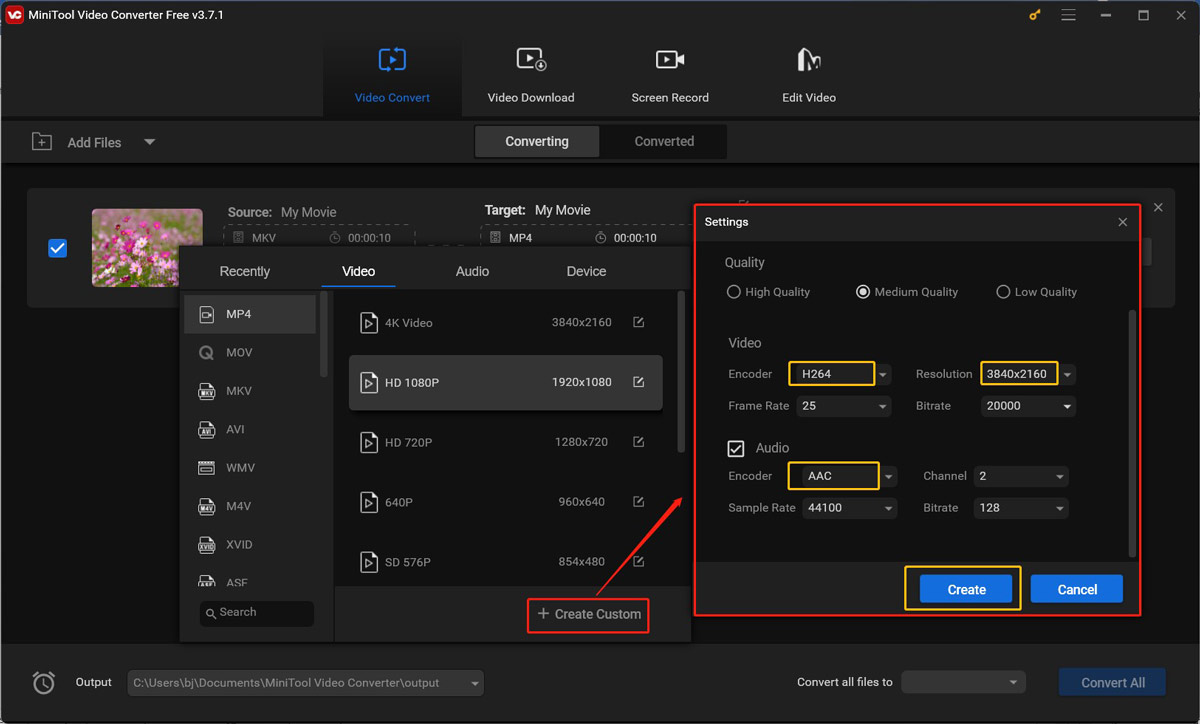
To convert video to the most recommended YouTube upload format, you need to personalize the video output format parameters. Click on + Create Custom to open the Settings window. On this window, you can set the encoder as H264, choose a higher resolution like 3840×2160, and adjust other settings like the audio channel, bitrate of both video and audio, and others. Click the Create button and then choose the newly created format.
Step 4. Click the pen icon behind Target to rename the converted video and choose a folder to save it. Then click OK to confirm the changes.
Step 5. To start converting the video to the YouTube upload format, click the Convert button. Once the conversion process is over, you can go to the Converted subtab and Play icon to check it. Also, you can click the Show in folder button to locate the converted video.
#Way 2. How to Convert and Edit Video for YouTube Upload with MiniTool MovieMaker
Step 1. Hit the button below to get the installation package of MiniTool MovieMaker and then install it on your PC.
MiniTool MovieMakerClick to Download100%Clean & Safe
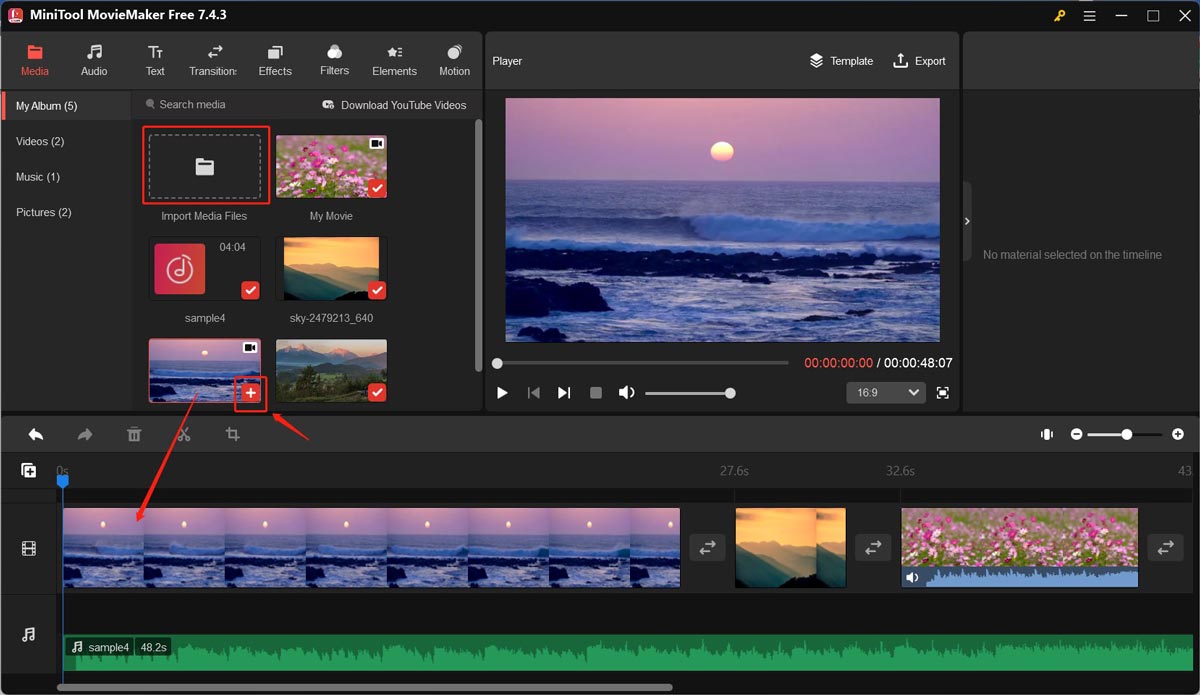
Step 2. Run this excellent program and close its promotion window to enter its main editing interface. Hit the Import Media Files option under the Media tab to upload the target images, videos, and audio for YouTube. Next, click the plus icons on the target files to add them to the timeline or directly drag and drop them onto the timeline for editing.
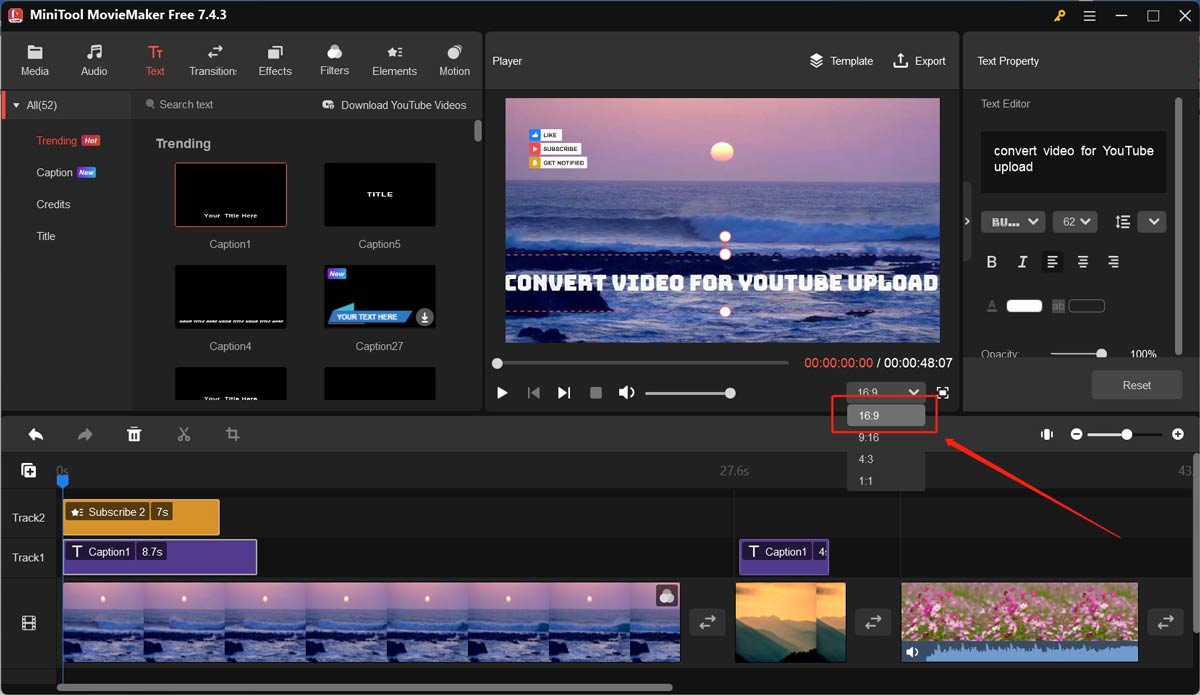
Step 3. If the video aspect ratio is not suitable for YouTube, you can go to the Player section to change the aspect ratio to 16:9. Then edit images, videos, and audio as you like. For example, you can add captions to YouTube videos, mute the background audio of video clips, fade music, apply Instagram-like filters, add social media stickers, etc.
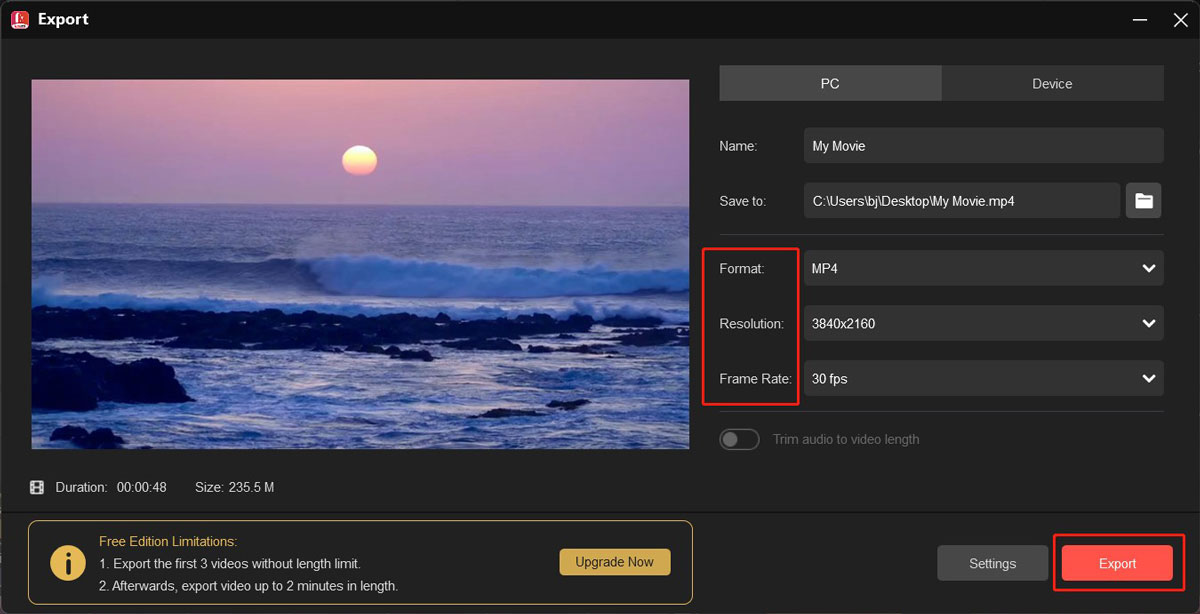
Step 4. Click the Play icon to preview your YouTube video. Once you are satisfied, you can click the Export option in the Player section and then the Export window will appear. Keep the default MP4 option as the output format. You can change the resolution to 3840×2160 and choose a needed frame rate like 30 fps. The choice of frame rate depends on the type of content and the needed viewing experience. Finally, click the red Export button to save the video for YouTube.
Part 4. How to Upload a Video to YouTube
After the video conversion task is finished, you can go to upload the converted video to YouTube. As a new user of YouTube, you may not know how to upload videos to YouTube. Don’t worry! The detailed steps to upload a video to YouTube are introduced in this part.
Step 1. Go to the official website of YouTube and sign in to your account.
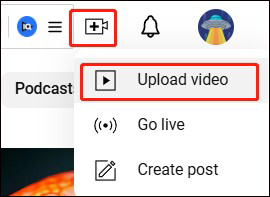
Step 2. Click the Create option at the top right corner and choose the Upload video option.
Step 3. Click Select files to upload your video. Next, complete to add important details to your video, such as the video title, description, thumbnail, playlist, audience, age restriction, tags, and more. Also, you can use the built-in video editor of YouTube to add captions to your video.
Step 4. Once you’ve processed to the Visibility page, you will need to select when to post the video and who can view your video. Finally, click the Publish button to share your video on YouTube.
This part only shows you how to upload a video to YouTube from a computer. If you want to know how to upload a video to YouTube from an iPhone, you can read: How to Upload Video to YouTube from iPhone or iPad – Solved
Part 5. Why and How to Fix Can’t Upload Video to YouTube
Have you ever encountered the problem of failing to upload videos to YouTube? This problem can be caused by the incompatible format and codec, which can be resolved by the video converters for YouTube upload mentioned above.
The weak and unstable Internet connection can also make the video unable to be uploaded to YouTube. You need to make sure you have a stable and fast Internet connection when you upload video to YouTube. Besides, there are other common reasons behind the problem, such as overmuch cache and cookies of the browser, large video size, and other reasons.
To Wrap Things Up
Before uploading a video to YouTube, you’d better make sure it meets the video specifications required by YouTube. If you upload MKV videos or other unsupported formats and media, you’ll fail to upload them to YouTube. You need to convert the video for YouTube upload. Useful tools and detailed tutorials are described above. You can choose a desired tool and follow the above tutorial to give it a try.
Hopefully, this article will be helpful to you. If you have any problems or feedback while using MiniTool Video Converter and MiniTool MovieMaker, please feel free to contact us via [email protected] for help.


![How to Screen Record Snapchat Without Them Knowing [PC/Phone]](https://images.minitool.com/videoconvert.minitool.com/images/uploads/2024/10/how-to-screen-record-snapchat-without-them-knowing-thumbnail.jpg)
![How to Record on Apple TV Easily [Mac/iPhone/Windows]](https://images.minitool.com/videoconvert.minitool.com/images/uploads/2024/10/how-to-record-on-apple-tv-thumbnail.jpg)
User Comments :