Whether you are a Windows user or a Mac user, you can find the answer in this post. We will show a step-by-step tutorial on how to record YouTube audio with Audacity on both Windows and Mac. Now, let’s get started!
How to Record YouTube Audio with Audacity on Windows
After recording the following guidance, you can master how to record audio from YouTube with Audacity instantly.
Step 1. Go to the official website of Audacity to download it and then install it on your Windows PC.
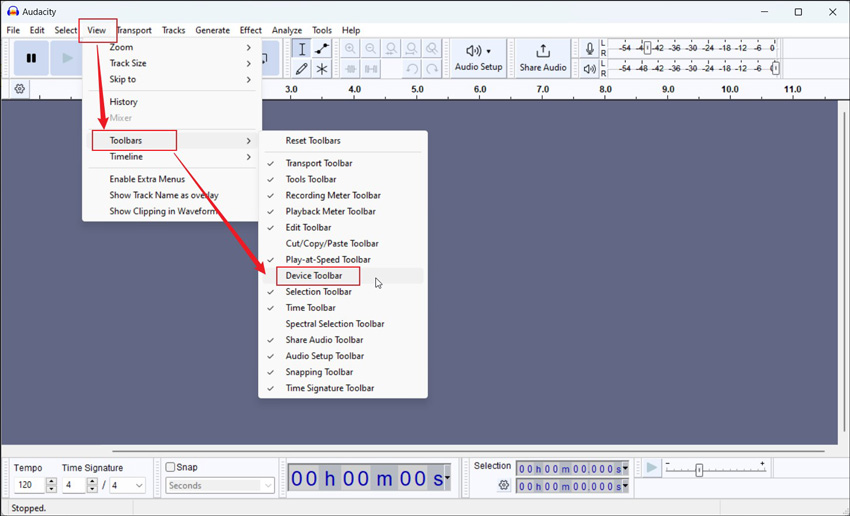
Step 2. Open Audacity, click the View tab in the top menu bar, move to Toolbars, and click the Device Toolbar to enable this feature.
Step 3. Expand the Audio Setup dropdown, go to Host, and choose the Windows WASAPI option. Enable Windows WASAPI will record the audio from your computer including YouTube audio.
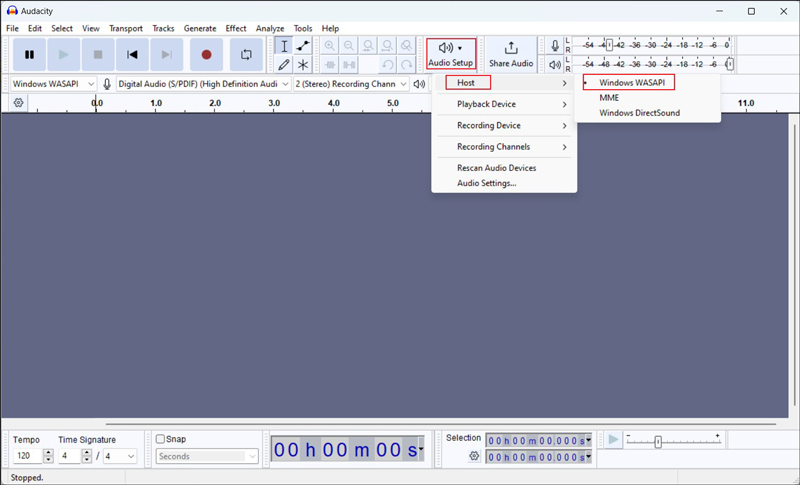
Step 4. Open the Audio Setup list again, click Recording Device, and select your default speaker.
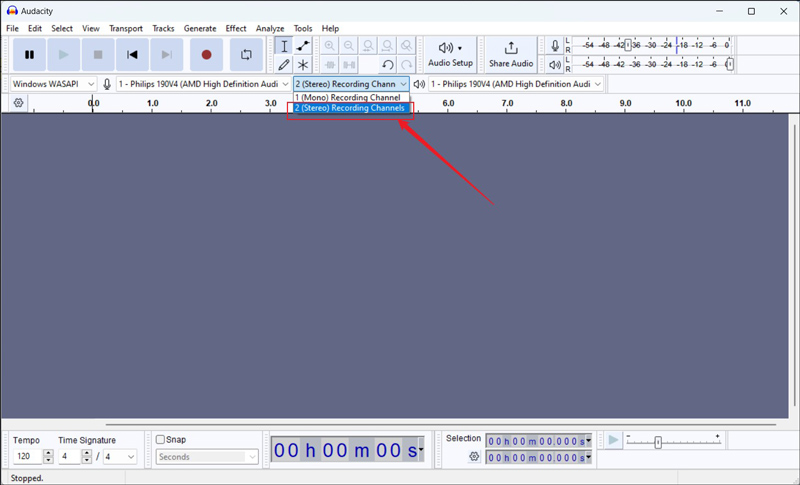
Step 5. For the recording channel, you can choose the 2 (Stereo) Recording Channel option.
Step 6. After adjusting the settings in Audacity, you can go to YouTube and open the audio you want to record. Click the Record button and play the YouTube audio immediately.
Step 7. Once the audio is end, you can click the Stop icon to finish the recording.
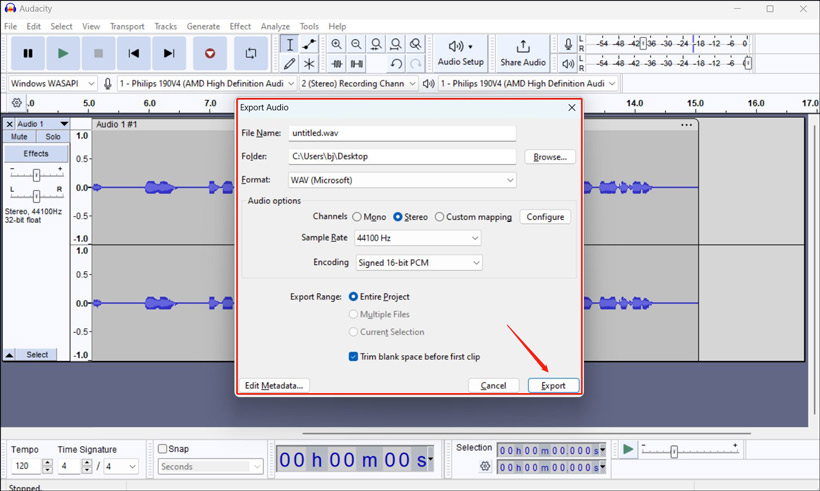
Step 8. Finally, go to File > Export Audio and select the Export to computer option. Then, name the audio, adjust other settings like saving path, output format, etc., tick the Trim blank space before first clip checkbox, and click the Export button.
How to Record YouTube Audio with Audacity on Mac
Compared with recording audio with Audacity on Windows, it is more complex on Mac. For Mac computers, there is no built-in ability to capture streaming audio playing on a sound device. Fortunately, you can use an additional audio device, such as Soundflower to help Audacity record computer audio. Below is a detailed guide on how to record audio from YouTube with Audacity on Mac.
Step 1. Download Audacity and Soundflower and install them on your Mac.
Step 2. Launch Soundflower, navigate to the Apple menu and click System Preferences. Click the Sound tab, choose Output, and select the Soundflower (2ch) option.
Step 3. Run Audacity, choose Core Audio as the audio host, change the audio input and output to Soundflower (2ch), and set 2 (Stereo) Record Channel as the recording channel.
Step 4. Open and play the YouTube audio, return to Audacity, and click the Record button to start recording.
Step 5. Click the Stop icon to end the recording, click the File tab, move to Export, and choose a desired format to save it.
Other Good Recorders for YouTube Video and Audio
For some beginners, Audacity is not friendly to them since it requires a learning curve. Except for Audacity, there are many excellent audio and screen recorders for YouTube. Furthermore, Audacity can’t record video. If you want to record audio from YouTube, you can find answers in this part.
#Free Sound Recorder – For Audio
As its name shows, Free Sound Recorder is a free program that can record any sound played by your PC. You can use it to record music from YouTube, streaming audio broadcasts, Skype, and other audio. It supports recording audio into MP3, WAV, WMV, or OGG formats. What’s more, it is available for both Windows and Mac.
#MiniTool Video Converter – For Video
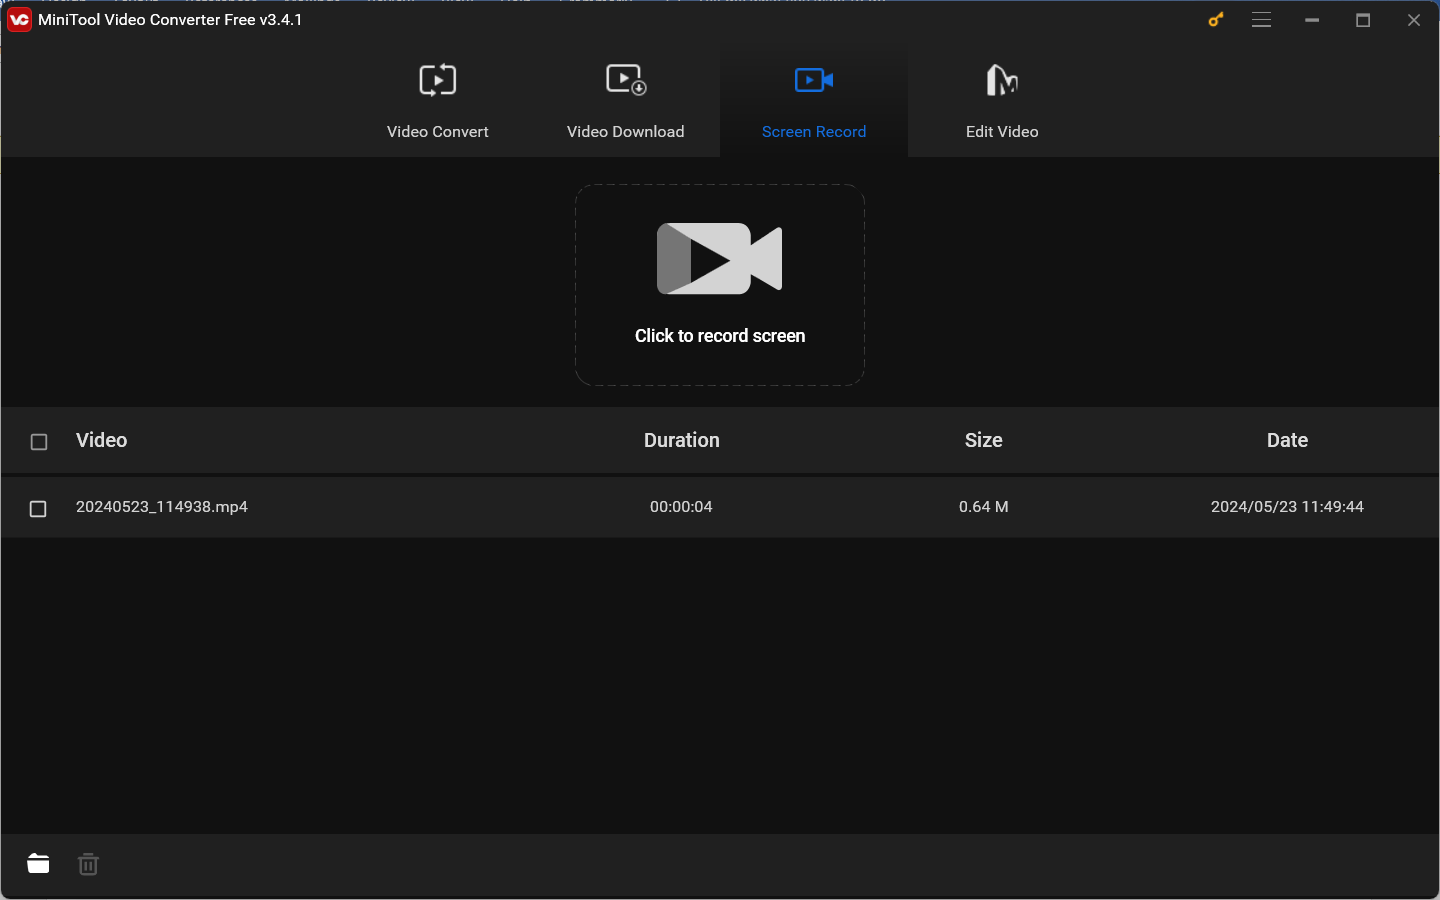
MiniTool Video Converter is not only a file converter that can convert video and audio files but also a screen recorder that can record any activities happening on your screen. With it, you can easily record YouTube live streams, online lectures, video conferences, and other videos. You can use it to record the full screen or select regions with the option to add audio from a microphone or system.
MiniTool Video ConverterClick to Download100%Clean & Safe
Conclusion
How to record YouTube audio with Audacity on both Windows and Mac. This post has shown you the detailed steps. Now, it’s your time to have a try!


User Comments :