This article walks you through the reasons for audio not working on various devices, such as incorrect settings and incompatible audio formats. More importantly, it offers you 36 effortless fixes for the audio issues, including restarting the device, changing the audio format with an audio converter, and more.
Audio issues often bring you headaches when watching TV shows or listening to music. Want to learn how to fix audio not working on a PC, browser, mobile, app, or TV? This article is written here for you.
Why Is Audio Not Working
Here are the possible reasons for the problem of audio not working.
Reason 1. Inappropriate Audio Settings
Inappropriate audio settings contribute to audio not working Windows 11. For example, if you have selected the main speakers as the output audio device, your PC won’t send the audio to other devices, such as Bluetooth headphones.
In addition, even if you have connected your PC to the correct audio device, you need to ensure that the speakers are not muted. Meanwhile, the volume needs to be set high enough.
Reason 2. Negative Audio Enhancements
Toggling on audio enhancements often causes driver conflicts. For instance, enhancements may clash with the drivers of the sound card, such as those from Intel, leading to audio not working. Meanwhile, audio enhancements require a lot of signal manipulation, such as effects and EQ (Equalization). This way, the audio is more likely to be distorted.
Moreover, the over-processing influence caused by audio enhancements also prevents the audio from passing through correctly. In addition, if you listen to the audio with external devices like high-end mics or DACs (Digital-to-Analog Converters), it is necessary for you to disable enhancements, which aim to shunt the interference from Windows and optimize the performance.
Reason 3. Incompatible Audio Formats
Before playing the audio on your PC or mobile, ensure that your device supports the audio format. For instance, Android doesn’t give native support for AIFF. As such, if you want to play AIFF on Android, you need to convert the audio to a more compatible format or install a third-party audio player, such as the VLC media player.
Reason 4. Audio Corruption
If your audio files are corrupted, the digital data within the audio file will be damaged. Simply put, the audio data will become incomplete. This way, your audio files are unreadable for your media players. In the end, the problem of audio not working arises.
Reason 5. Low Volume Levels
Low volume levels are also a cause for audio not working Windows 11. For example, if the volume of your device is set too low, it is difficult for you to hear the sounds in a noisy environment. It seems that the audio is not working.
Reason 6. Uncleaned Speaker Grille
As an important part of your phone/PC, the speaker grille has much to offer in sustaining the protection for internal components. However, as time goes on, if you haven’t cleaned the speaker grille in time, things like makeup residue or dirt can gradually cover the tiny openings, creating a sound barrier. Finally, the volume of your phone will be lower and lower.
Reason 7. Lack of Sound Permissions
Considering that unexpected, annoying noises may bring users a bad experience, modern browsers, such as Chrome and Firefox, are equipped with a function that automatically blocks autoplaying audio. If the website you are visiting is stopped from playing audio, it means that you haven’t enabled the sound permissions yet.
Reason 8. Problematic Browser Extensions
Some problematic browser extensions will also lead to audio not working on your web browser. For example, the extensions, such as Transpose and Audio Equalizer, can modify the sound output. However, if they contain some bugs or conflict with each other, the audio signal will stop completely.
Reason 9. Problematic Cache
The browser cache, which acts as a container for different website parts like audio, videos, images, and more, offers you faster page loading. However, if the audio file in the cache is corrupted, the website can't play the audio smoothly. To fix that issue, just clear the cache. This way, your browser will directly download a complete audio file from the website again.
Reason 10. Outdated Operating System/Apps
An outdated operating system or app may bring a wide range of problems like driver conflicts, incompatibility, and unfixed bugs. Some problems may frustrate the proper communication of the system with audio hardware, leading to computer audio not working.
How to Fix Audio Not Working on Computers
Here are the methods that help you fix the audio not working on a PC.
#1. Restart the Computer
Restarting the PC is one of the easiest solutions to computer audio not working. Specifically, it helps clear temporary memory (RAM) glitches, resets the Windows Audio services, and reloads the audio drivers. Hence, before trying other methods below, try to restart your computer.
#2. Check the Speaker Output
To ensure that there is nothing wrong with the output audio settings. Follow these steps below to check the speaker output.
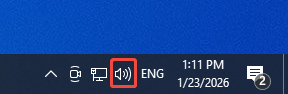
Step 1. Check the volume.
Click on the Speakers icon in the taskbar to access the small pop-up. There, ensure that the speaker is not muted. Drag the slider to adjust the volume based on your needs.
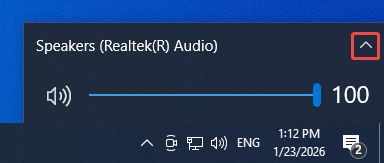
Step 2. Enable the audio device list.
Click on the arrow icon to expand the audio device list. There, you can see all audio devices connected to your PC. Ensure that the audio is playing on the device you want.
If this method doesn’t work, please try other methods below.
#3. Check the Audio Hardware and Volume Controls
Ensure that no loose cables or cords can interrupt your headphone and speaker connections. Meanwhile, check if there are some cords and cables that you haven’t plugged in. For those who need to plug into many jacks, don’t plug the cords or cables into an incorrect jack.
On condition that you don’t know which jack to choose for a specific cable, pay attention to the color of the jacks. The blue jack means line in, while the green one denotes line out. In addition, the pink jack is for the mic in, and the grey jack is used for the analog side speakers. Besides, if you desire CRT Bass, plug your cable into the yellow jack. Finally, the black jack means rear.
Meanwhile, it is suggested that you turn off the mute settings and turn up all the volume controls. In addition, some apps or speakers have built-in volume controls. Ensure that you have turned them up.
#4. Toggle off Audio Enhancements
To avoid the problem of audio not working caused by audio enhancements, you can turn off these enhancements. Below are the steps.
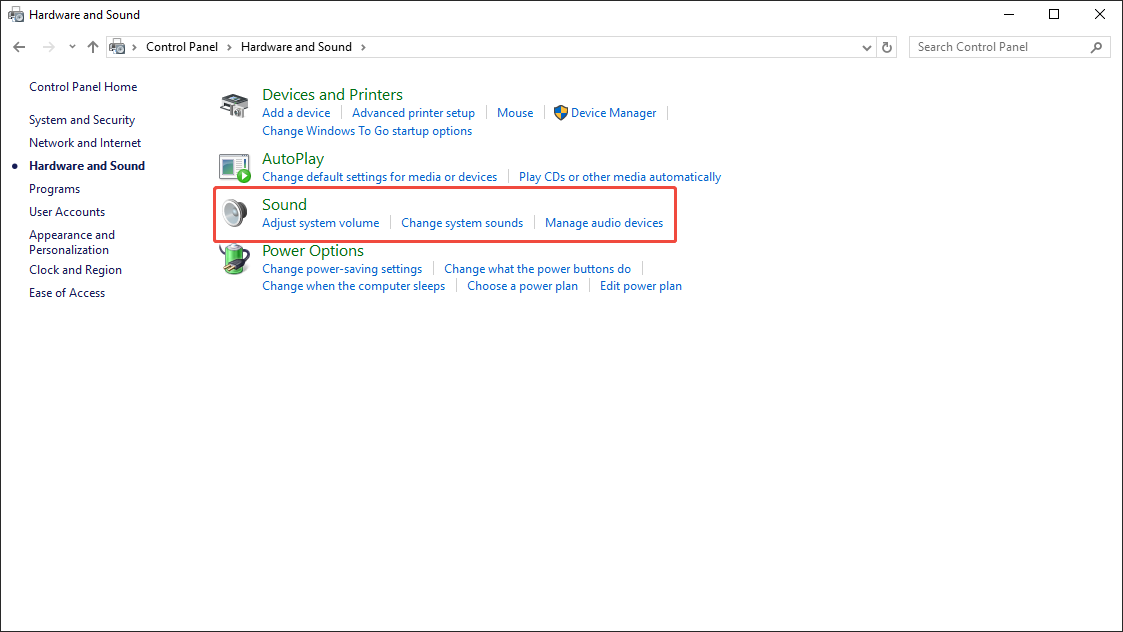
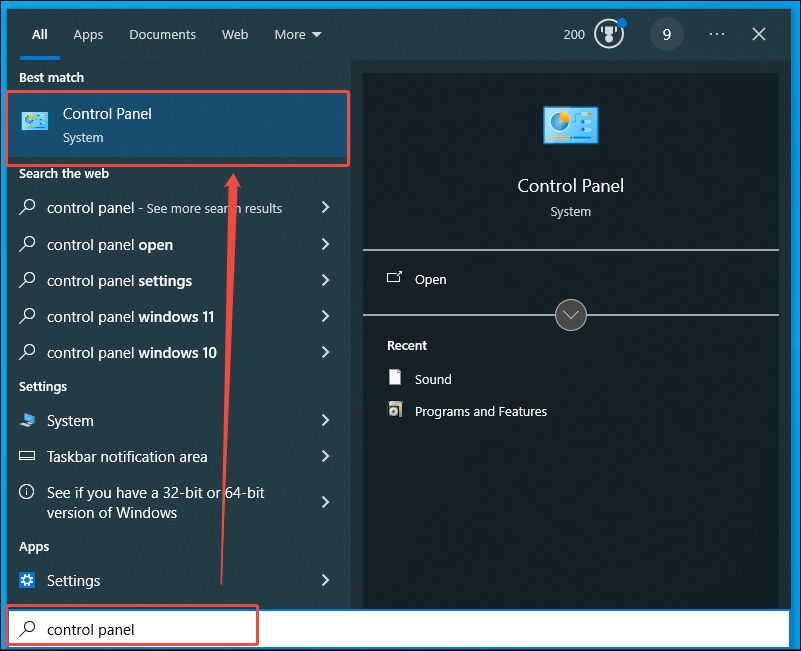
Step 1. Access Control Panel.
Go to the taskbar and activate the search box. There, enter control panel and click on the pop-up option to enter the Control Panel window.

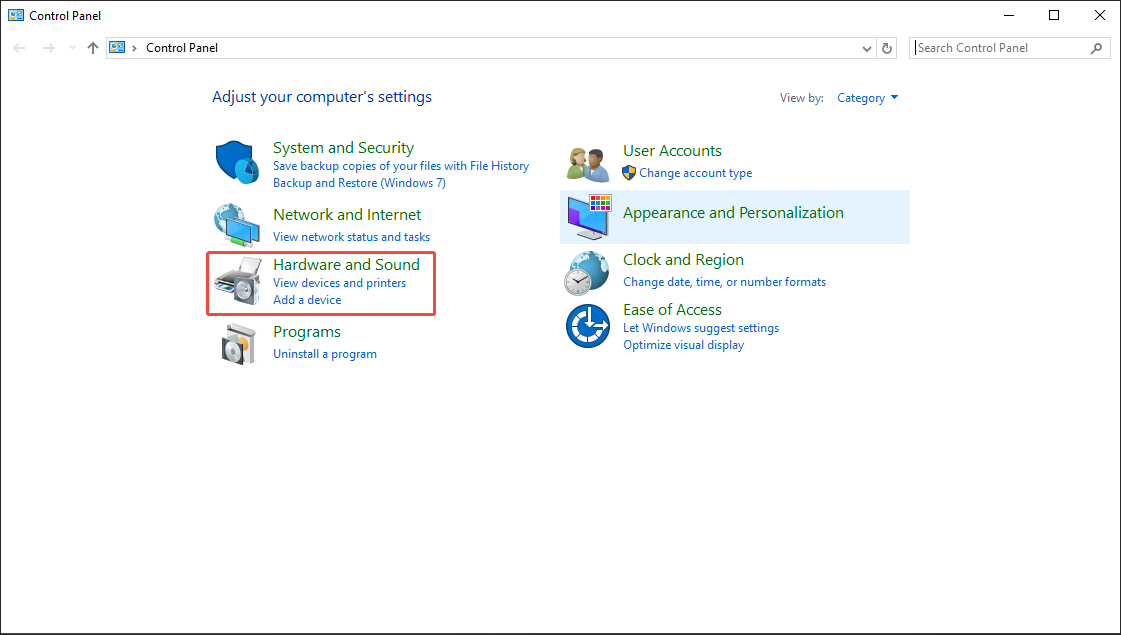
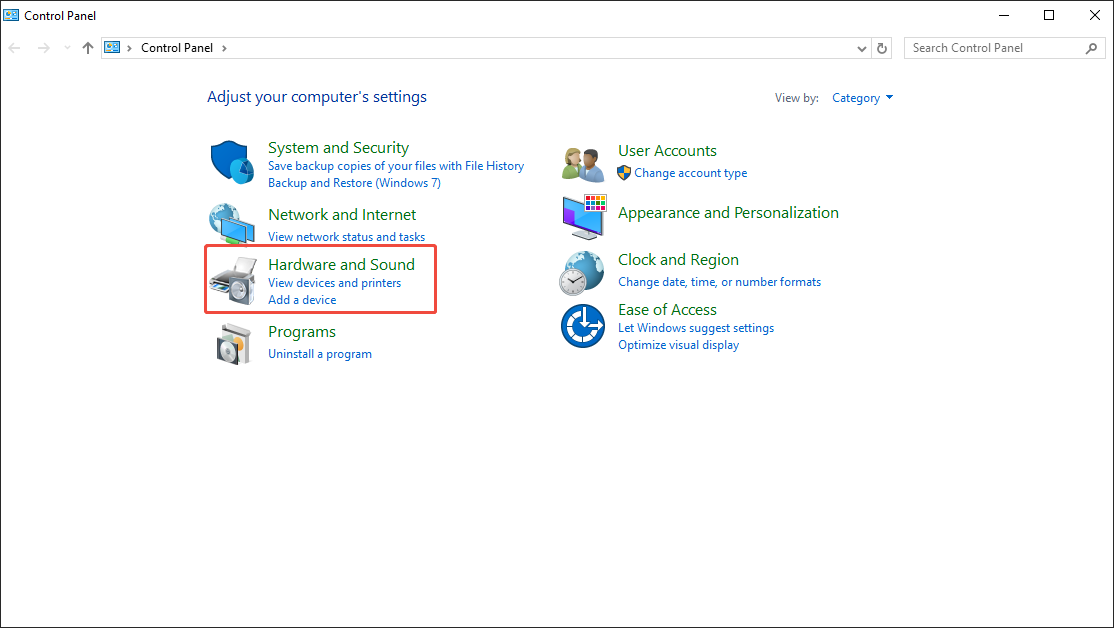
Step 2. Go to the Sound section.
Select the Hardware and Sound option to enter the next page.
Choose the Sound option to access the pop-up Hardware and Sound window.
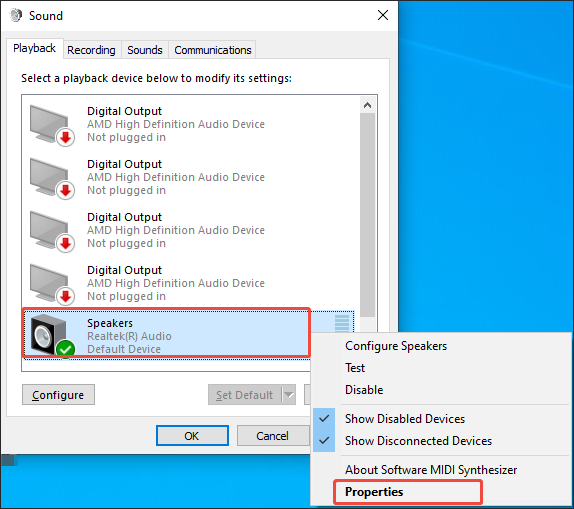
Step 3. Turn off audio enhancements.
In the Sound window, right-click on the Default Device and choose Properties to access the Speakers Properties window.
Navigate to the Advanced tab and uncheck the Enable audio enhancements option under the Signal Enhancements section.
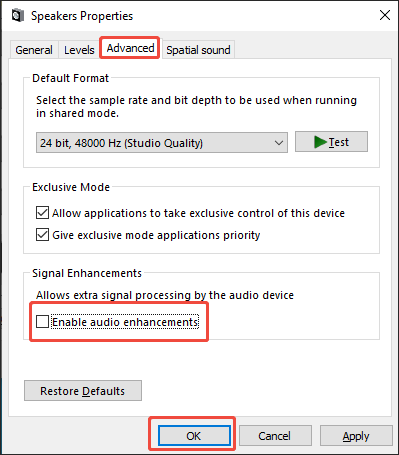
After turning off the audio enhancements, try to play the audio on your device again to check whether the method is effective or not. If that solution doesn’t work, please try other methods below.
#5. Activate the Audio Troubleshooter
Running the troubleshooter is also an effective solution to computer audio not working Windows 11. Specifically, this method enables you to check whether you have chosen the correct playback device. In addition, it walks you through whether the volume levels are appropriate. The activation of the audio troubleshooter also helps scan and update problematic drivers.
What’s more, running the troubleshooter has much to offer in detecting hardware/software conflicts that may interfere with sound. Plus, it ensures that essential services (such as the Windows Audio service) are running correctly. During the troubleshooting process, the system will automatically apply some solutions, such as disabling audio enhancements and resetting the sound components to their default settings.
Below are the detailed steps to run the troubleshooter.
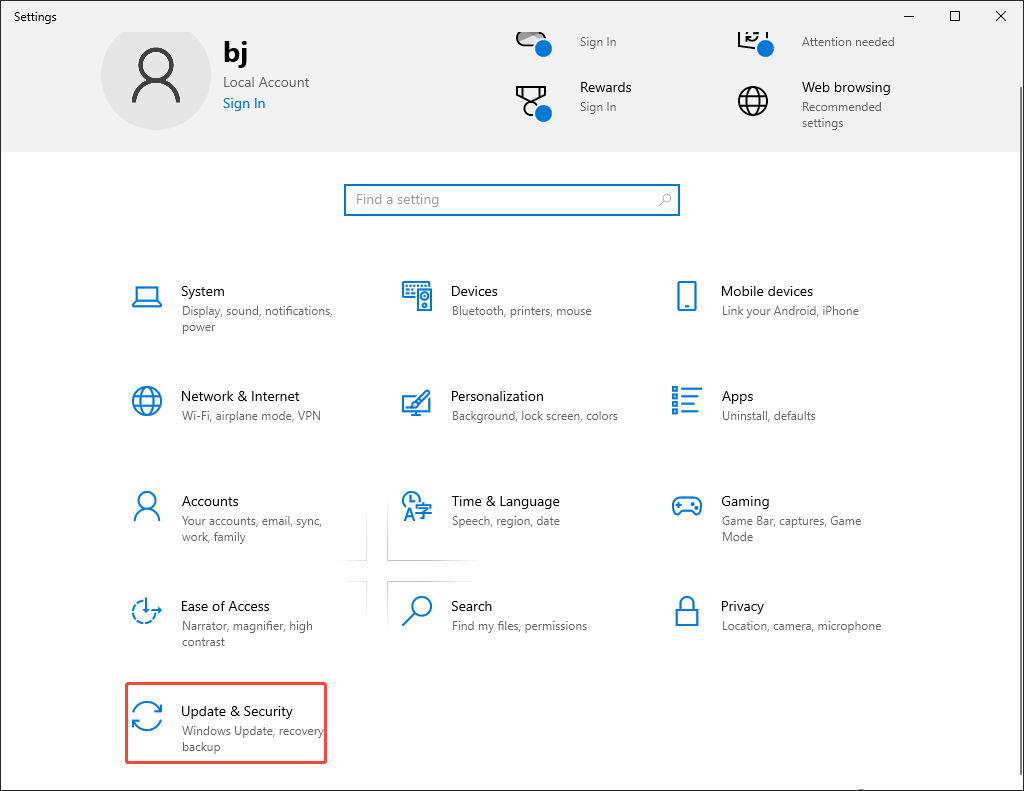
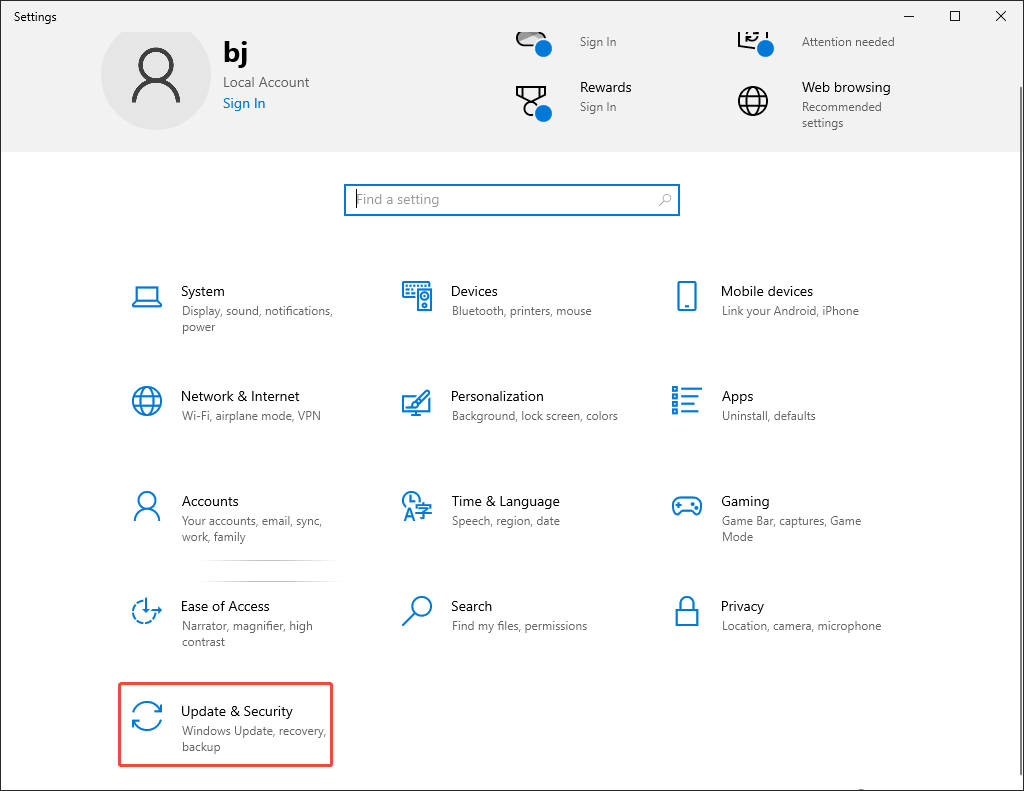
Step 1. Enter the Settings window.
Press the Windows + I keys to enter the Settings window. There, click on the Update & Security option.
Step 2. Access the troubleshooter page.
Navigate to the Troubleshoot section. There, choose Additional troubleshooters.
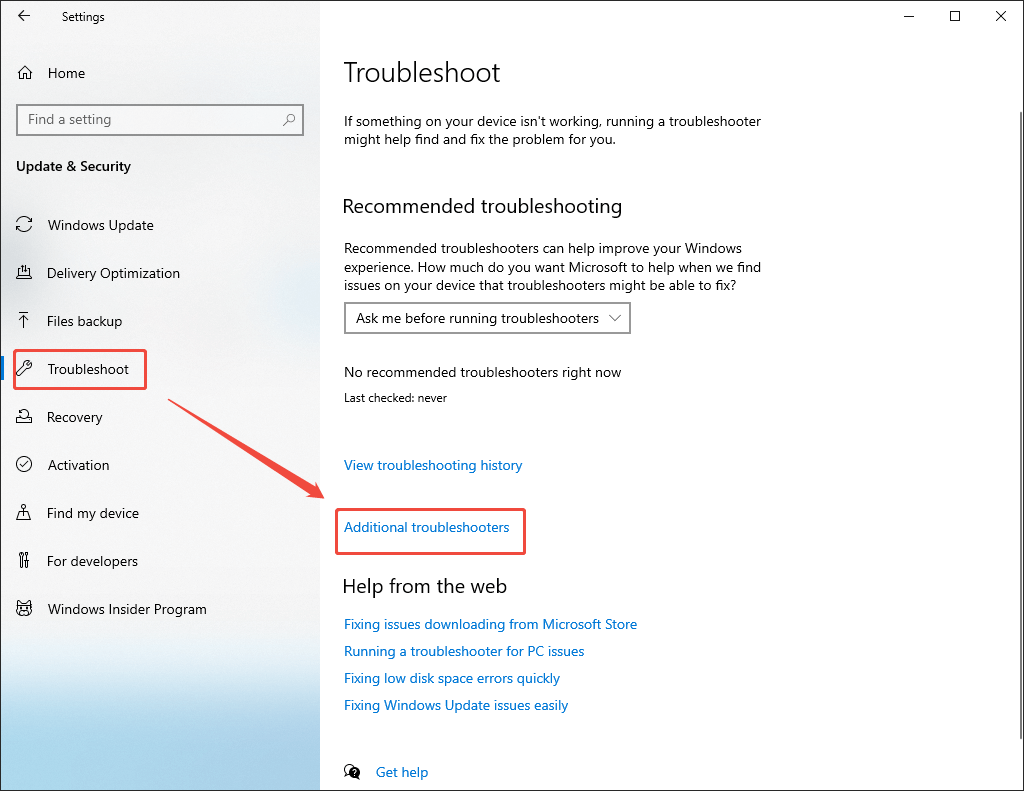
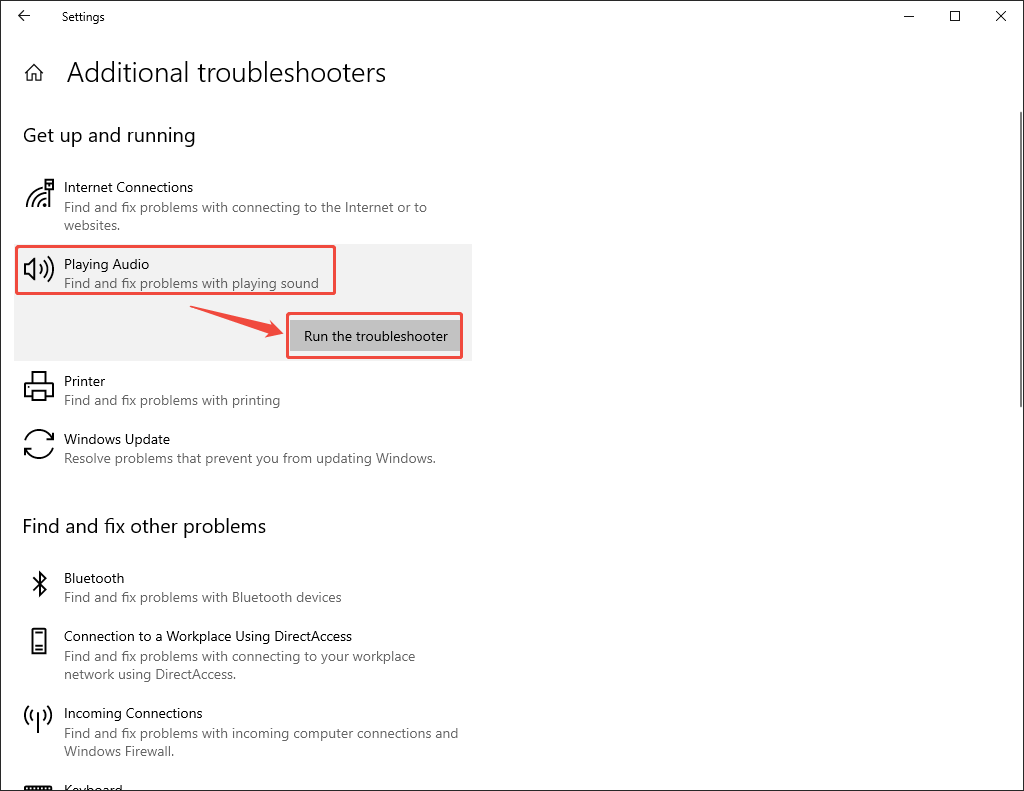
Step 3. Run the troubleshooter.
Click on the Playing Audio option and choose the Run the troubleshooter option to activate the troubleshooter.
With the above-detailed steps, you are more likely to fix audio not working Windows 10.
#6. Update Operating System
If an outdated operation leads to Chrome audio not working on your PC, try these steps below to update the operating system and solve the problem.
Step 1. Go to the update interface.
Press the Windows + I keys to enter the Settings window. There, choose the Update & Security option to enter the update interface.
Step 2. Check for the update.
Click on the Check for updates option to check whether the update is available. If it is, follow the on-screen prompts to finish the update process.

With this method, an outdated operating system will never be a trigger for audio not working on laptop and other computers.
#7. Change Audio Formats
If your device doesn’t support the audio files, you can try to change their format to a format with higher compatibility, like MP3. If you are unsure which conversion tool to choose, I highly recommend MiniTool Video Converter.
What Is MiniTool Video Converter
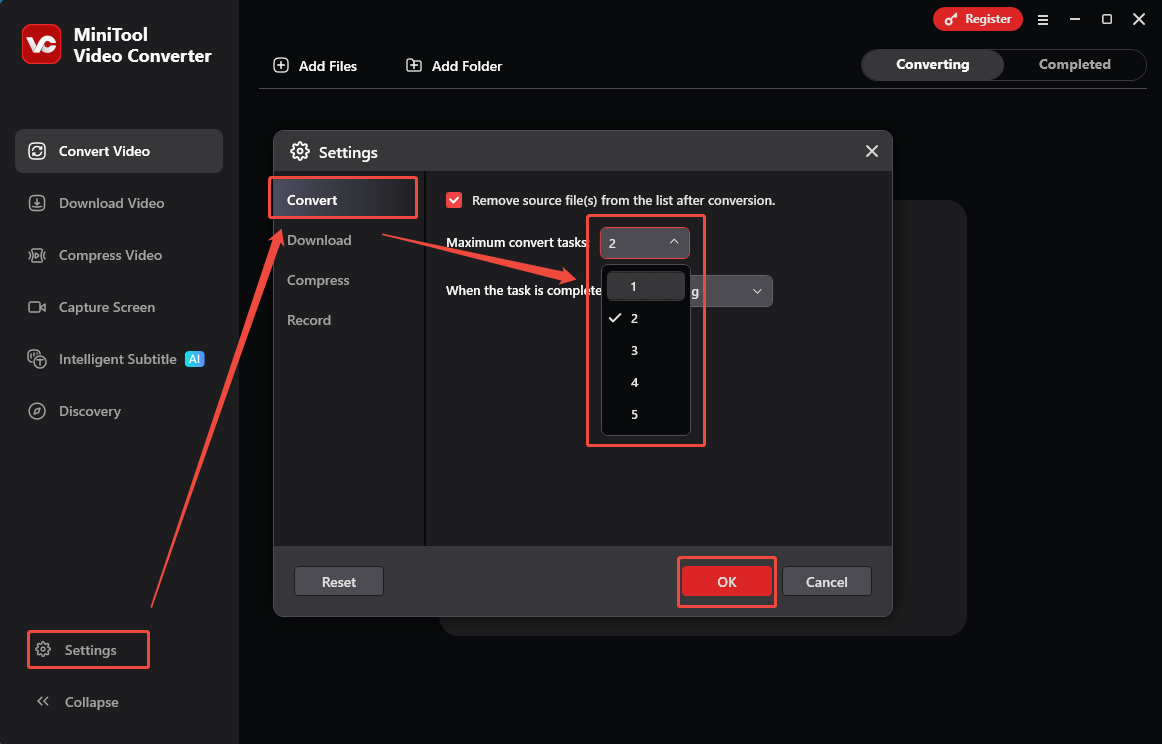
MiniTool Video Converter is not only a video converter but also an audio format changer. It offers you a batch-conversion function (up to 5 audio files can be converted at the same time), which ensures a high conversion efficiency. In addition, MiniTool Video Converter features an intuitive interface, which makes this application easily accessible to entry-level users.
What’s more, MiniTool Video Converter supports a wide range of audio formats, including MP3, WAV, AIFF, WMA, OGG, M4A, M4B, and so on. In addition, it provides you with multiple customizable options, empowering you to change various parameters, including encoder, bitrate, audio channel, and more.
How to Change Audio Format with MiniTool Video Converter
Below is a step-by-step guide on how to change the audio format with MiniTool Video Converter.
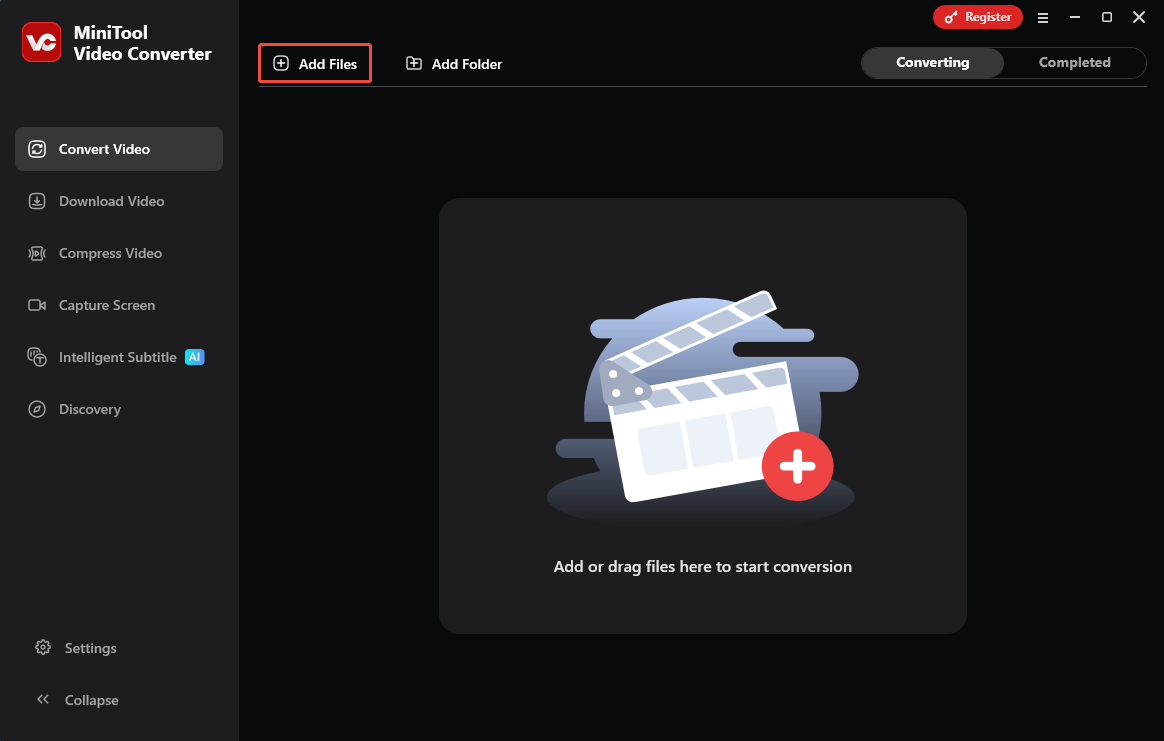
Step 1. Download and install MiniTool Video Converter.
MiniTool Video ConverterClick to Download100%Clean & Safe
Download MiniTool Video Converter by clicking on the download button above. Then, follow the on-screen prompts to install this audio converter on your PC. Then, launch it.
Step 2. Upload the audio files.
Import your audio files by clicking on the upper-left Add Files option.
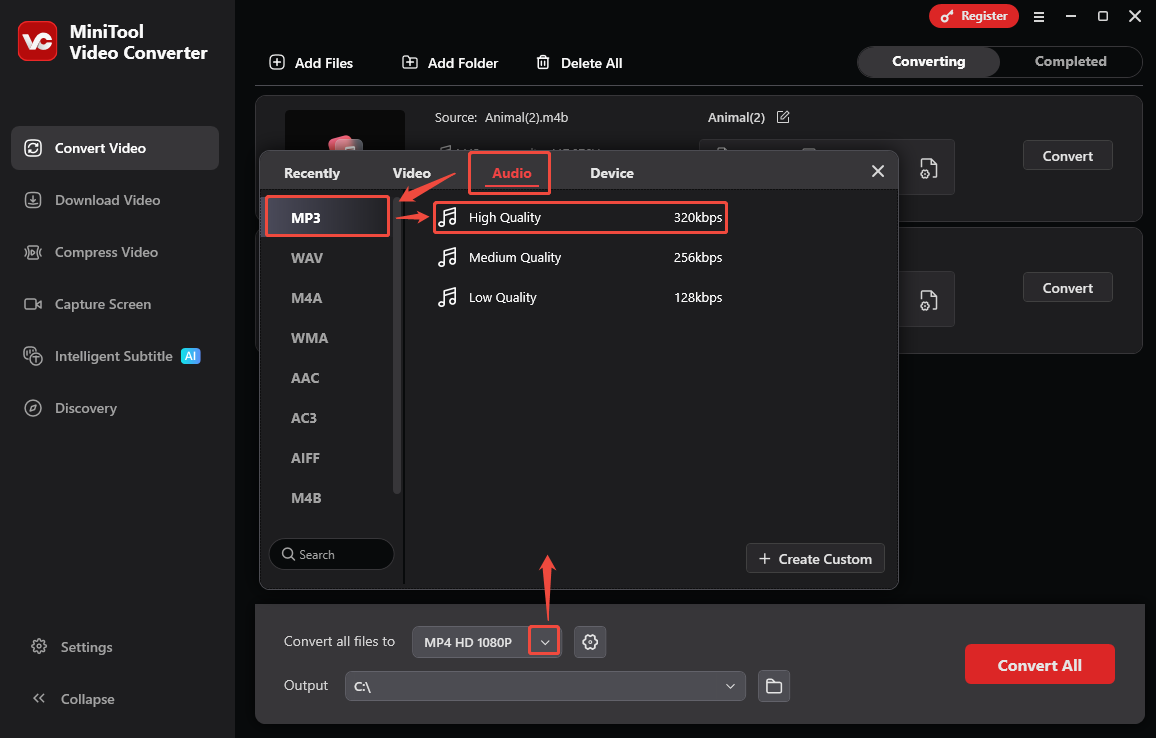
Step 3. Set an output format.
Expand the bottom Convert all files to option to enter the output format window. There, switch to the Audio tab. Then, click on the audio format you want on the left side. Here, I choose MP3 as an example. Next, choose the audio quality you desire. Here, I select High Quality.
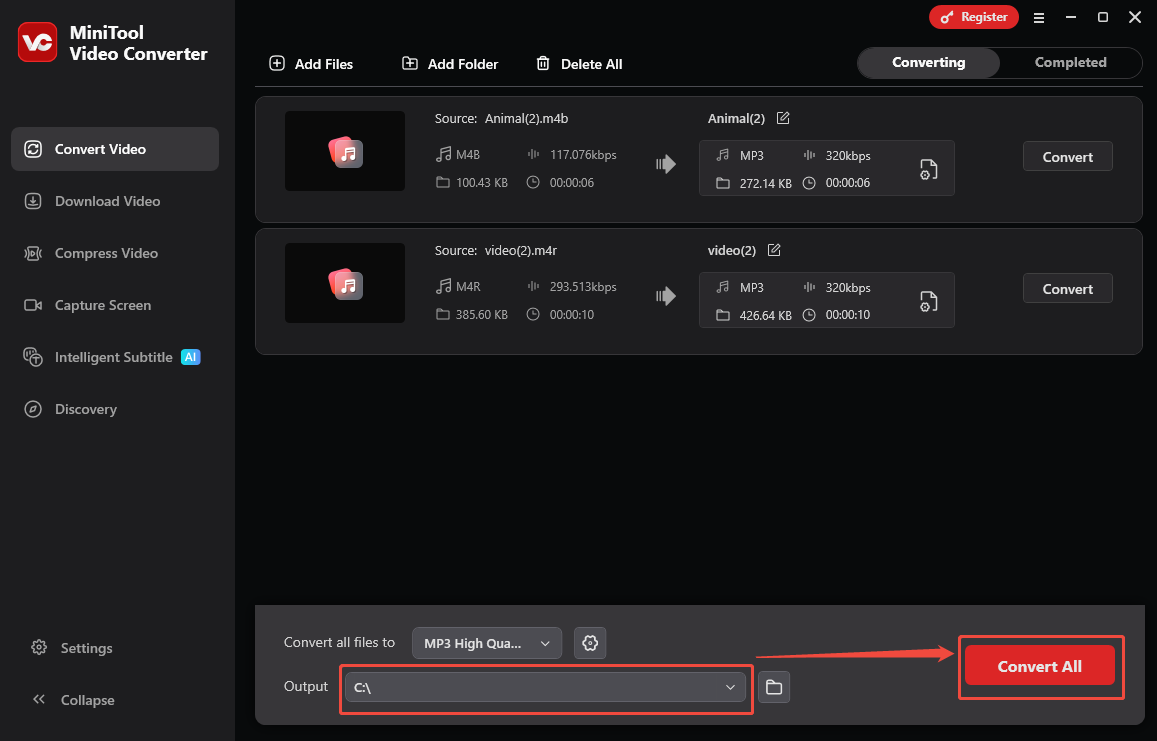
Step 4. Set an output folder and begin conversion.
Expand the bottom Output option to choose a destination folder for the output files. Then, begin the conversion process by clicking on the bottom-right Convert All button.
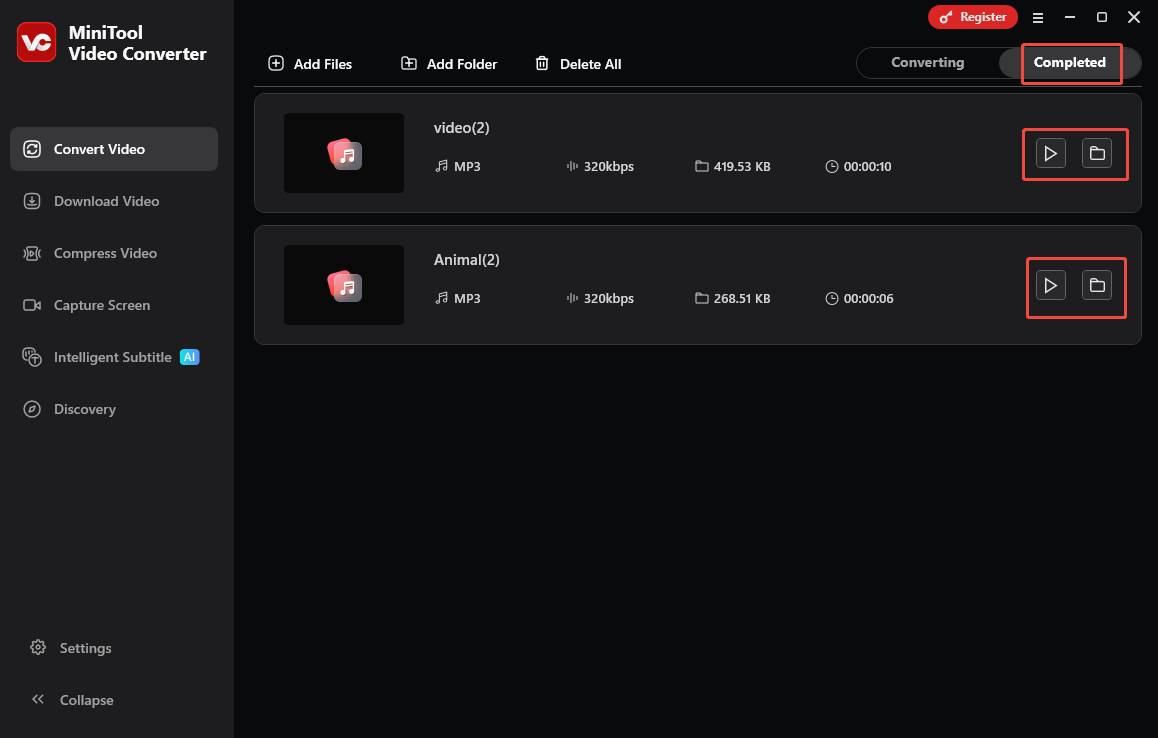
Step 5. Check the output files.
When the file conversion process ends, this audio converter will automatically switch to the Completed section. There, click on the Play icon to listen to the converted files. If you want to locate the output files, click on the Folder icon.
More than an audio converter, MiniTool Video Converter is also a one-stop solution for video compression, which enables you to manage various parameters that affect the video file size. Plus, this application supports audio/video transcription with advanced AI technology, allowing you to get an accurate transcription result with simple clicks.
#8. Trim the Audio
If there is a broken part in your audio file, you can also remove the problematic section by audio trimming. To do that, you need an audio editor. Here, I highly recommend MiniTool MovieMaker.
About MiniTool MovieMaker
MiniTool MovieMaker is a top-grade program that enables you to edit your audio/video file effortlessly. Specifically, it empowers you to trim, merge, or reverse the audio files based on your needs.
In addition, MiniTool MovieMaker allows you to change the volume and speed of the audio effortlessly. It also saves your audio files in multiple formats, such as MP3, MP4, MOV, MKV, WMV, and so on.
How to Trim the Audio with MiniTool MovieMaker
Below is a detailed guide on how to trim the audio file using MiniTool MovieMaker.
Step 1. Download and install MiniTool MovieMaker.
MiniTool MovieMakerClick to Download100%Clean & Safe
Click on the download button above to download and install MiniTool MovieMaker on your PC.
Step 2. Upload the audio file.
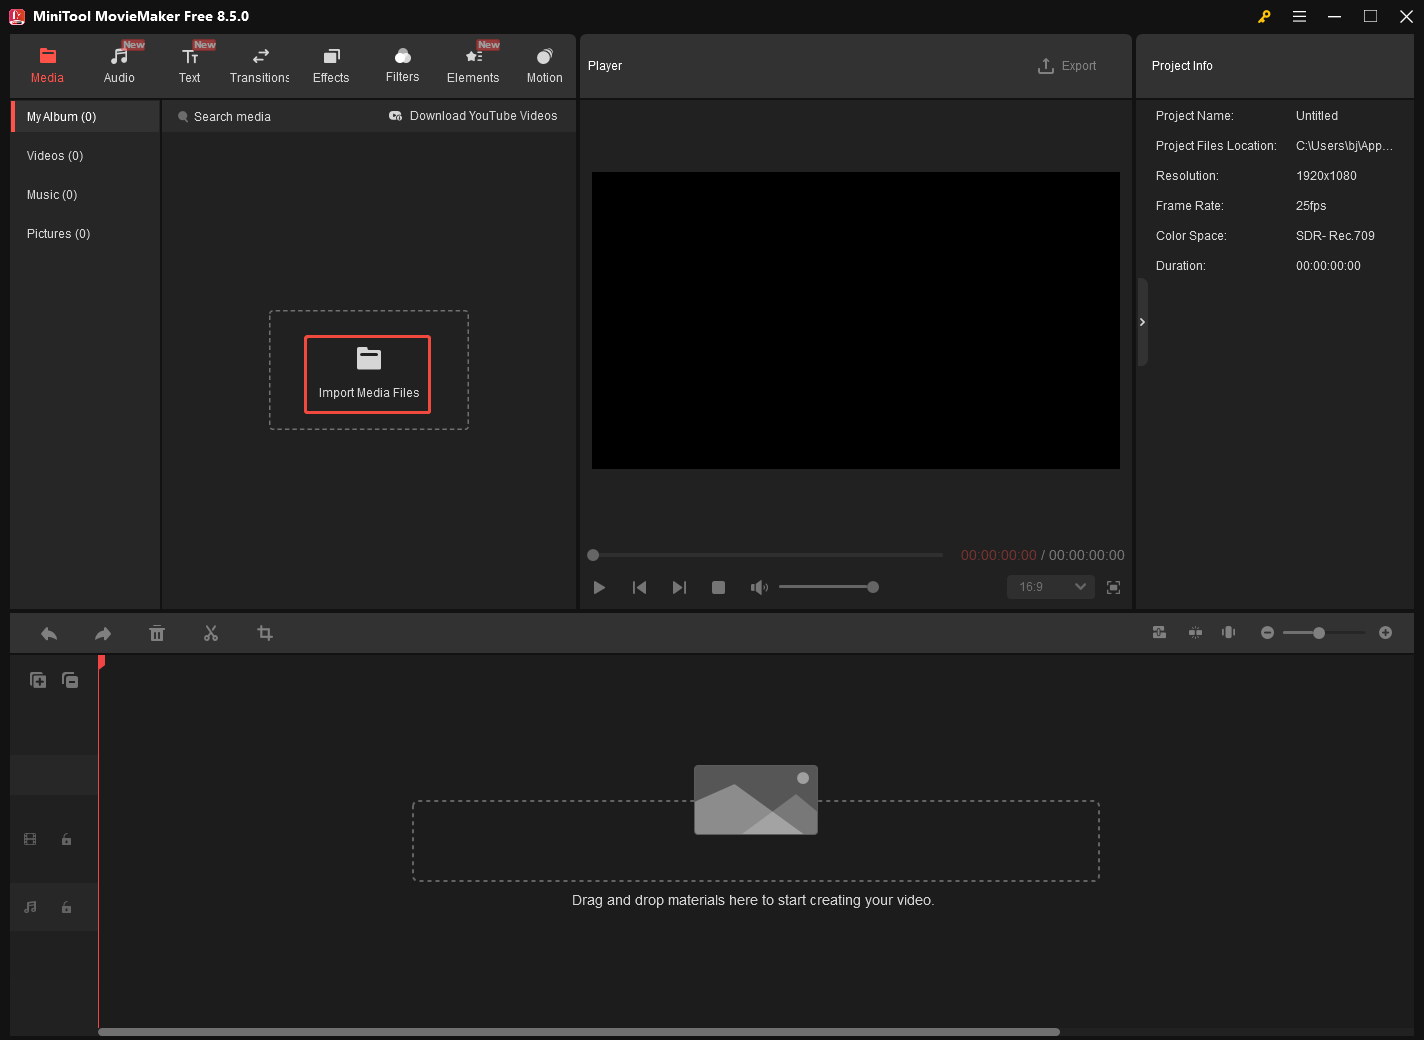
After launching MiniTool MovieMaker, close the promotion window to enter the main interface. There, click on the Import Media Files area to import the audio file. Then, drag the audio file onto the timeline below.
Step 3. Trim the audio file.
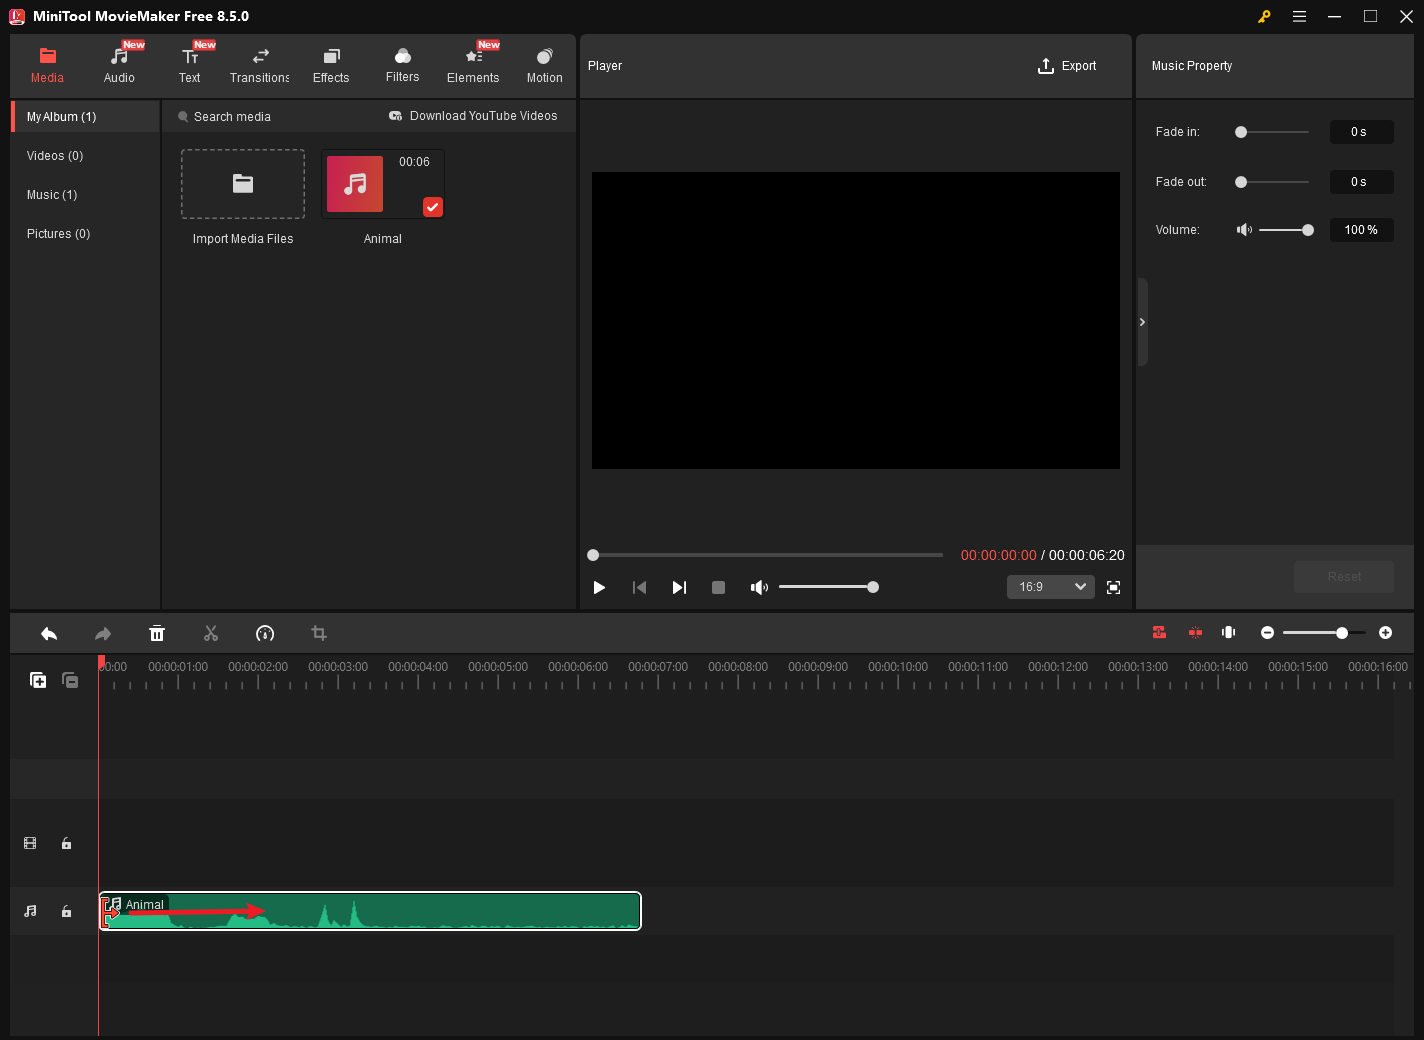
If the broken audio is located on the beginning/ending part of the audio clip, mouse over the start/end of the audio clip. There, you will see an arrow appear. Then, drag the arrow rightwards/leftwards to the beginning/end of the wanted part.
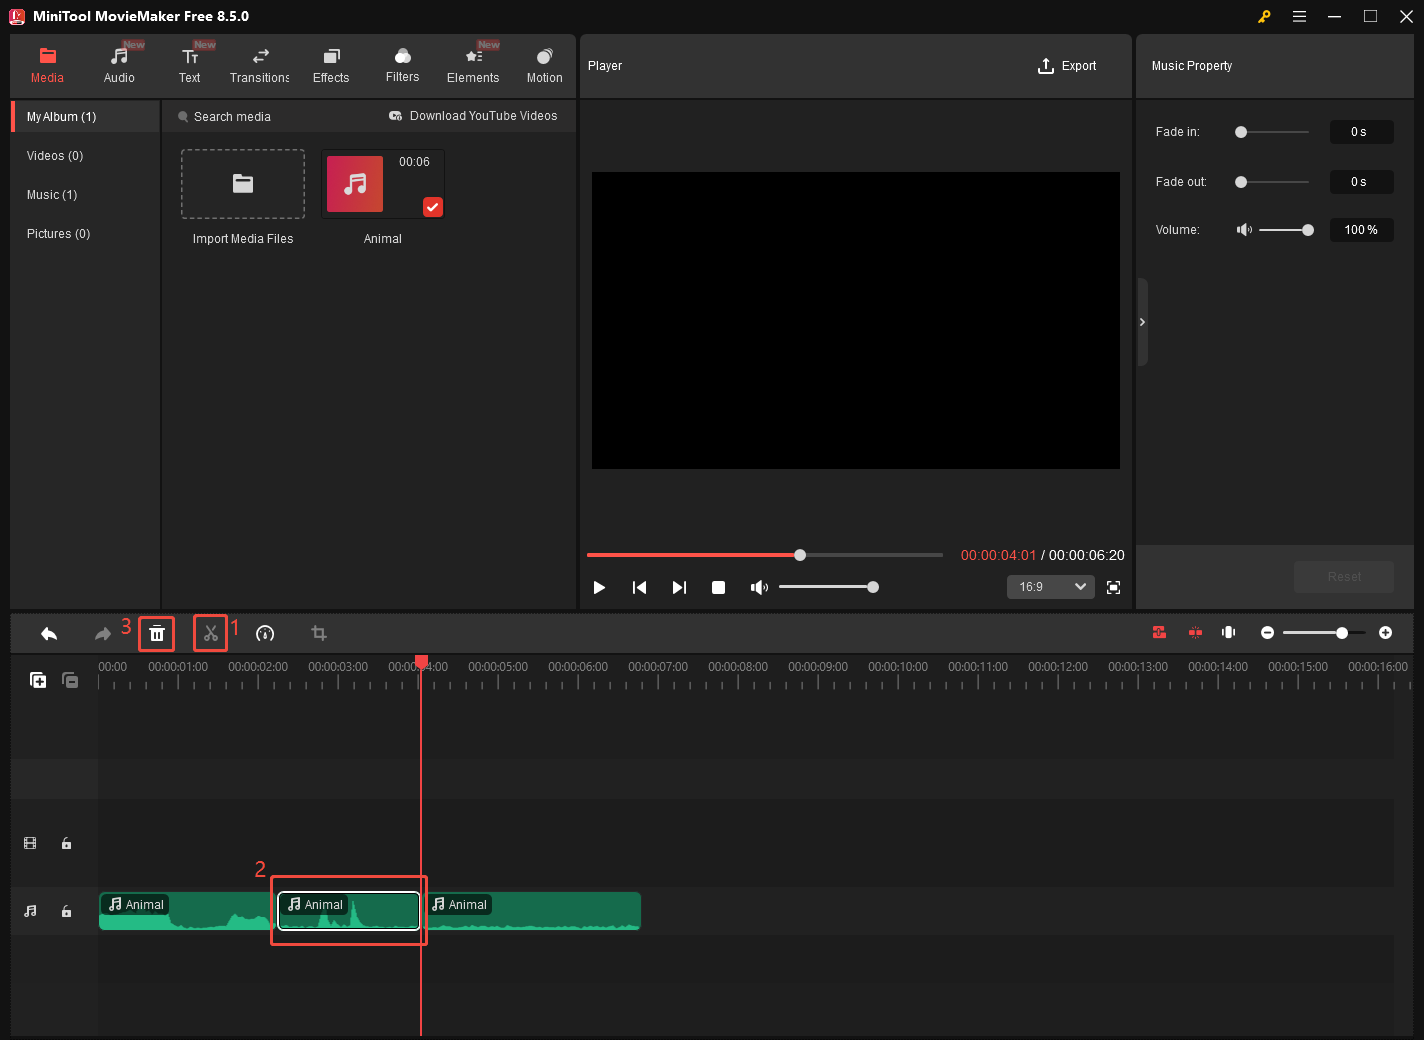
On condition that the problematic audio is in the middle part of the audio clip, move the playhead to the beginning of the broken audio. Next, click on the scissor icon. Then, drag the playhead to the end of the broken audio and click the scissors icon again. After that, click on the unwanted part and click on the Delete icon to remove it.
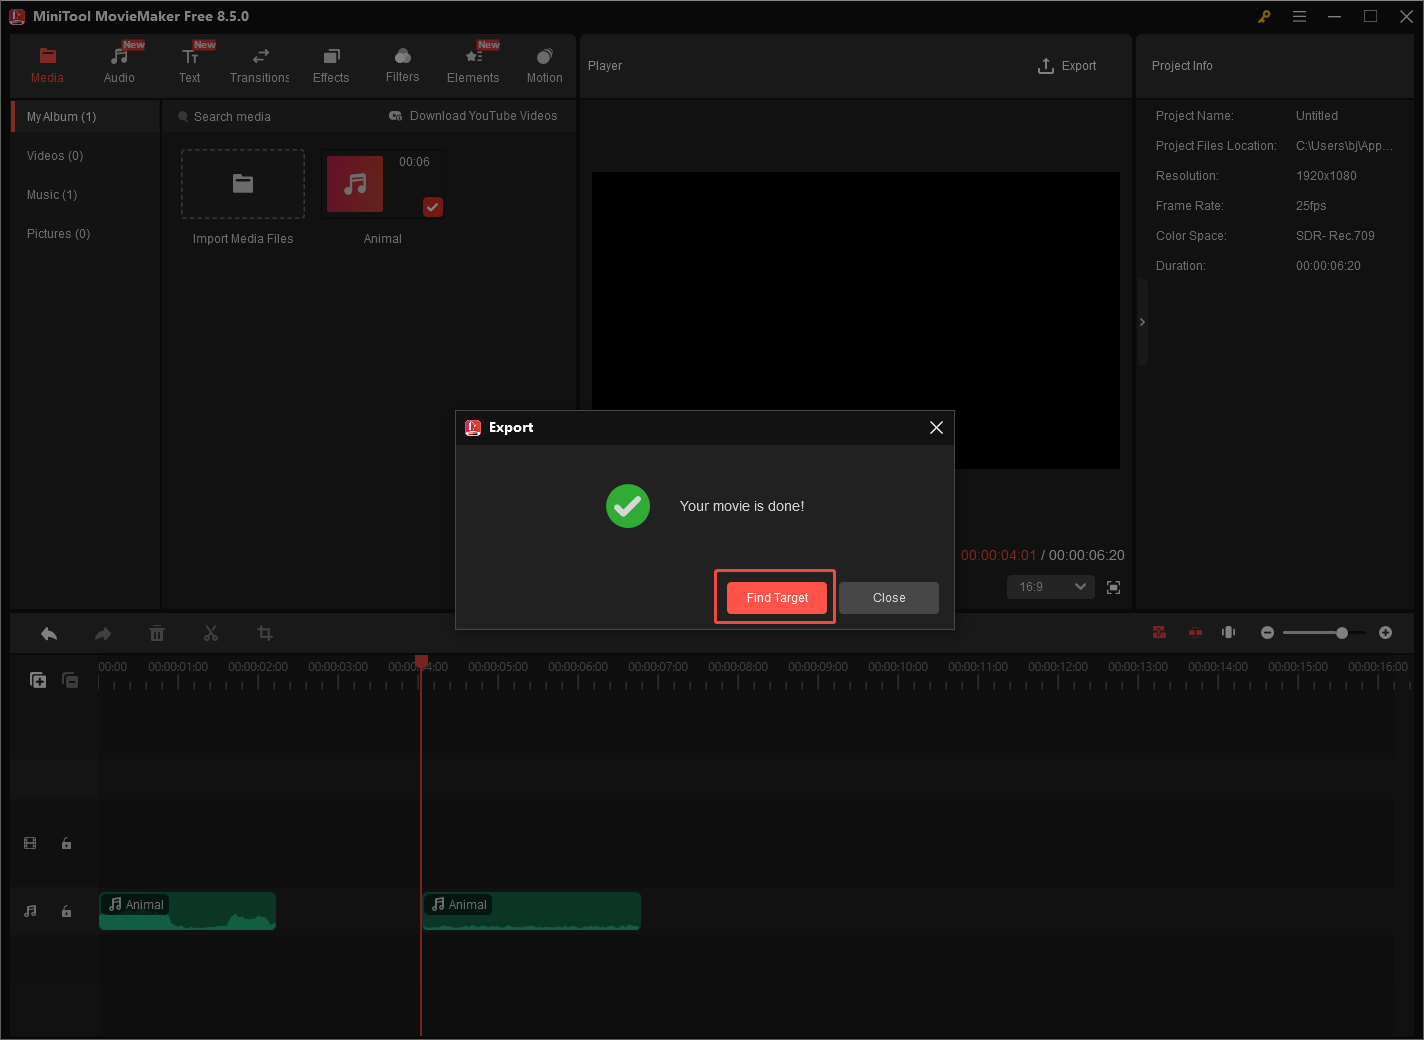
Step 4. Configure the output settings and start exporting the audio.
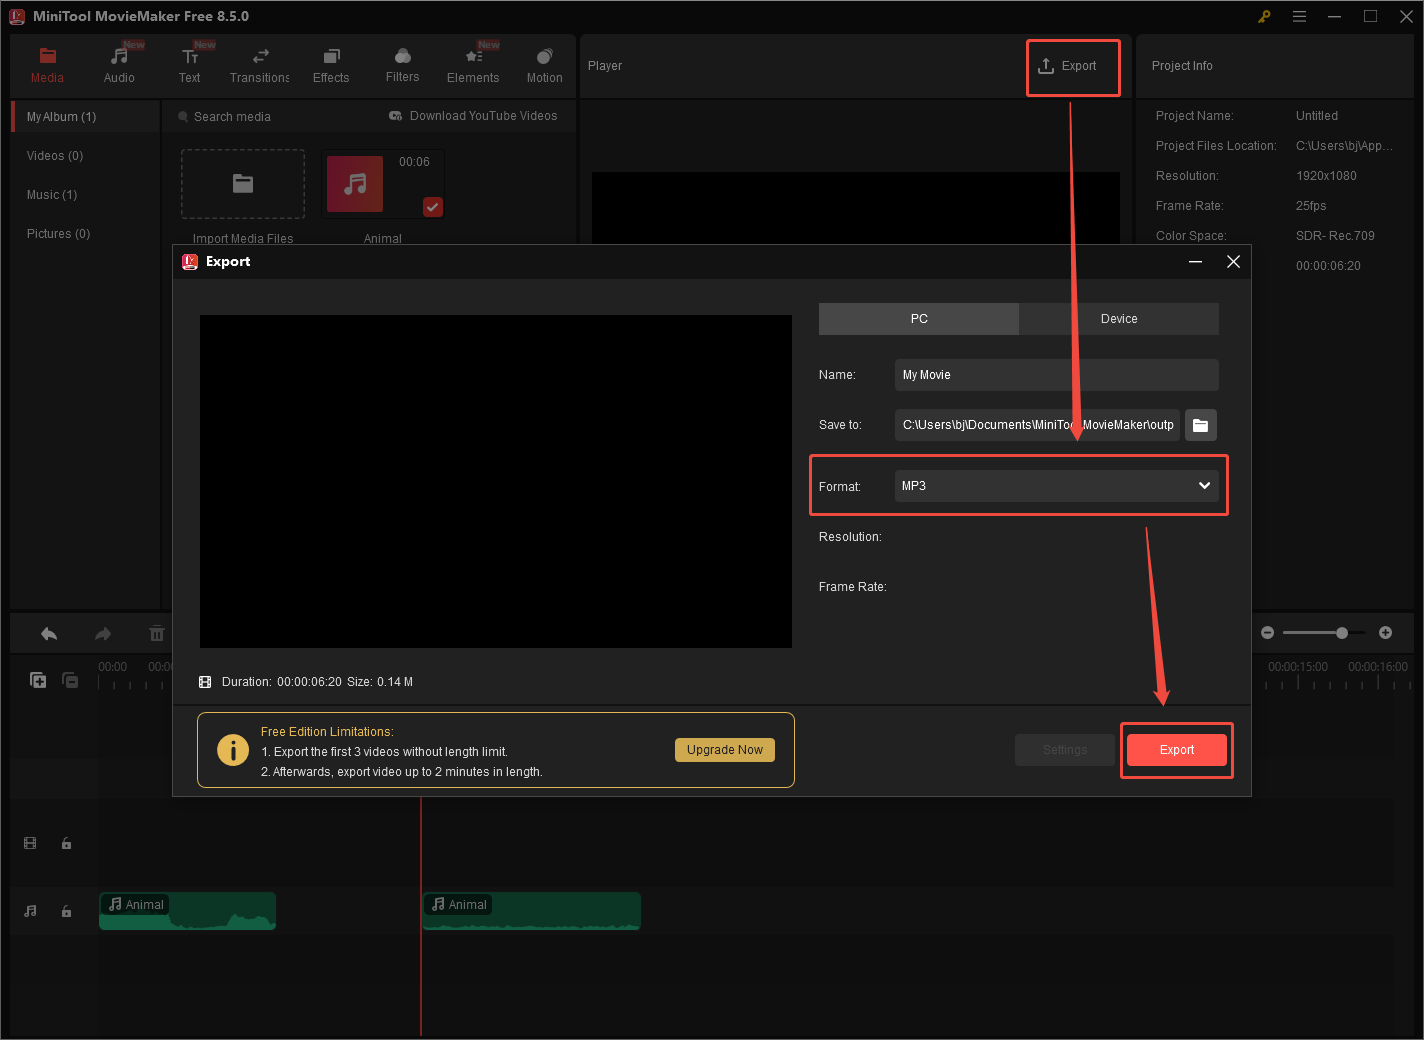
Click on the Export option at the upper right of the Player section to access the Export window. There, you can set an output folder for the trimmed audio. Then, expand the Format option and choose MP3 as the output format. Finally, click on the bottom-right Export button to start the audio exporting process.
Step 5. Check the output audio.
When the audio exporting process finishes, click on the Find Target button in the pop-up window to locate the output audio.
With the detailed steps above, you can trim the problematic audio easily and quickly.
#9. Repair Corrupted Audio
To handle the audio corruption, you need to use an audio repair tool. There are a lot of applications available online, such as VEED.IO. Just download and install one on your PC to repair the corrupted audio. This way, audio not working Windows 10 will never be a problem for you.
#10. Check Sound Settings
To ensure that the sound settings on your PC are correct, follow the steps below to check them.
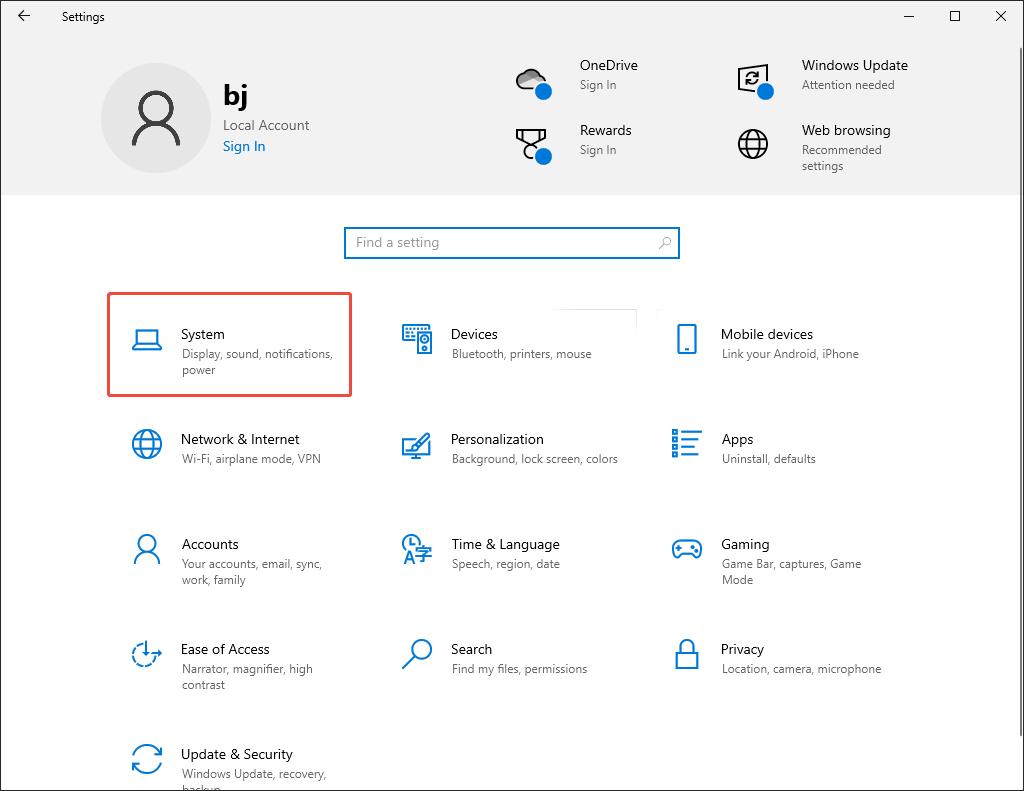
Step 1. Go to the System window.
Press the Windows + I keys to enter the Settings window. There, choose the System option.
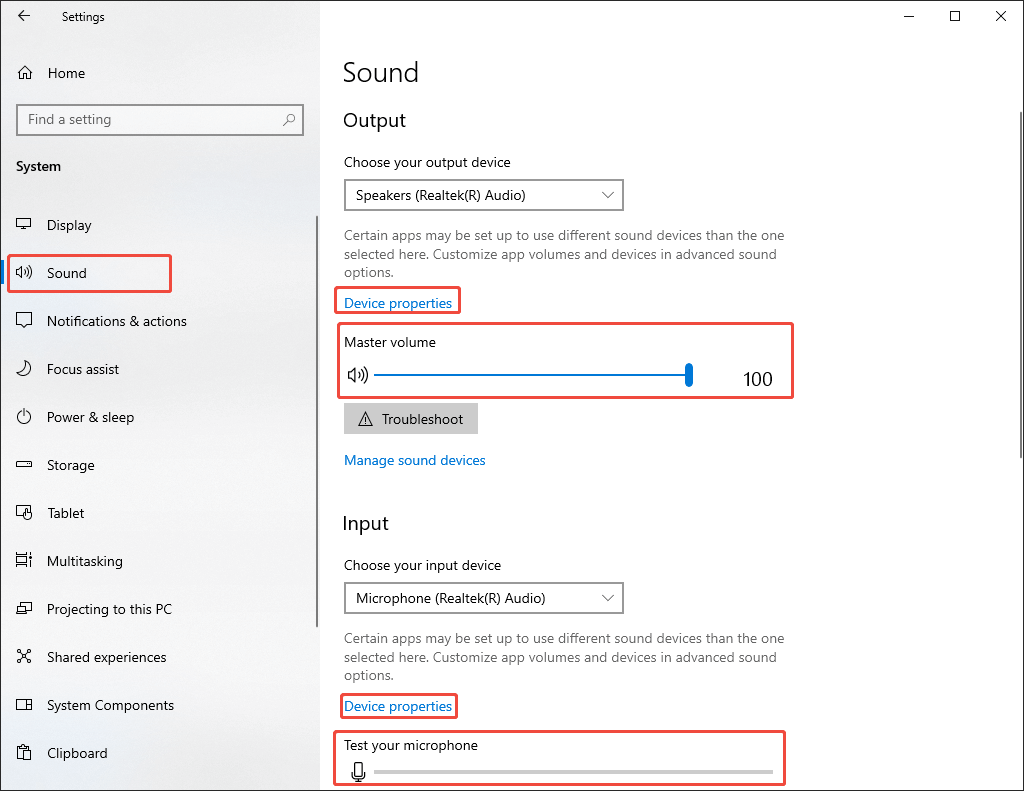
Step 2. Check the sound settings.
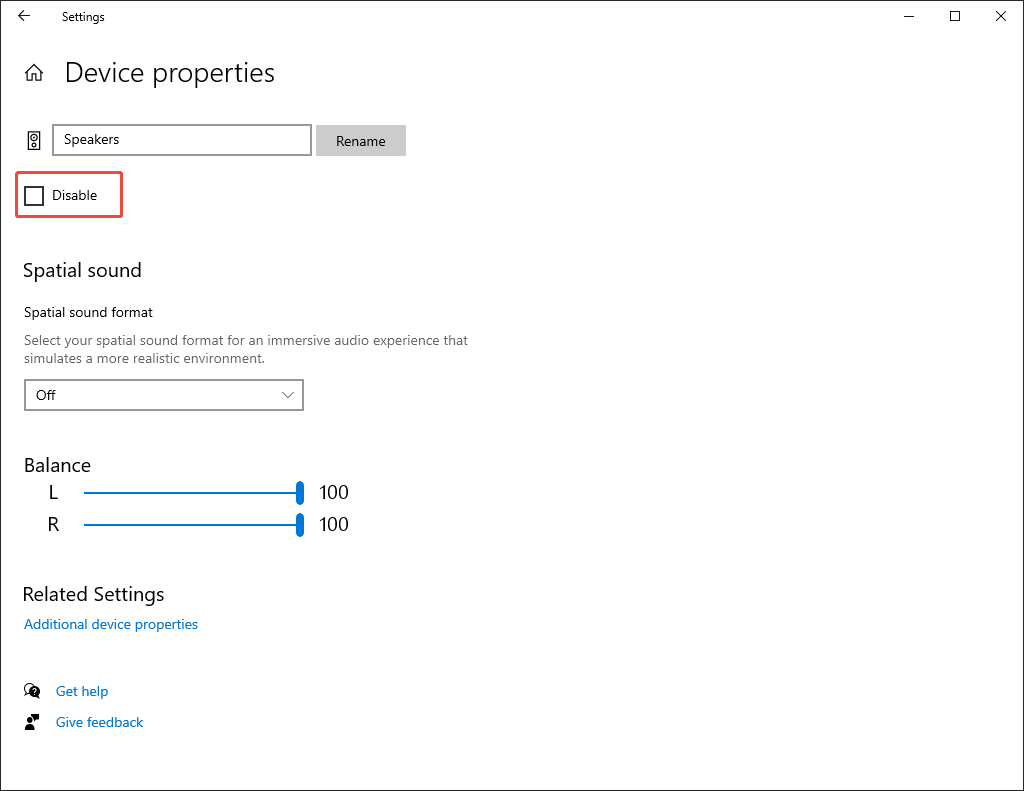
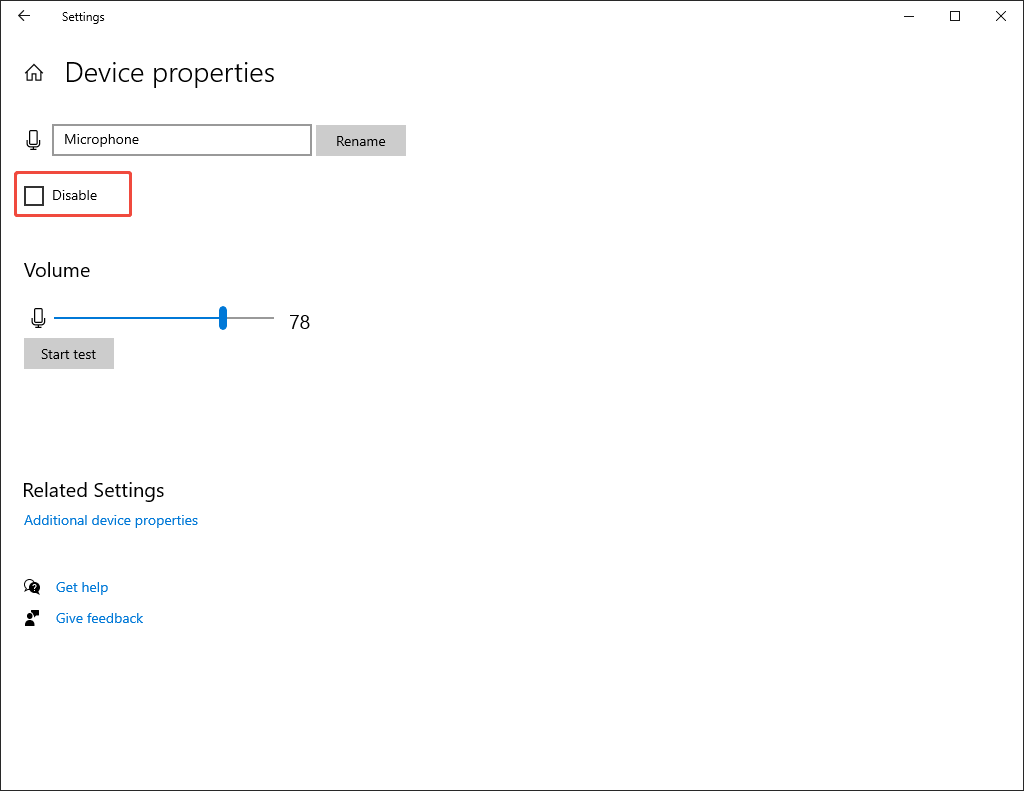
Switch to the Sound tab. There, check the input and output sounds. Ensure that they are not muted. Click on the Device properties options to access the small windows. Click the Device properties options under the Output and Input section to ensure that the speakers and microphone are not disabled.
For example, the picture below shows that the device properties of Speakers are enabled.
The picture below shows that the device properties of Microphone is enabled.
With the above-detailed steps, you can check the sound settings effortlessly.
#11. Check for IDT High Definition Audio CODEC
A problem with the audio system’s IDT High Definition Audio CODEC will also cause the audio not to work. To solve that problem, follow the guide below to update the driver manually.
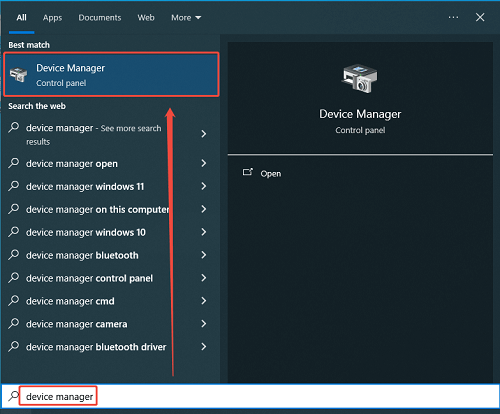
Step 1. Enter the Device Manager window.
Activate the search box in the bottom taskbar. Then, enter device manager and click on the pop-up Device Manager option to enter the window.
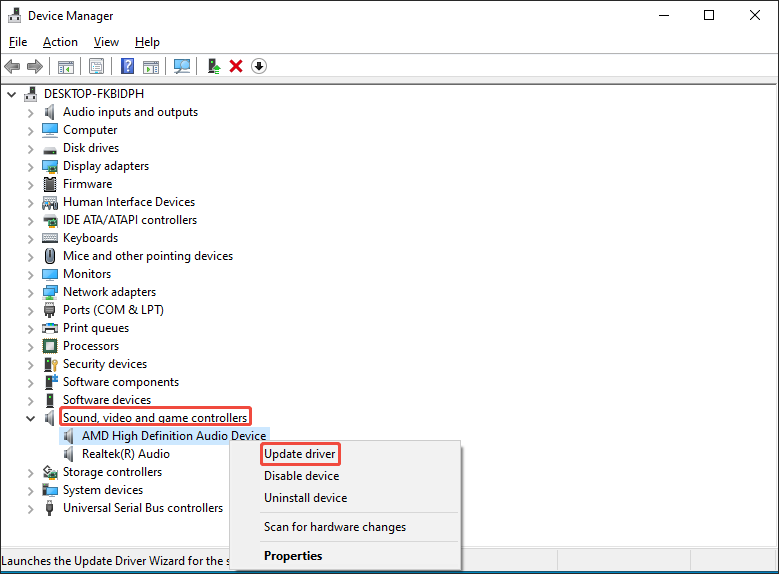
Step 2. Access the update interface.
Expand the Sound, video and game controllers option and right-click on the IDT High Definition Audio CODEC option. Next, choose the Update driver option.
Step 3. Begin the update process.
Click on the Browse my computer for drivers option and choose Let me pick from a list of device drivers on my computer. As you see a driver list, choose High Definition Audio Device. Finally, click on the Next button to start the update process.
With the guidance above, it is more possible for you to fix the audio issue.
#12. Update/Reinstall Audio Drivers
If there is no IDT High Definition Audio CODEC option on your system, update other audio drivers.
Step 1. Go to the update interface.
Expand the Sound, video and game controllers option in Device Manager. Then, right-click on the sound driver in the list and choose Update driver.
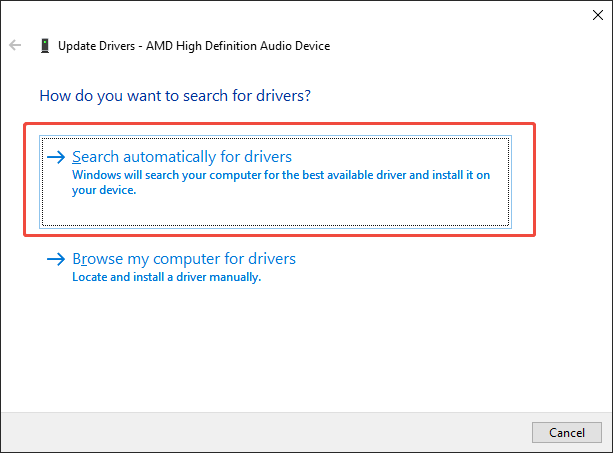
Step 2. Start the update process.
Choose the Search automatically for drivers option to begin the update process.
Provided that you want to reinstall the audio driver, follow the guide below.
Step 1. Enter the uninstallation window.
After entering the Device Manager window, expand the Sound, video and game controllers option. Then, right-click on the sound driver in the list and choose Uninstall device.
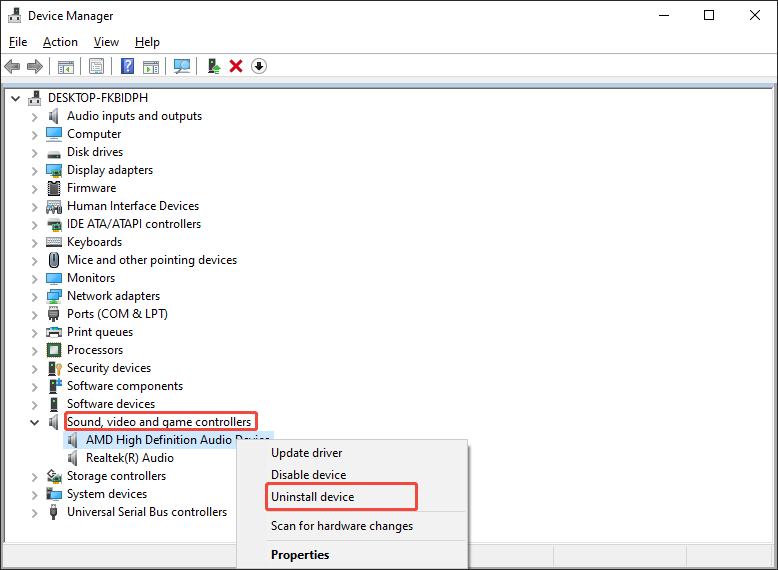
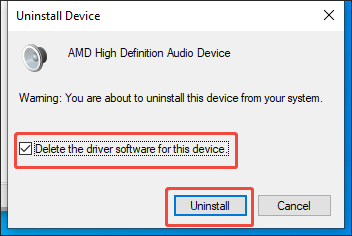
Step 2. Start the driver uninstallation.
Check the Delete the driver software for this device option and click on the Uninstall button to start the uninstallation process.
Step 3. Reinstall the driver.
Once the uninstallation is done, restart your PC. The restart will prompt your computer to finish the driver reinstallation automatically.
That’s all the methods about how to fix audio not working on PC. If you want fix the audio issues on your browsers, the following paragraphs can help.
![[6 Ways] Movies and TV App No Sound Causes and Fixes](https://images.minitool.com/videoconvert.minitool.com/images/uploads/2022/11/movies-and-tv-app-no-sound-thumbnail.png)
#13. Set Default Audio Device
If you have connected an external audio device like a headphone, you may need to set the audio device as the default one. Otherwise, no audio will be sent to the external audio device. Below is a detailed guide on how to set the audio device as the default.
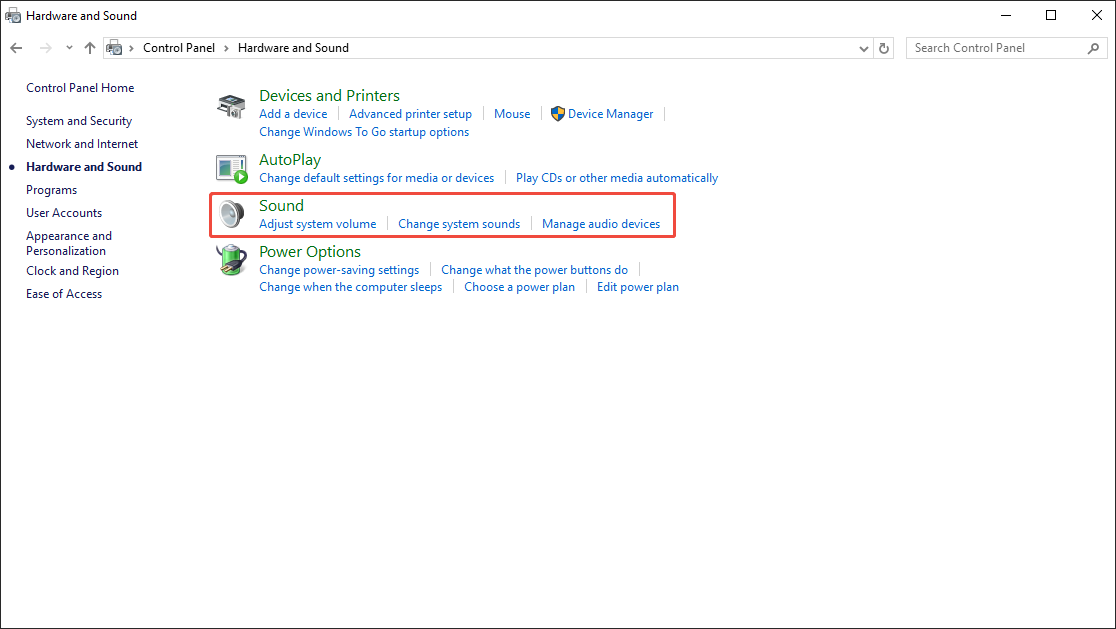
Step 1. Enter the Control Panel window.
Type control panel into the search box on the bottom taskbar. Click on the pop-up Control Panel option to enter its window.
Step 2. Go to the Sound window.
Choose the Hardware and Sound option to enter the sound panel.
Choose the Sound option to activate the Sound window.
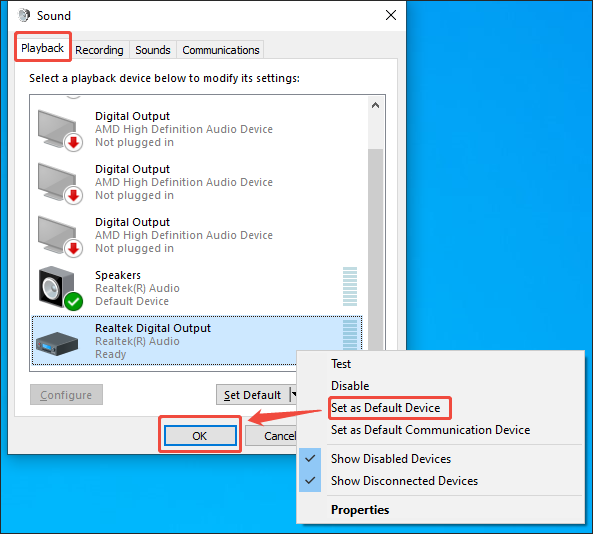
Step 3. Set a default audio device.
Under the Playback section, you will see a list of audio devices. There, right-click on the audio device you are using and choose Set as Default Device. Then, click on the OK button to save the changes.
If this method doesn’t work, try other methods below.
#14. Restart Windows Audio Services
Restarting Windows Audio Services also helps you fix audio not working on laptop. Follow the steps below to do that.
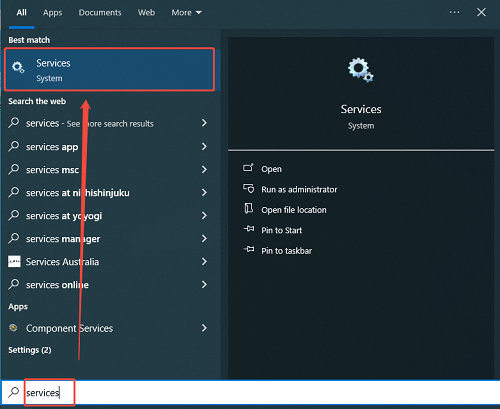
Step 1. Access the Service window.
Start the search box in the taskbar. Then, type services and click on the Services option.
Step 2. Restart the service.
Scroll down and find the Windows Audio option. Right-click on this potion and select Restart.
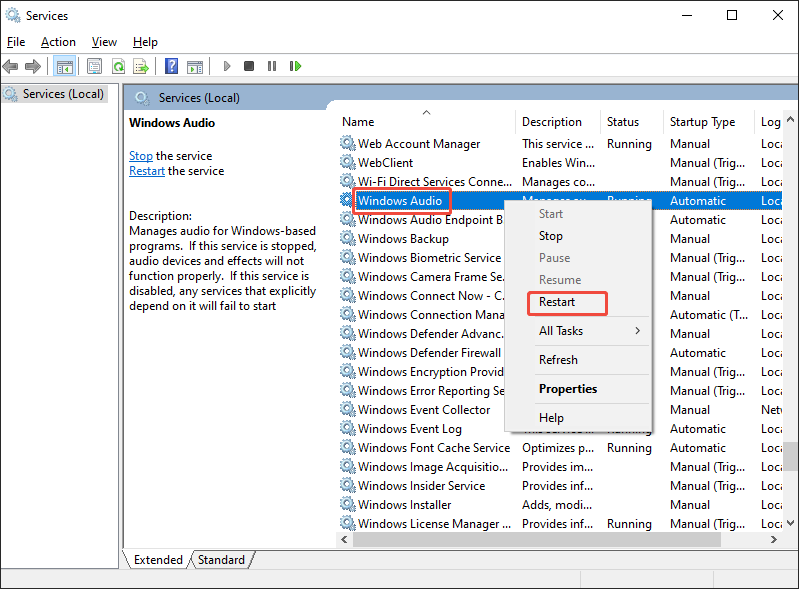
When the restarting finishes, check whether the sounds work.
#15. Fix Microphone Privacy Settings
To make the audio work again, you can also follow the steps below to fix the microphone privacy settings.
Step 1. Enter the Settings window.
Press the Windows + I keys to enter the Settings page. There, choose the Privacy option.
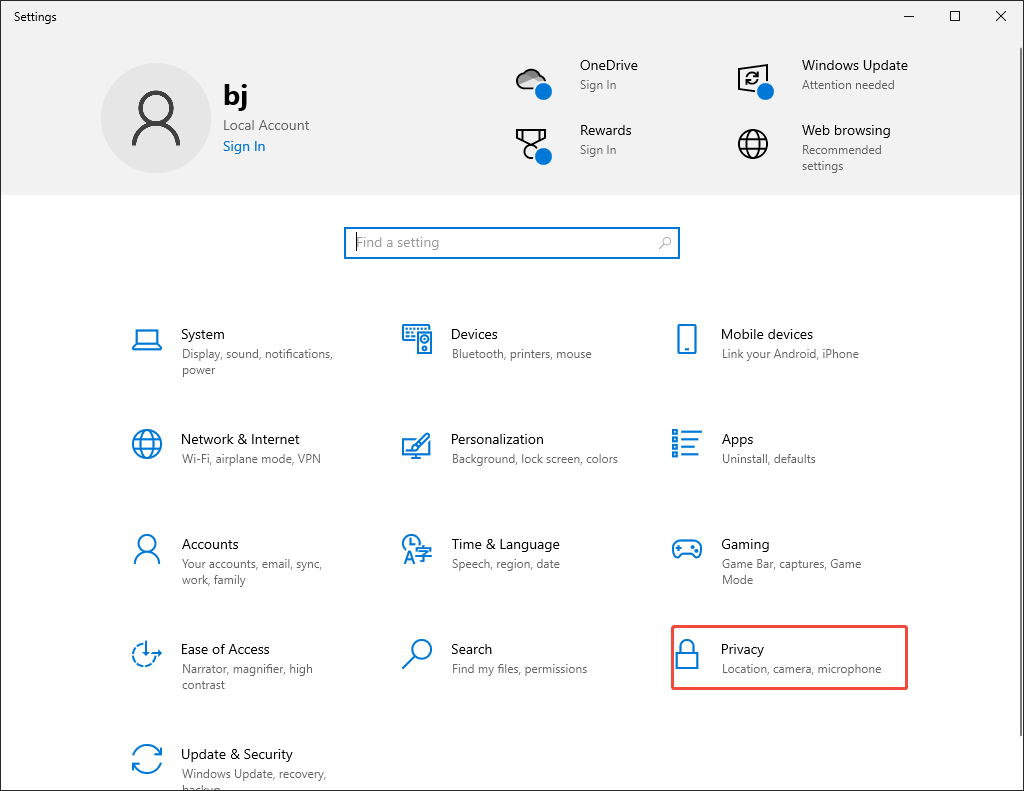
Step 2. Fix the microphone privacy settings.
Switch to the Microphone tab. Then, click on the Change option under the Allow access to the microphone on this device section.
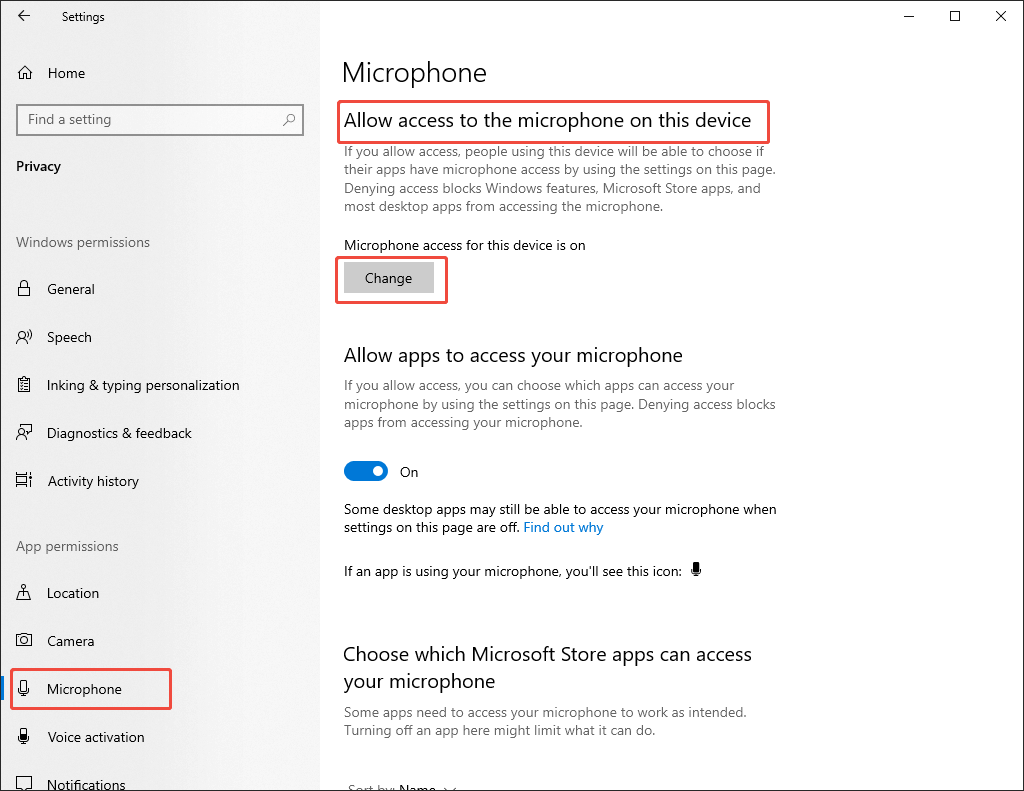
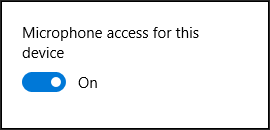
Ensure the Microphone access for this device option is turned on.
Once the microphone privacy settings are fixed, check the audio playback.
How to Fix Audio Not Working on Browsers
Here are the solutions to audio not working on web browsers.
#1. Restart the Browser
Restarting the web browser means a lot for fixing the audio not working issue. For example, it helps you cope with temporary software conflicts easily. Meanwhile, after restarting, the connection of the browser to the audio engine of the operating system can be reset.
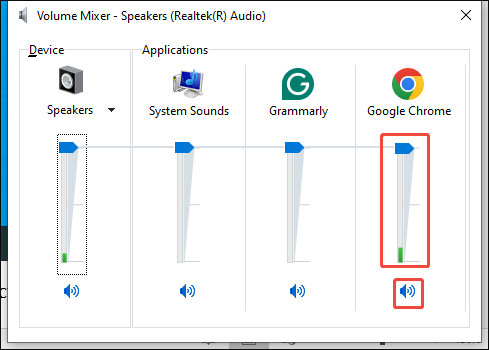
#2. Check the Volume Mixer
Not similar to the main volume, the volume mixer features a separate slider for each running browser like Google Chrome. As such, even if you have turned up the main volume, you won’t hear any audio with a muted volume mixer. Below are the detailed steps to check the volume mixer.
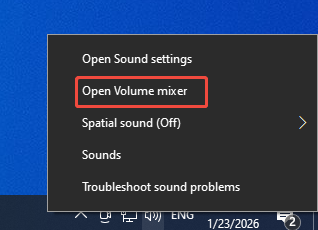
Step 1. Enter the Volume Mixer panel.
Right-click on the Loudspeaker icon in the bottom taskbar. Then, choose the Open Volume mixer option to access the Volume Mixer panel.
Step 2. Check the Volume Mixer.
In the pop-up panel, you can see the volume slider under the icon of your web browser. Ensure that the audio hasn’t disabled in the volume mixer. If the volume is set too low, adjust the volume by dragging the slider based on your needs.
With the above-detailed steps, you can avoid the potential problems from the volume mixer easily.
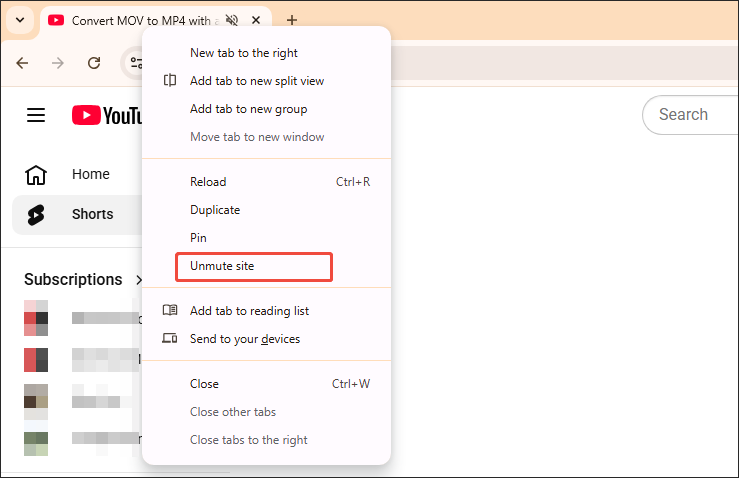
#3. Unmute the Tabs
Most web browsers allow you to mute a specific tab as needed. However, if you have accidentally muted a tab that is playing audio, it seems that the audio is not working on browsers. To resolve this issue, you can follow the steps below to unmute the tab. Here, I take Google Chrome as an example.
Step 1. Go to Google Chrome.
Launch your Google Chrome and access the tab that is playing the audio.
Step 2. Unmute the tab.
Right-click on the tab and choose the Unmute site option. Then, check whether there are sounds from your browsers.
On condition that this method doesn’t work, try other solutions below.
#4. Check Sound Permissions
Below is a step-by-step guide on how to check sound permissions on your web browser (taking Google Chrome as an example).
Step 1. Go to the Settings page of Google Chrome.
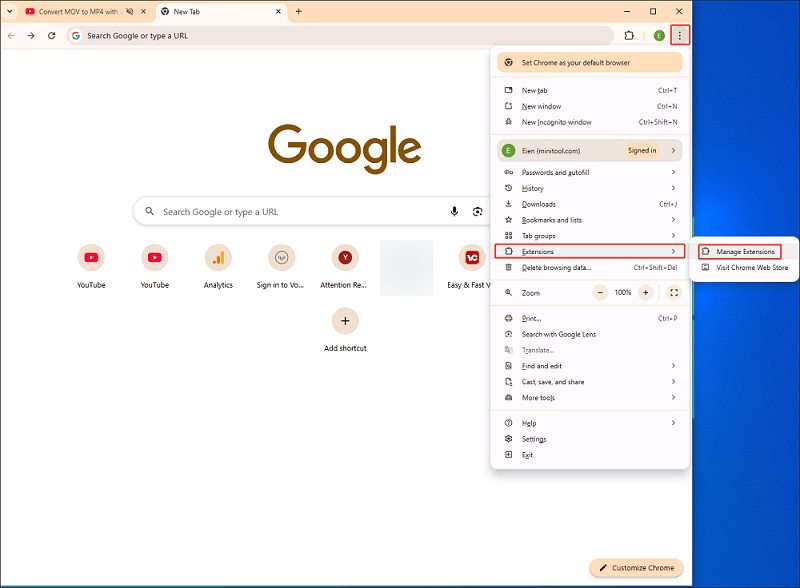
After launching the Chrome browser, click on the upper-right More icon to expand the option menu. There, choose the Settings option to access the Settings page.

Step 2. Go to the Site settings panel.
Switch to the Privacy and security section. There, choose the Site settings option.

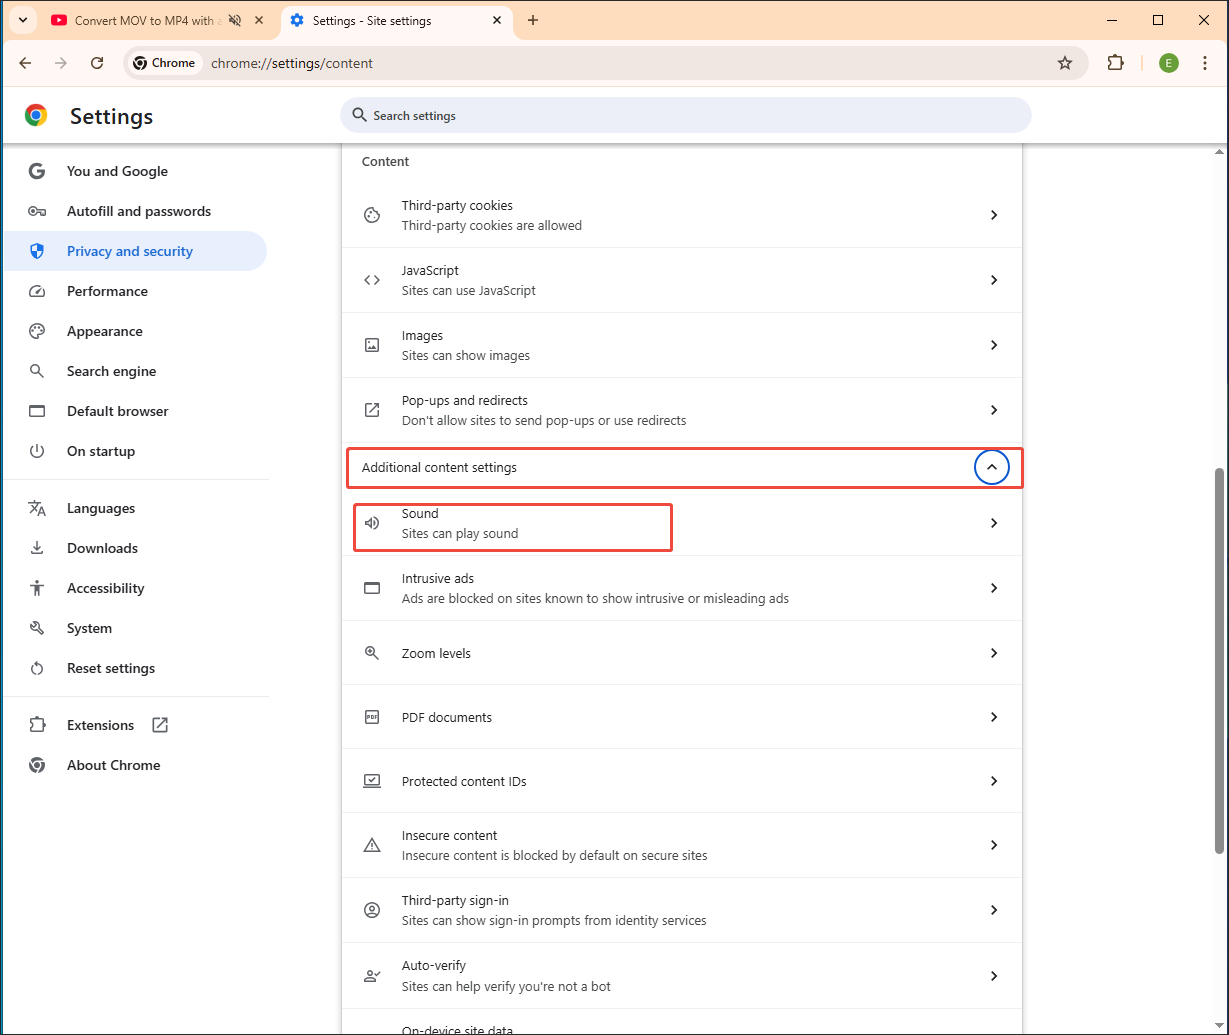
Step 3. Go to the sound permissions panel.
Scroll down to the Content section. There, expand the Additional content settings option. Next, click on the Sound option to enter the sound permission panel.
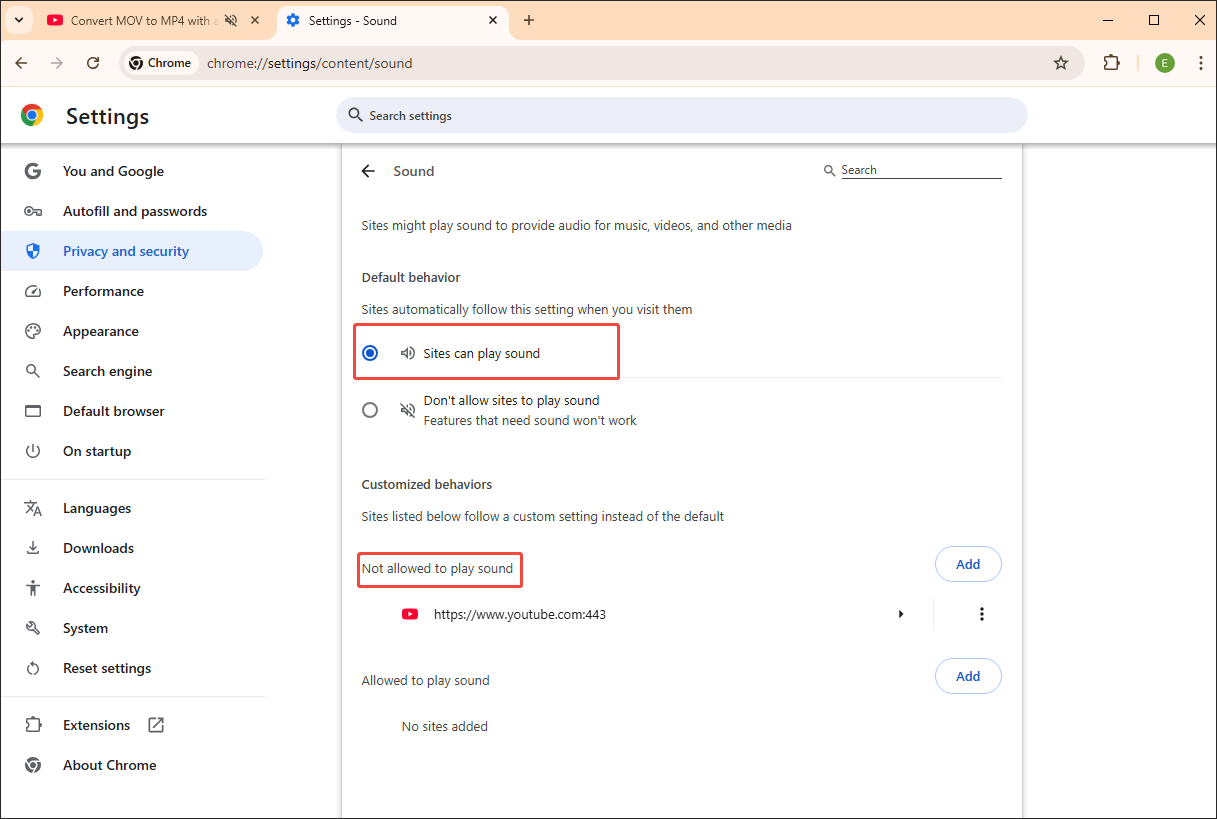
Step 4. Check the sound permissions.
Check the Sites can play sound option. Meanwhile, pay attention to the Not allowed to play sound section. There, you can see the sites whose audio playback has been blocked. If there is a site that is playing audio, remember to remove it from the site list.
If the above solution doesn’t work for Chrome audio not working, try other methods below.
#5. Disable Problematic Extensions
Below is an in-depth guide on how to disable problematic extensions on Google Chrome.
Step 1. Go to the extension management panel.
Run Google Chrome and click on the upper-right More icon to access the option menu. There, select the Extensions option and click the Manage Extensions option to enter the extension management panel.
Step 2. Disable the risky extensions.
Find the extensions that you want to disable and turn off the corresponding option.
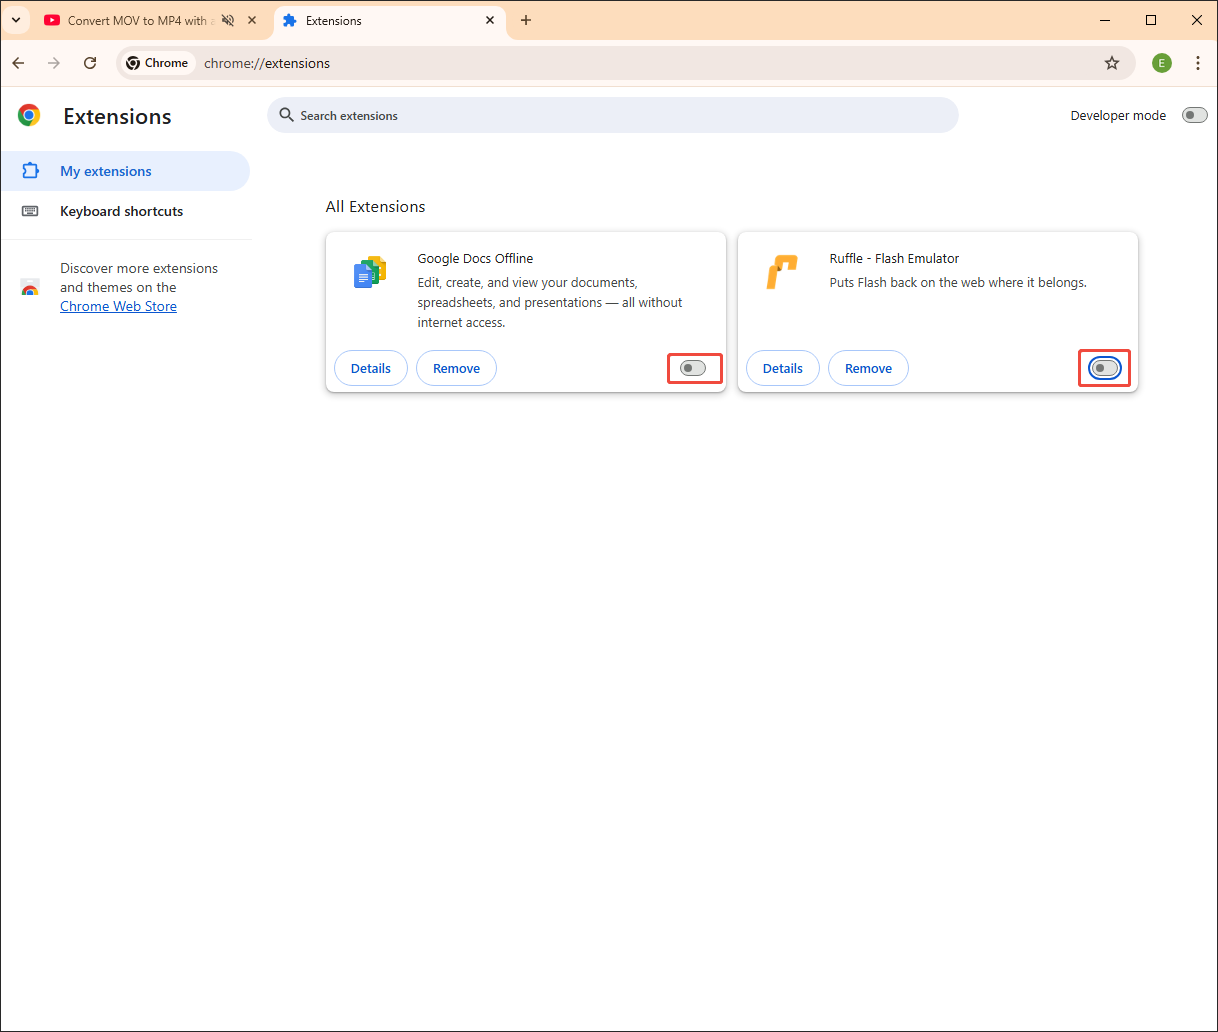
Once all problematic extensions are disabled, check whether the audio is playable on your Google Chrome.
#6. Clear the Browser Cache
Clearing the browser cache also helps you fix the audio issues. Follow the guidance below to do that.
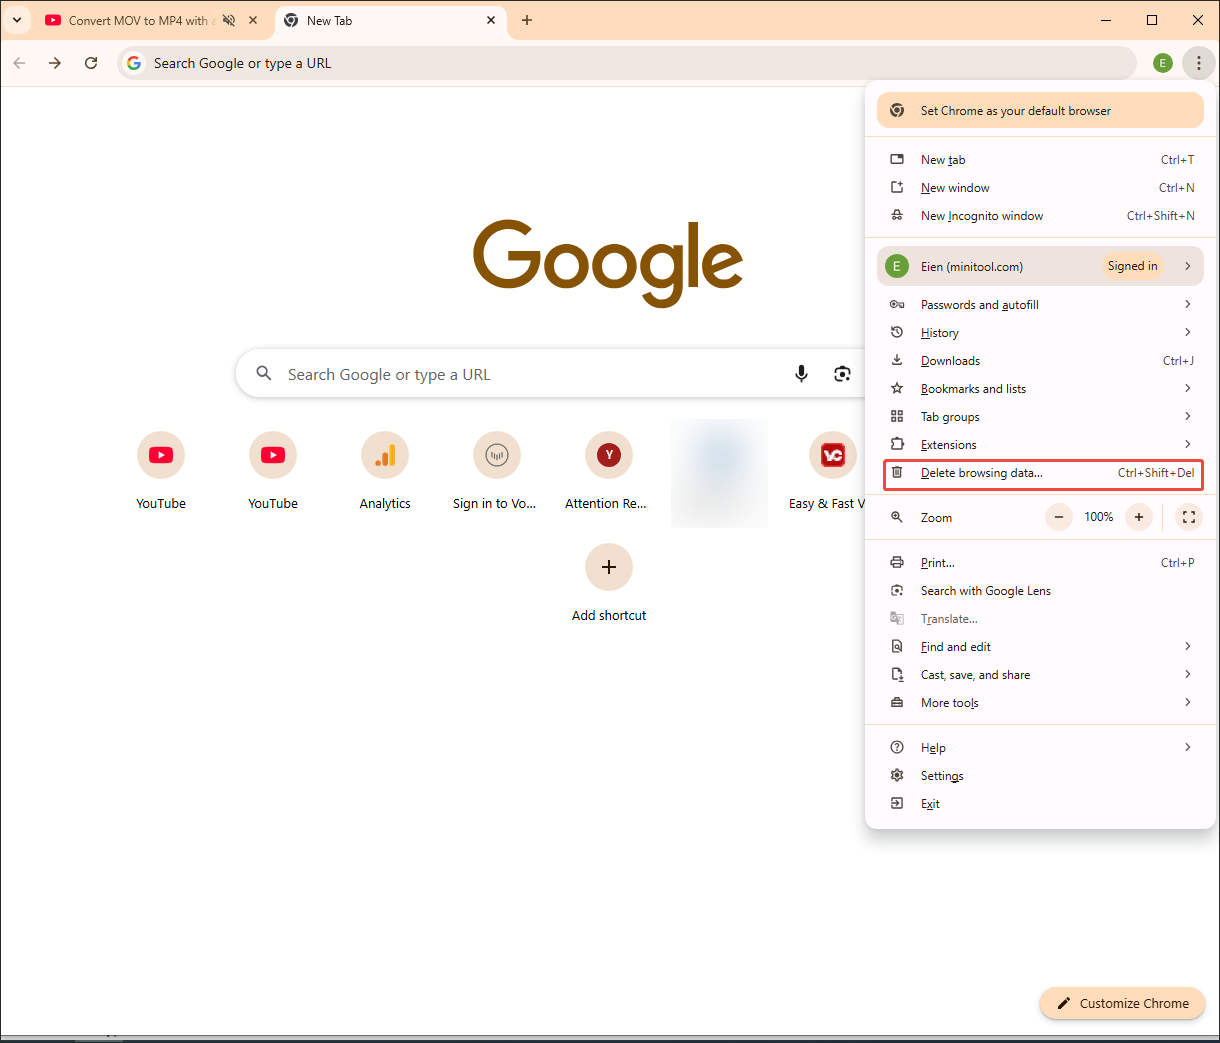
Step 1. Go to the cache deletion panel.
After launching Google Chrome, click on the upper-right More icon to access the drop-down option menu. There, click on the Delete browsing data… option to enter the cache deletion panel.
Step 2. Begin deleting the browser cache.
In the Delete browsing data window, choose a specific time period. Then, check the Cookies and other site data option and the Cached images and files option. Finally, click on the Delete data button to begin the cache deletion process.
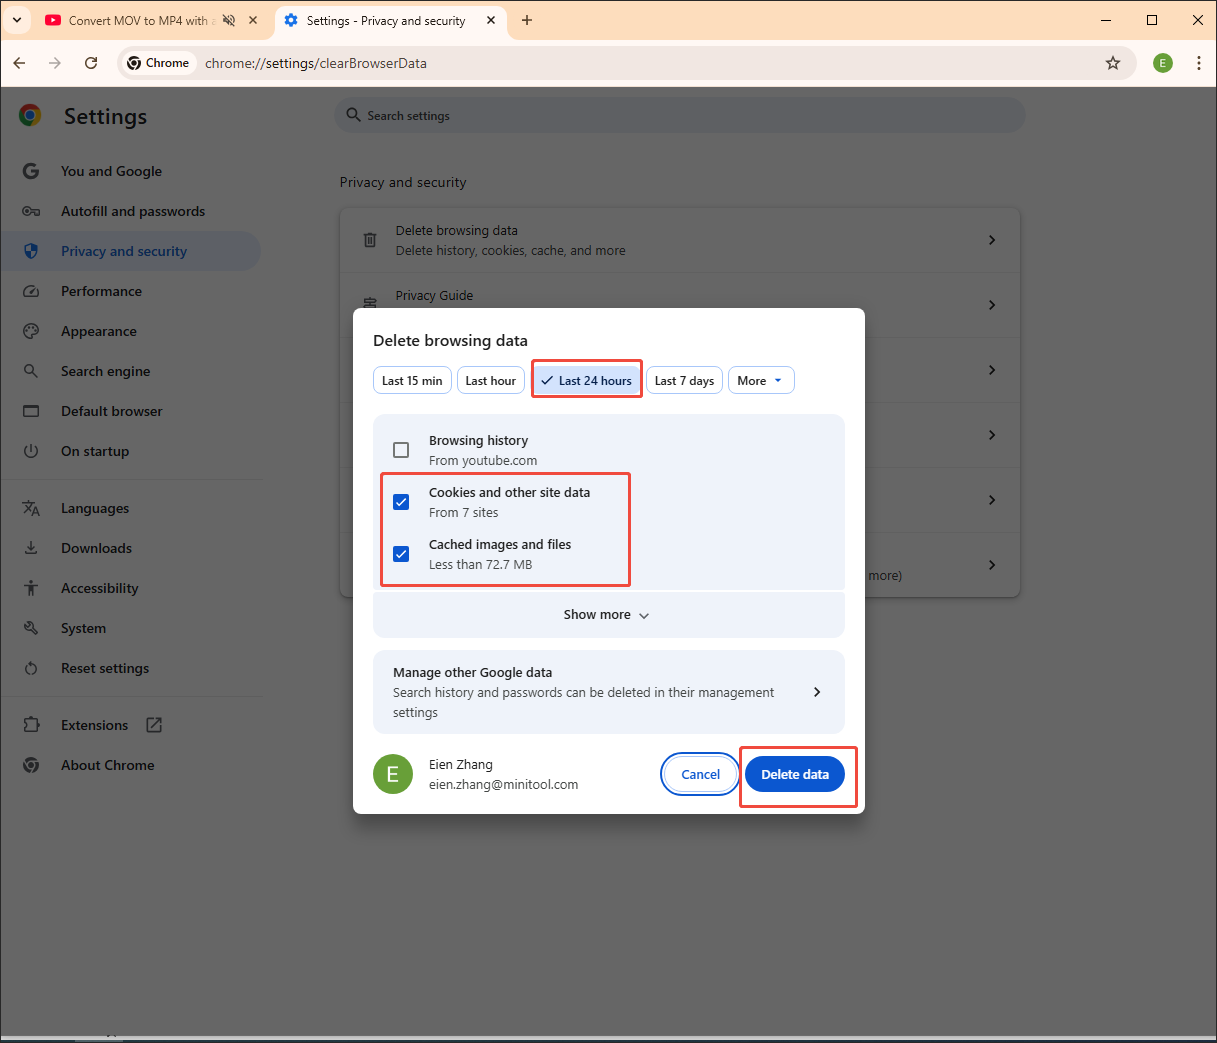
Once you have deleted the browser cache, check whether the audio is playable on your browser.
#7. Reset the Browser Settings
You can also try to reset the browser settings to fix the audio not working.
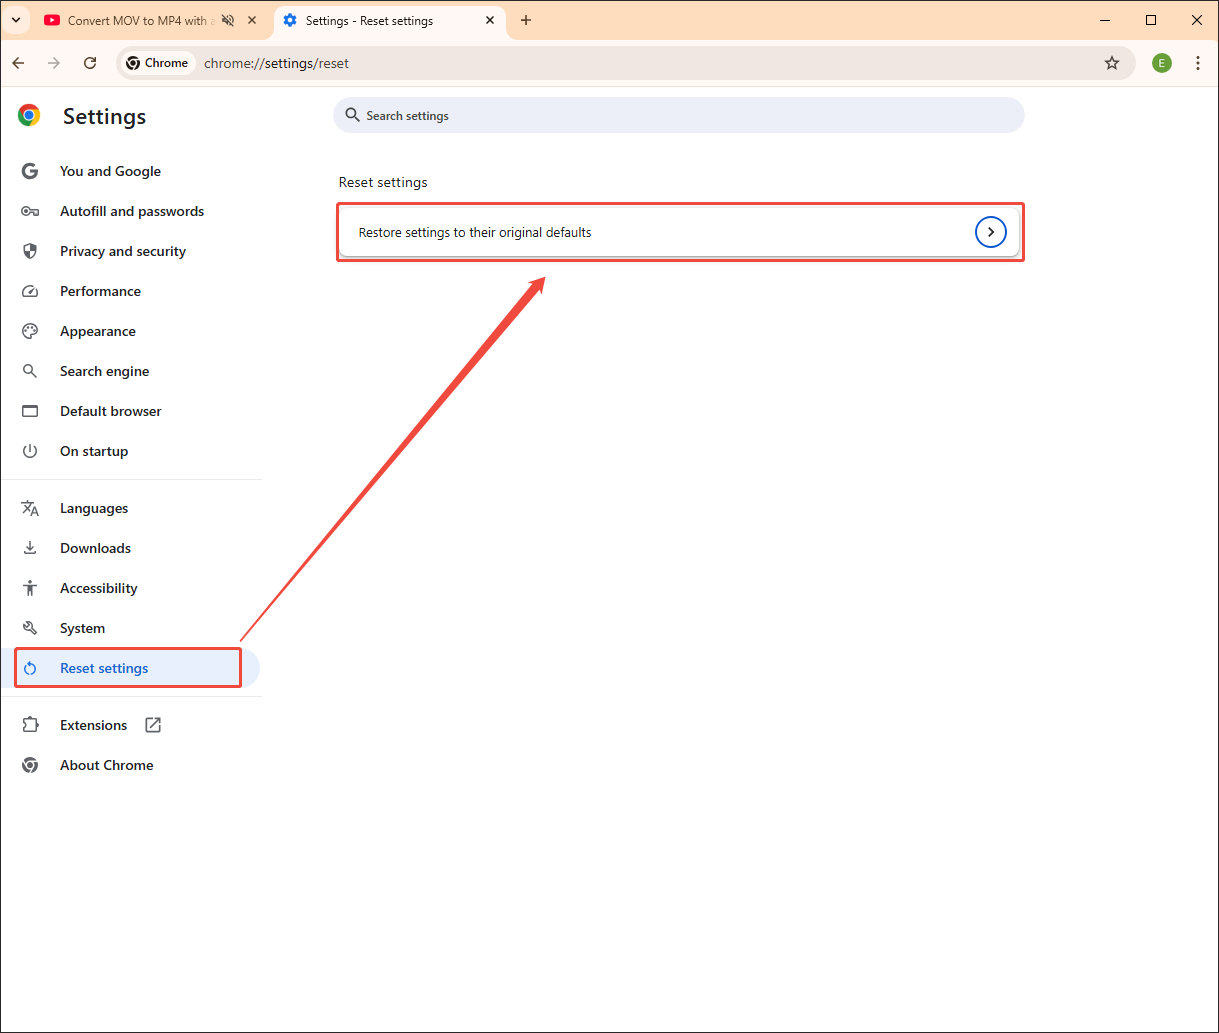
Step 1. Go to the Reset settings panel.
After running Google Chrome, go to its Settings page. There, switch to the Reset settings section to enter the panel where you can reset the settings.
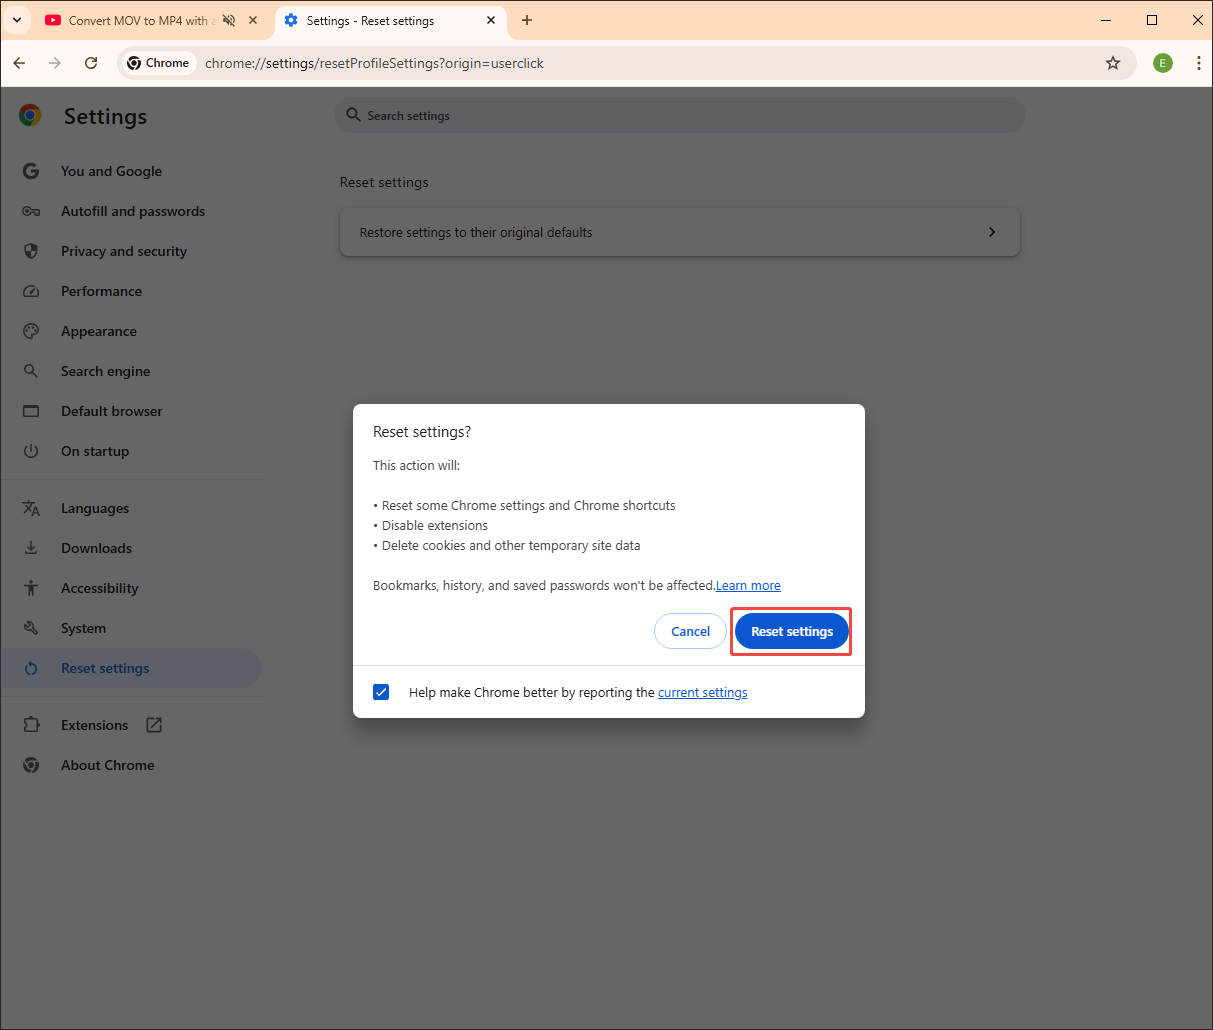
Step 2. Reset settings.
Click on the Restore settings to their original default option to access the pop-up. There, click on the bottom-right Reset settings button.
After the browser is reset, you are more likely to play audio without hassle.

How to Fix Audio Not Working on Mobiles
Below is a wide range of fixes for audio not working on your phones. Before trying these fixes, remember to restart your mobiles first.
#1. Check the Volume
One of the easiest methods to fix audio not working on phones is to check the volume. To ensure that your mobile is not muted, press the physical Volume Up button. If that doesn’t work, try the detailed guidance below to check the volume.
Step 1. Enter the Settings app.
After unlocking your phone, tap the Settings app to enter the next interface.
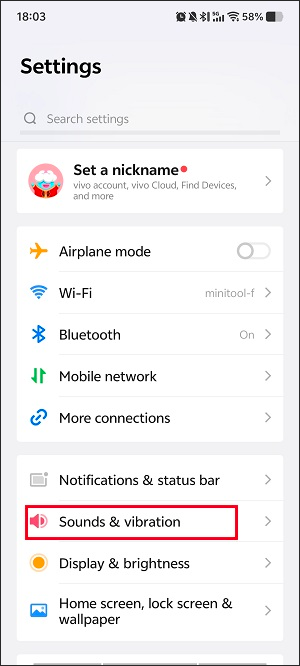
Step 2. Go to the sound management page.
In the option list of the Settings app, select the Sounds & vibration option to access the page where you can manage the volume.
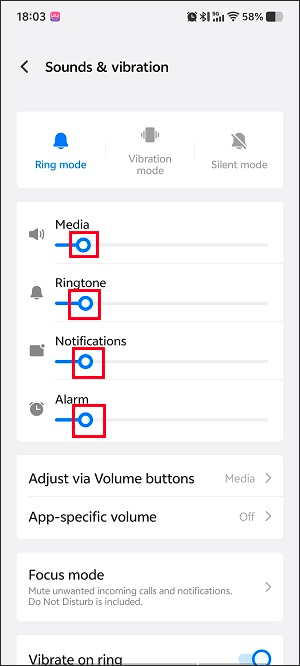
Step 3. Check the volume.
On this page, you can see the volume for media, ringtones, notifications, and alarms. Check whether the volume is too low or set to zero. Next, based on your needs, adjust the volume by dragging the corresponding circle sliders.
This method is an easy fix for iPhone audio not working. However, if it is not effective, try other solutions below.
#2. Turn off Bluetooth
Turning off the Bluetooth stops your mobile from sending audio to wireless accessories like cars or headphones. If you have accidentally connected phones to the unwanted device, you won’t receive any audio from the desired device. In this background, toggling off Bluetooth allows you to set the built-in speaker as the audio output device again.
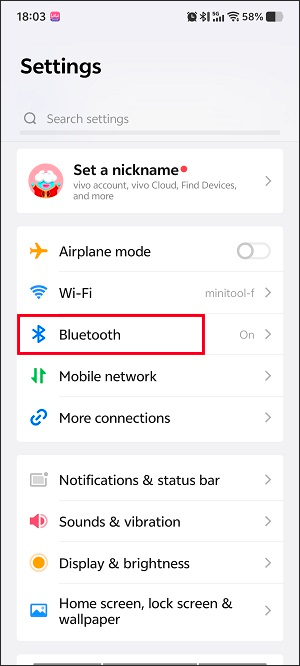
You can swipe down from the top of your screen to access the Quick Settings menu. There, click on the Bluetooth icon to turn off Bluetooth directly. If you don’t find the option, follow the step-by-step tutorial below to toggle it off.
Step 1. Go to the Settings app.
Hit the Settings app to access the option list.
Step 2. Access the Bluetooth panel.
Select the Bluetooth option.
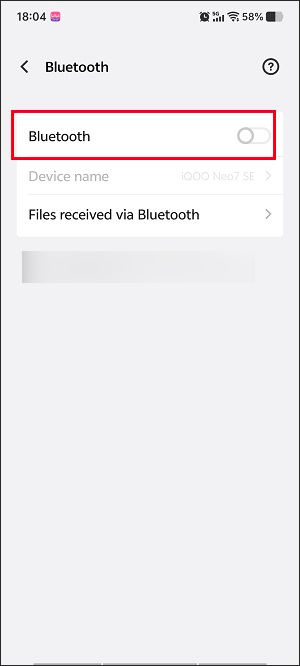
Step 3. Toggle off Bluetooth.
Turn off the Bluetooth option.
With the guidance above, you can toggle off Bluetooth effortlessly. Meanwhile, you are more likely to fix iPhone audio not working
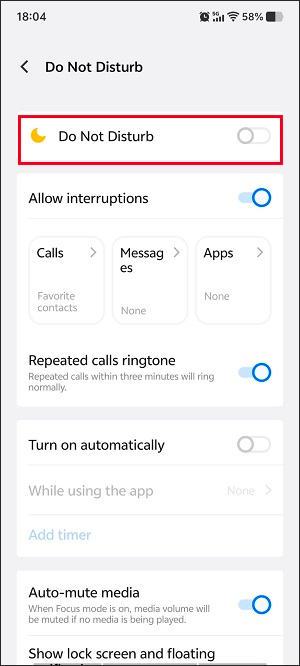
#3. Disable DND (Do Not Disturb)
DND (Do Not Disturb), which is a built-in feature on your mobile, aims to mute notifications, sounds, and even video/audio playback to prevent interruptions. Simply put, DND restricts the audio very much. To disable this function, go to the Quick Settings menu and tap the Do Not Disturb option.
If you can’t find it in the Quick Settings, below is a detailed guide on how to disable DND on your phone.
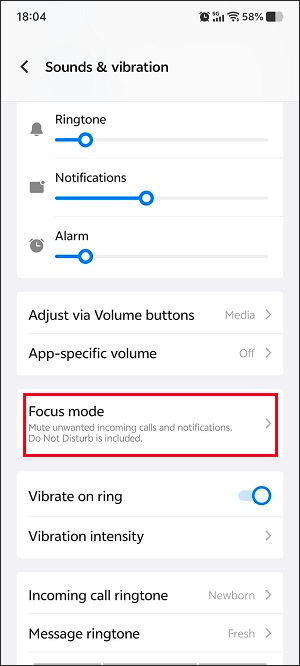
Step 1. Go to the Sound & Vibration section.
After unlocking your device, enter the Settings app. Next, choose the Sound & Vibration option.
Step 2. Disable the DND function.
Select the Focus mode option.
Choose the Do Not Disturb option.
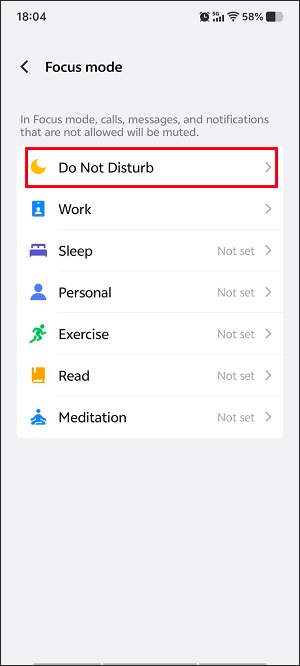
Toggle off the Do Not Disturb function.
Now, check whether the audio is working on your mobiles.
#4. Restart the Phone
If you have turned off the DND function, but it doesn’t work, try restarting your mobile. There are many benefits brought by such restarting. For instance, the temporary software glitches can be removed. Simultaneously, the misbehaving applications can be closed. More importantly, after restarting, a resetting audio process can be implemented.
#5. Clean Speaker Grille
Here are some tools that you can use to clean the speaker grille. For example, a soft toothbrush can help. You can use it to remove debris by scrubbing the mesh gently. Also, the sticky tape helps you lift dirt out. During the cleaning process, remember to be careful.
#6. Check the Headphone Jack
The headphone jack is a vital switch that realizes the rerouting of sounds from internal speakers to the headphones. If there is something wrong with it, the connection between your mobile and the headphone will fail, which eventually leads to the problem of audio not working.
Here are some methods that help you check the headphone jack. Firstly, ensure that your headphone is fully plugged into the jack. If not, there may be no connection. In addition, clear the debris and lint in the jack. This way, the electrical connection between the jack and plug won’t be blocked.
In addition, if your phone doesn’t detect the headphones, you can also unplug the headphones and re-plug them into the jack. On condition that you find that the jack is damaged, just contact the repair support.
#7. Conduct a Factory Reset
A factory reset helps reset the system settings that negatively affect sound drivers. Meanwhile, it enables the removal of conflicting applications and corrupted software. In addition, the factory reset helps restore your device to the original state. In one word, after a factory reset, you can fix many audio issues.
Below is a detailed guide on how to conduct a factory reset on your phone.
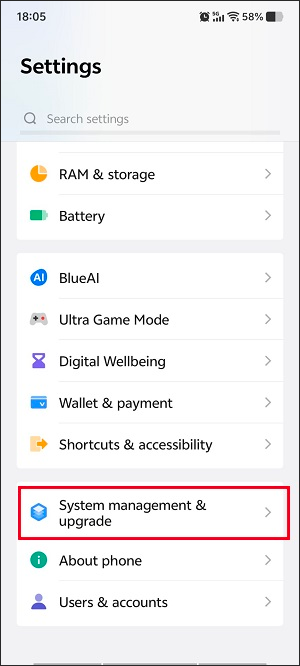
Step 1. Go to System management & upgrade.
Enter the Settings app and scroll down to the bottom. There, choose the System management & upgrade option.
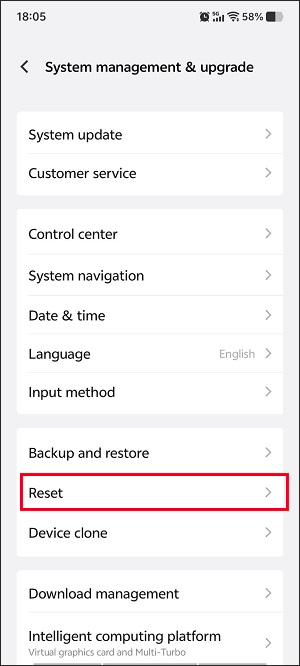
Step 2. Enter the Reset panel.
Select the Reset option to enter the Reset panel.
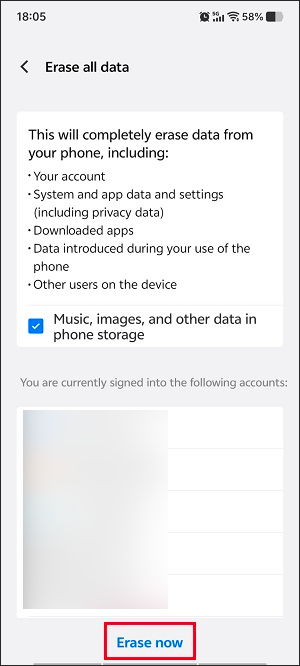
Next, tap the Erase all data option to enter the next page.

Step 3. Begin the factory reset.
Start the factory reset by hitting the bottom Erase now button.
When the factory reset process finishes, turn on your phone and check whether the audio is working or not.
#8. Contact for Repair Support
If the methods mentioned above are all ineffective, try contacting the repair support. Firstly, you need to clarify the brand and model of your phone. Next, go to the official websites of the corresponding brands. Then, go to the sections like Repair, Support, or Contact Us to ask for help.
How to Fix Audio Not Working on Apps
How to handle audio not working on apps, such as YouTube, Zoom, Discord, and more? The following paragraphs can help.
#1. Restart the App
Restarting the app to clear the temporary software glitch is an effective fix for audio issues like Zoom audio not working. Hence, before trying other methods below, restart the app first. If that doesn’t work, try the solutions below.
#2. Clear App Cache & Data
Like the cache in web browsers, the app cache may contain the temporary files that are outdated or corrupted, which has a negative influence on the sound processing of an app. Finally, you will encounter audio issues, such as Teams audio not working and Zoom audio not working.
To fix that issue, follow the detailed steps below to clear the app cache and data. Here, I will take YouTube as an example.
Step 1. Go to the Settings app.
After unlocking your device, tap the Settings app to enter the Settings panel.
Step 2. Enter the App manager panel.
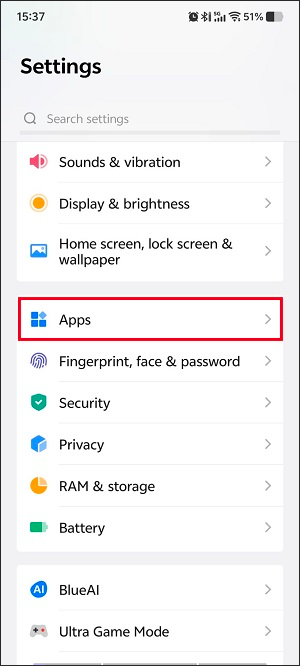
Scroll down and choose the Apps option to enter the next panel.
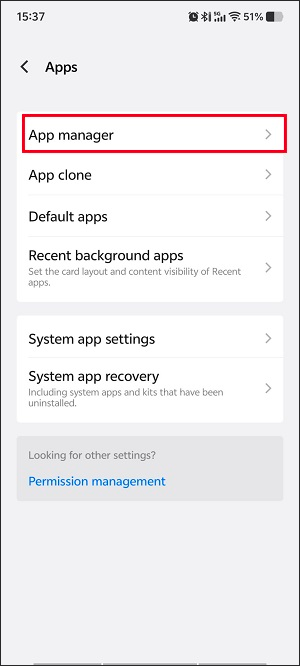
Choose the App manager option to enter the app list.
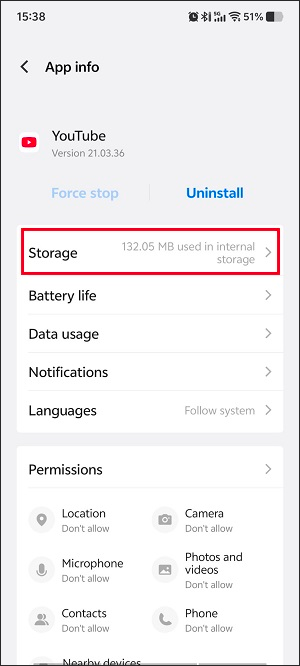
Step 3. Access the App info page.
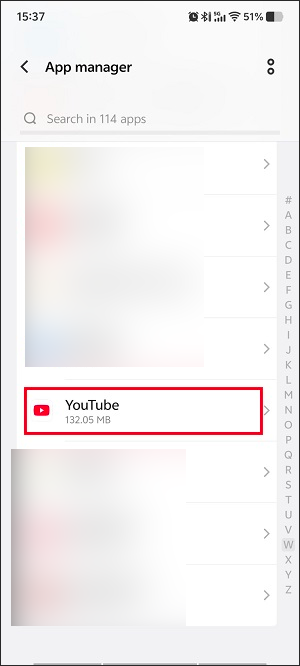
Scroll down and choose YouTube to enter its App info interface.
Choose the Storage option to enter the cache deletion page.
Step 4. Begin the clearing process.
In the Storage panel of the YouTube app, choose the Clear cache option to clear the app cache.
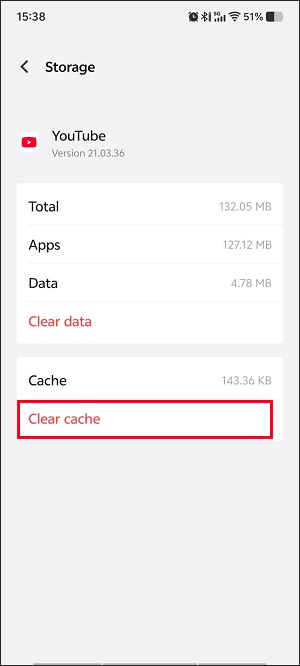
Once the app cache and data are cleared, check whether the audio can work on YouTube. This method is also workable for issues, such as Teams audio not working and Discord audio not working.
#3. Check App Permissions
On condition that the apps are stopped from accessing the speakers or microphones, a no-sound problem will happen when you are making a call or recording a meeting. To solve that problem, you can follow the guidance below to check the app permissions.
Step 1. Enter the Settings page of your PC.
Press the Windows + I keys to enter the Settings app.
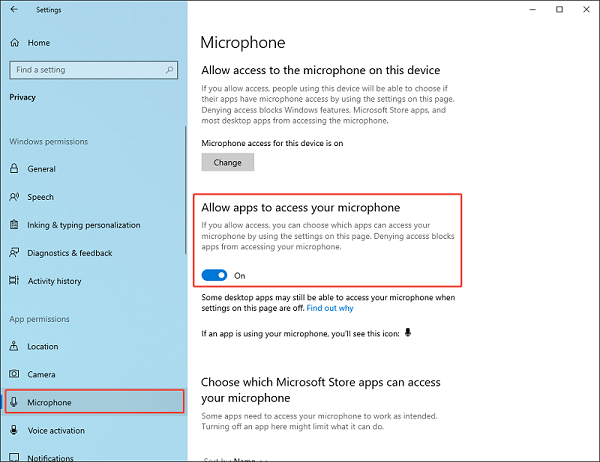
Step 2. Check the microphone permission.
Choose the Privacy option to enter the next page.

Switch to the Microphone tab. There, turn on the Allow apps to access your microphone option.
If you are a mobile user, try these instructions below.
Step 1. Go to the App info page of a specific app.
Go to the Settings app. Then, scroll down and choose the Apps option. Next, select the App manager option to access the app list. There, find and choose the app you want to check the permissions for.
Step 2. Check the app permission.
In the App info page, choose the Microphone option under the Permissions section.
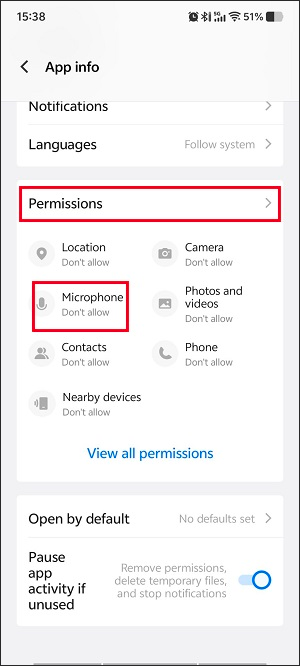
Then, check the While using the app option.
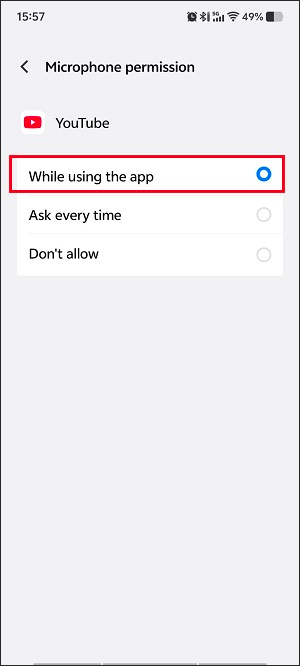
With the above-detailed tutorials, you can fix many audio issues caused by a lack of app permissions, such as Discord audio not working.
#4. Update/Reinstall the App
If all the methods above are not workable, try to update or reinstall the application on your PC/mobile. This way, the negative factors, such as corrupted data and software conflicts, can be removed easily. Meanwhile, some patch bugs that lead to incorrect interaction of an app with the audio hardware on your device can be erased by an app update or reinstallation.
#5. Test Other Apps
If you have updated or reinstalled the app, but there is still no sound, check whether the sounds work on other apps. Provided that the audio is not working on all apps, the problem is more likely caused by your device.
How to Fix Audio Not Working on TVs
The following content is for those whose TVs have no audio. You can also use these methods to fix issues like PS5 audio not working and Samsung TV audio not working.
#1. Restart the TV
Before trying other methods below, try restarting your TV to build a fresh connection between your TV and the audio devices. In addition, some inappropriate settings that block the sounds can be reset. Meanwhile, ensure that your TV volume is not set too low or muted.
#2. Check the Audio Output
A correct audio output is important for you to receive audio from TVs. For example, if your TV has sent the audio to an external device without a connection. Audio not working is inevitable. Therefore, it is necessary to check the audio output. Just follow these steps below.
Step 1. Go to the settings page of your TV.
Turn on your TV. Then, press the Settings or Menu button to access the Settings page.
Step 2. Access the audio management panel.
Go to the Sound section. (The option name on different TVs may be Audio or Display & Sound).
Next, go to the Audio Output or Speakers part.
Step 3. Check the audio output.
If you want direct audio from your TV, select TV Speakers as the audio output. On condition that you desire the sounds with a home theater or soundbar, choose Audio System/External Speakers.
After following the guidance above, if there is still no audio on your TV, try to check the external device connection.
#3. Check the Cables
Ensure that all the cables are firmly pushed into the input and output ports. If there isn’t a loose cable connection but problems still happen, the cables may be broken. In this background, use a new cable to rule out the problematic ones. Provided that this method isn’t workable for problems like PS5 audio not working, use the other methods below.
#4. Check External Device Connection
Checking the external device connection also ensures smooth audio playback. Follow the guide below to finish the check.
Step 1. Go to the Settings page.
Press the Menu or Home button to access the option menu. There, hit the Settings icon to enter the Settings page.
Step 2. Access the input list.
Select the Source option to access the input list.
Note: On a different TV, the possible option names include Channels & Inputs, Input, or External Inputs.
Step 3. Select a correct input.
Check in which the external device is plugged. Next, choose the specific port, like USB or HDMI.
With the above-detailed steps, the external device connection will never be a reason for the Samsung TV audio not working.
#5. Test Inputs
To clarify the cause of the audio not working, you can also test the inputs in 3 aspects. Firstly, you can plug the HDMI cable into a different port. The only port where no sound comes must be faulty.
Secondly, if there is no sound on all HDMI ports, try a new HDMI cable. On condition that the sounds work after using a new HDMI cable, the original cable is problematic.
Provided that there is still no sound with a new cable, plug a well-working device into the same HDMI port. If there are sounds from the new device, there must be something wrong with the original device.
#6. Implement a Factory Reset
Below is a detailed guide on how to implement a factory reset on your TV.
Step 1. Go to the settings page.
Activate your TV. Then, press the Settings, Home, or Action Menu button to enter the settings interface.
Step 2. Go to the reset panel.
Navigate to the System section. There, select the About option and hit Reset. Next, enter the pin. Generally speaking, the default pin is 0000.
Step 3. Begin a Factory Reset.
Start the reset process by selecting the Reset, Erase everything, or OK button.
Once the reset is over, restart the TV and try to play the audio again.
To Wrap Things Up
This article has summarized 10 possible reasons for audio not working on various devices, including turning on audio enhancements, unsupported audio formats, audio corruption, and so on. To fix the audio issue, try the 36 feasible fixes like configuring audio settings correctly, converting an incompatible audio file, trimming the broken audio, and more. Just choose a method according to your situation.
If you have encountered any problems when using MiniTool Video Converter or MiniTool MovieMaker, you can ask for help by sending an email to support@minitool.com. Also, you can directly share your problems with me on X. I will help you solve them as quickly as possible.
About The Author

Position: Columnist
With over 6 years of experience as a tech writer, Eien specializes in creating clear, simple guides for video conversion, transcription, screen recording, etc. He stays connected with the tech community and its readers to understand the real-world problems users face. By combining their feedback with his own hands-on testing, Eien always provides proven solutions to complex software problems in time.
User Comments :