VLC converts a video file to MP4 with no audio? If you encounter the same issue, you can use another video converter like MiniTool Video Converter to convert your video or change the audio and video settings in VLC.
If you receive the error message like “Streaming / Transcoding failed: VLC could not open the mpg audio encoder” when converting a video file to MP4, you will find no audio in the converted video. How to fix the VLC convert no audio problem? Follow this guide to fix it!
Method 1. Change Audio Sample Rate in VLC
To fix no audio after conversion in VLC, you can fix it by changing the audio sample rate.
Here’s how:
Step 1. Launch the VLC media player and open the video file you want to convert.
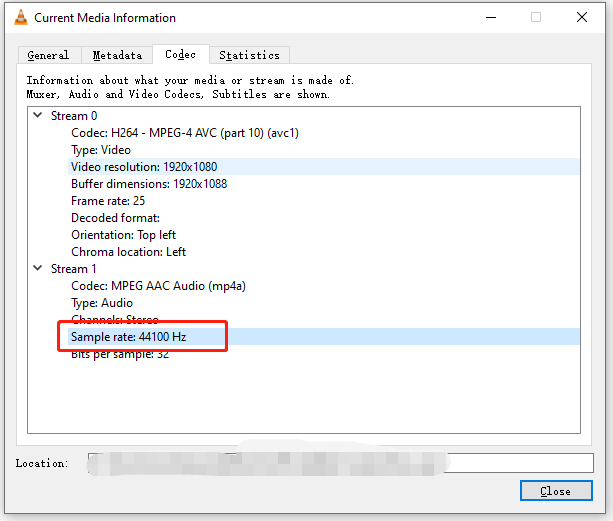
Step 2. To check the current media information, press Ctrl + J or go to Tools > Codec Information. Under Stream 1, check the audio sample rate.
Step 3. Click on Media > Convert / Save and add the video file you open in VLC. Click the Convert / Save button to continue.
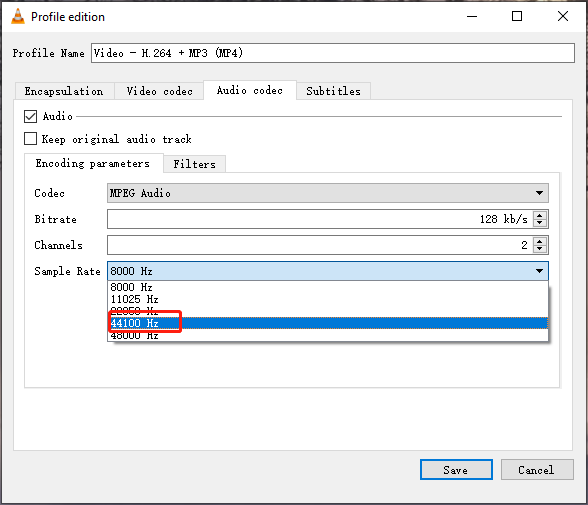
Step 4. Select the output format you want. Click the wrench icon to edit the profile.
Step 5. In the Profile edition window, click Audio codec and set the sample rate to the value that is the same as the source file. Click Save.
Step 6. Choose a folder to save the converted file and press the Start button.
Step 7. Once done, you can check the converted file and see if it has audio.
Related article: How to Fix the VLC Error “Your Input Can’t be Opened”
Method 2. Adjust Strict Standard Compliance in VLC
Another method to fix VLC convert to MP4 no audio is to adjust the strict standard compliance in VLC.
Follow the steps below:
Step 1. Open VLC media player.
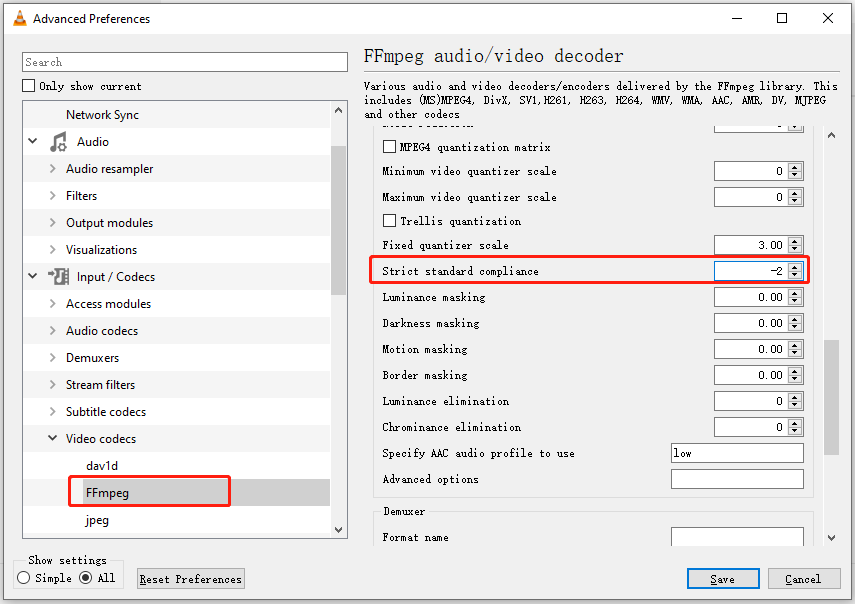
Step 2. Head to Tools > Preferences. Under Show settings, click All to open the Advanced Preferences window.
Step 3. Expand Input / Codecs. Find Video codecs and expand it.
Step 4. Choose FFmpeg and scroll down to Strict standard compliance. Set the value to -2.
Step 5. Click on Save.
Step 6. Convert your video using VLC and see if the issue has been fixed.
Method 3. Change Video and Audio Codec Settings
Step 1. Click Media > Convert / Save in VLC.
Step 2. Add the video file to VLC and click Convert / Save.
Step 3. Choose an output format for your video and click the wrench icon.
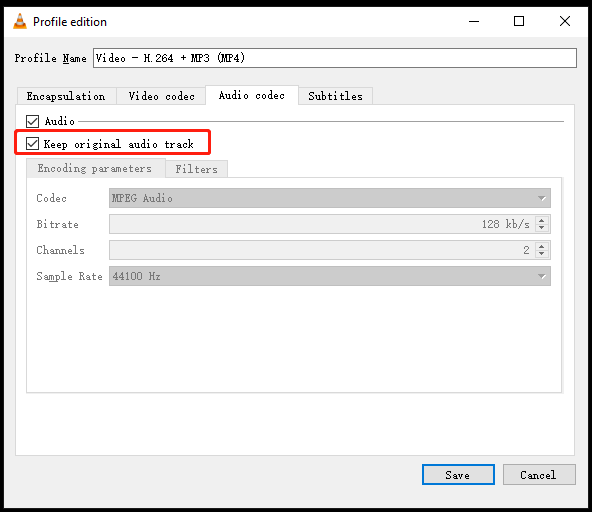
Step 4. Click Video codec and check the option Keep original video track. Then go to the Audio codec tab and tick the box next to Keep original audio track. Click Save.
Step 5. Then convert your video file.
Method 4. Use Another Video Converter
If the above methods can’t solve the VLC convert no sound problem, you can use a professional video converter like MiniTool Video Converter. It’s free and allows you to convert video and audio files with no limits and watermarks.
MiniTool Video ConverterClick to Download100%Clean & Safe
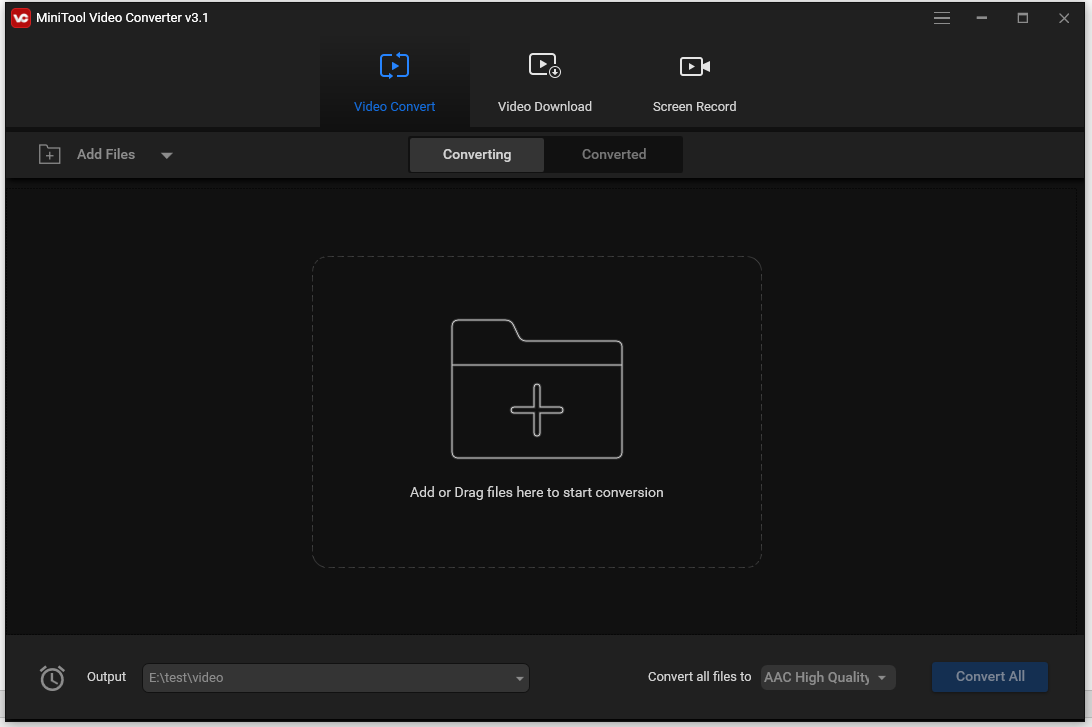
Here’s a quick guide.
- Open MiniTool Video Converter.
- Import the video by clicking Add Files.
- Click the diagonal icon and select the desired output format.
- Click Convert.
- Then you will find the converted video in the Converted
Conclusion
VLC is a powerful media player that supports video/ audio playback and video conversions. It’s not a professional video converter. So, when you encounter the issue VLC convert no audio, the best way is to use a video converter like MiniTool Video Converter.


User Comments :