Currently, online meetings have become a vital part of our daily work. Cisco Webex is the leading enterprise solution for online meetings, video conferencing, screen share, and webinars. So, how to record a Webex meeting? In this article, we will introduce the best ways to record a Webex meeting, including using MiniTool Video Converter.
Have you ever thought of recording Webex meetings for people who can’t attend in time? Well, this article will show you how to record a Webex meeting.How to Record a Webex Meeting with Webex Built-in Recorder?
The easiest way to record a Webex meeting is to use its built-in screen recording function. There are two ways to record meetings. Your account type and Webex site configuration determine whether you can use the recording function. Keep reading to get more details.1. Record a meeting in the cloud- Webex Free - Not available
- Webex Starter/Business - Available
- Webex Enterprise - configured by Webex Site administrator
- Webex Free/Starter/Business - Available
- Webex Enterprise - configured by Webex Site administrator
Note: If you are using a paid account, you can choose whether to save to the cloud or the computer.
How to Record a Webex Meeting on Windows?
# Windows 10 Game Bar
To record a Webex meeting on your Windows computer, Xbox Game Bar is the best option for you. It is a free screen recorder that is pre-installed on Windows 10. You can use it to record game clips, screenshots, and broadcasts. However, it only allows you to capture the entire computer screen.Steps:- Go to Settings on your Windows and select the Gaming option.
- Enable Record game clips, screenshots, and broadcast using Game bar.
- Press the Windows + G keys to run Xbox Game bar.
- Click the gear icon to set up the recording parameters.
- Start your Webex meeting.
- Select Capture > Start recording.
- When the meeting is over, click the Stop Recording button.
- A notification will appear, informing you that the recorded video is saved on your computer.
- Hit Game Clip Recorded to view the recorded video.
# MiniTool Video Converter
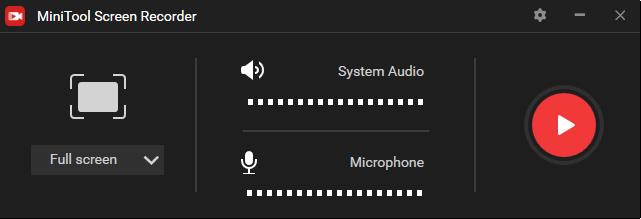
The next excellent Webex recorder is MiniTool Video Converter. It is a free all-in-one video toolbox designed for Windows users. With its screen recording tool, you can customize the recording area, capture anything that occurs on your computer screen, and export it in MP4, MOV, WMV, MKV, AVI, FLV, or TS format. Besides, there are no limitations on the length and number of recordings.MiniTool Video ConverterClick to Download100%Clean & Safe
 Steps:
- Download MiniTool Video Converter from the official website and get it installed on your Windows.
- Launch it to enter the main interface and click the Screen Record tab to access the recording tool.
- Click anywhere within the Click to record screen dotted box.
- The program is set to capture the full screen. If you want to specify the area to be recorded, click the down arrow and hit Select region.
- Choose to record system sound only, record microphone only, record both, or record without audio.
- Click the Settings icon to change the recording parameters and click OK to save your changes.
- Start your Webex meeting.
- Back to MiniTool Video Converter, and click the Record button.
- When the meeting is over, press F6 to stop. Then the recorded file will appear on the screen.
# Bandicam
The next solution to record a Webex meeting on Windows is to use Bandicam. It is an advanced screen recording program that not only allows the host but also allows attendees to record Webex meetings. Besides, if you are unable to attend a Webex session, you can use its scheduled recording function to start recording at a specific time. Pitifully, the free version is limited to 10 minutes with a watermark.Steps:- Download Bandicam from its official website and install it on your Window.
- Open the Bandicam app, select the Screen Recording mode, and click the down arrow to specify the screen area to be recorded.
- Decide whether to show mouse cursor, add mouse click effects, add webcam overlay, and more.
- Start your Webex recording.
- Back to Bandicam and click the red REC button or press the F12 key.
- Once done, hit the red circle again to stop recording.
- Go to Home > Videos to check the captured Webex video.
How to Record a Webex Meeting on Mac?
# QuickTime Player
When it comes to recording a Webex meeting on Mac, most people may think about QuickTime Player because every Mac comes with QuickTime Player preinstalled. It is an extensible media player that can handle various formats of digital video, picture, audio, etc. Meanwhile, it is one of the most popular screen recording software for Mac, which allows you to create a recording of your entire screen or select just a portion of it.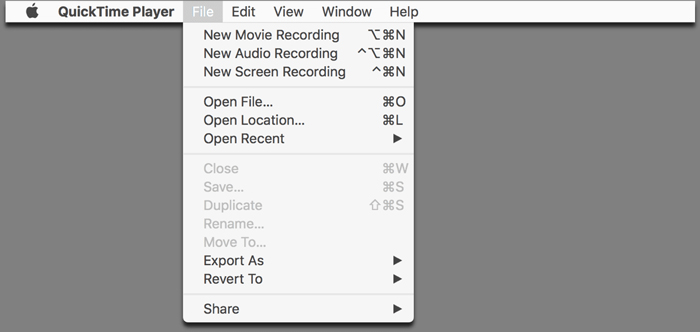 Steps:
- Launch QuickTime Player on your Mac.
- Go to File > New Screen Recording to open Screenshot and display the tools.
- Click Options to set the location where you want to save your screen recording.
- Start your Webex meeting.
- When you are ready, click the Record A popup will appear in the center of your screen.
- To capture the entire screen, click anywhere on the screen. If you just want to record a part of the screen, drag the dotted frame to cover the area you’d like to record, and then click Start Recording.
- When the meeting is over, click the Stop icon.
- Go to File > Save to download the recorded Webex video.
# OBS
Another common Webex recorder available on Mac is OBS (Open Broadcaster Software). It is a free and open-source video recording and live streaming program. With this program, you can easily perform real-time video/audio capturing and mixing, set up an unlimited number of scenes, access a wide array of configuration options, and set convenient hotkeys for nearly every sort of action.Steps:- Download OBS from the official site and install it on your Mac.
- Go to Tools > Auto Configuration Wizard to set up OBS. If you start OBS for the first time, you will be asked if you want to run the installation wizard.
- Click the + icon under the Sources section and select the Display Capture option.
- Start your Webex meeting.
- Back to OBS and hit the Start Recording button.
- When you are done, click the Stop Recording button.
- Go to File > Show Recordings to check the recorded Webex meeting video.
How to Record a Webex Meeting Online?
# Apowersoft Free Online Screen Recorder
Apowersoft Free Online Screen Recorder is a powerful online screen recorder that allows you to record a Webex meeting without any installation. The highlight of this web-based screen recorder is that it doesn’t limit what or how long you record and can export the recordings to MP4, FLV, WMV, AVI, MPEG, VOB, ASF, and GIF. However, you’re asked to install a launcher for first-time use.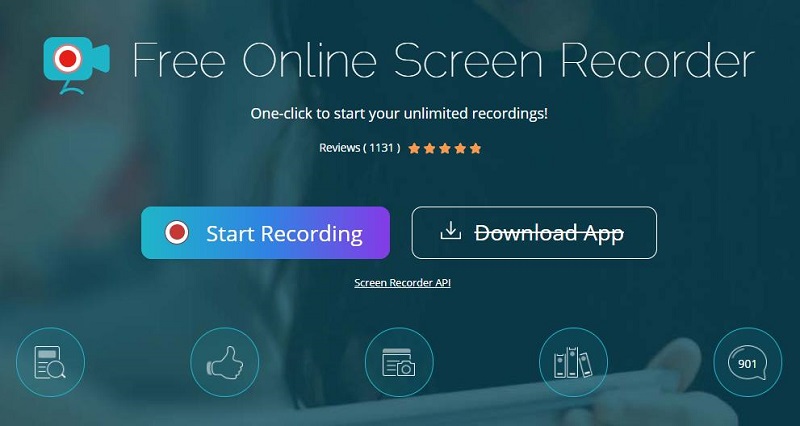 Steps:
- Navigate to Apowersoft Free Online Screen Recorder on your browser.
- Click the Start Recording button in the middle of the interface.
- Tap on Download Launcher to get a launcher and install it on your PC.
- Specify the area you’d like to record and decide whether to record audio.
- Go to More > Settings to adjust the recording parameters.
- Hit the REC button.
- Click the red square icon to stop recording, and then select Save video, followed by Save as Video File.
- Select Open folder to check the recorded video.
# Screen Capture
Another online Webex recorder we’d like to introduce is Screen Capture. This web-based tool can help you grab your browser or computer’s desk, capture a webcam, and record the screen with sound. Besides, it also lets you schedule recordings, draw on videos, show keystrokes and mouse clicks. However, it will watermark the recording in the free plan. And the only way to remove the watermark is to upgrade to the Premium plan.Steps:- Head to screenrecord.com on your browser.
- Determine whether you want to record sound and add a webcam overlay.
- Hit Start Recording and then choose what you’d like to share: Your Entire Screen, Application Window, or Chrome Tab.
- Then you will see the prompt “Recording in Progress…”.
- Once the conference is done, click the green Stop Recording button.
- Preview the recorded video and click Download to save it on your PC.

How to record Skype calls? In this article, we are going to detail how to record Skype calls using the built-in recording feature and other Skype recorders.
Bottom Line
All the solutions mentioned above can help you record Webex meetings regardless of whether you are a host or not. Which one do you want to try first? If you have any questions or suggestions when using MiniTool Video Converter to capture Webex meetings, please let us know via support@minitool.com or share them in the comments section below.How to Record a Webex Meeting FAQ
How do I record a Webex meeting?
If you are the host or cohost of a meeting, you can record the Webex meeting use the built-in recording function. If not, you can use other professional screen recorders, such as MiniTool Video Converter, Bandicam, OBS, etc.
Why can’t I record my Webex Meeting?
- If you are using the free plan, the recording function is only available from the desktop app.
- If you are not the host or cohost of the meeting, request the host to record.
- if your recording function is disabled, contact your Webex site administrator.
Where is my recorded Webex meeting video stored?
Webex stores all recorded meetings either on your local computer or on the Webex site. Just sign in to Webex, and click Recordings to check all your recordings.
How to get a recording transcript?
Site administrators can enable automatic transcription of audio for MP4 conference recording. They can turn on the feature for everyone, for specific users, or allow users to turn it on themselves.
User Comments :