In this article published by video converter from MiniTool, we'll address common problems related to FLV files in Adobe Media Encoder, such as "FLV source compression not supported" or "source compression type is not supported." We'll also discuss methods to convert FLV files in Adobe Media Encoder and offer solutions to these challenges.
Adobe Media Encoder is a powerful tool used by video professionals to encode, transcode, and compress video files into various formats. While it offers a wide range of capabilities, users sometimes encounter issues with specific file formats, such as FLV (Flash Video).
Understanding the FLV Compression Issue
FLV (Flash Video) files have been widely used for web-based video playback due to their small file size and efficient compression. However, as technology advances, some video codecs used in FLV files may no longer be supported by modern video software, including Adobe Media Encoder. This leads to errors like "Adobe Media Encoder FLV source compression not supported" or "Adobe Media Encoder source compression type is not supported".
Converting FLV with Adobe Media Encoder
If you encounter such compression issues with FLV files in Adobe Media Encoder, consider converting them to a more compatible format like MP4. Here's a step-by-step guide on how to convert FLV to MP4 using Adobe Media Encoder:
Step 1. Open Adobe Media Encoder
Launch the Adobe Media Encoder application on your computer.
Step 2. Import the FLV File
Click on the + Add button in the queue panel to import the FLV file you want to convert. Alternatively, you can drag and drop the file into the queue panel.
Step 3. Choose Output Format
In the format dropdown menu, select H.264 or H.265 as the output format. These formats are widely supported and offer excellent compression.
Step 4. Configure Output Settings
Click on the output settings to customize parameters such as resolution, frame rate, and bitrate according to your preferences. Ensure that the settings match your desired output.
Step 5. Select Destination
Specify the output destination for the converted file by clicking on the Output File field.
Step 6. Start Encoding
After configuring the settings, click the Start Queue button to begin the conversion process.
Step 7. Monitor Progress
Adobe Media Encoder will display the progress of the encoding process. You can monitor the status in the queue panel.
Step 8. Access Converted File
Once the conversion is complete, you can find the MP4 file in the specified output folder.
![[Solved] How to Fix After Effects Not Sending to Media Encoder?](https://images.minitool.com/videoconvert.minitool.com/images/uploads/2023/04/after-effects-not-sending-to-media-encoder-thumbnail.png)
Preventing Future Compression Issues
To avoid encountering compression-related problems with FLV files in Adobe Media Encoder in the future, consider using more modern and widely supported video codecs when creating or exporting your video content. Codecs like H.264 and H.265 are commonly used and have broader compatibility with modern video editing and encoding software.
Making Use of Adobe Media Encoder Alternative – MiniTool Video Converter
If your "Adobe Media Encoder source compression type is not supported" or “Adobe Media Encoder FLV could not be imported” problem can’t be solved within the application, you may consider fixing the issue out of the box and relying on one of the replacements of Adobe Media Encoder such as MiniTool Video Converter, a professional and reliable MP4 converter. It supports 1000+ media file formats including FLV (either converting FLV files or converting to FLV).
The following also takes converting FLV into MP4 for example to show you how convenient to use MiniTool Video Converter for media conversion.
MiniTool Video ConverterClick to Download100%Clean & Safe
Step 1. Download and install this video to MP4 converter on your Windows computer.
Step 2. Launch it and enter its main interface (UI).
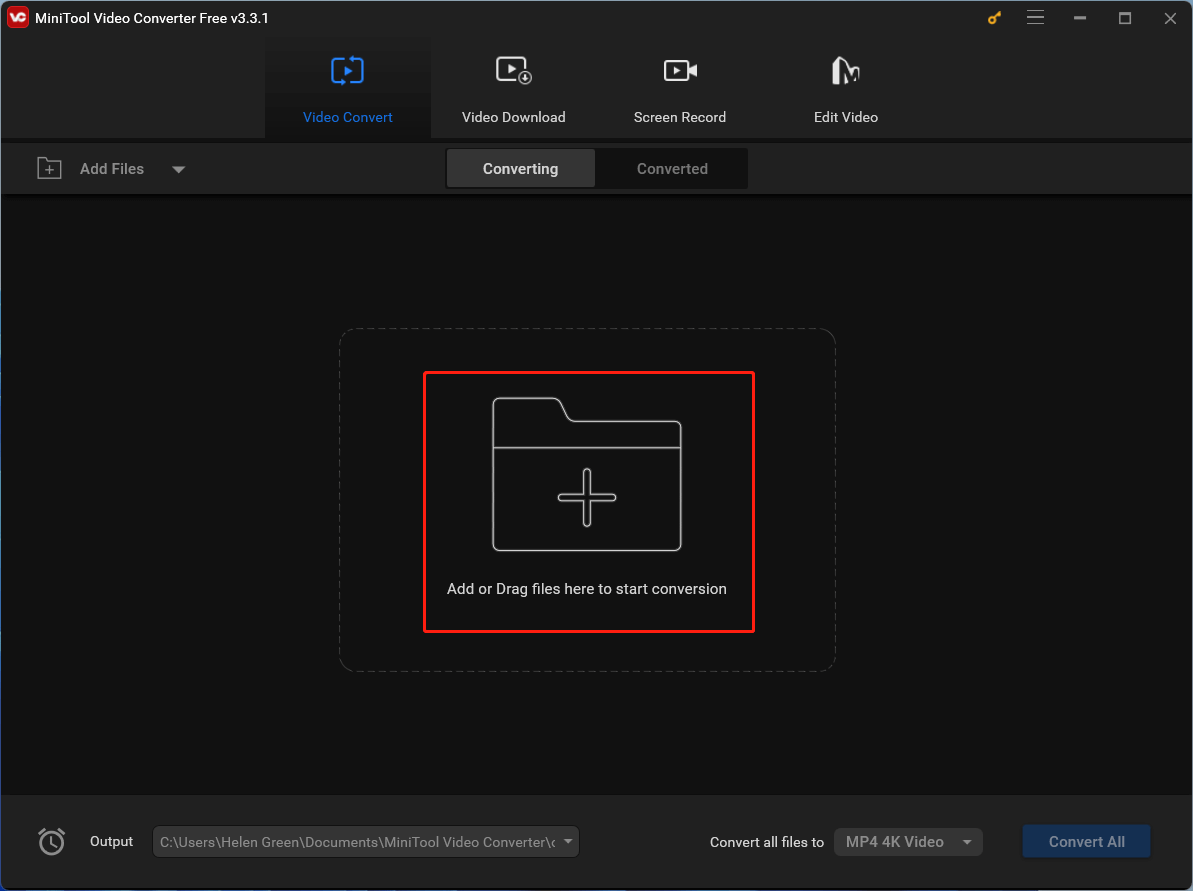
Step 3. In the default Converting subtab of the Video Convert tab, you can add the target FLV file either by clicking the Add or Drag files here to start conversion option or directly dragging the FLV there just as described.
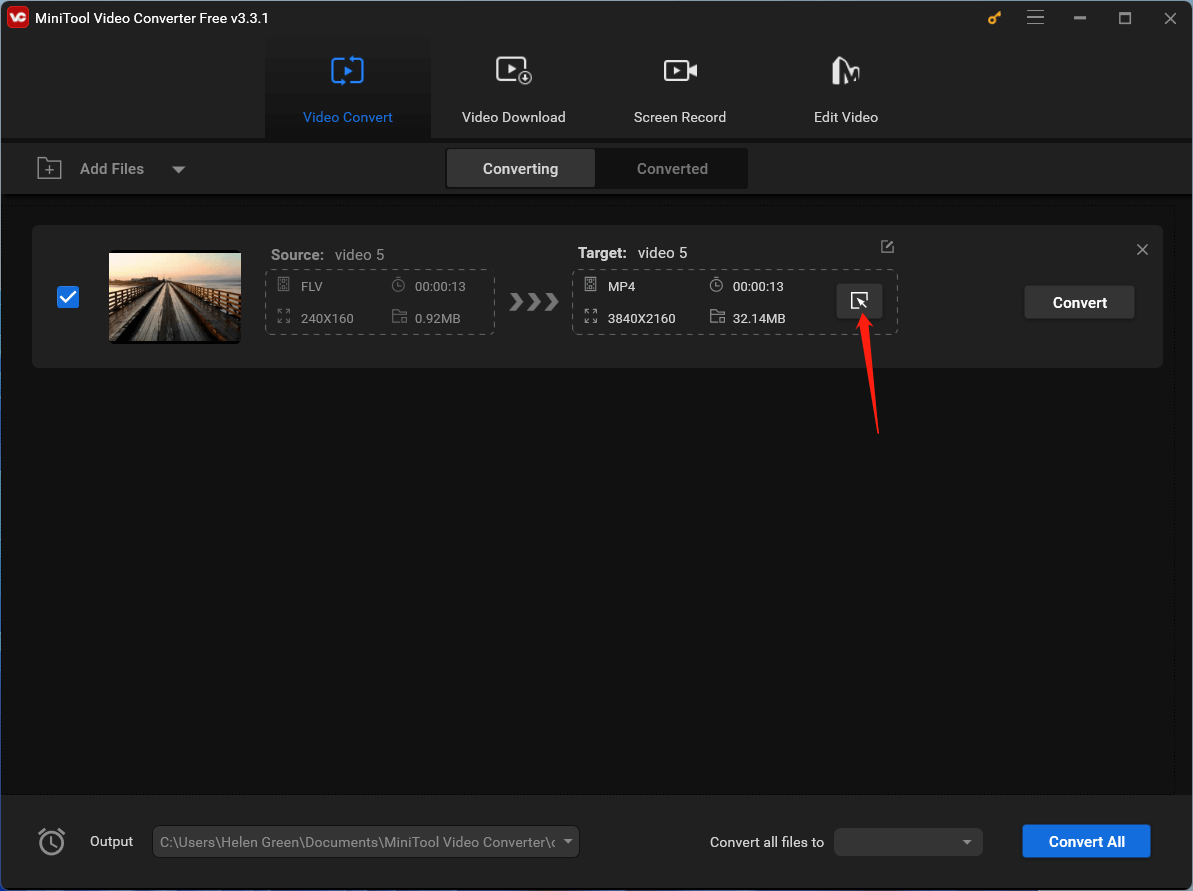
Step 4. Click the settings icon under the Target to trigger the output media file format settings.
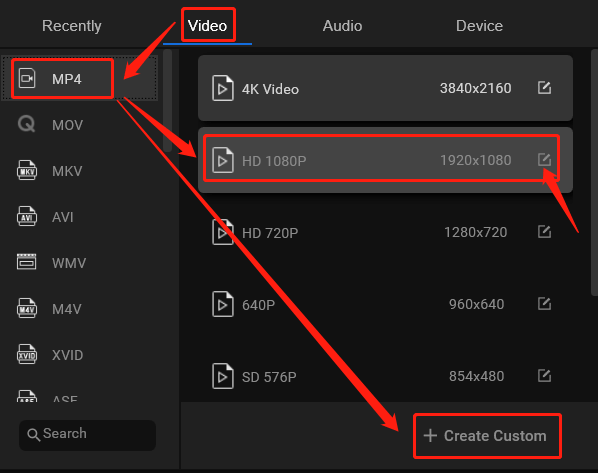
Step 5. In the new pop-up window, switch to the Video tab from the top menu, then select MP4 from the left panel, and pick up a video resolution option from the right area. You can also customize the selected video format by clicking the settings icon behind the option. Or you can directly click the Create Custom option to specify your own output format.
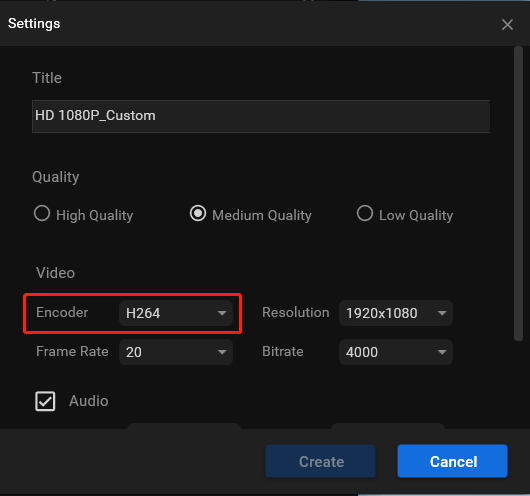
Step 6. Within the next popup, you are able to personalize the format name, video quality, encoder, resolution, frame rate, and bitrate; as well as the encoder, channel, sample rate, and bitrate of the embedded audio. Don’t forget to click the Create button to save the customized video format.
Step 7. You will be redirected back to the up-level window. There, scroll down the MP4 output video format options and find your customized one at the bottom of the list. Click on the customized video format to select it and click the Convert button to start the conversion.

Finally, wait for the process to complete.
Conclusion
Adobe Media Encoder is a valuable tool for video professionals, but it may encounter issues when dealing with older video formats like FLV. When you face problems like "FLV source compression not supported," converting the file to a more compatible format, such as MP4, can often resolve the issue. By following the steps outlined in this article, you can efficiently convert FLV files and ensure smoother encoding processes in Adobe Media Encoder. Additionally, consider using up-to-date video codecs to prevent future compression-related challenges or using an alternative to Adobe Media Encoder like MiniTool Video Converter.
You May Also Like
About The Author

Position: Columnist
Helen is a tech writer with over 10 years of experience. She specializes in creating easy-to-follow guides for video editing, media file conversion, and computer performance. Helen doesn't just write—she tests every software herself and listens to feedback from users and experts. Her goal is to make complex programs simple so that everyone can solve their tech problems with confidence.
User Comments :