Bluesky is a platform that encourages users to share diverse forms of content, including videos. However, Bluesky imposes a 100 MB video size limit. This article from a free file converter will help you bypass the limit by compressing video size with MiniTool Video Converter or generating a shareable video link.
Bluesky is a microblogging social media service owned by Bluesky Social PBC. As of January 11, 2025, it had 27 million users. One of the features that users have come to appreciate is the ability to share videos.
However, like many platforms, Bluesky has imposed certain limitations on video size and duration to manage server resources, ensure a smooth user experience, and maintain the integrity of the platform.
What’s the Bluesky Video Size Limit
Bluesky has some main video size limits:
- 3-minute Video Duration Limit: In the past, Bluesky only allowed users to upload videos with a maximum length of 1 minute. However, with the release of version 1.99 on March 11, 2025, the video upload duration limit has been extended from 1 minute to 3 minutes.
- 100MB Video File Size: According to the platform’s guidelines, the file size should not exceed 100 MB for 1 – 3 minutes videos.
- 10GB Daily Upload Volume Limit: Bluesky restricts the number of videos a user can upload per day to 25, or a total of 10GB of video content. This means that even if the individual video size is within the allowable range, users cannot exceed the total limit of 25 videos or 10GB of data per day.
All in all, users can upload a video up to 3 minutes long and with a maximum file size of 100 MB. After you have a comprehensive understanding of the Bluesky video size limit, you should also know what video format Bluesky supports. Currently, this platform supports the following video file formats: MP4, M4V, MPG, MPEG, MOV, and WebM.
People often ask: Can I upload videos larger than 100MB to Blusky? The answer is yes. The following content will solve your problem.

How to Bypass Bluesky Video Size Limit
Are there free methods that enable you to break the Bluesky video size limit? Of course, there are four methods for you to choose from.
- Use a video compression application.
- Use an online compressor.
- Use a video editor.
- Use a cloud service and share the link.
Method 1. Use a Video Compression Application – MiniTool Video Converter
The best solution for bypassing the Bluesky video size limit is to use a video compressor. Believe it or not, MiniTool Video Converter is a great choice for you. This powerful application has advanced functions you can use, including video compression, video conversion, video downloading, and screen recording.
With its video compression feature, you can compress numerous video formats, such as MP4, AVI, MOV, MKV, WMV, WebM, FLV, and more. Plus, it allows you to have batch compression to compress 2 – 5 videos simultaneously. When you use it, you can flexibly adjust any value from 10% to 100% by moving the ratio slider to control the quality and size you want. Then, export them in MP4, MKV, or WebM formats.
As a free video converter, you can use its video conversion feature for Bluesky video compression by adjusting the resolutions, frame rate, bitrates, etc.
How to compress videos for uploading to Bluesky with MiniTool Video Converter’s video compression and conversion features? We will explain to you one by one. Before starting compression, please download and install this application on your computer first.
MiniTool Video ConverterClick to Download100%Clean & Safe
Option 1. Using MiniTool Video Converter’s Video Compression Feature
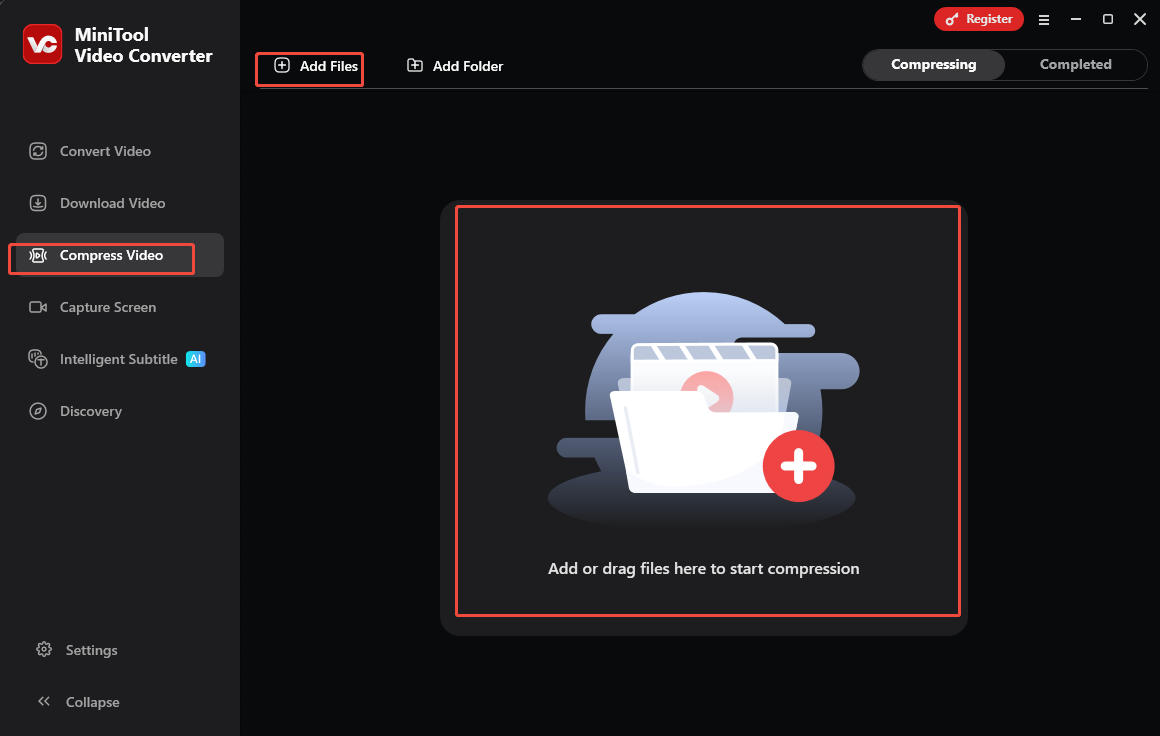
Step 1. Import video to MiniTool Video Converter
Open MiniTool Video Converter, switch to Compress Video, and click on Add Files or drag and drop the video to the middle area to import the video.
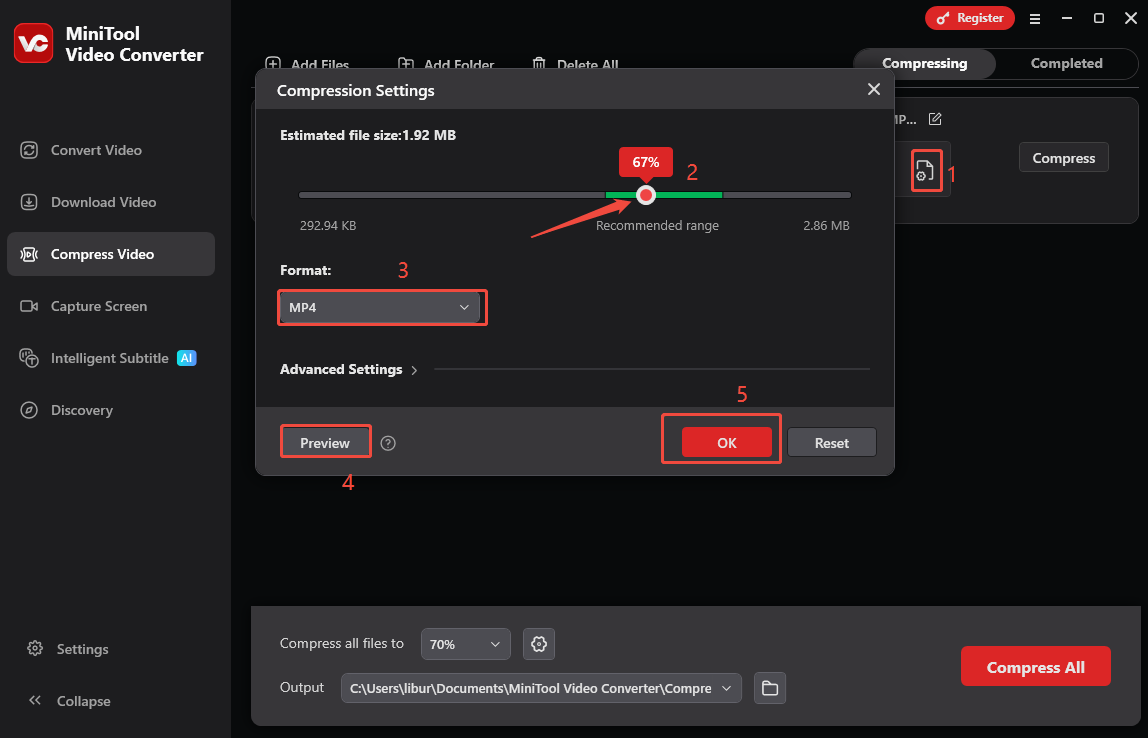
Step 2. Customize the compression settings
- Click the Settings icon and drag the slider to adjust the compression percentage from 10% to 100%.
- Expand the Format option to select a Bluesky-supported output format.
- Click Preview to preview the compressed file.
- Click on OK to confirm if you’re satisfied.
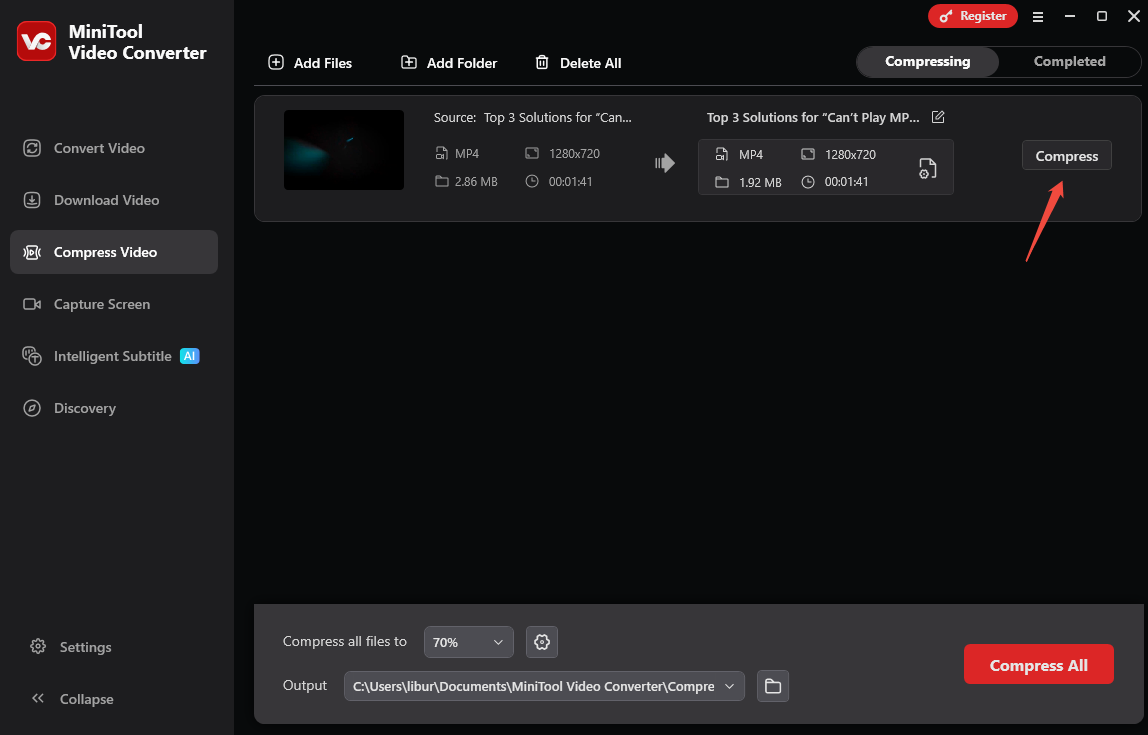
Step 3. Compress the video
Click on Compress to initiate compressing the video.
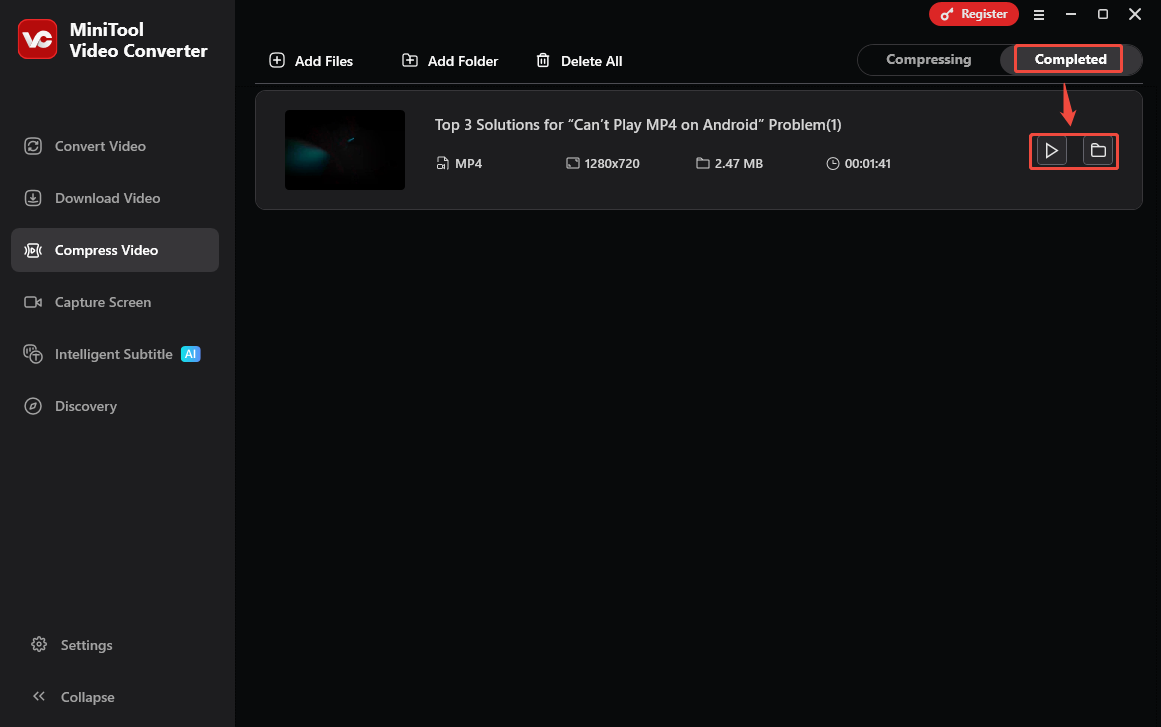
Step 4. Play or locate the compressed video
After the video is compressed successfully, you will be taken to Completed. Click on the play icon to watch the compressed video, or click on the folder icon to find the saved position.
Option2. Using MiniTool Video Converter’s Video Conversion Feature
Step 1. Add the video to convert
Switch to Convert Video and click on Add Files to add the video you want to compress.
Step 2. Choose a video format and a low resolution
- Click on the gear icon on the target file to open the output format list.
- Go to the Video tab and select a Bluesky-compatible video format (we take MP4 as an example).
- Choose a lower resolution option, or click the Edit icon to specify more settings.

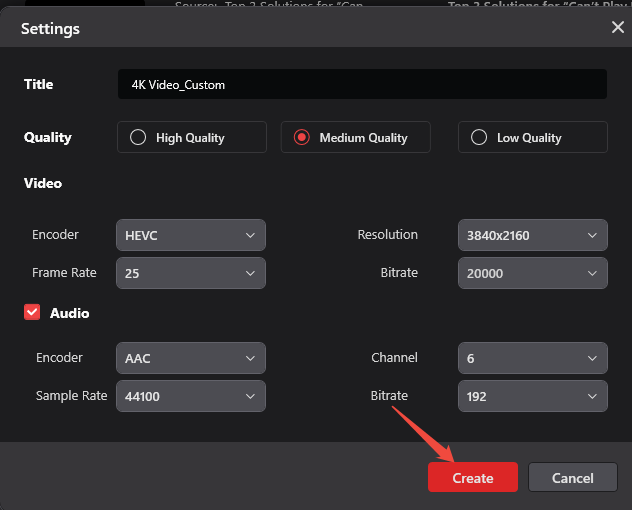
Step 3. Specify more settings and apply
- In the Settings window, choose lower video quality, encoder, resolution, frame rate, bitrate, and specify other audio settings.
- Click on Create to create your custom format.
- Click on the custom format to apply.
Step 4. Compress the video
Click on Convert to start compressing the video.
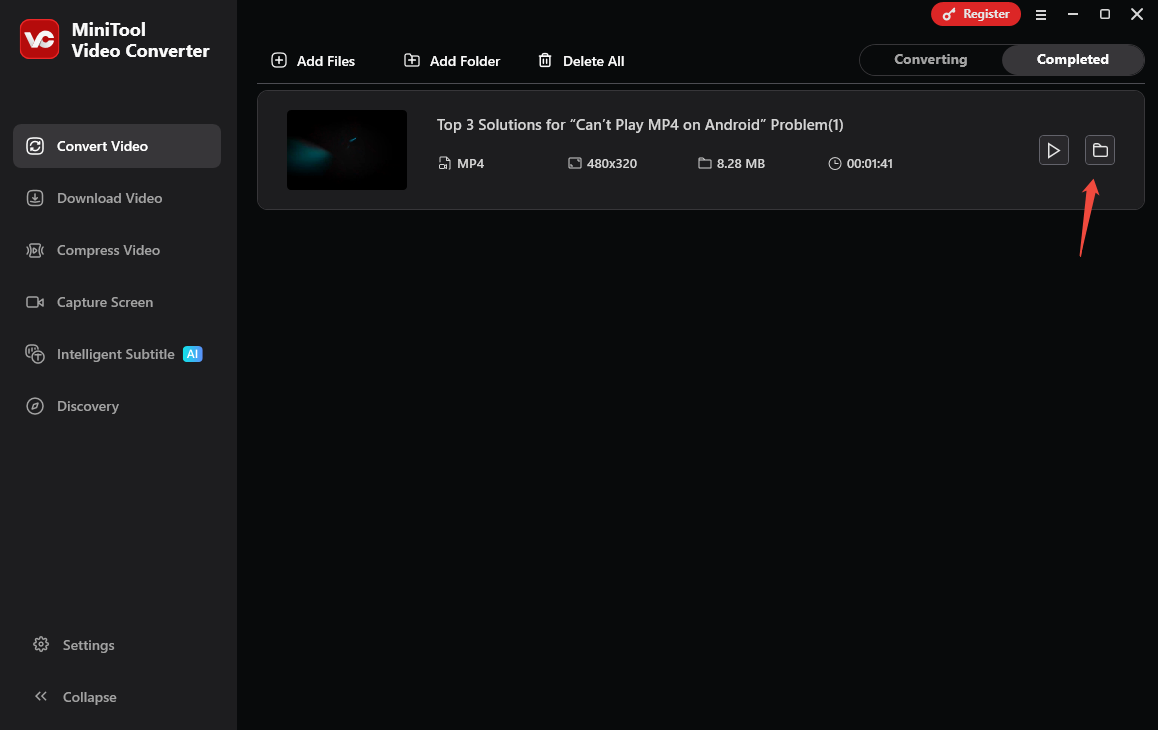
Step 5. Locate the compressed video
Once compressed, click on the folder icon to locate the compressed video on your computer.
Method 2. Use An Online Compressor – AnyMP4 Online Video Compressor
If you don’t have enough storage space on your computer or want to download an application, try using an online video compressor for Bluesky. Among all the online tools I have used, AnyMP4 Online Video Compressor is one of the best choices. It is a 100% free and fast video compressor to reduce the video size without quality loss.
This web video compressor can work on any browser you can open on a computer or mobile device. Similar to MiniTool Video Converter, AnyMP4 Online Video Compressor can also set the file size value or a percentage from 10% to 100% of the original video size. You can download the compressed video in 12 output formats, like MP4, MOV, WMV, AVI, MKV, FLV, 3GP, etc, without a watermark.
Here’s how to compress videos for Bluesky uploading with the Bluesky video compressor.
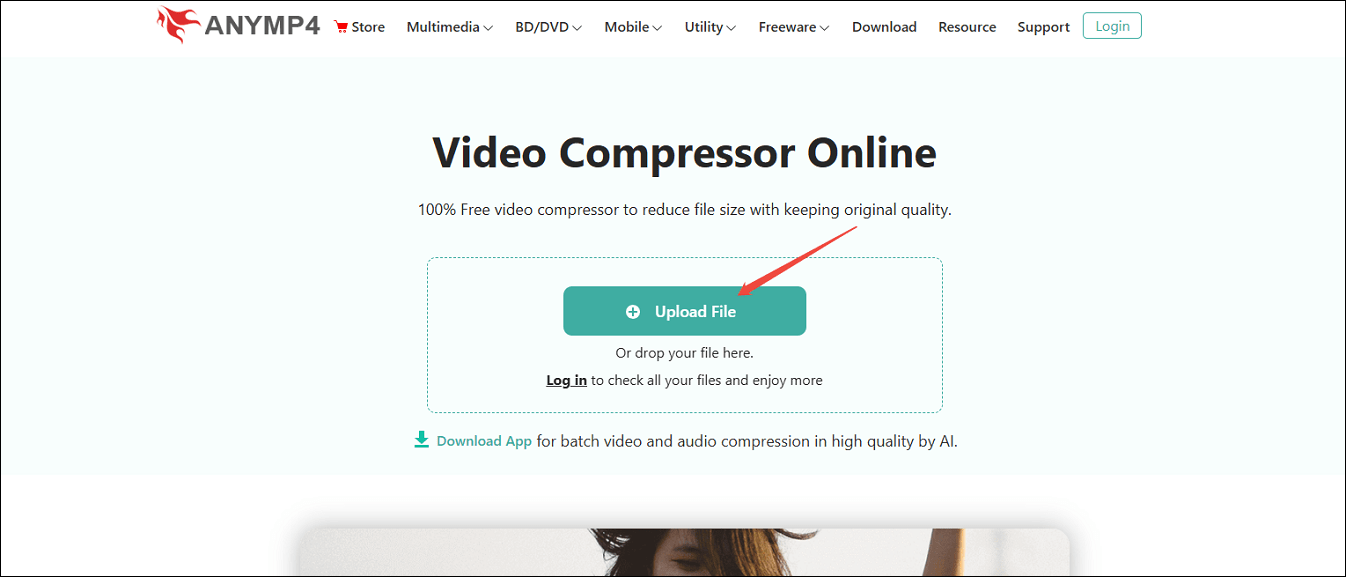
Step 1. Visit AnyMP4 Online Video Compressor and upload the video
- Visit the official website of AnyMP4 Online Video Compressor with your browser.
- Click on Upload File or drag and drop your file to upload the video to AnyMP4 Online Video Compressor.
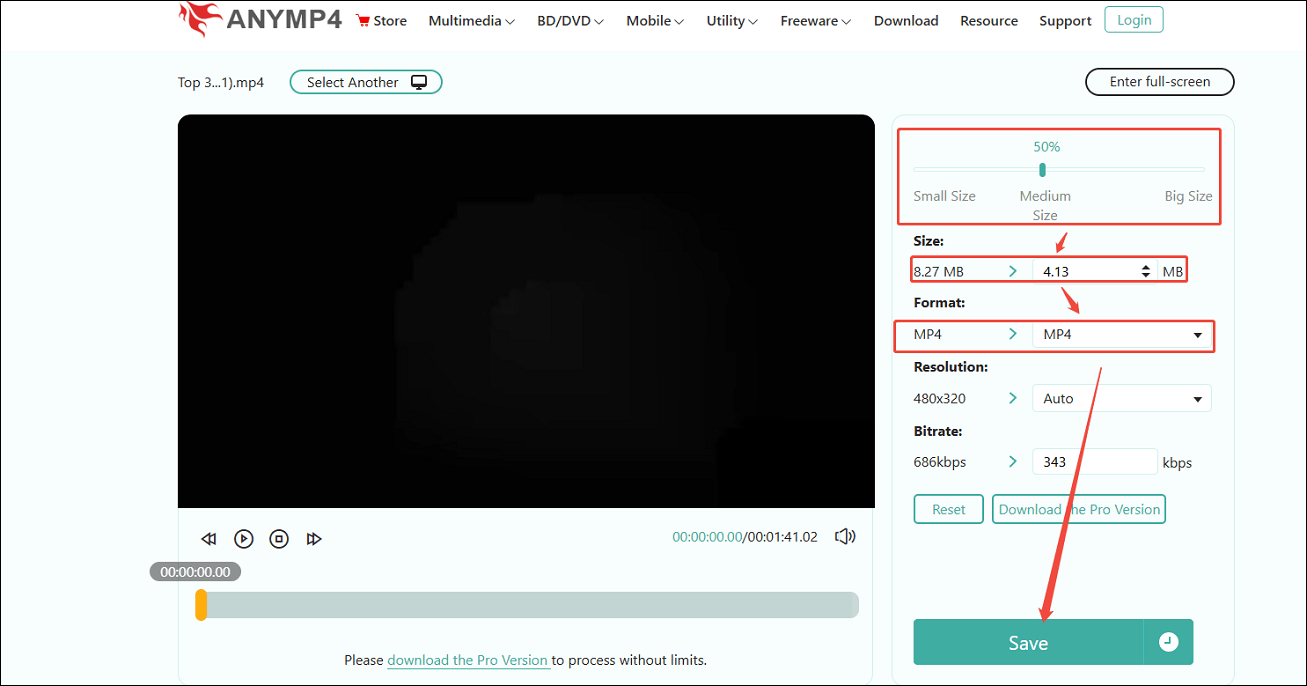
Step 2. Customize the compression settings and compress the video
- Move the slider to the left to reduce the file size, or manually type the accurate video size into the box.
- Expand the Format to choose a Bluesky-supported video format.
- Click on Save.
Step 3. Locate the compressed video
The compressed video will be saved in Downloads on your browser.
Other handy video compressors include VEED.io, FreeConvert, Clideo, CapCut, HandBrake, Video Candy, XConvert, etc.

Method 3. Use A Video Editor – MiniTool MovieMaker
Apart from using a Bluesky video compressor tool, you can choose to trim unnecessary parts of the video or the long intro to reduce the video size. Here, I strongly recommend MiniTool MovieMaker, a video editor I have used many times. It also has two methods to compress videos, similar to MiniTool Video Converter.
If you don’t want to lower the video quality, try to use its trimming feature. Plus, adjusting export parameters, like the video format, resolution, frame rate, and bitrate, is also a good choice to compress videos. Here’s the guide on how to use MiniTool MovieMaker to compress the video to less than 100 MB in 2 methods.
Option 1: Use MiniTool MovieMaker’s Trimming Feature
Step 1. Download and install MiniTool MovieMaker
Download and install MiniTool MovieMaker on your computer by clicking on the button below.
MiniTool MovieMakerClick to Download100%Clean & Safe
Step 2. Import the video and add it to the timeline
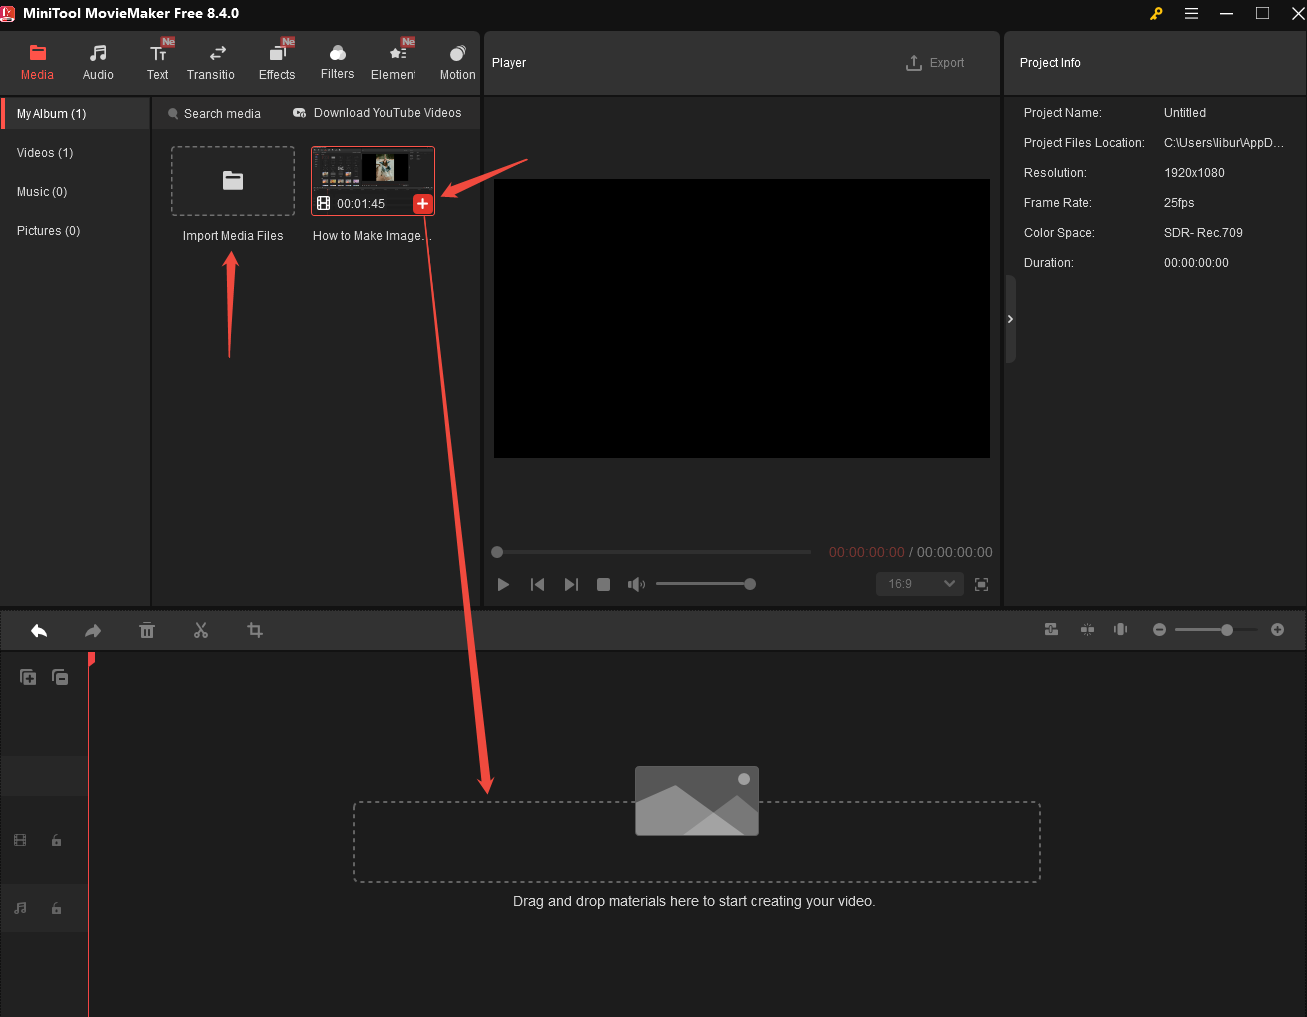
- Open this video editor and click on New Project to enter the main interface.
- Click on Import Media Files to import your video, and add the video to the timeline by clicking the + icon on it or by dragging and dropping.
Step 3. Shorten the video
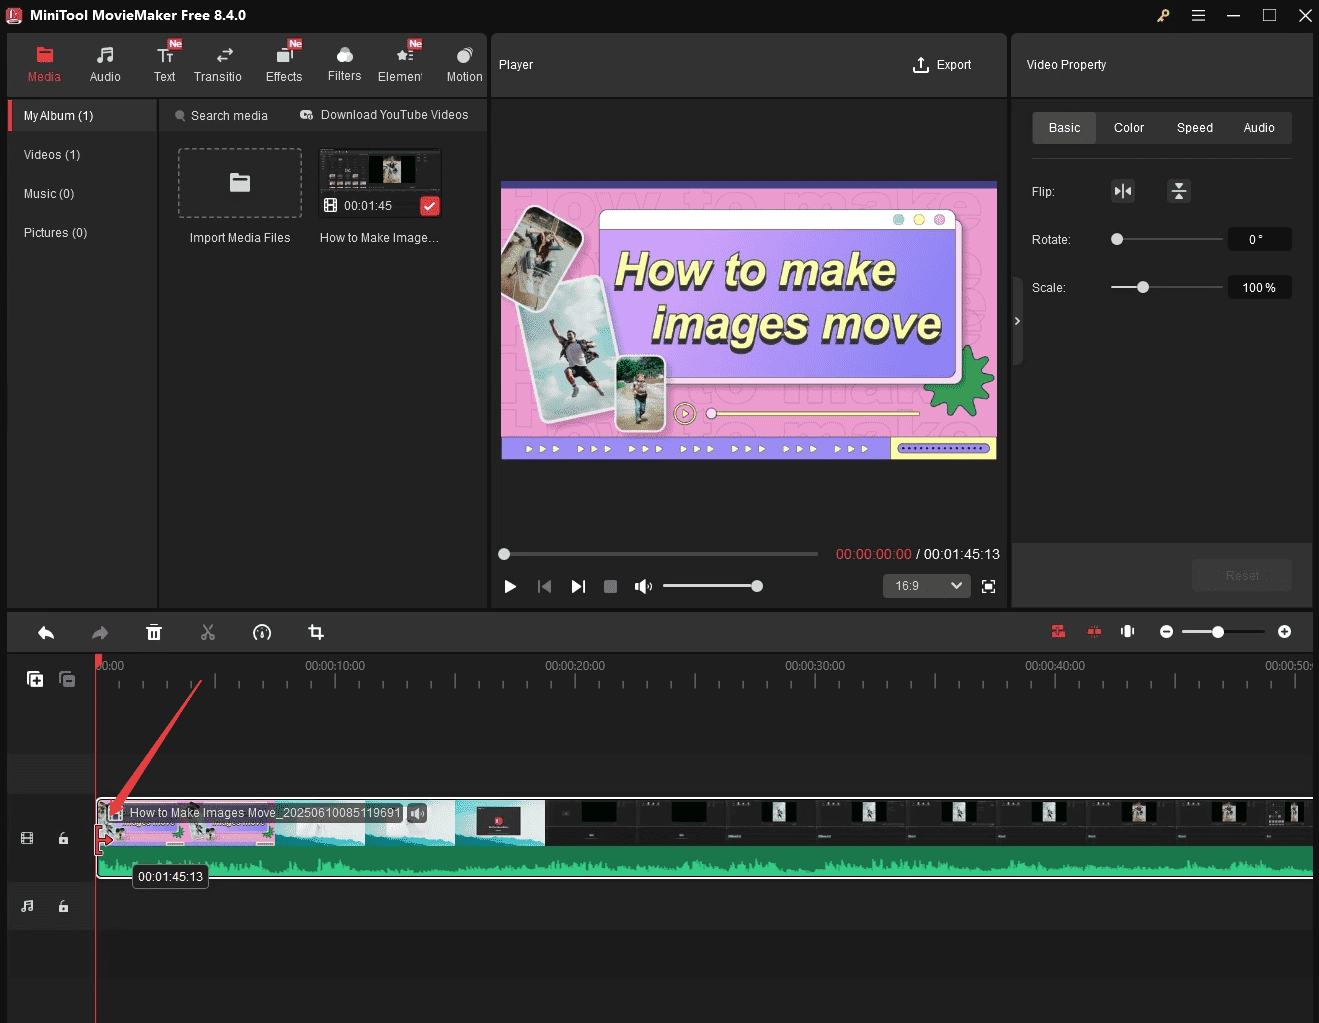
- Put your mouse on the beginning of the video, and an arrow will appear. Then, drag the arrow rightward to shorten the video.
- Similarly, put your mouse on the end of the video. Then, drag the arrow leftward to shorten the video.
Step 4. Export the shortened video
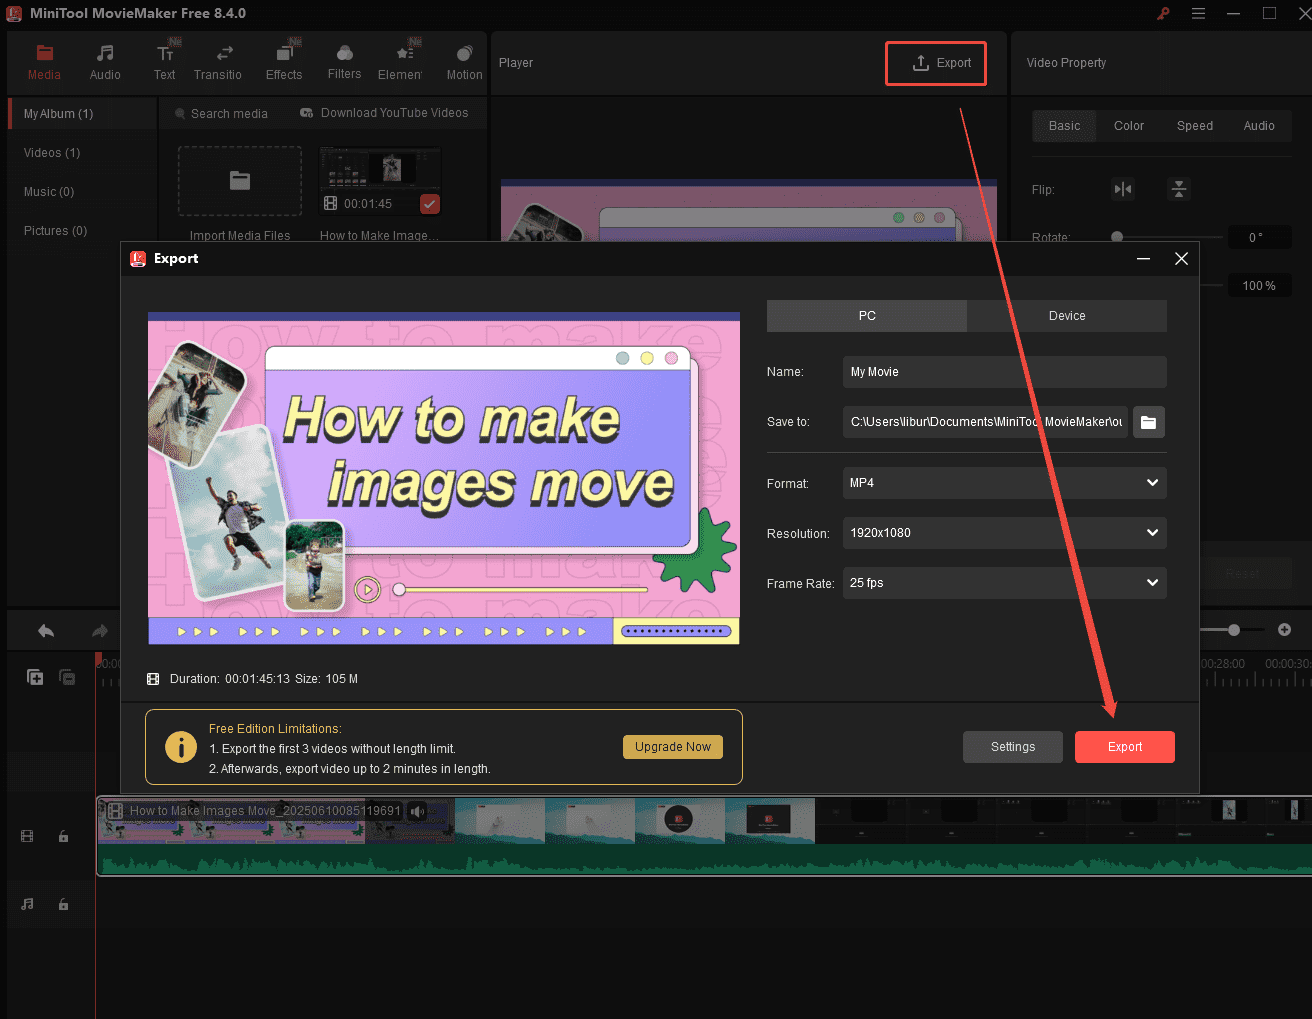
- Click on the Export icon at the upper right of the Player window to enter the Export window.
- Directly export the trimmed video by clicking on the Export button.
If you are not satisfied with the above method, use the second method to compress video with MiniTool MovieMaker before exporting the video.
Option 2: Adjust Export Parameters
Step 1. Adjust resolution and frame rate
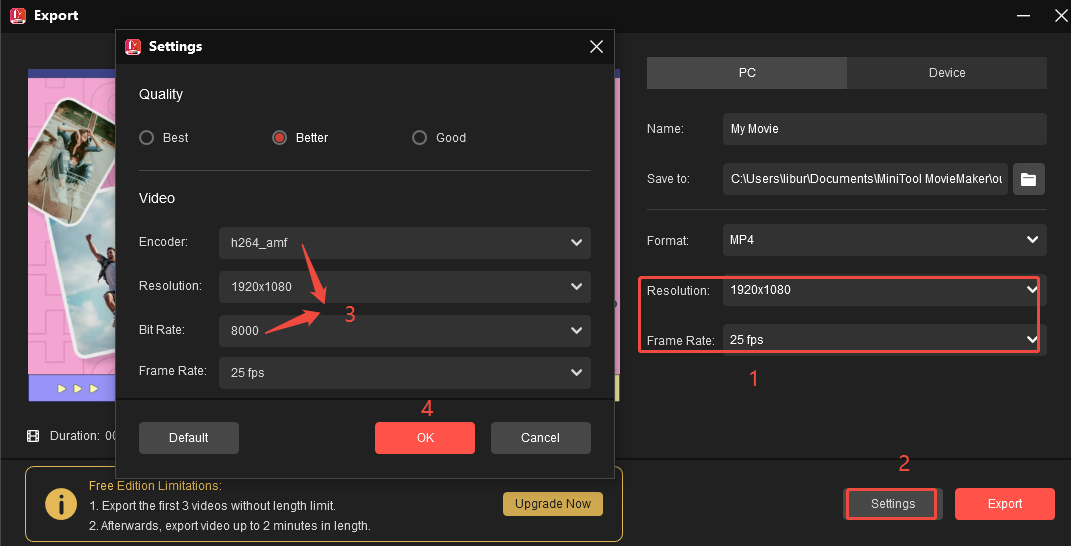
In the Export window, you can rename the video, change the save position, and choose the output format. Compressing the video by selecting a low resolution and frame rate. Here, I choose 720P, 25fps.
Step 2. Adjust the encoder and bitrate (optional)
Also, there are other parameters you can adjust, such as the encoder and bitrate, by clicking Settings. Then, click on OK.
Step 3. Export the video
Click on Export.
In a word, MiniTool MovieMaker’s trimming feature doesn’t reduce the video quality, but it loses some parts. You can adjust export parameters, such as resolution, to maintain the integrity of the video.

Method 4. Use a Cloud Service and Share the Link
If you prefer to share high-resolution videos, an excellent workaround is external hosting. Bluesky supports links, which means you can make your full video accessible via other platforms. Plus, you don’t need to download and install any application.
Now, let’s begin to generate a shareable link for the video.
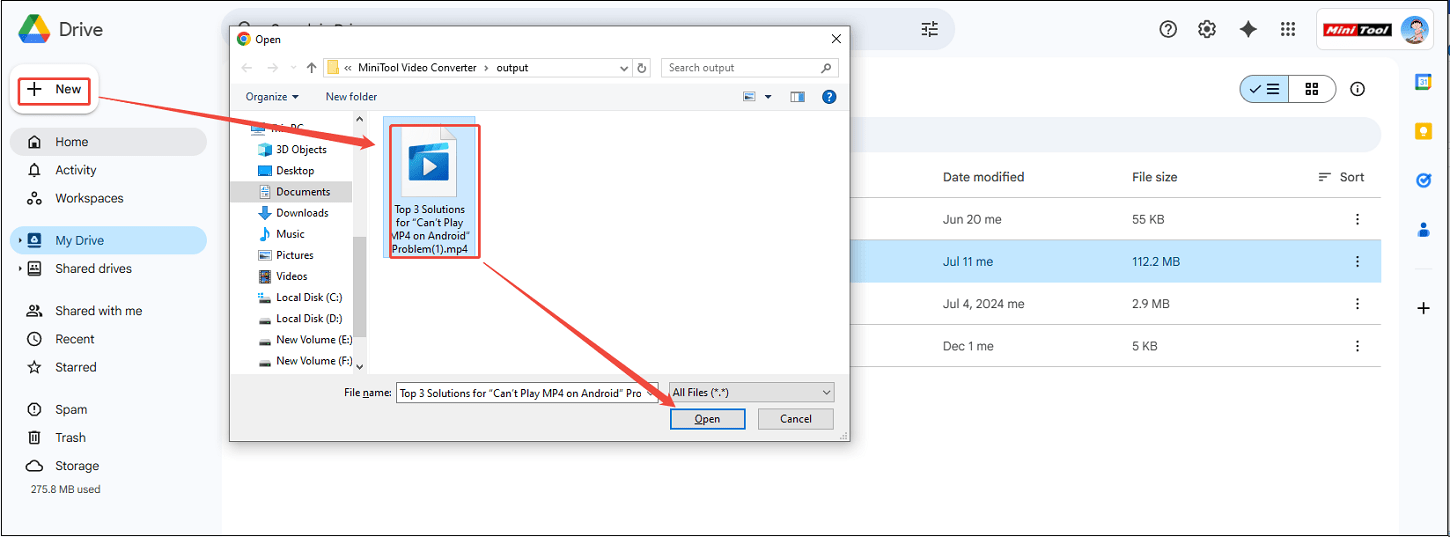
Step 1. Upload the video to Google Drive
- Visit Google Drive in your browser and log in to your account.
- Click on the + New button on the left side and choose File upload.
- Locate and click on the video you want to upload to Bluesky.
- Click on Open to upload it to Google Drive.
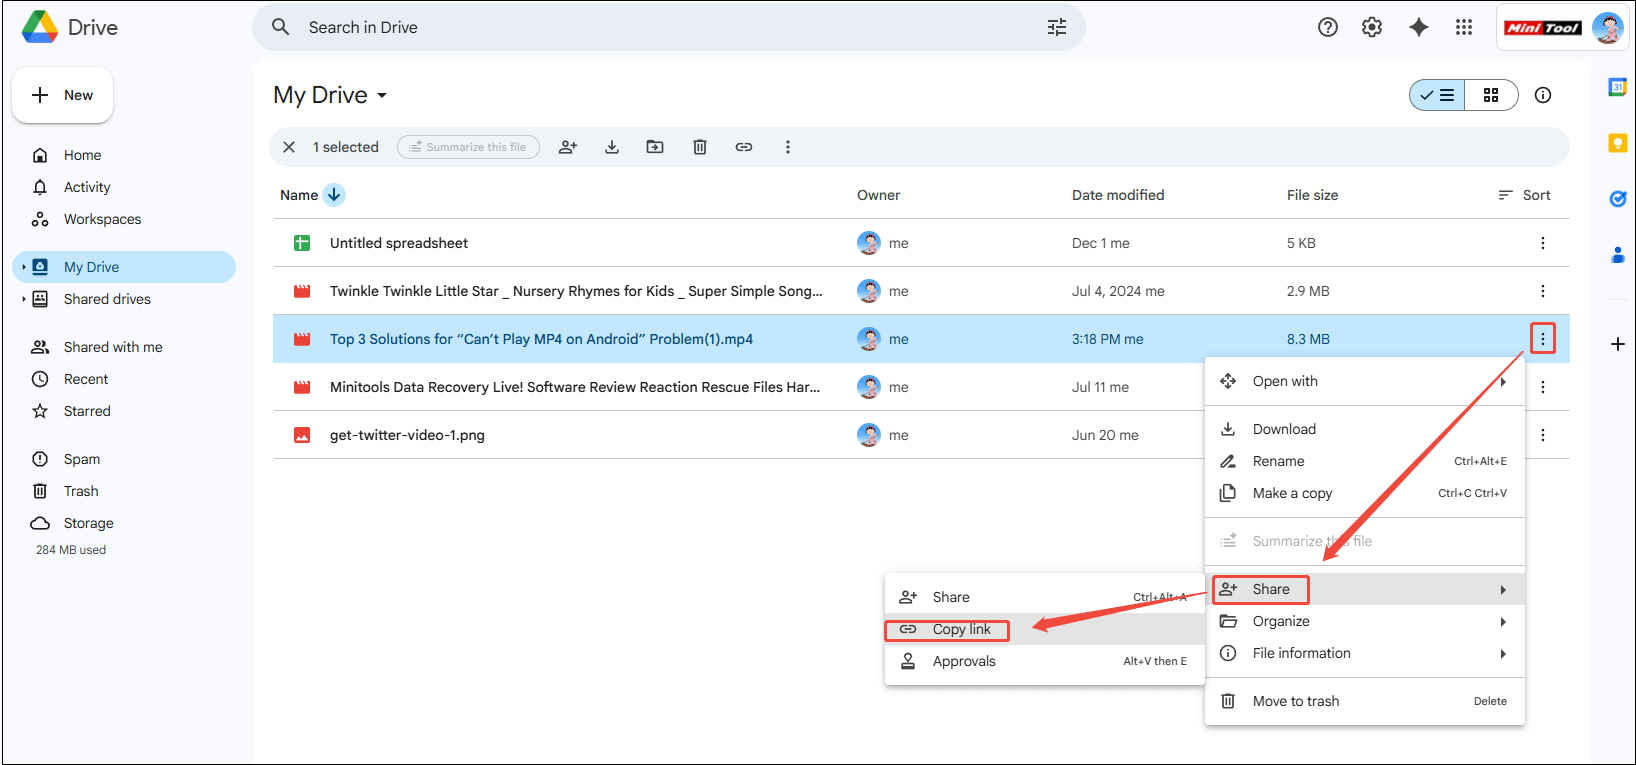
Step 2. Get the video shared link
Once the video is uploaded, right-click on the video and choose Share > Copy link.
After you get the share link, how to upload to Bluesky? The following part will guide you on what to do with the compressed video and the copied link.
How to Post Compressed Videos to Bluesky
Once the video is compressed or the video shared link is generated, uploading videos to Bluesky is a breeze. Here’s how to do that.
Step 1. Log in to Bluesky
Visit the official website of Bluesky and log in to your account.
Step 2. Upload the compressed video or the video shared link
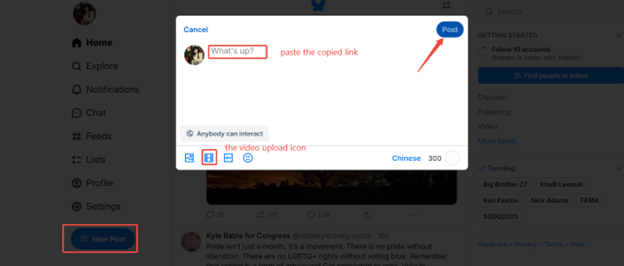
Click on the New Post button on the left side. In this window, you can see several media upload options.
- For uploading the compressed video, click on the video upload icon to browse and select the compressed video.
- For the video shared link, directly paste the link into the input box.
Step 3. Post the compressed video
Hit Post to publish your video on Bluesky.
Bottom Line
Bluesky video size limit doesn’t have to be a roadblock to sharing your amazing video content. By understanding the limit, using the right video compression methods, and following the proper upload process, you can successfully share your videos on the platform.
Whether you choose to use professional video compressor software, an online compression tool, or editing software, each method has its own advantages. Now, go ahead and start compressing and uploading your videos to make your mark on Bluesky!
If you have any questions or suggestions when you use MiniTool Video Converter or MiniTool MovieMaker to compress your videos, please feel free to reach out to us via support@minitool.com for further assistance.
User Comments :