MiniTool Video Converter (a reliable free file converter) releases this post to explain why you need to compress AVI file. Meanwhile, this article recommends three powerful AVI video compressors and shows you how to compress AVI videos step by step.
AVI, standing for Audio Video Interleave, refers to a video format that gives you a high-quality viewing and auditory experience. However, an AVI file, which is uncompressed, often has a large file size, which may cause low storage space on your device. To solve that problem, you can try to compress AVI file.
In addition, many platforms like Vimeo and Discord have a file size limit. Therefore, it may be problematic to share your AVI files on those platforms. In this background, an AVI compressor is indispensable. Considering that some of you may know little about how to compress AVI files, I will recommend three robust AVI video compressors in the following paragraphs.
AVI Video Compressor 1. MiniTool Video Converter (Offline)
The best AVI file compressor that I want to recommend is MiniTool Video Converter. MiniTool Video Converter is an easy-to-use file compressor that supports batch compression. Below are the detailed steps to compress AVI file using MiniTool Video Converter.
Step 1. Download MiniTool Video Converter by clicking on the download button below. Then, follow the on-screen instructions to install this AVI compressor on your PC.
MiniTool Video ConverterClick to Download100%Clean & Safe
Step 2. After launching MiniTool Video Converter, switch to the Compress Video tab and click on the upper-left Add Files button to upload your AVI files.
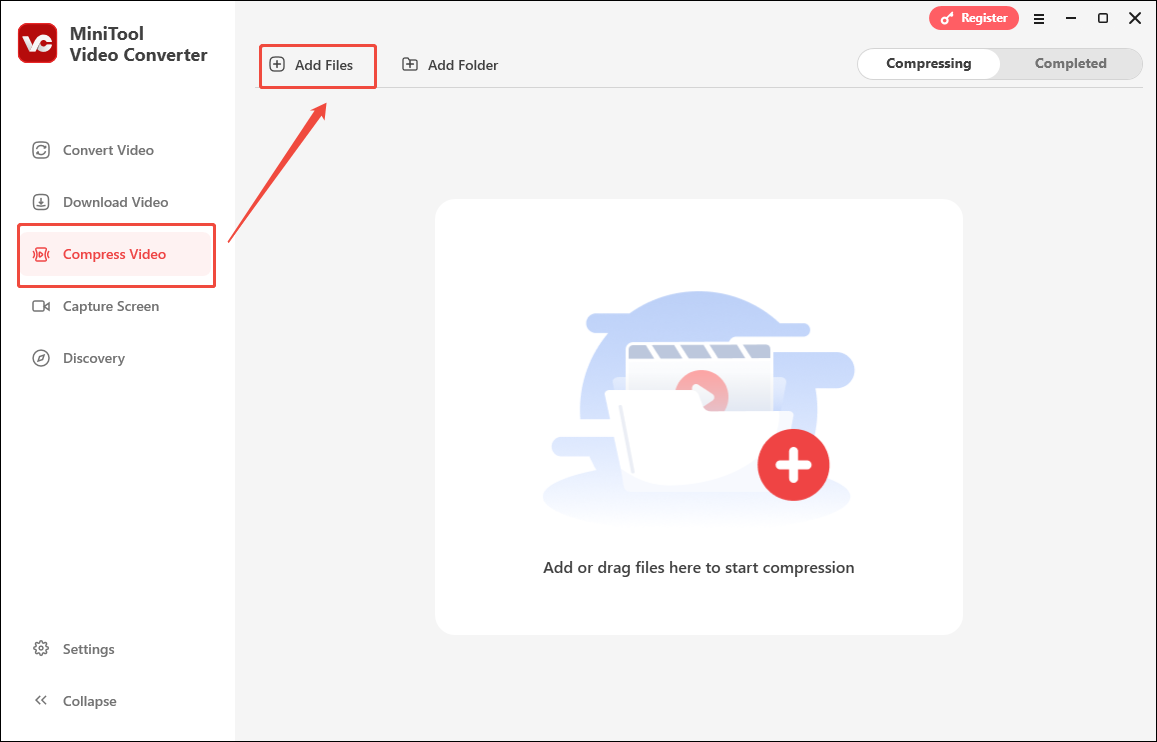
Step 3. Enter the Compression Settings window by clicking on the Settings icon.
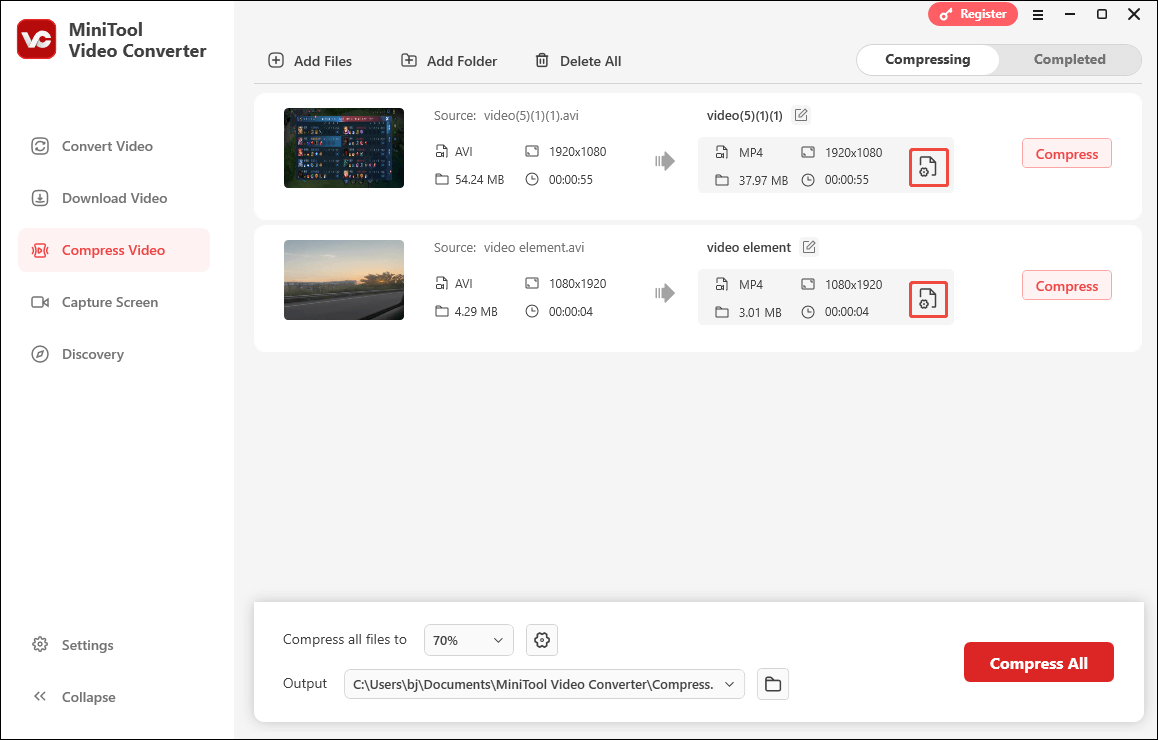
There is a recommended compression percentage in the pop-up window. Moving the red dot icon enables you to freely adjust the compression percentage. Expand the Format option and choose the output format you want (MP4, MKV, and WEBM are available). Click on the Preview button to check whether the compression level is appropriate. Then, click on OK to save the changes.
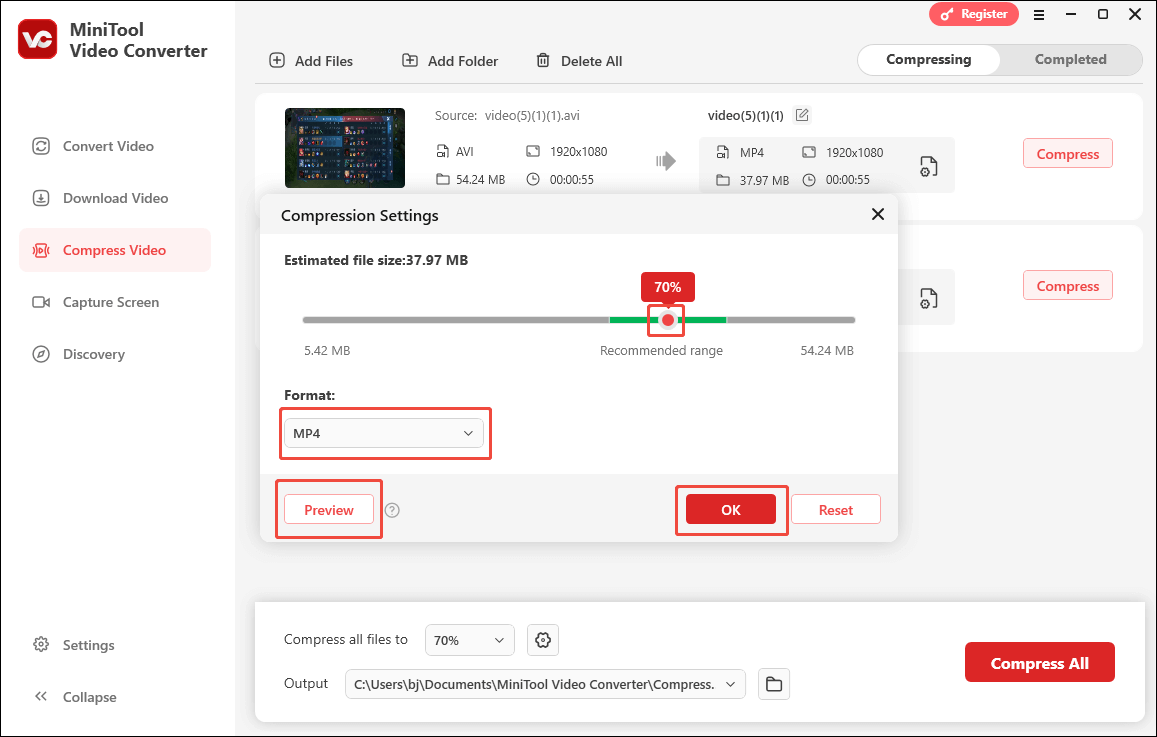
Step 4. Determine where to save the compressed AVI files by expanding the bottom-left Output option.
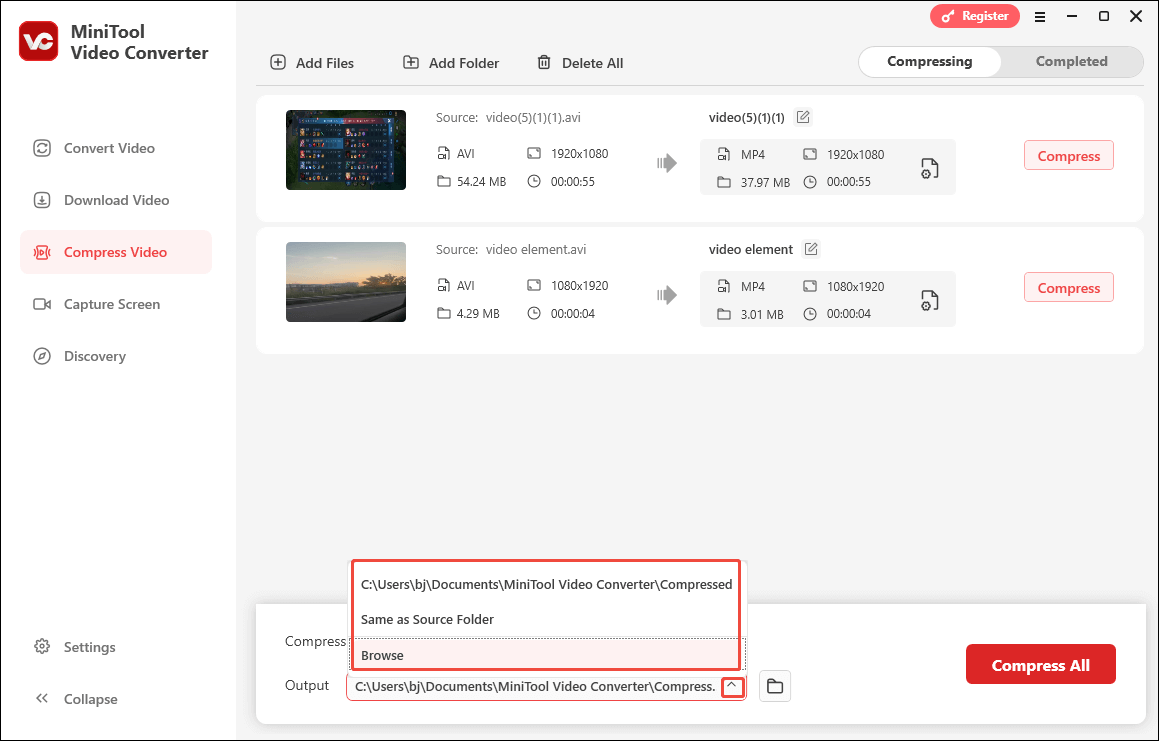
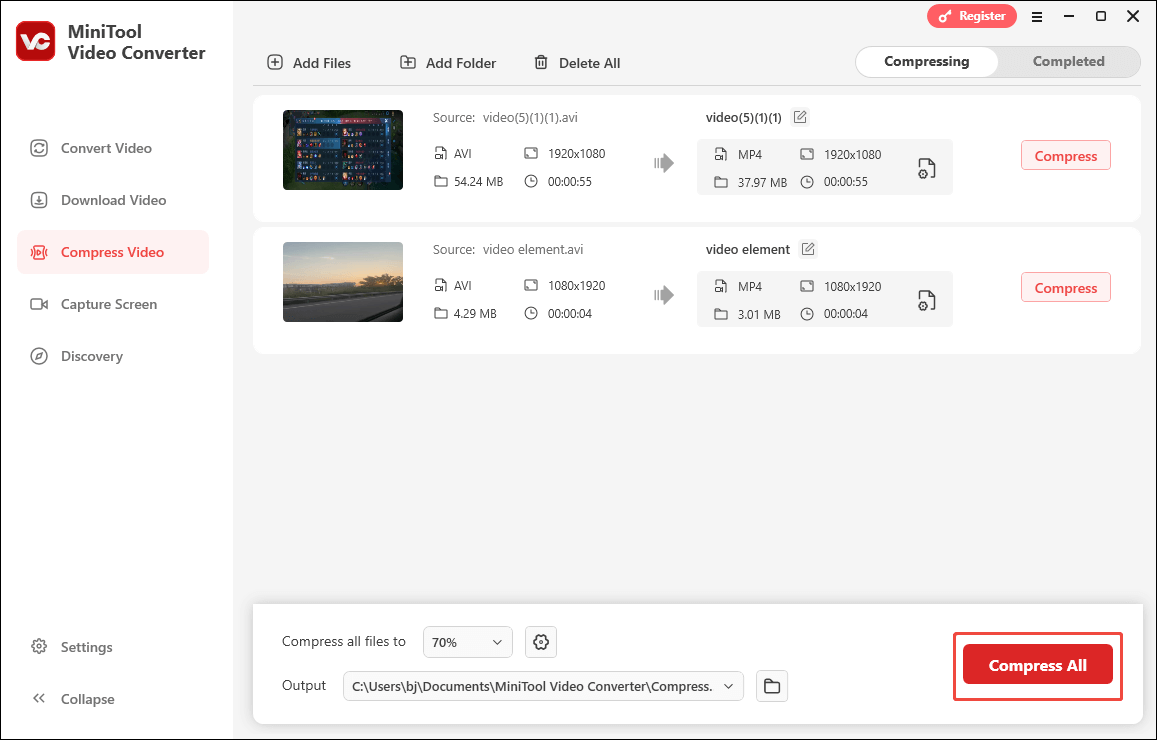
Step 5. Start the compression process by clicking on the bottom-right Compress All button.
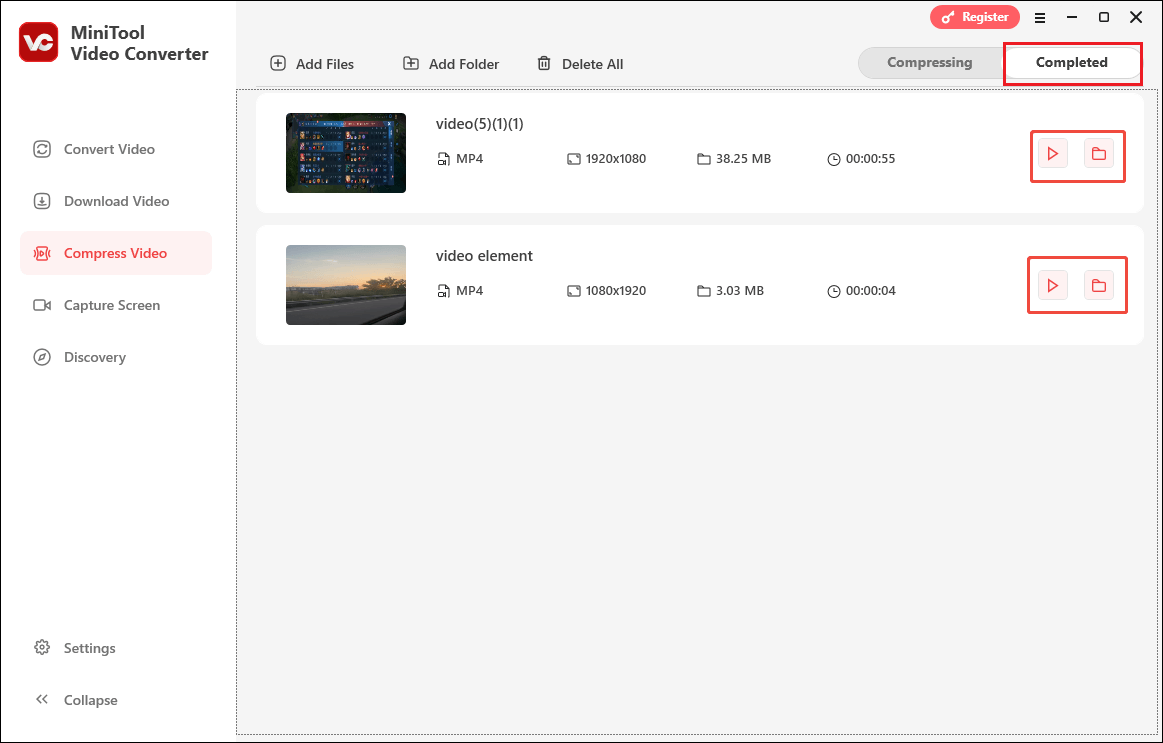
Step 6. When the file compression ends, MiniTool Video Converter will automatically switch to the Completed section. Then, click on the Folder icon to locate the compressed files. Click on the Play icon to view these AVI files directly.
Undoubtedly, MiniTool Video Converter is an easy-to-use AVI compressor. However, this file compressor saves all compressed files in MP4, MKV, or WEBM. Don’t worry. If you want to keep compressed files as AVI, switch to MiniTool Video Converter’s Convert Video tab and convert those files to AVI.
AVI Video Compressor 2. MiniTool MovieMaker (Offline)
The second application that enables you to compress AVI file is MiniTool MovieMaker. As an outstanding file compressor, MiniTool MovieMaker allows you to compress AVI videos by changing the format, resolution, frame rate, and bitrate. Below is a step-by-step guide on how to compress your AVI files using MiniTool MovieMaker.
MiniTool MovieMakerClick to Download100%Clean & Safe
Step 1. Click on the download button above to download and install MiniTool MovieMaker on your computer. Then, run this AVI compressor.
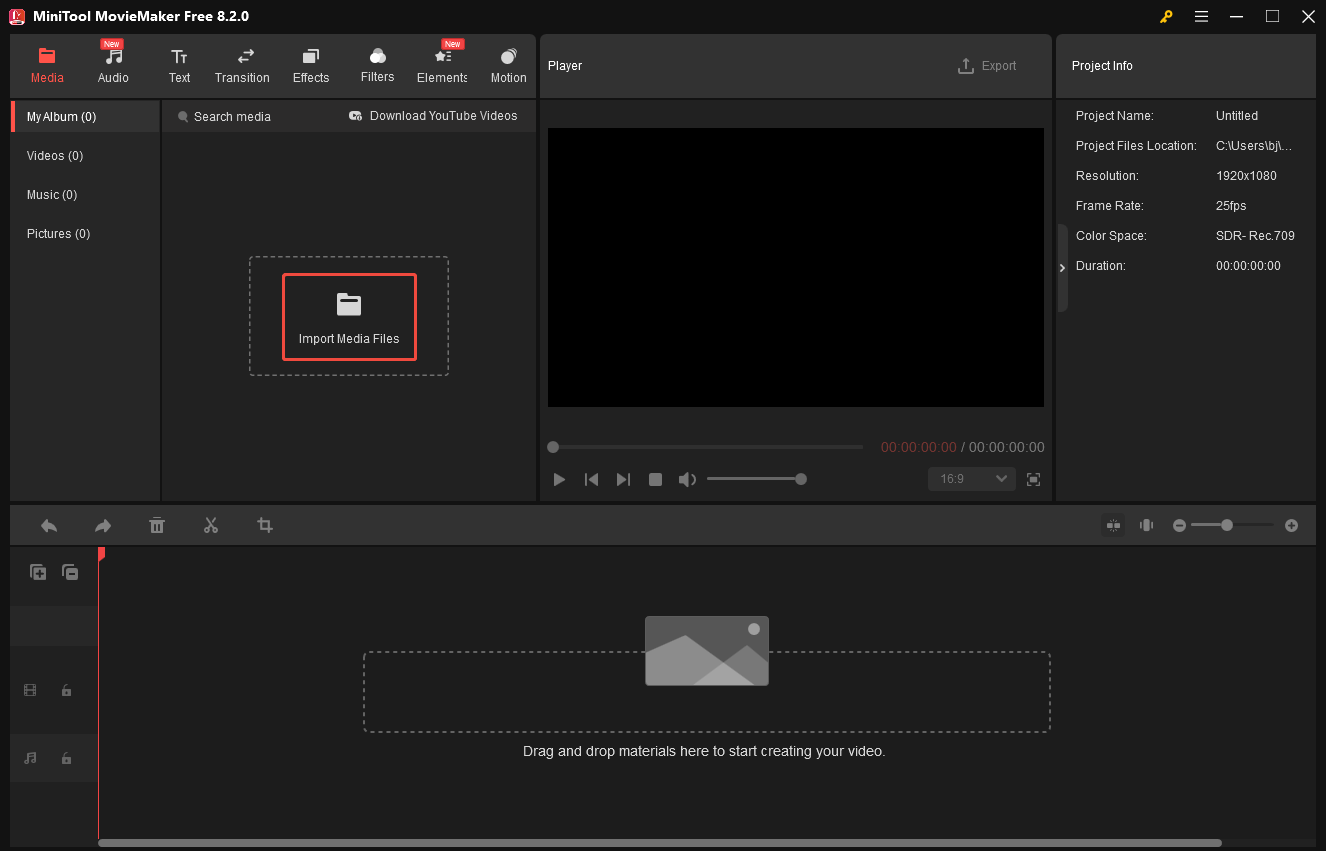
Step 2. After closing the promotion window, click on the Import Media Files area to import your AVI files into MiniTool MovieMaker.
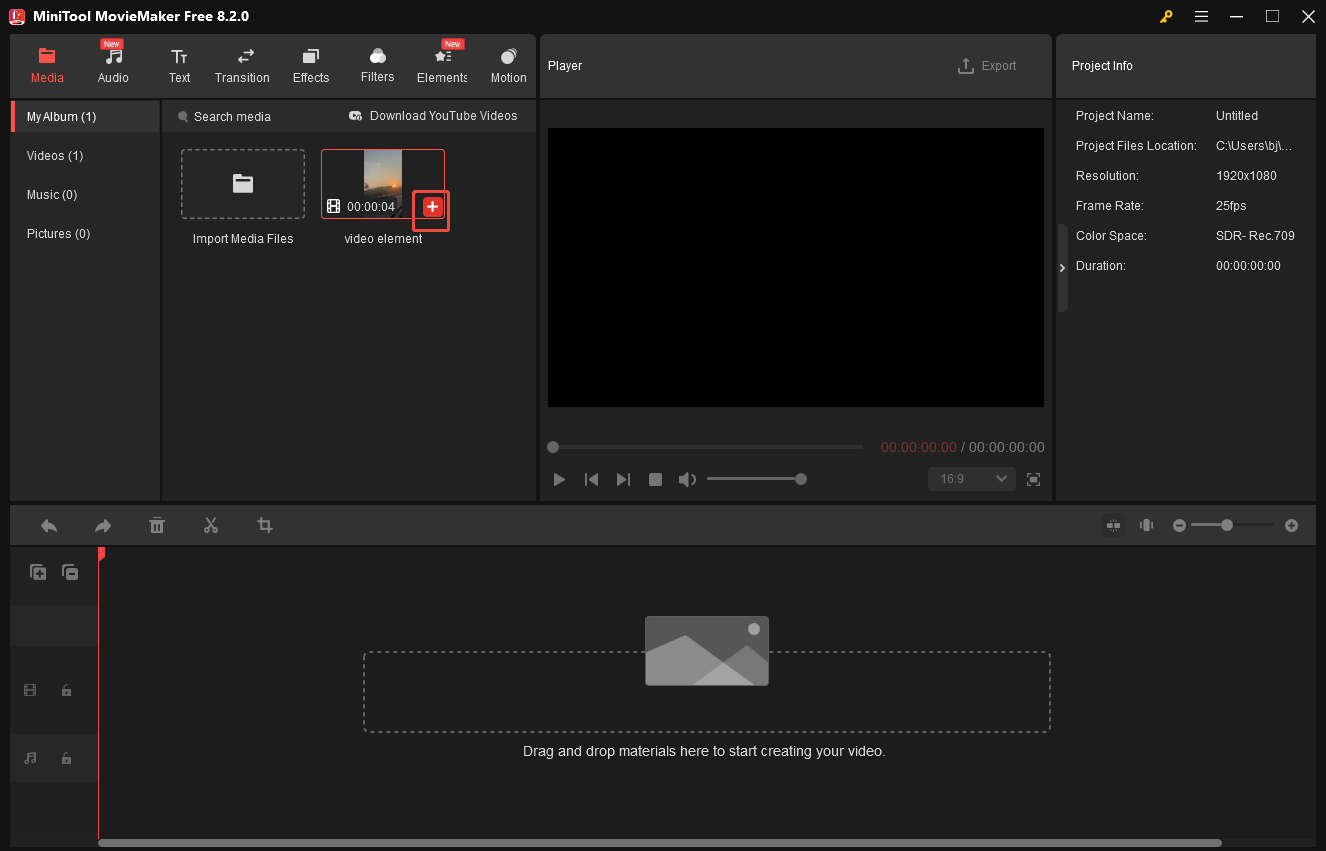
Step 3. Move the mouse to the area above your AVI video. Then, click on the Plus icon to add the AVI video to the timeline.
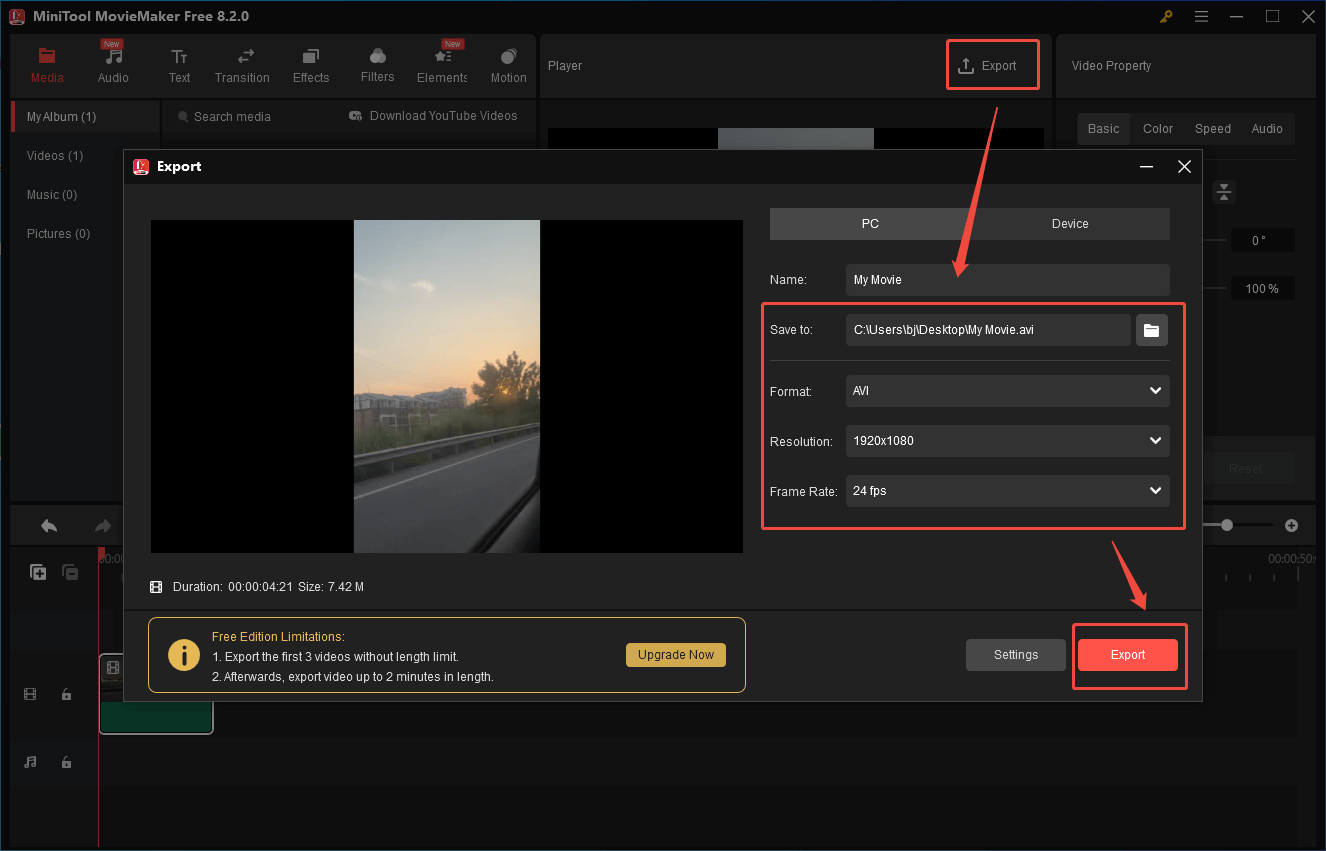
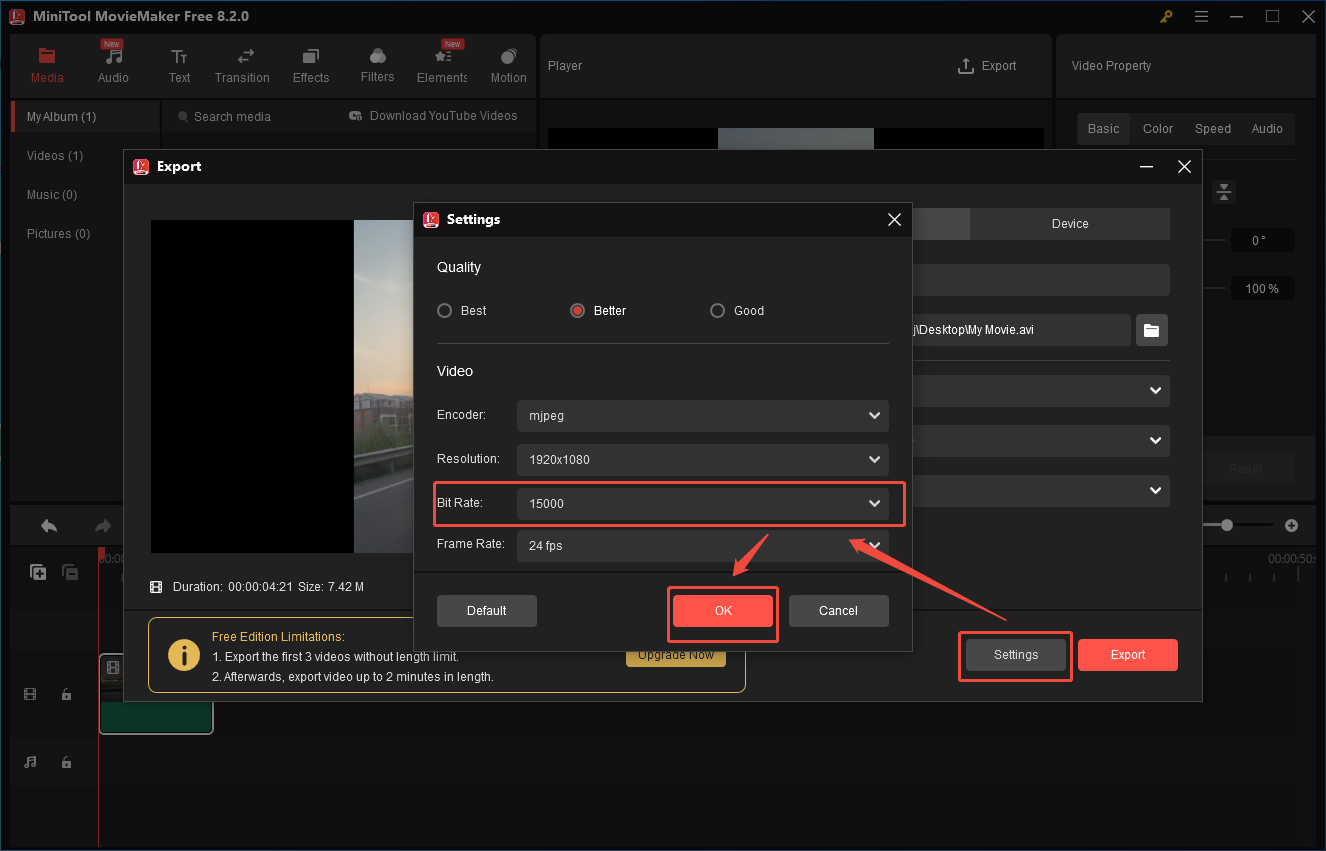
Step 4. Click on the Export icon at the upper right of the Player window to enter the Export window. There, you can choose a saving path for the compressed file and configure the parameters, such as format, resolution, and frame rate. As the latter two are lower, the video size can be smaller. Here, I will take AVI 1080P 24fps as an example. Then, click on the Export button to begin the compression process.
Step 5. When the file compression completes, you will see a pop-up window. There, click on the Find Target button to locate the compressed file.
MiniTool MovieMaker is more than an AVI compressor. It also enables you to edit your AVI files with various editing functions, like trimming, color correction, speed changing, and so on.
AVI Video Compressor 3. VEED (Online)
Can you compress AVI file without downloading and installing any programs or plug-ins? Of course, you can! VEED, which is an easy-to-use online AVI video compressor, can help. Below are the detailed instructions on how to compress AVI files using VEED.
Step 1. Go to https://www.veed.io/tools/video-compressor/compress-avi.
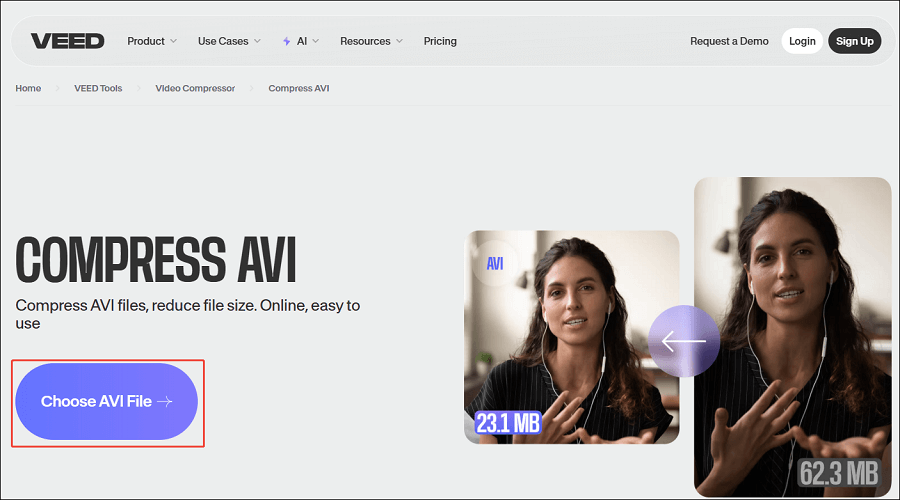
Step 2. Click on the Choose AVI File button to enter the compression interface.
Step 3. Click on the Upload a File button to upload the AVI video that you want to compress.
Step 4. When the file upload ends, expand the Quality option and the Resolution option. Then, customize the video quality and resolution based on your needs. Next, click on the Compress Video button to begin the compression process.
Step 5. When the file compression completes, click on the Download file button to get the compressed file.
With the above-detailed steps, it will never be difficult for you to compress AVI file online.
To Wrap Things Up
Although an AVI file offers you a high-quality video, its large file size will bring you many obstacles, such as low storage space and difficulty in file sharing. To solve those problems, I have recommended three tools to help you compress AVI file effortlessly. If you prefer an offline AVI video compressor, try MiniTool Video Converter or MiniTool MovieMaker. On condition that you want an online solution, go to the website of VEED.
Finally, if you have encountered any problems when using MiniTool Video Converter or MiniTool MovieMaker, please contact us via [email protected]. Also, you can directly send a message to me on Twitter. I will help you as quickly as possible.


User Comments :