If you are a game player looking to capture StarCraft 2, this article provides comprehensive guides on how to record StarCraft 2 on PC without lag. In addition, you can also learn how to edit your game recordings with the recommended editing software.
Introduction to StarCraft 2
StarCraft 2 is a real-time strategy video game developed by Blizzard Entertainment and released in 2010. Its new 3D graphics engine delivers a visually stunning experience that has been widely acclaimed. The game continues the human narrative thread from its predecessor, StarCraft, primarily unfolding the story through the perspectives of the Zerg and Protoss races.
Players can experience first-person gameplay through modes like single-player campaigns and multiplayer battles. Its multiplayer mode later spawned a standalone competitive scene, igniting the game's esports phenomenon.
How to Record StarCraft 2 on PC
Many skilled players share StarCraft 2 game videos on platforms like YouTube. If you also want to showcase your gaming skills to a wider audience and highlight your epic victories, you can record your StarCraft 2 gameplay using these three efficient methods:
Method 1: Use Xbox Game Bar
The Xbox Game Bar is a built-in screen recording tool in Windows that works with most PC games. Simply press the Windows + G key combination, and then you can start recording gameplay, capture screenshots, and chat with friends without leaving your game interface. Below are detailed steps for using Xbox Game Bar to record StarCraft 2 gameplay. For the full guide, please continue reading.
Step 1: Launch StarCraft 2
Launch StarCraft 2 on your computer and make sure it’s ready.
Step 2: Open the Xbox Game Bar
Press Windows + G to launch the Xbox Game Bar on your computer.
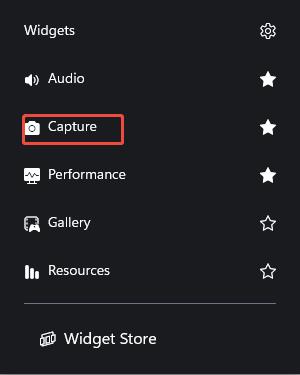
Step 3: Control Recording Audio
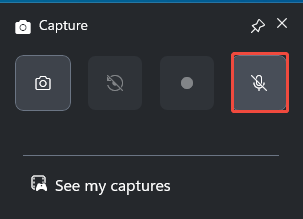
1. Click on Capture under the Widgets module to enter the Capture panel.
2. Then, click the Microphone to turn on or off the microphone function during the recording process.
Step 4: Start Recording
Click the Start recording icon in the Capture panel or press the shortcut keys Windows + Alt + R to start recording StarCraft 2 gameplay.
Step 5: End Recording
To stop the recording, click the Stop recording icon in the Capture panel or press Windows + Alt + R again.
Method 2: Use MiniTool Video Converter
If you're seeking a more powerful screen recorder with advanced features, MiniTool Video Converter is an essential choice you won't want to miss.
MiniTool Video Converter is a free Windows screen recorder with a user-friendly interface that makes it easy to master all its features. Beyond capturing thrilling gameplay moments, it also supports recording online meetings, webinars, video calls, and many more.
Additionally, MiniTool Video Converter supports screen recording without time limits and allows you to set a recording duration. More notably, all videos captured through this software support 4K HD quality and are saved in MP4 format. Now, you can follow these detailed steps to learn how to record StarCraft 2 using MiniTool Video Converter:
Step 1: Download and Install MiniTool Video Converter
Click on the button below to download and install the latest version of MiniTool Video Converter.
MiniTool Video ConverterClick to Download100%Clean & Safe
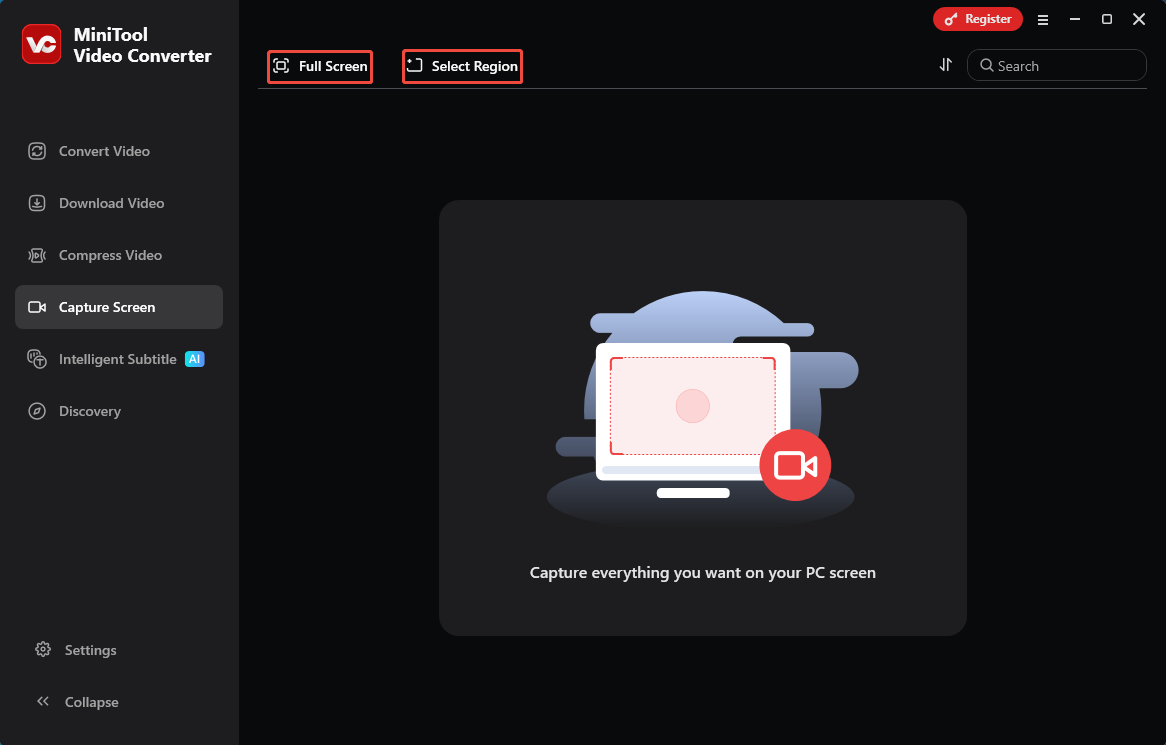
Step 2: Select the Recording Area
1. Launch MiniTool Video Converter on your computer and navigate to the Capture Screen module.
2. Click on Full Screen to capture the entire screen. Or, click on Select Region, then drag the red dotted border to decide the recording region.
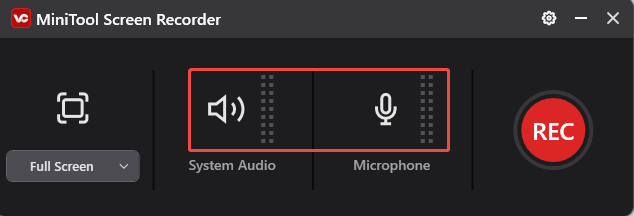
Step 3: Control the Audio Recording
Click on the System Audio icon or Microphone icon to determine whether you want to record the sound from the system or the microphone.
Step 4: Start and End the Recoding Process
1. Click the REC button in the MiniTool Screen Recorder panel or press the default key F6 on your keyboard to start the recording process.
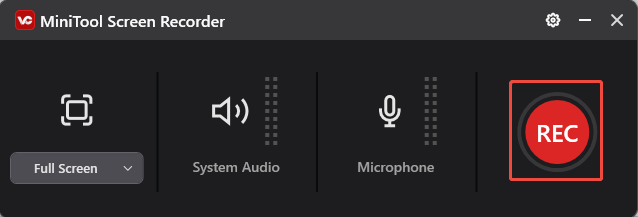
2. After a 3-second countdown, it will record StarCraft 2 gameplay. You can press the default key F9 to pause or resume the recording process.
3. When you want to end recording StarCraft 2, press the default F6 again.
Step 5: Check the Recorded Video of StarCraft 2
1. After recording the video, you will be redirected to the main interface, which displays the list of recorded videos.
2. In the recorded video list, you can click on the folder icon to check the location of the recorded video.
How to record StarCraft 2 gameplay easily? Read this post to get the detailed guide.Click to Tweet
Method 3: Use Bandicam
Bandicam is a lightweight screen recording software designed specifically for Windows systems. In addition to capturing gameplay that uses DirectX/OpenGL/Vulkan graphics technologies, Bandicam can record any content displayed on the screen in high definition.
Furthermore, it allows users to select specific screen areas for recording and supports saving recorded videos in formats such as AVI and MP4. However, non-members using Bandicam will encounter a 10-minute recording time limit, and videos will be watermarked. Therefore, you can review the steps below before deciding whether to subscribe.
Step 1: Download and Install Bandicam
Visit the official Bandicam website to download and install the software on your PC.
Step 2: Start Recording
1. Launch Bandicam on your PC, then click the Game icon to enter the Game Recording Mode in the Bandicam main interface. If the User Account Control window pops up, please select Yes.
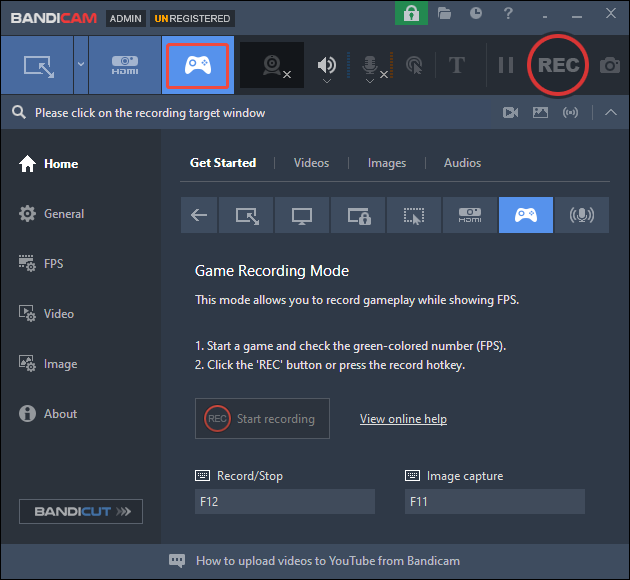
2. Launch the game StarCraft 2 and make sure it’s ready.
3. Then, go back to Bandicam to click the REC button or press the default key F12 on the keyboard to start recording StarCraft 2.
Step 3: End Recording
When you want to end the game recording, just press the default key F12 again to stop recording.
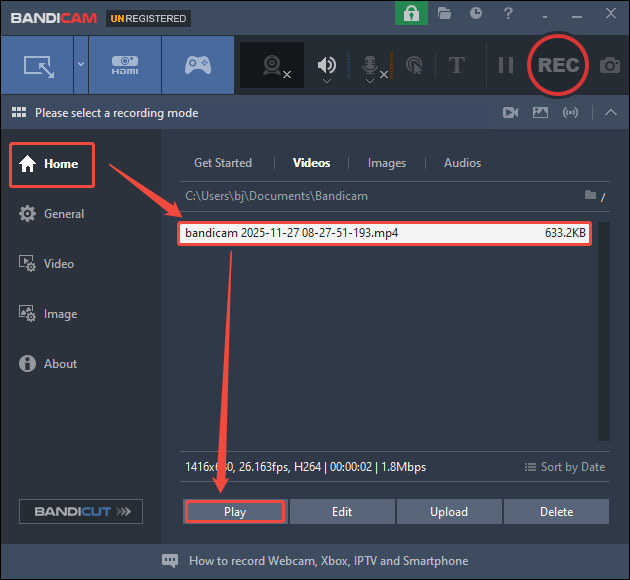
Step 4: Check the Recorded Videos
When the recording process ends, go to the Bandicam homepage. Then, navigate to the Videos module and click on Play to check the recorded video on this page.
![Record NBA League Pass Games in 3 Easy Ways [Step-by-Step Guide]](https://images.minitool.com/videoconvert.minitool.com/images/uploads/2025/11/record-nba-league-pass-games-thumbnail.jpg)
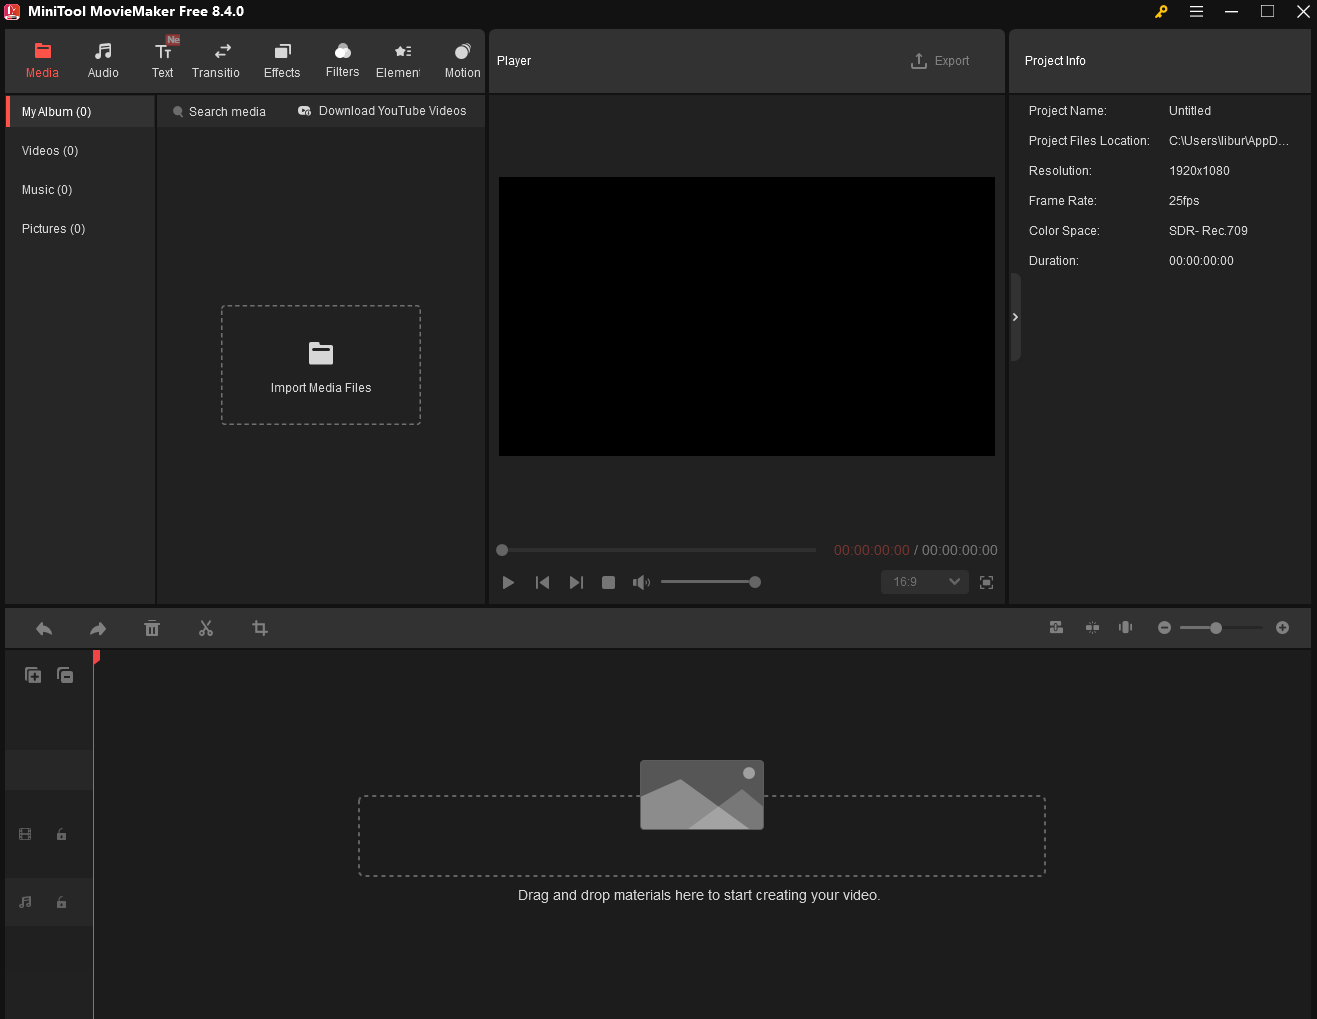
Bonus: Edit StarCraft 2 Recordings with MiniTool MovieMaker
If you also want to share StarCraft 2 videos on platforms like YouTube, optimizing and editing your recordings before uploading them can significantly boost viewer engagement. For this purpose, I highly recommend MiniTool MovieMaker.
MiniTool MovieMaker is a professional media editing tool. Not only can you use powerful editing features like cropping, rotating, and reversing to make your videos smoother and more eye-catching, but you can also access its vast resource library to make your videos more impactful. Now, click the button below to download and install MiniTool MovieMaker on your computer.
MiniTool MovieMakerClick to Download100%Clean & Safe
Final Words
How to record StarCraft 2 on PC with ease? This post provides 3 effective methods for you to capture your gameplay seamlessly. In addition, don’t forget to polish your StarCraft 2 recordings with MiniTool MovieMaker to enhance their viewing experience.
If you encounter any issues while trying out MiniTool Video Converter or MiniTool MovieMaker, feel free to email us via support@minitool.com or send me a message on X for assistance.
About The Author

Position: Columnist
Jade is an experienced multimedia tech writer who has authored hundreds of guides on screen recording, video editing, and software troubleshooting. Dedicated to bridging the gap between complex technical concepts and user-friendly solutions, she specializes in providing clear, actionable advice.
User Comments :