This article drafted by the free video converter from MiniTool delves into the various aspects of 15 fps video recording, its applications, benefits, and how to effectively record videos at this frame rate.
In the world of videography, frames per second (fps) is a critical metric that determines the smoothness and clarity of video playback. While the industry standard for most high-definition videos is 24, 30, or 60 fps, there is a niche but significant space for 15 fps video recording.
Understanding 15 FPS Video Recording
Frames per second (fps) refers to the number of individual frames or images that are displayed in one second of a video. A 15 fps video means that 15 frames are shown each second. This lower frame rate can result in a choppier or more staccato motion, which can be a disadvantage in some contexts but advantageous in others.
Applications of 15 FPS Video Recording
While 15fps video recording is rare in today’s digital video content, it is still can be seen in the following fields.
# Webcams and Video Calls
Many webcam applications use 15 fps to conserve bandwidth while still providing adequate video quality. This is particularly useful for video conferencing where high frame rates are not crucial.
# Surveillance Systems
Security cameras often use 15 fps as a balance between storage capacity and image quality. This allows for extended recording times without excessively large file sizes.
#3 Animation and Stop-Motion
Creators in animation and stop-motion frequently utilize 15 fps to create a distinctive, deliberate look. This frame rate can make the motion appear more handcrafted, adding charm to the animation.
#4 Educational and Instructional Videos
For tutorials and educational content where motion is not fast-paced, 15 fps is sufficient and helps reduce file sizes, making it easier to store and share.
#5 Historical and Archival Footage
Older video recordings, such as those from early 20th-century film reels, often run at lower frame rates. Modern equipment can mimic this by recording at 15 fps, providing an authentic historical feel.
Benefits of 15 FPS Video Recording
Although there are many disadvantages to recording a video at 15fps, it still has some pros:
- Reduced File Size: Videos recorded at 15 fps take up less storage space, which is beneficial for extended recordings or when storage capacity is limited.
- Lower Bandwidth Usage: When streaming or uploading, 15 fps videos require less bandwidth, making them ideal for areas with slow internet speeds.
- Extended Recording Time: Devices with limited battery life or storage capacity can record for longer periods at a lower frame rate.
How to Record a Video at 15 FPS?
Below are several ways to record 15fps videos.
Solution 1. Using a 15 FPS Video Recorder
Many cameras and smartphones offer settings to adjust the frame rate. Check your device’s settings or manual to set the recording to 15 fps.
Solution 2. Software and Apps
Various video recording apps and software allow you to choose your frame rate. Programs like OBS Studio, VLC Media Player, MiniTool Video Converter, and smartphone apps such as Filmic Pro support customizable frame rates.
Solution 3. Dedicated Equipment
Some webcams and surveillance cameras are pre-configured to record at 15 fps. These can be ideal for specific use cases like video conferencing or security systems.
Record 15 FPS Videos with MiniTool Video Converter
Then, how to exactly record a video at 15fps on a computer with a 15fps video recorder? Here, let’s take MiniTool Video Converter for example to show you the details.
MiniTool Video ConverterClick to Download100%Clean & Safe
Step 1. Download, install, and launch MiniTool Video Converter on your Windows PC.
Step 2. Navigate to the Screen Record tab from the top menu of the default main user interface.
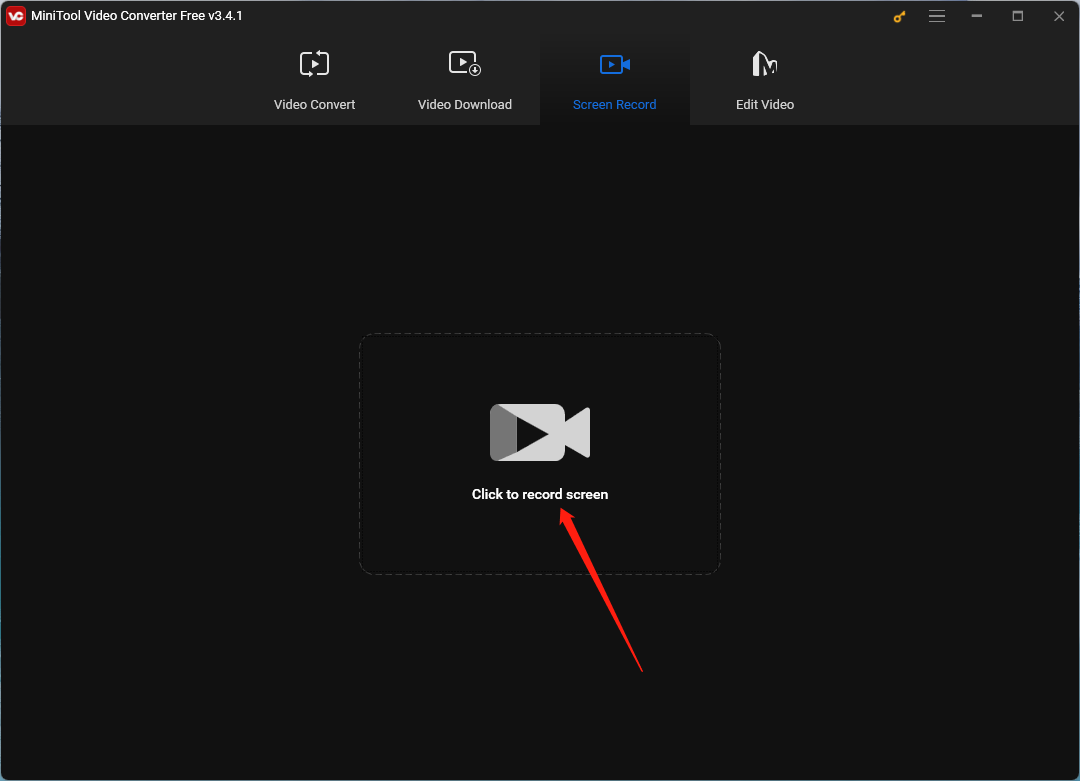
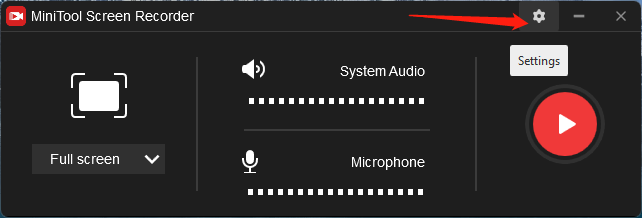
Step 3. It will trigger the MiniTool Screen Recorder window. Within the window, you can customize the recording section and sound recording. To get more settings, just click the Settings icon (gear) from the top right of the window.
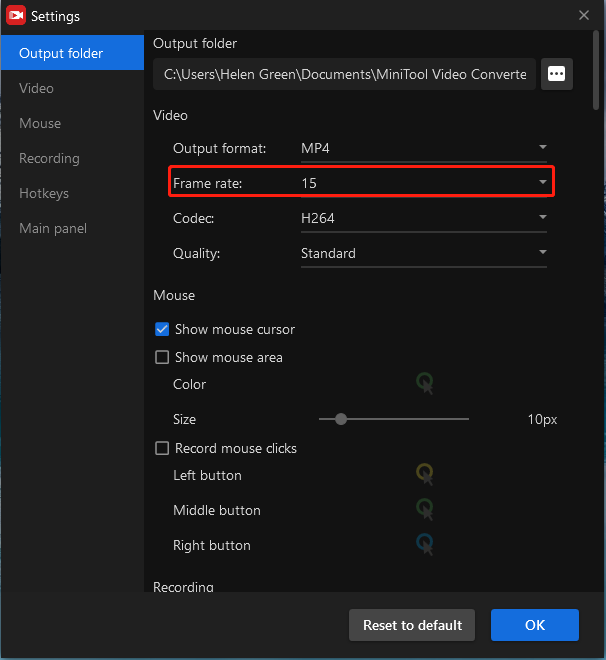
Step 4. In the new Settings popup, under the Video settings, just expand the Frame rate options and choose 15. You can further personalize other settings like video output format, codec, and quality. Click the OK button at the bottom right to save the changes you have made.
Step 5. You will be redirected to the MiniTool Screen Recorder window. There, click the big red Record button to start capturing your activities.
Step 6. Press F6 (or your customized shortcut) to stop recording.
Finally, you have successfully recorded a video at 15 fps.
Tips for Recording 15 FPS Videos
For capturing 15fps videos with a physical hardware camera, you can try the following tricks to improve the video quality.
- Lighting: Ensure good lighting to compensate for the lower frame rate, which can help in maintaining image clarity.
- Stability: Use tripods or stabilizers to keep the camera steady, as any jerkiness will be more noticeable at lower frame rates.
- Subject Movement: Limit fast movements within the frame, as they can appear choppy or blurred at 15 fps.
Recap and Key Takeaways
15 fps video recording is a versatile option that suits various applications where high frame rates are not necessary. Whether you’re recording a video call, setting up a surveillance system, or creating an animation, understanding and utilizing 15 fps can be highly effective. By choosing the right tools and techniques, you can produce quality videos while saving on storage and bandwidth.
If you encounter any problem while using MiniTool Video Converter, you can contact [email protected] for technical help.
Also Read



User Comments :