The Flickr video size limit is 1GB. A free user can only play the first 3 minutes of the video. To help you bypass the video size limit, this post shows you how to make Flickr videos smaller with free file converters like MiniTool Video Converter, MiniTool MovieMaker, and FreeConvert.
As a popular platform, Flickr enables you to store, organize, and share various images and videos. Meanwhile, it allows you to communicate with others via tagging, commenting, and other functions.
You can upload a multitude of video files, including MP4, AVI, MOV, WMV, MPEG,3GP, OGG, OGV, and M2TS, to Flickr. However, due to the Flickr video size limit, you may not be able to share a large video on Flickr. Don’t know that video size limit? Read on to find out.
What Is the Flickr Video Size Limit
According to the official website of Flickr, users can upload videos up to 1GB. Meanwhile, there isn’t any limit on the video length. However, free users can only view the first 3 minutes of the video.
For users who pay for the upgrade, the first 10 minutes of the video can be played. In addition, the highest resolution that Flickr supports is 1080p. Furthermore, the frame rate of your video can’t exceed 30fps.
How to Break the Video Size Limit with Video Compressors
You can effortlessly break the Flickr video size limit with offline/online file compressors.
Method 1. Use MiniTool Video Converter (Offline)
One of the best video compressors for Flickr is MiniTool Video Converter.
Why MiniTool Video Converter is a Can’t-Miss Compression Tool
MiniTool Video Converter is a lightweight video compressor that supports batch compression. With it, you can compress up to five videos simultaneously. Moreover, MiniTool Video Converter is completely free and doesn’t have any file size limit.
All the compressed files can be saved in MP4, MKV, or WEBM format. This way, you can play them with a wide range of media players. Additionally, MiniTool Video Converter features a well-organized interface, making it an ideal choice for beginners.
How to Compress Flickr Videos with MiniTool Video Converter
Below is an in-depth guide on how to break the Flickr video size limit using MiniTool Video Converter.
Step 1. Download and install MiniTool Video Converter.
MiniTool Video ConverterClick to Download100%Clean & Safe
Download MiniTool Video Converter by clicking on the download button above. Then, follow the on-screen instructions to install this video compressor for Flickr on your PC. Next, launch MiniTool Video Converter.
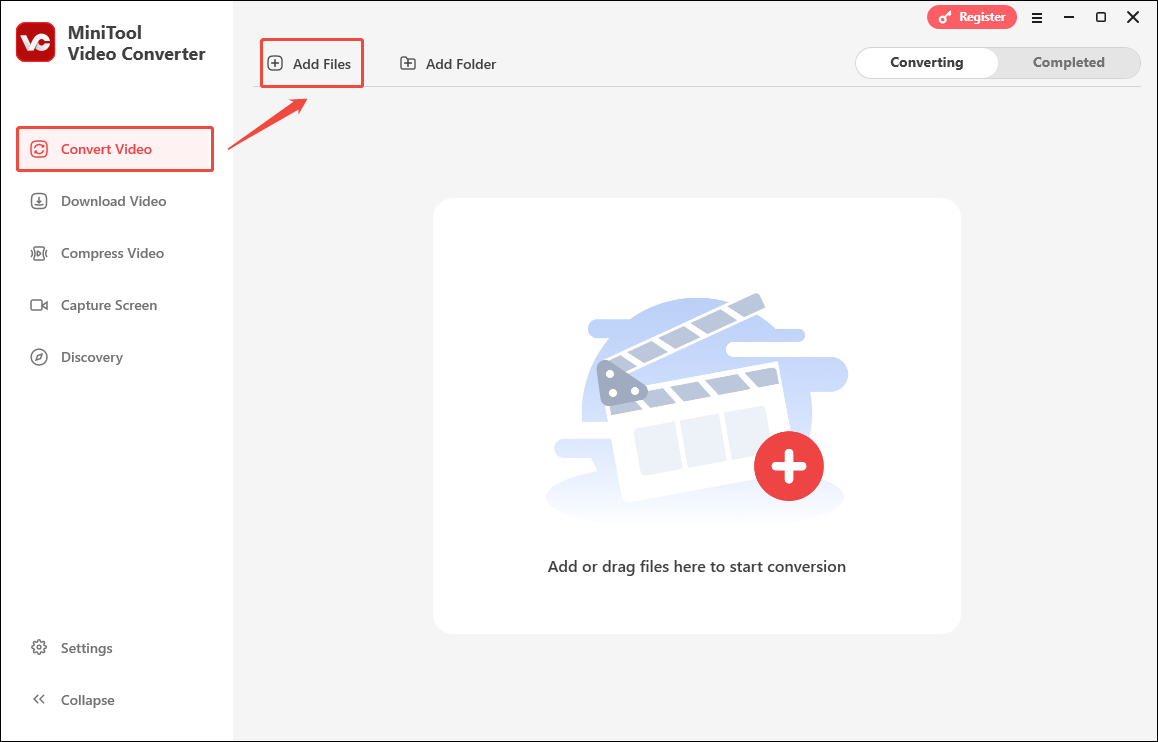
Step 2. Upload the videos.
Navigate to the Compress Video tab. There, click on the Add Files option. Then, select the videos that you want to compress.
Step 3. Configure the compression settings.
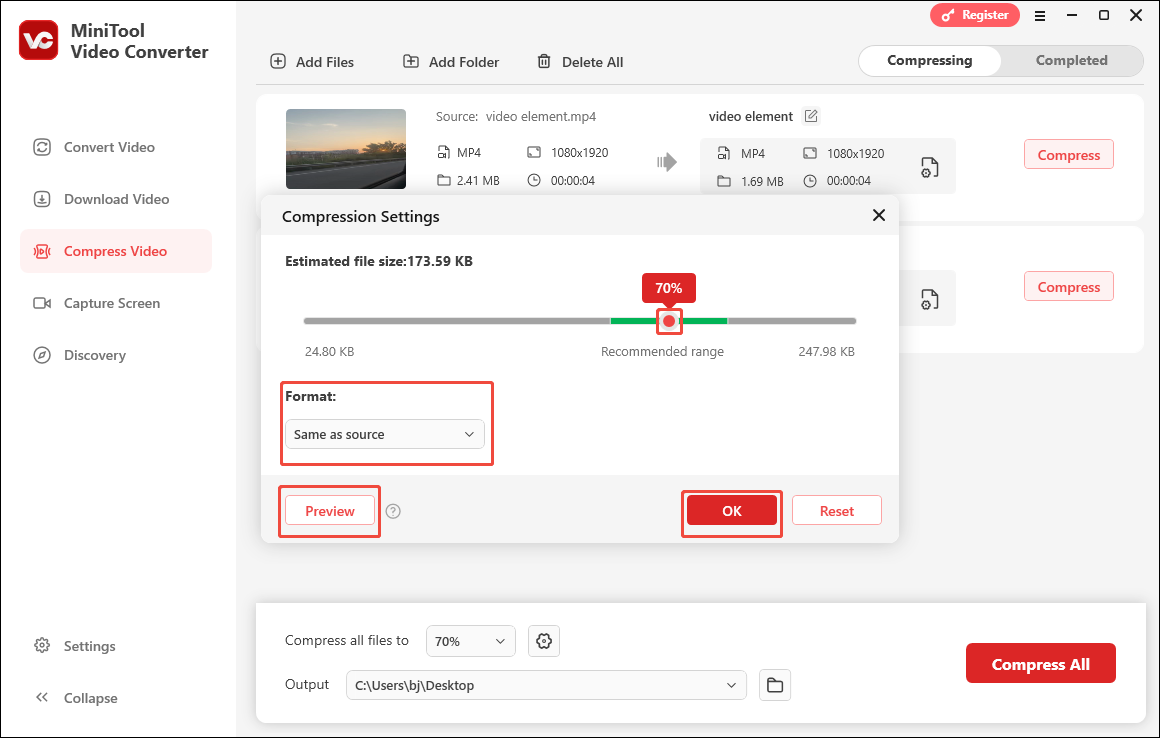
Click on the Settings icon to enter the Compression Settings window.
In the Compression Settings window, you will see a recommended compression percentage. If you don’t want it, drag the red slider to adjust the output file size based on your needs. Then, expand the Format option and select the desired output format. To check whether the compression level is appropriate, click on the Preview button. Then, click on OK to save the changes.
Step 4. Choose a saving path.
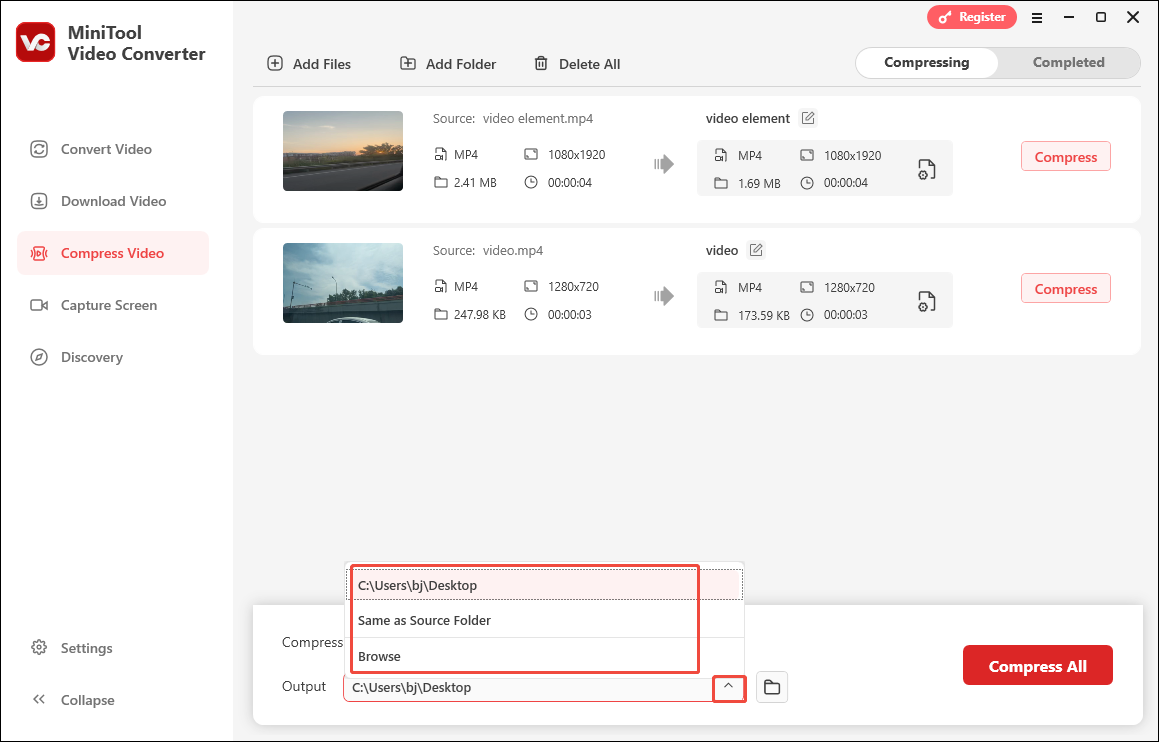
Expand the bottom Output option and choose a destination folder for the compressed Flickr videos.
Step 5. Start compression.
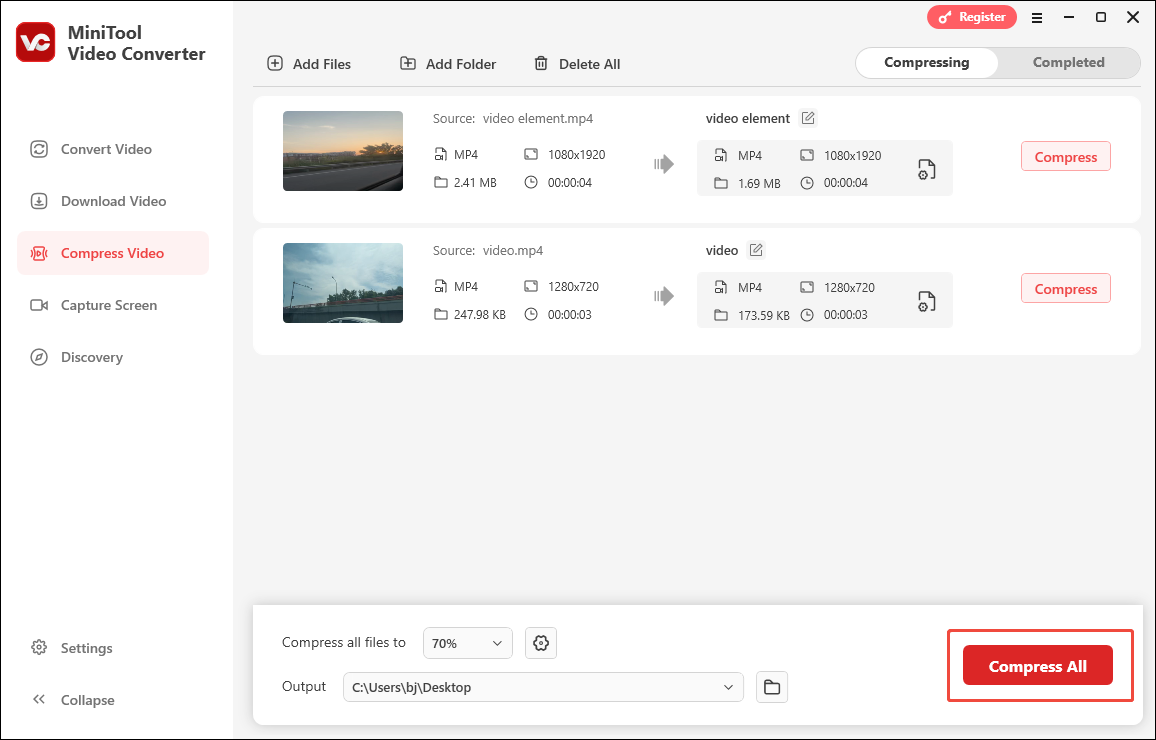
Click on the bottom-right Compress All button to begin the compression process.
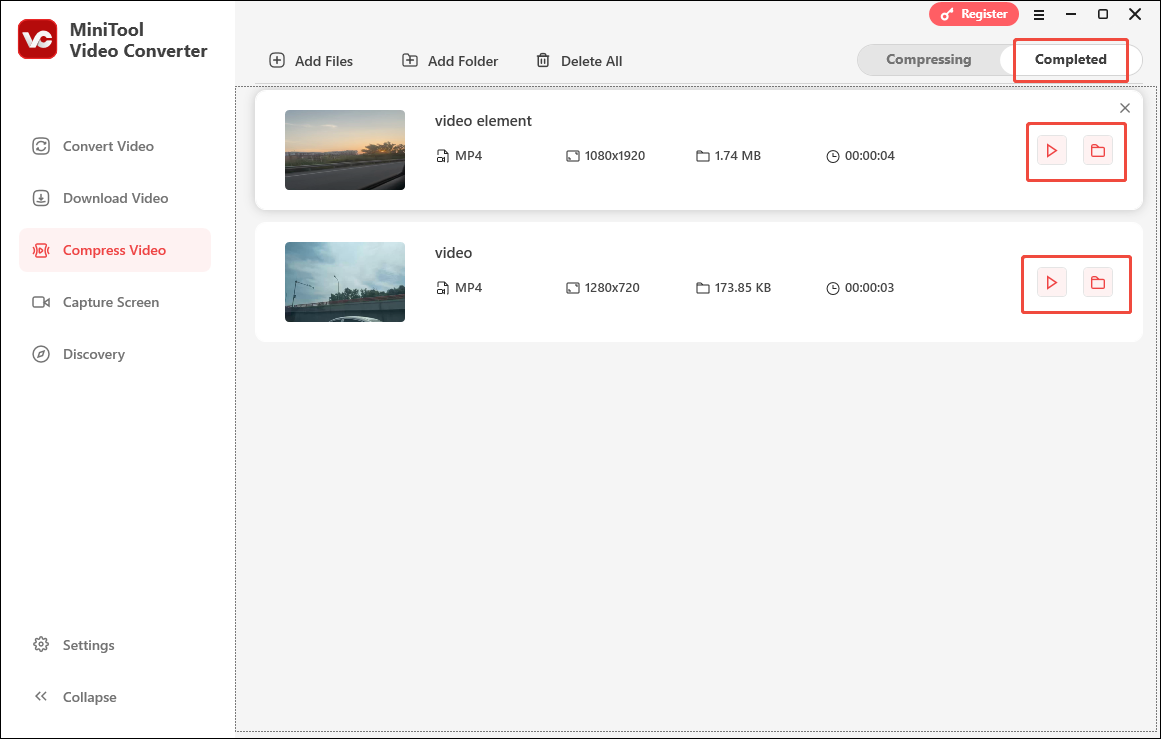
Step 6. Check the compressed videos.
When the file compression ends, this video compressor will switch to the Completed section. There, click on the Folder icon to locate the output files. If you want to directly view them, click on the Play icon.
What to do if you want to convert the compressed videos to more video/audio formats? MiniTool Video Converter, as a free video converter, can also help.
How to Convert Compressed Videos to Other Formats
Below is a step-by-step tutorial on how to get other formats from your compressed videos.
Step 1. Upload the compressed videos.
Go to MiniTool Video Converter’s Convert Video module. There, import the compressed videos by clicking on the Add Files option.
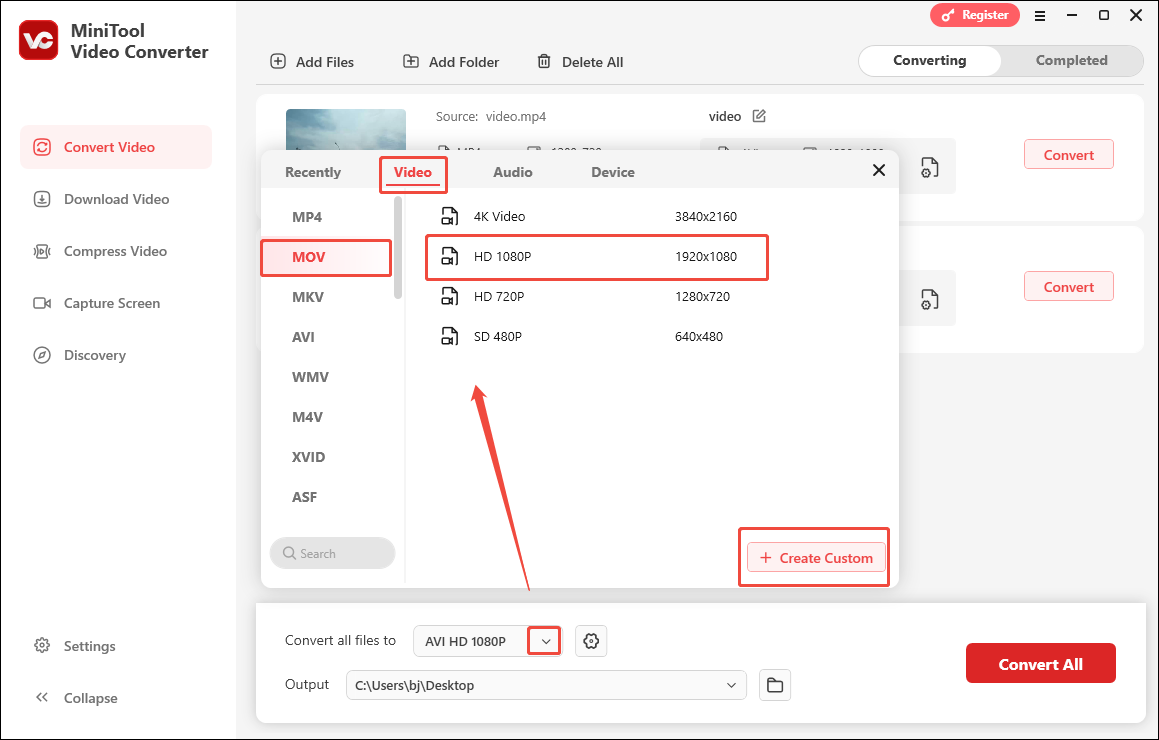
Step 2. Set an output format.
Expand the Convert all files to option to access the output format window. There, switch to the Video or Audio tab. Then, choose the format you want. Here, I select MOV HD 1080P.

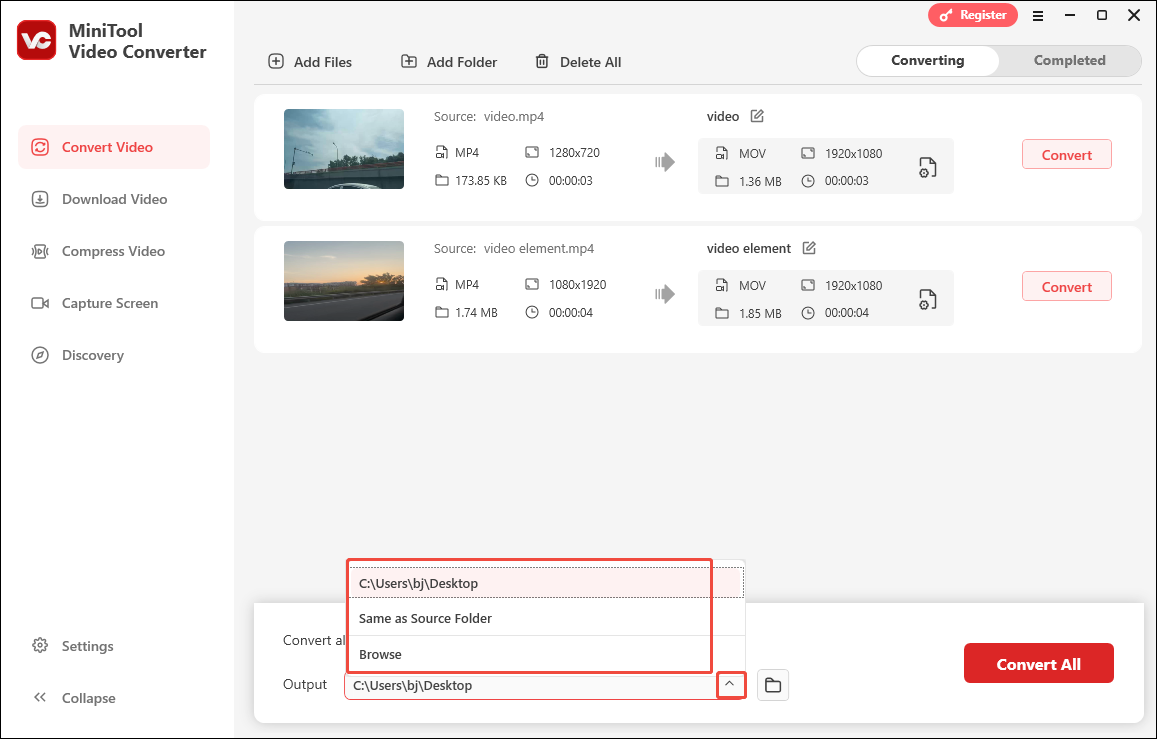
Step 3. Select an output folder.
Expand the Output option to choose an output folder for the converted files.
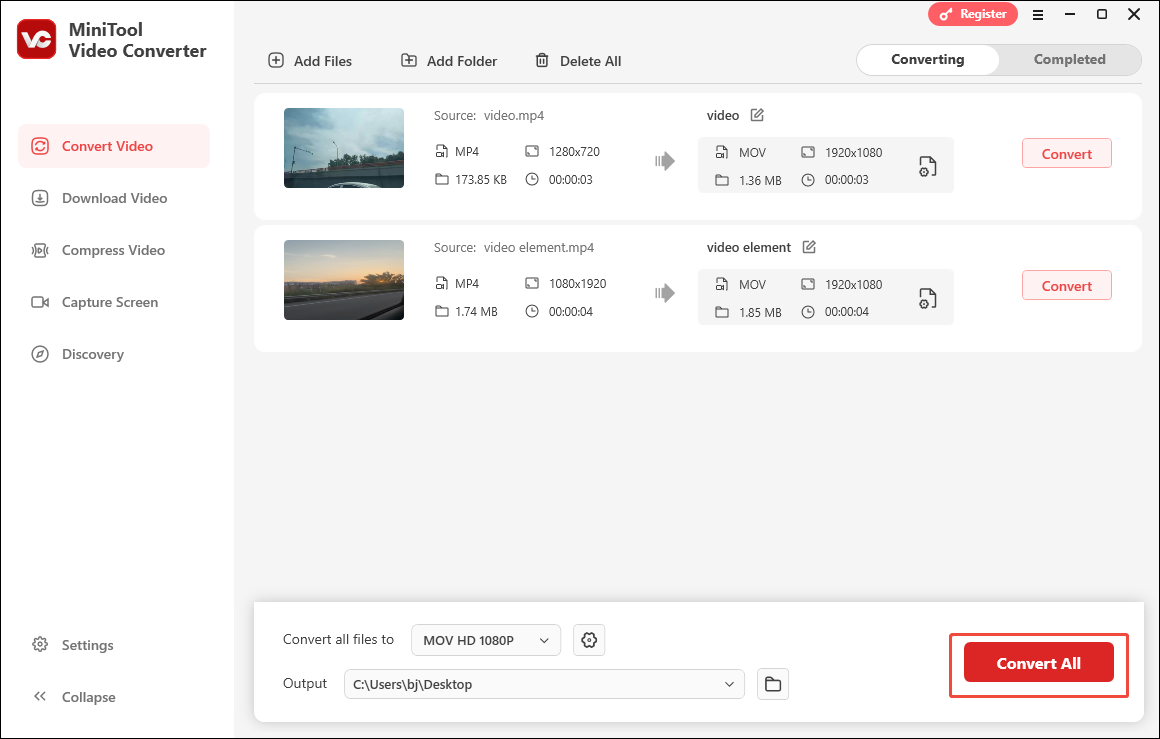
Step 4. Commence compression.
Click on the Convert All button to initiate the conversion process.
Step 5. Locate and view the output files
When the file conversion completes, this file converter will automatically switch to the Completed section. There, view the converted files by clicking on the Play icon. To locate the output files, click on the Folder icon.
More surprisingly, MiniTool Video Converter is more than a file compressor and file converter. It can also help you in two other aspects, watermark-free screen recording and video downloading.
Method 2. Use MiniTool MovieMaker (Offline)
The second video compressor for Flickr is MiniTool MovieMaker.
What Makes MiniTool MovieMaker a Good Video Compressor
MiniTool MovieMaker allows you to compress Flickr videos by changing various parameters, like the video format, frame rate, bitrate, and resolution. In addition, its well-organized interface makes MiniTool MovieMaker very easy to use for newbies.
How to Compress Flickr Videos with MiniTool MovieMaker
Below are the detailed steps to break the Flickr video size limit with MiniTool MovieMaker.
Step 1. Get MiniTool MovieMaker.
Click on the download button below to download and install MiniTool MovieMaker on your Windows computer. Then, run this video compressor for Flickr.
MiniTool MovieMakerClick to Download100%Clean & Safe
Step 2. Import your Flickr video.
After closing the promotion window, click on the Import Media Files region to import your Flickr video.
Step 3. Add the video to the timeline.
Drag the Flickr video to the timeline.
Step 4. Configure the output settings and begin compression.
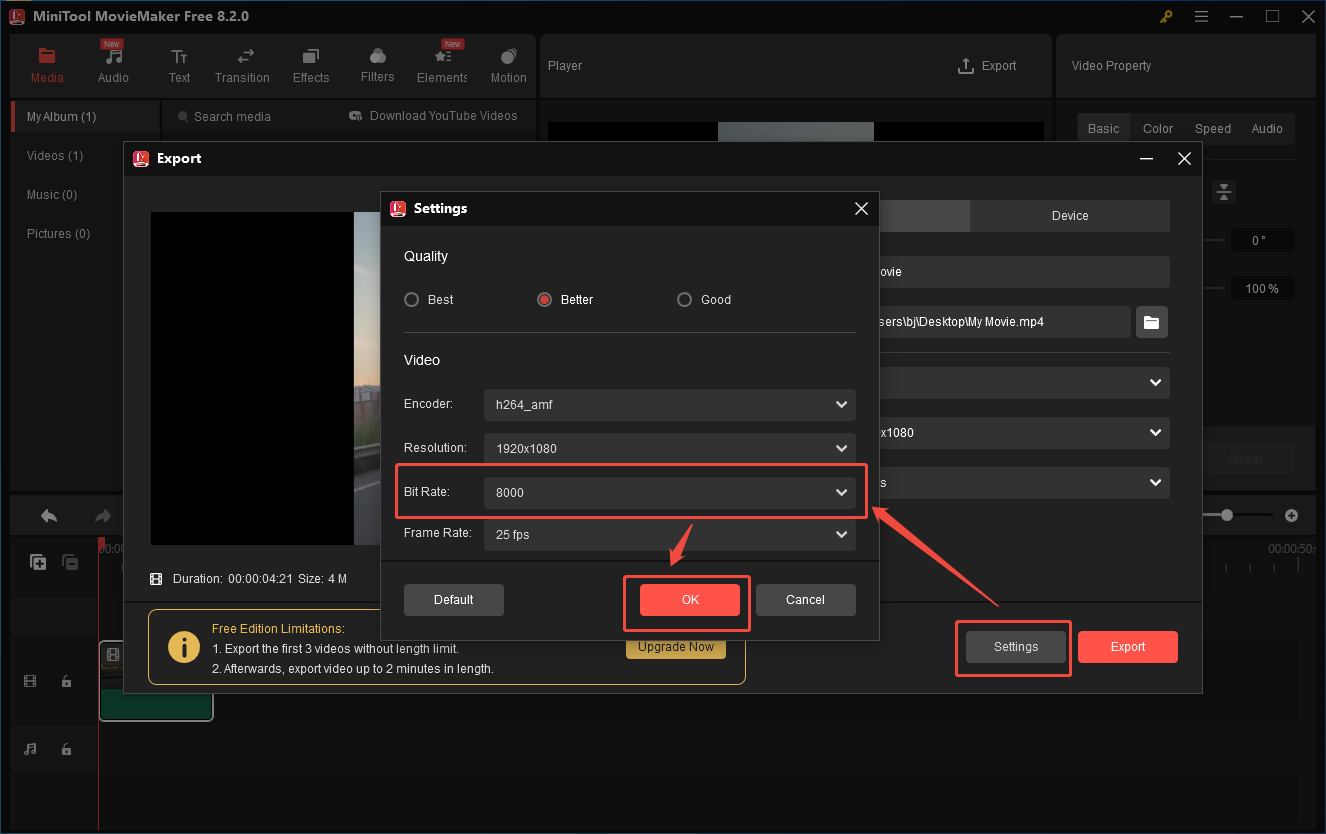
Click on the Export icon at the top right of the Player window to enter the Export window. There, you are free to choose an output location for the compressed file. Then, expand the Format, Resolution, and Frame Rate option to customize the output settings. Finally, click on the Export button to save the compressed video.
To configure the bitrate settings, click on the Settings button in the Export window. There, customize the bitrate and click on OK to save the changes.
Step 5. Check the compressed file.
When the file conversion finishes, click on the Find Target button in the pop-up window to locate the compressed Flickr video.
As you can see, MiniTool MovieMaker is a remarkable video compressor for Flickr.
Method 3. Use FreeConvert (Online)
If you want to break the Flickr video size limit with an online video compressor, FreeConvert can suit your needs. It is a robust tool that enables you to compress various video files, like MP4, AVI, MKV, MOV, and more. In addition, FreeConvert offers you many advanced options to customize the compression settings.
Below is a detailed guide on how to compress videos for Flickr using FreeConvert.
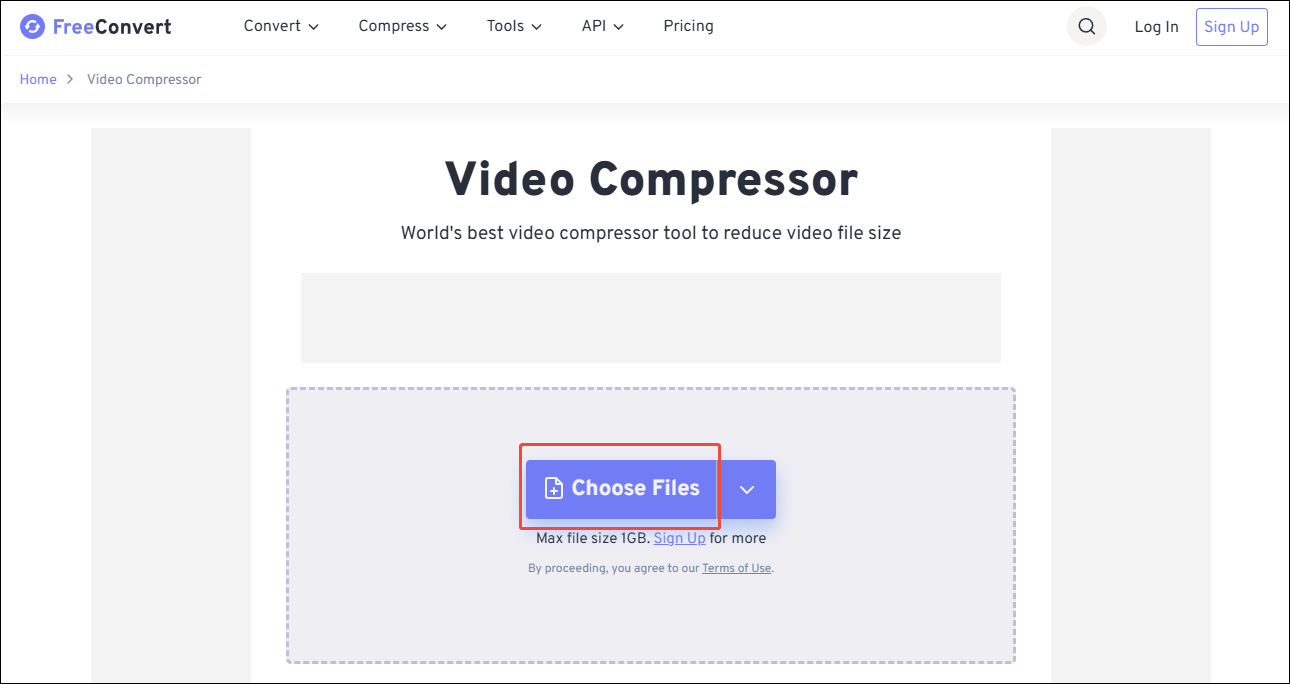
Step 1. Go to FreeConvert Video Compressor.
Go to https://www.freeconvert.com/video-compressor.
Step 2. Import your Flickr videos.
Click on the Choose Files button to upload your Flickr videos.
Step 3. Configure the compression settings.
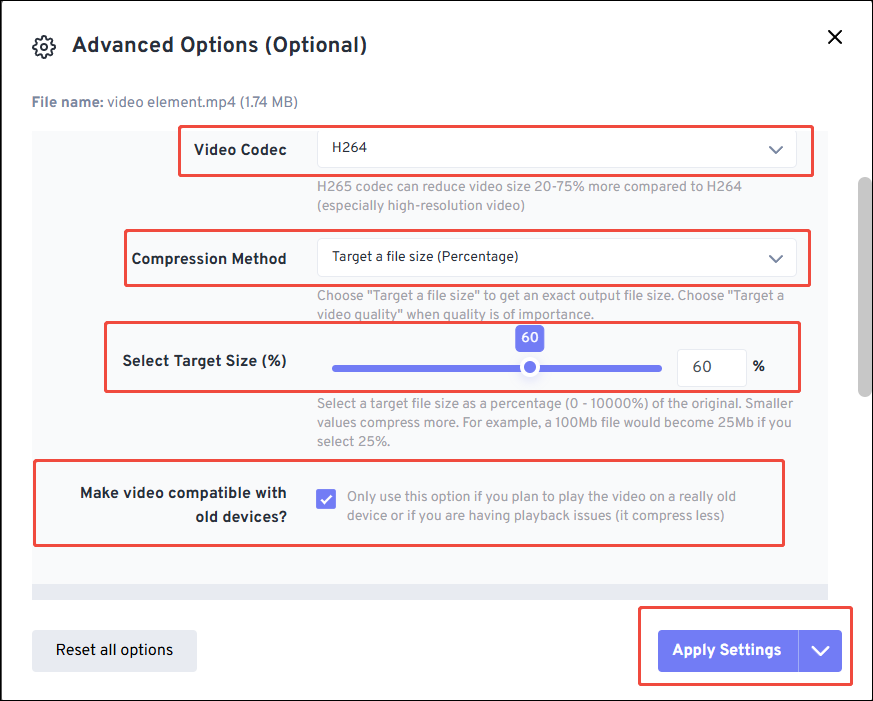
Once these videos are uploaded, enter the Advanced Options (Optional) window by clicking on the gear icon.
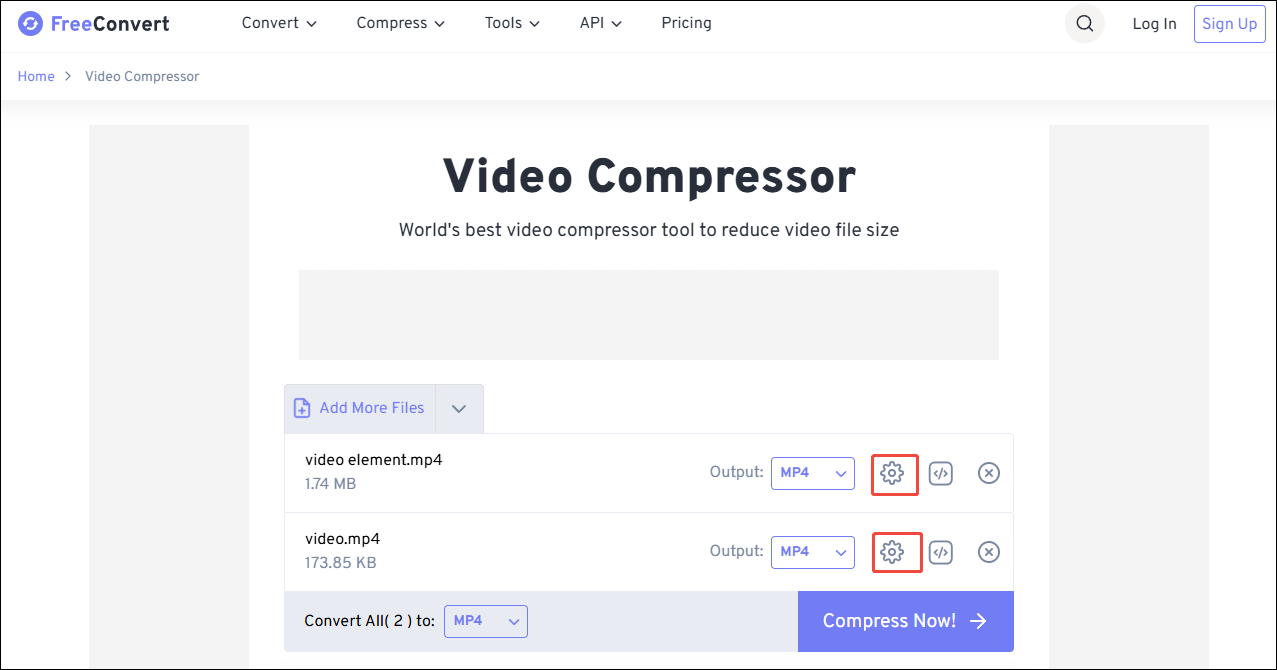
In the pop-up window, you can customize the video codec, compression method, and output file size. Also, you are free to make the compressed videos compatible with old devices. Finally, click on the Apply Settings button to save the changes you have made.
Step 4. Start compression and check the compressed files.
Commence the compression process by clicking on the Compress Now button. When the file compression ends, click on the Download button to download and check the compressed files.
By the way, FreeConvert has a 1GB file size limit for free users. To break that limit, you need to pay for the advanced service.
How to Break the Video Size Limit with a Video Editor
Although the video compressors help you break the Flickr video size limit, the video quality may also be decreased. Fortunately, with a video editor, you can handle the Flickr video upload size limit without losing video quality. Just follow the tutorial below to do that.
MiniTool MovieMakerClick to Download100%Clean & Safe
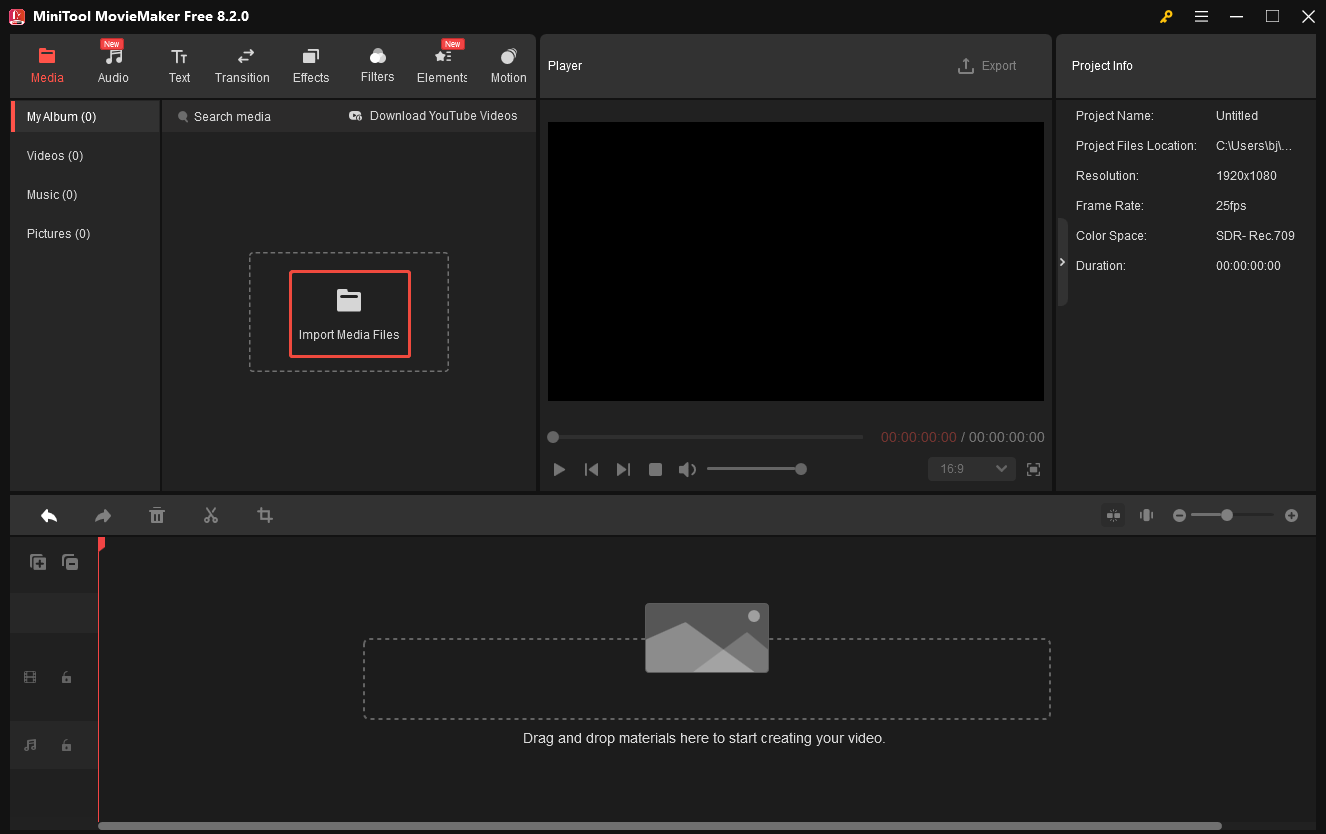
Step 1. Download and install MiniTool MovieMaker
Click on the download button above to download and install MiniTool MovieMaker on your PC. Then, open it.
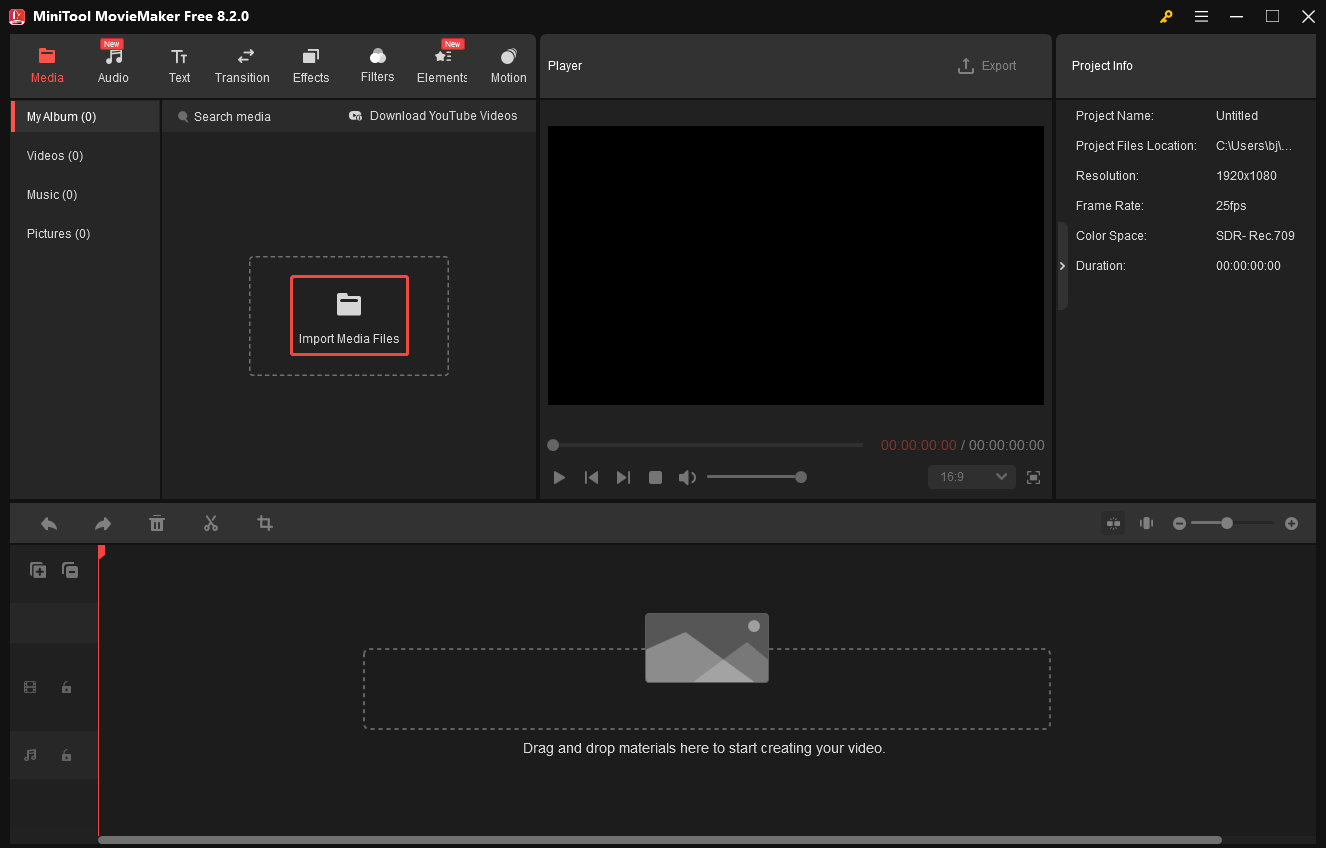
Step 2. Import your Flickr video.
Click on New Project to enter its main interface. There, click on the Import Media Files area to upload your Flickr video.
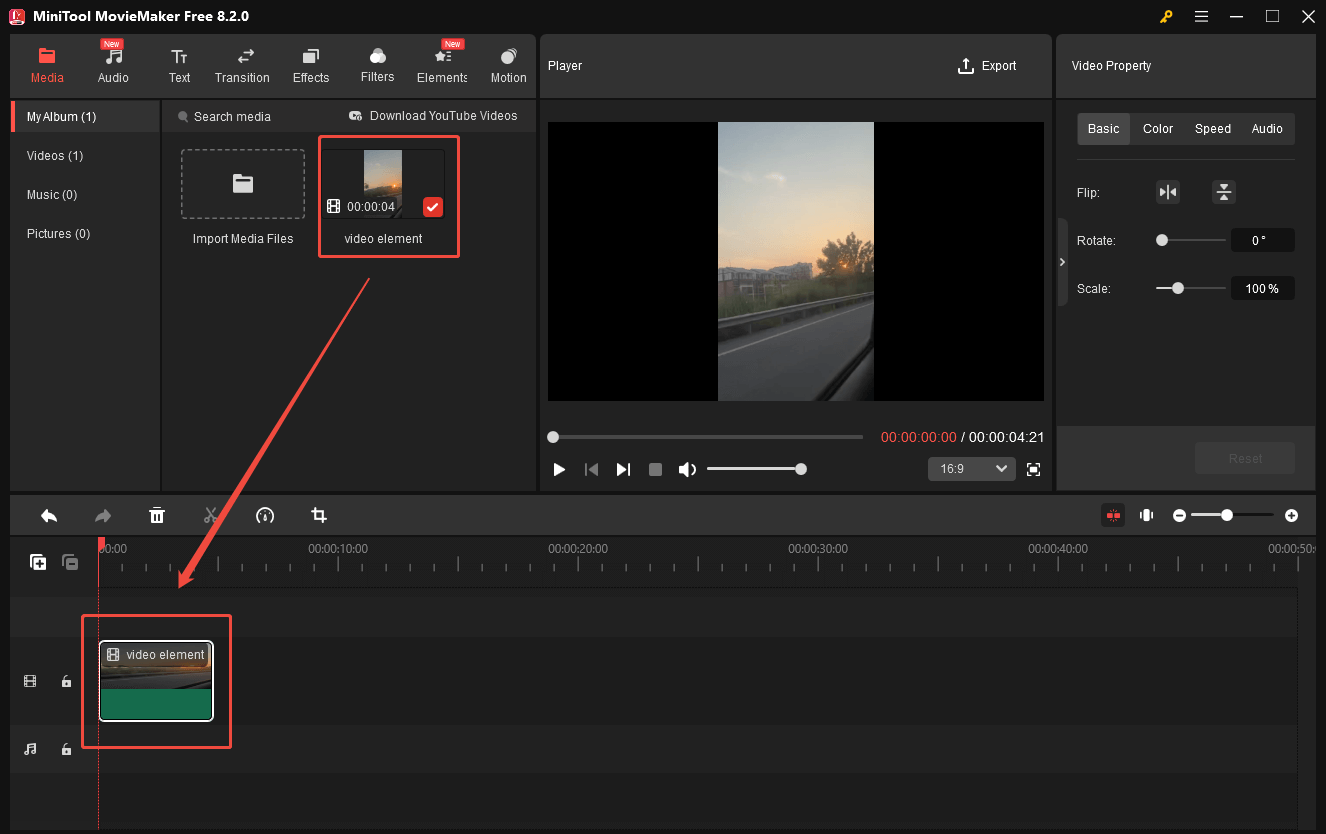
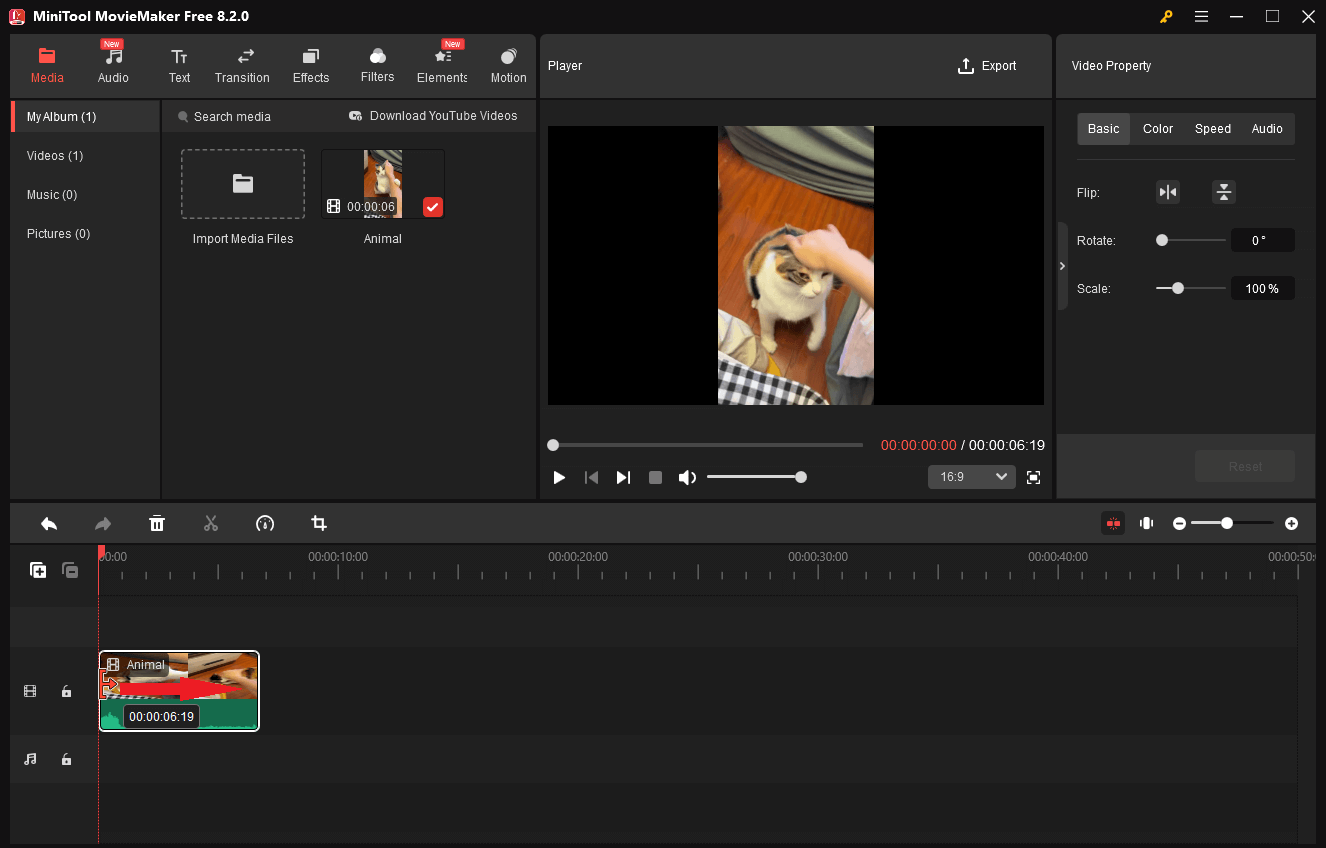
Step 3. Edit your Flickr video.
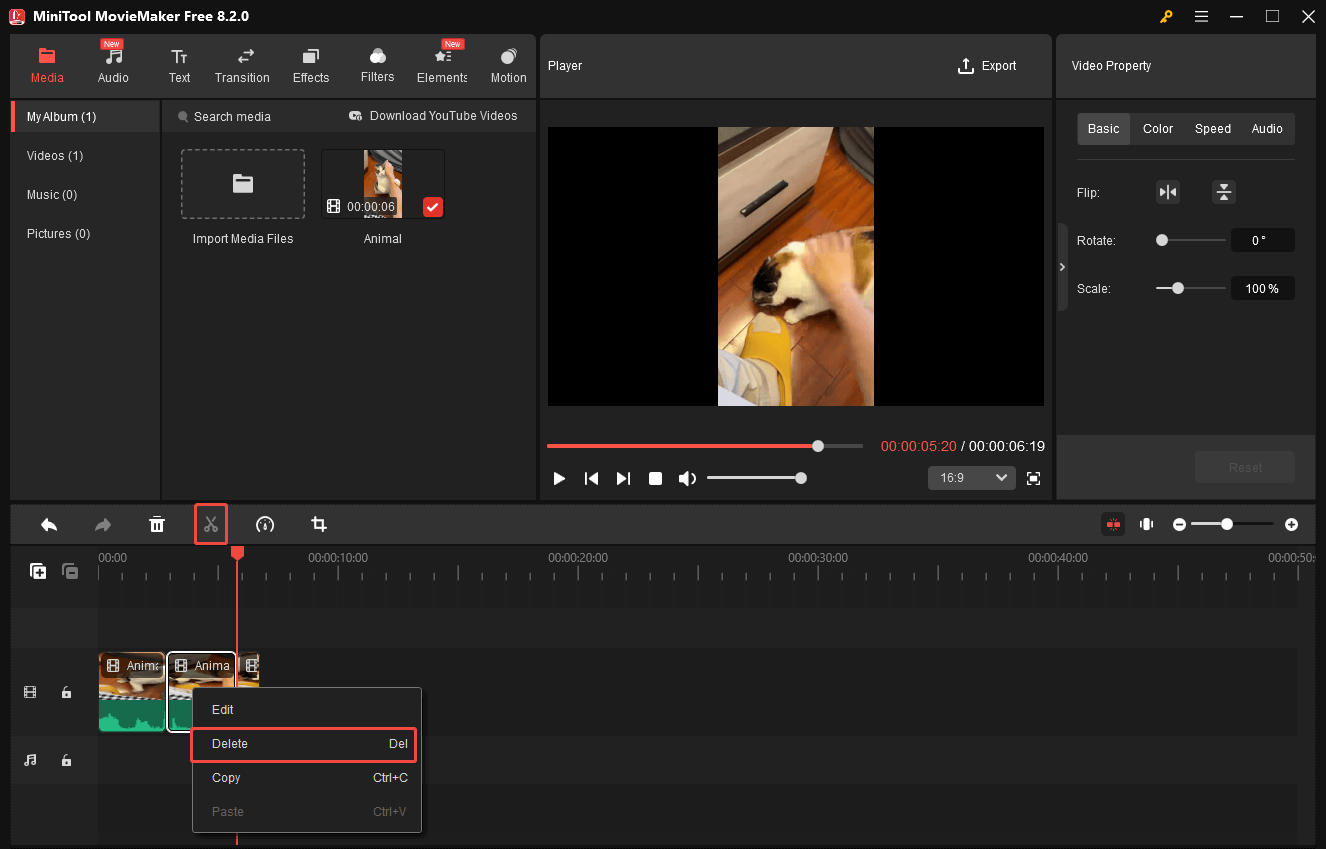
Drag your video to the timeline below. Then, move the mouse to the beginning/end of the video clip. You will see an arrow appear. Next, remove the unwanted part by dragging the arrow rightwards/leftwards.
If you want to remove the middle part from the video clip, drag the playhead to the start of the unwanted part. Then, split the video clip by clicking on the scissors icon. Next, move the playhead to the end of the unwanted part and click on the scissors icon again. After that, select the unwanted clip, right-click on it, and choose Delete.
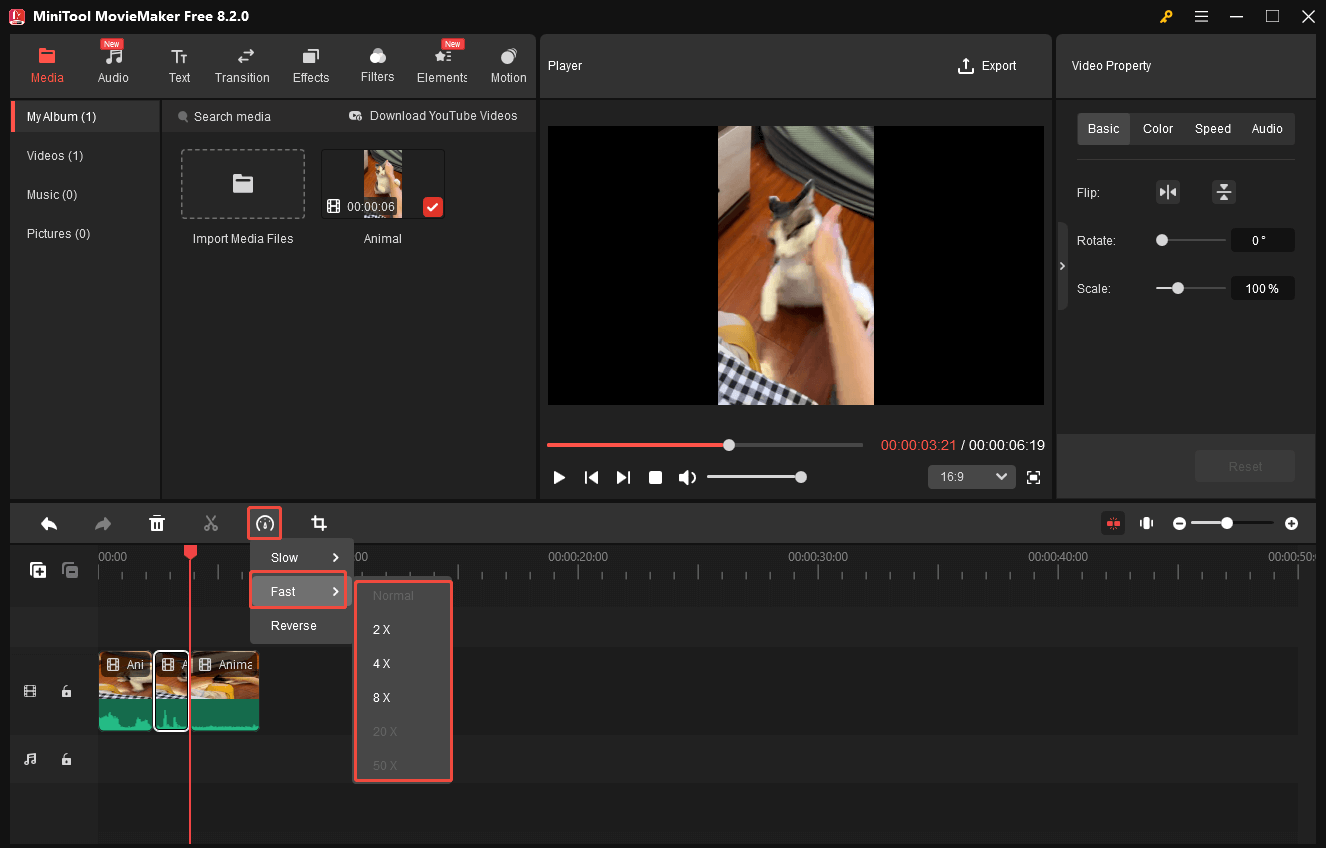
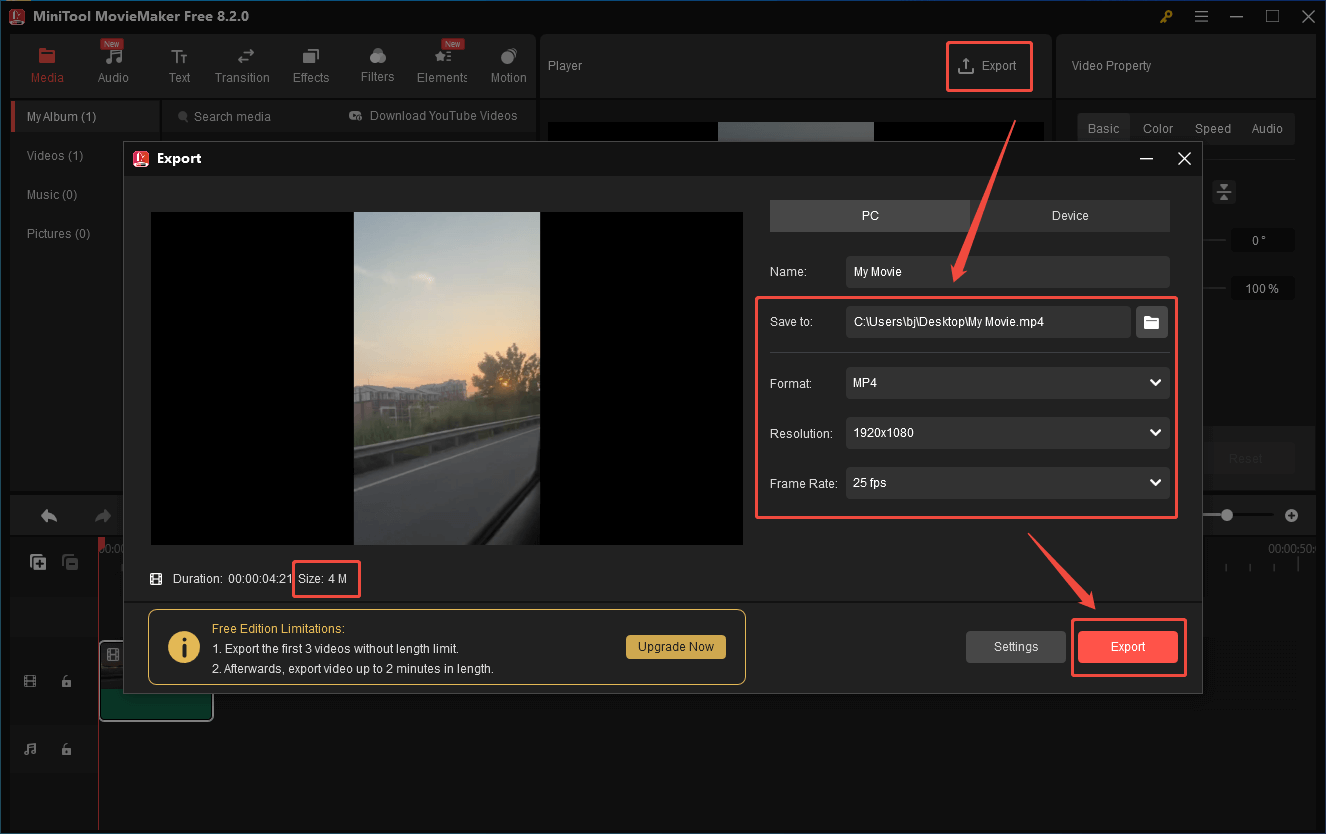
Step 4. Start compression.
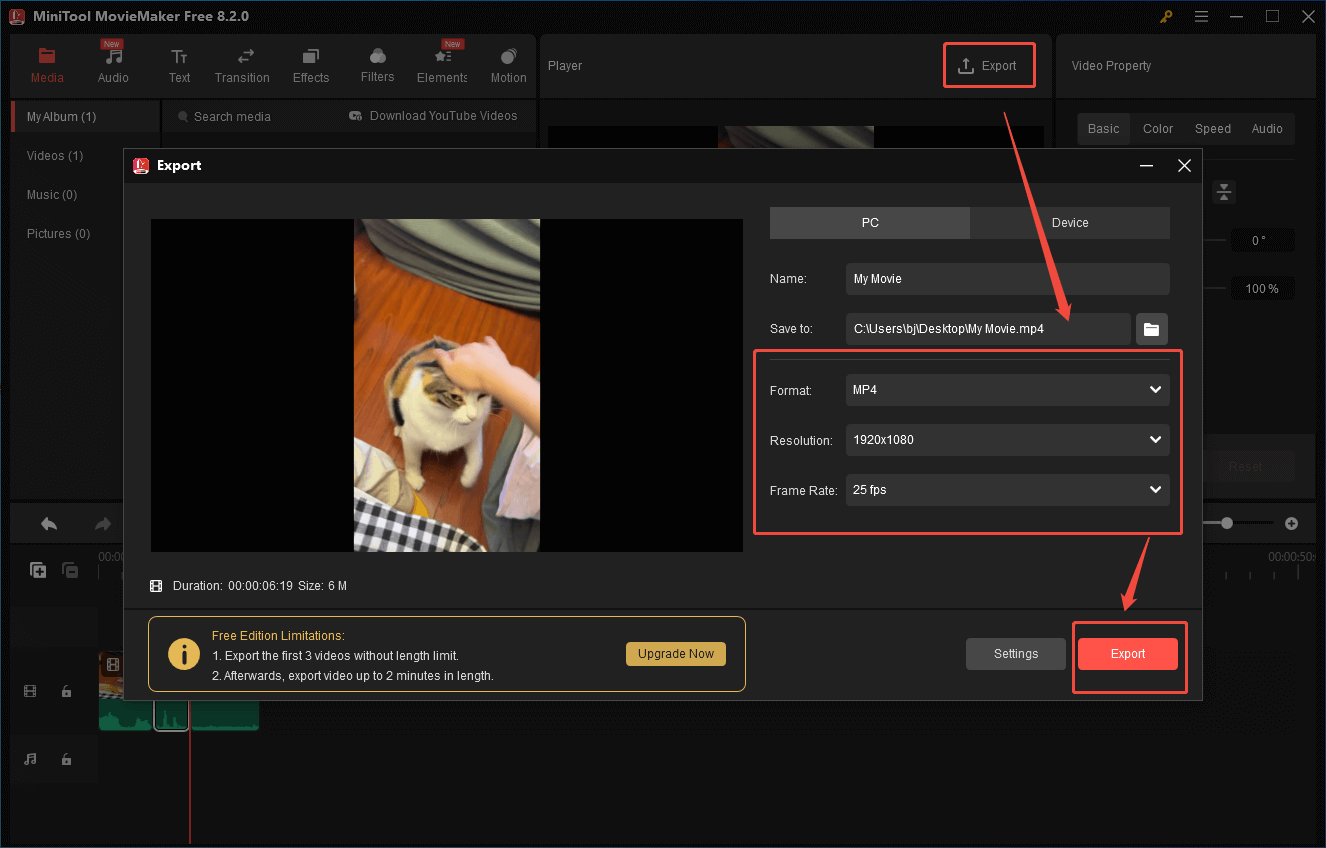
Click on the upper-right Export icon to enter the Export Window. There, choose a destination folder for the output file. To avoid video quality loss, it is suggested that you keep the original video format, resolution, and frame rate. Then, click on the Export button to save the compressed video.
Step 5. Locate the compressed file.
When the video exporting ends, click on the Find Target button to locate and check the output video.
In short, MiniTool MovieMaker is a feature-rich tool that enables you to break the Flickr video size limit effortlessly.
How to Break the Video Size Limit with Cloud Storage Services
Another method to bypass the Flickr video size limit is to directly share the video link on Flickr. To do that, a robust cloud storage service is indispensable. There are various cloud storage services that you can choose from, including Google Drive, OneDrive, Dropbox, and more.
Here, I will show you how to share a video from Google Drive to Flickr step by step.
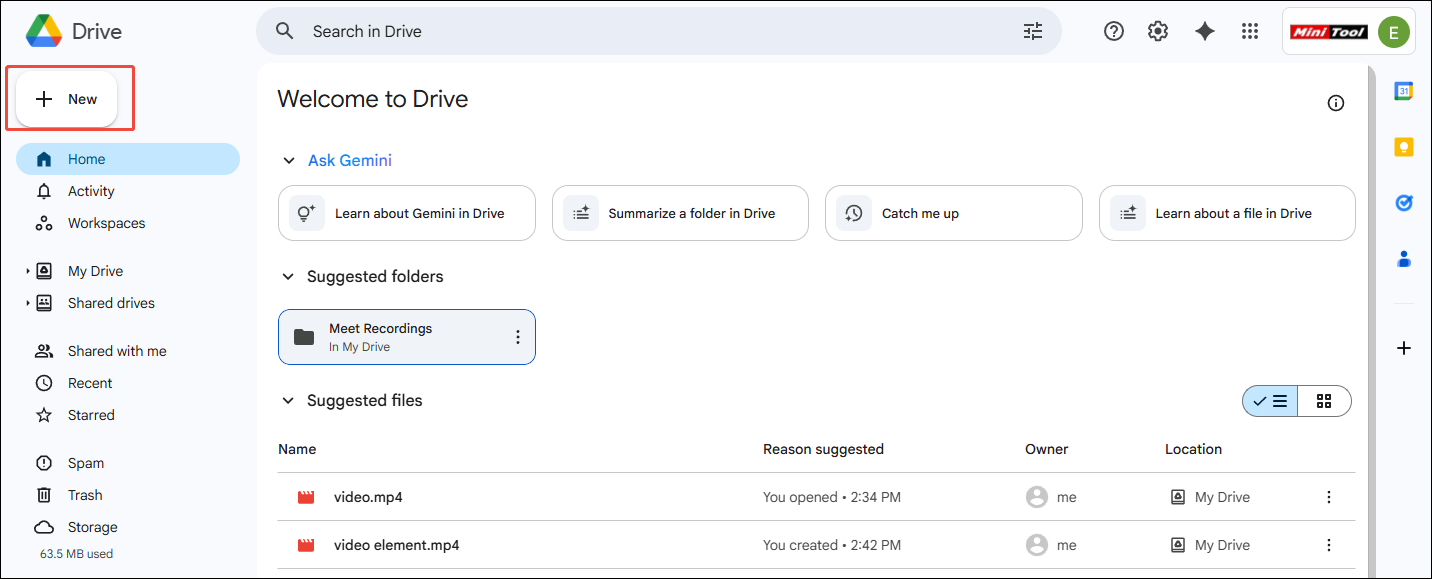
Step 1. Go to Google Drive and log in to your account.
Step 2. Click on the upper-left New option to expand the option menu.
Step 3. Choose File upload to upload the Flickr video.
Step 4. As a pop-up window appears at the bottom-right corner, click on the Folder icon to locate it.
Step 5. Select the Flickr video. Then, click on the paperclip icon to copy the video link.
Step 6. Paste the video link to Flickr and share it with others.
With the above-detailed steps, it will never be difficult for you to deal with the Flickr video size limit.
To Wrap Things Up
How to avoid the 1GB Flickr video size limit? File Compressors can help. If you trust offline compressors more, try MiniTool Video Converter or MiniTool MovieMaker. On condition that you prefer an online file compressor, try FreeConvert.
If you want to bypass the Flickr video upload size limit without losing quality, you can use MiniTool MovieMaker to trim your video or speed it up. Also, it is workable to share a video on Flickr via links.
If you are bothered by any problems when using MiniTool Video Converter or MiniTool MovieMaker, please ask for help by contacting the MiniTool Team via support@minitool.com. You can also directly send me a message on X. I will help you as quickly as possible.
About The Author

Position: Columnist
With over 6 years of experience as a tech writer, Eien specializes in creating clear, simple guides for video conversion, transcription, screen recording, etc. He stays connected with the tech community and its readers to understand the real-world problems users face. By combining their feedback with his own hands-on testing, Eien always provides proven solutions to complex software problems in time.
User Comments :