Do you want to convert screen recording to MP4? Do you prefer a reliable and easy solution? What operating system are you running? This post written by MiniTool free video converter will teach you different methods to finally get MP4 screen recording videos.
Among so many video file formats, MP4 is the most popular one for its wide compatibility with almost all software operating systems, hardware devices, social media platforms, etc. Besides, MP4 keeps a balance between video quality and file size and compresses digital data at a proper level. Therefore, in common situations, people will always choose MP4 as their video format.
However, there are still some cases when MP4 isn’t the encoding method of video content. Thus, problems may occur when you try to play or transfer these videos. For example, some screen recording apps save their recorded roblox gameplay in their preferred file format like TS, FLV, and HEVC instead of MP4. In such situations, you may need to convert roblox recording to MP4.
How to Convert Screen Recording to MP4?
The most direct way is to rely on a professional screen recording to MP4 converter, which enables you to easily turn your recording videos into MP4 format in a few steps.
According to the operating system you are running, you can refer to one of the following guides.
How to Convert a Screen Recording to MP4 on Windows?
First of all, let’s see the instructions on changing recording videos to MP4 based on Windows OSes. Here, we take the robust and free MiniTool Video Converter for example.
MiniTool Video ConverterClick to Download100%Clean & Safe
Step 1. Download and install MiniTool Video Converter on your Windows PC. Then, open it.
Step 2. Under the Converting subtab of the default Video Convert tab, click Add or Drag files here to start the conversion to upload the target recording videos.
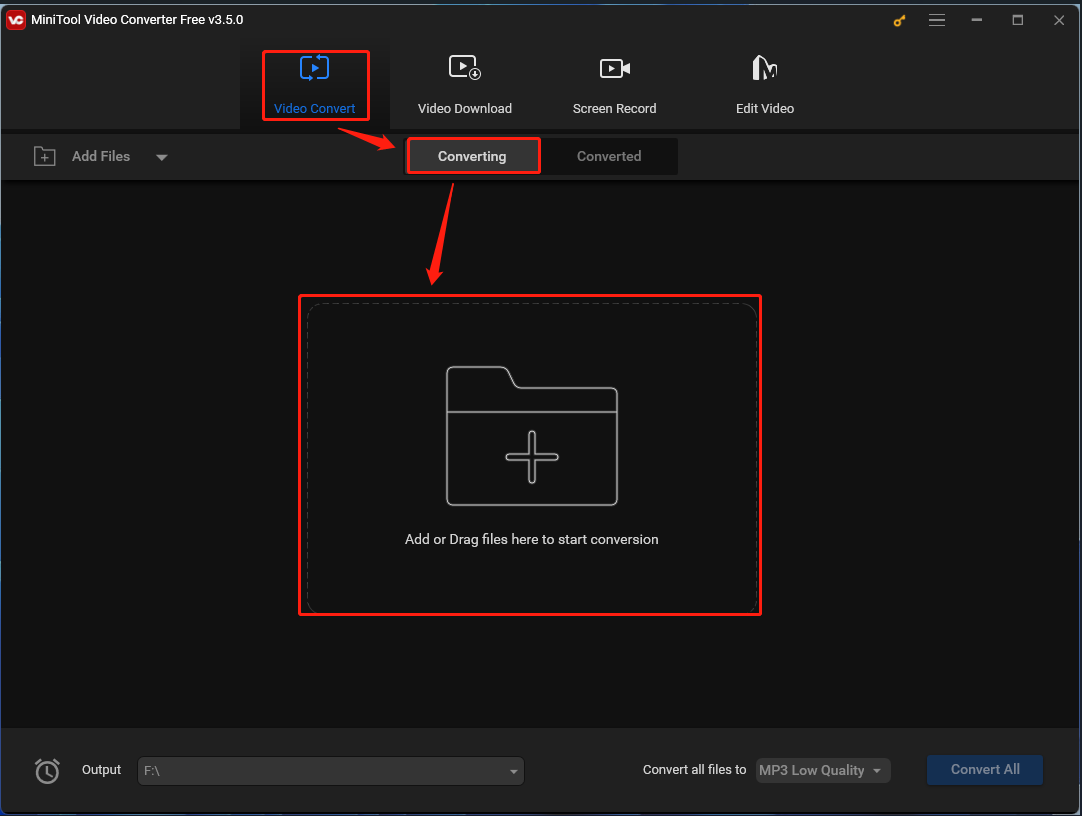
Step 3. It will create tasks for the conversion. Then, expand the Convert all files to option to set up the target format.
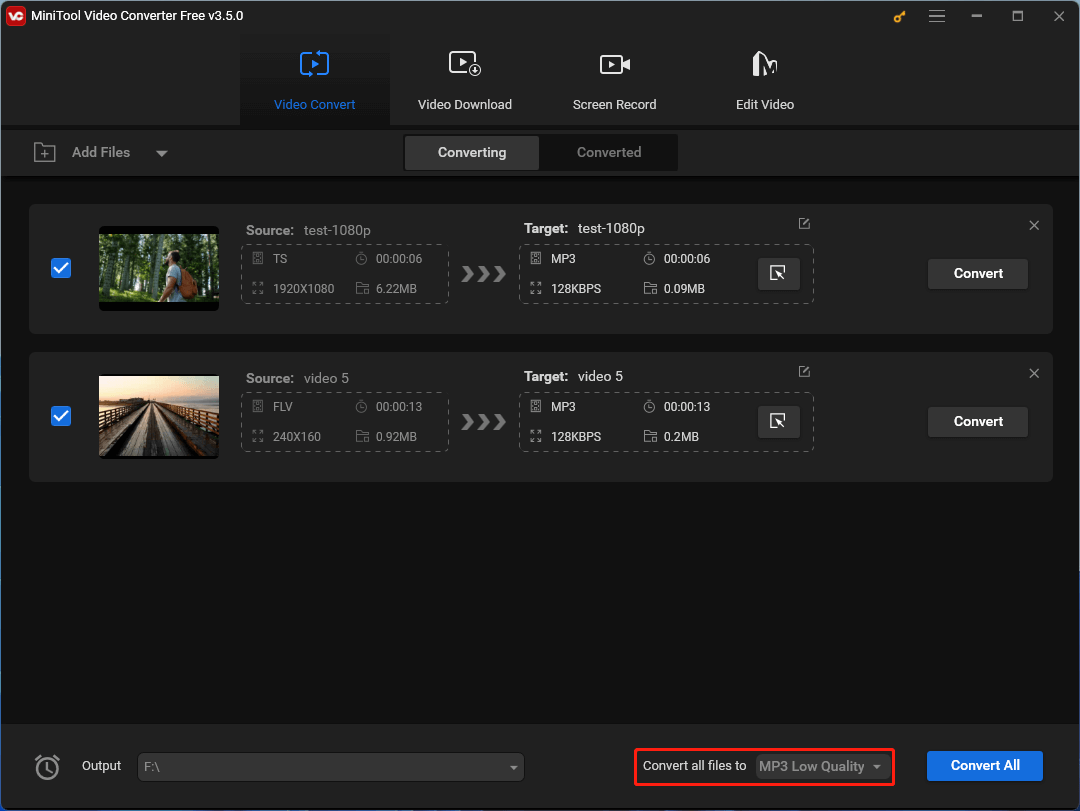
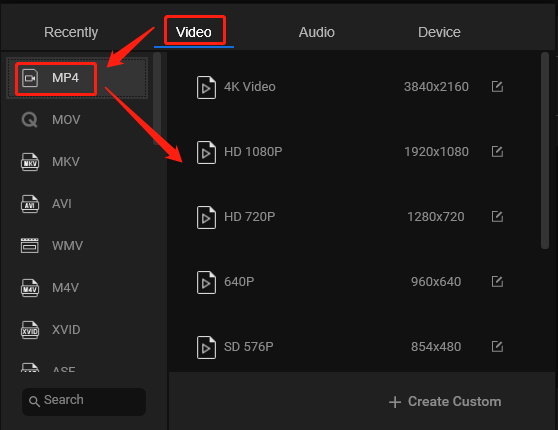
Step 4. In the pop-up window, go to the Video tab, select MP4 from the left panel, and choose a video resolution option from the right section.
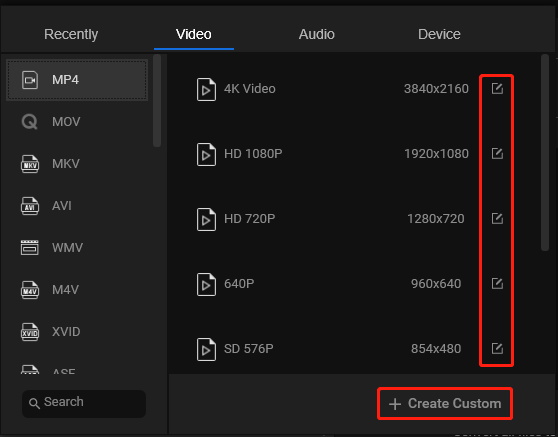
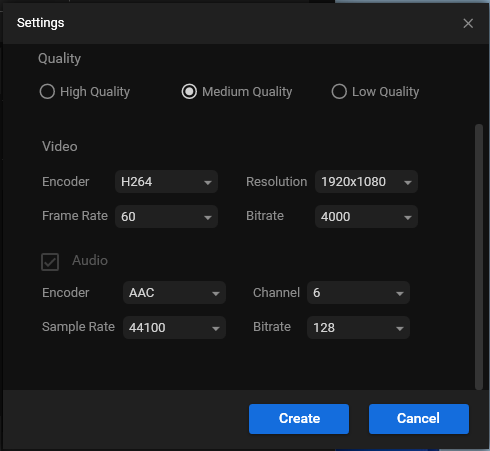
Step 5. If you want a further setup of the target files, click the settings icon for your preferred video format option or just click on the Create Custom option at the bottom right.
Step 6. Next, you are able to specify the video quality, encoder, resolution, frame rate, and bitrate, as well as the embedded audio encoder, channel, sample rate, and bitrate. Once done, click Create to save the settings.
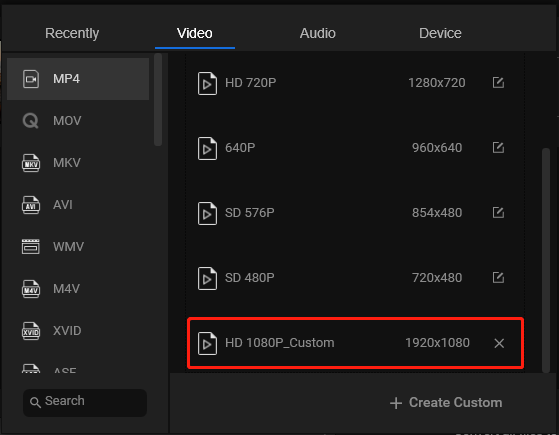
Step 7. It will guide you back to the previous popup. There, scroll down the MP4 video resolution option list, find your personalized option, and choose it.
Step 8. Next, you will be redirected to the main interface. There, continue to unfold the Output option to pick up a location to save the converted files.
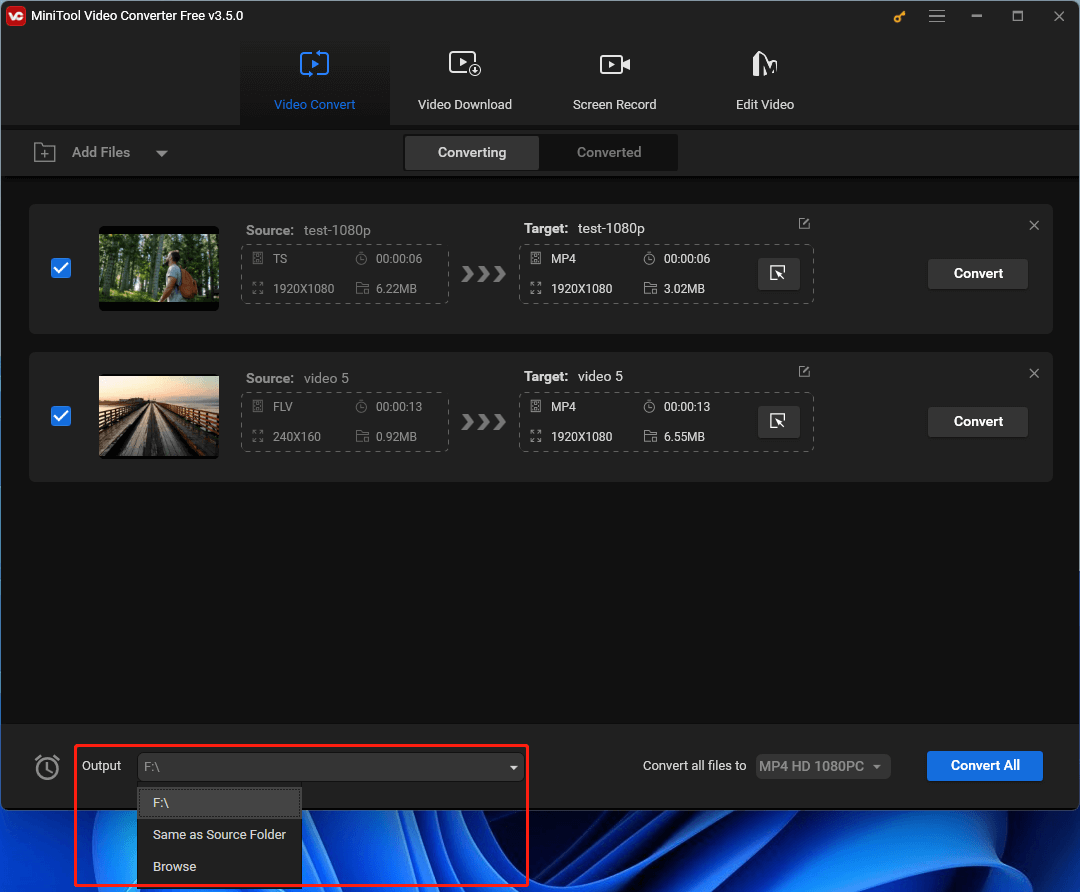
Step 9. Finally, click the Convert All button to start the conversion immediately!
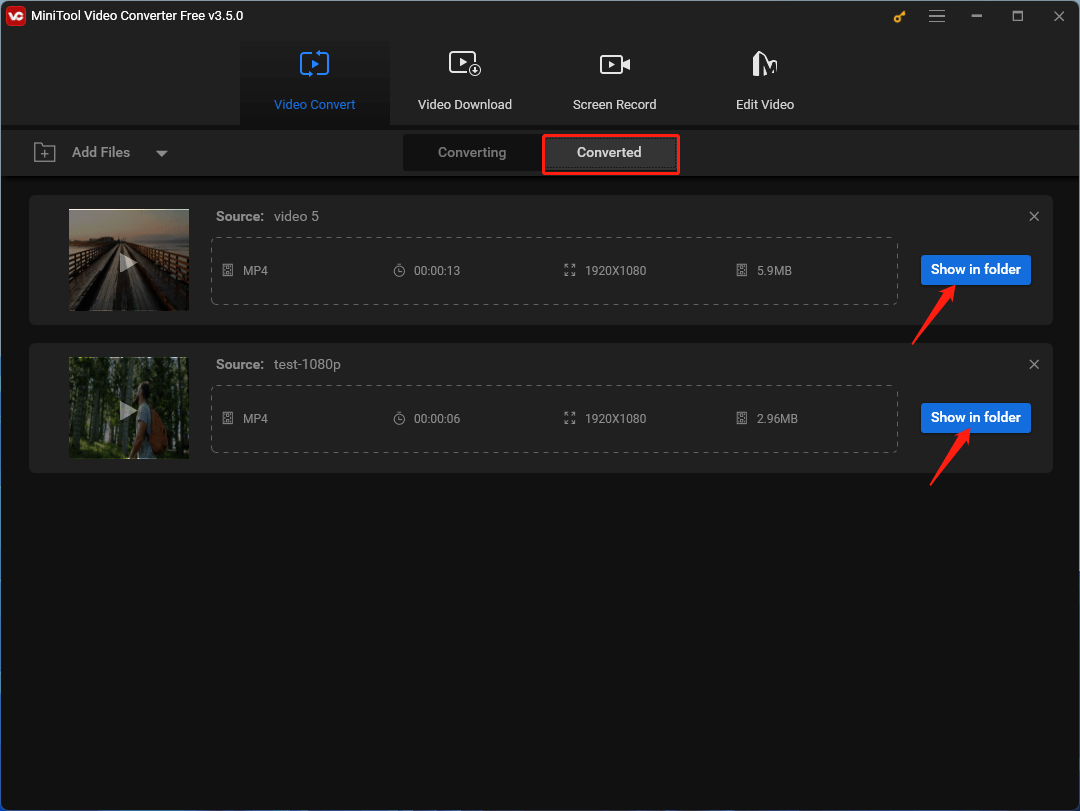
Step 10. Once finished, move to the Converted subtab. There, you can click the Show in folder buttons to navigate to where the converted videos are saved. Of course, you can directly go to the destination if you remember where it is.
In addition to videos, MiniTool Video Converter also enables you to convert audio from one format to another. Conversion between video formats and audio formats is also possible!
How to Convert Mac Screen Recording to MP4?
Secondly, we will talk about how to convert screen recording to MP4 on Mac with VLC media player.
Step 1. Download, install, and launch VLC media player on your Mac computer.
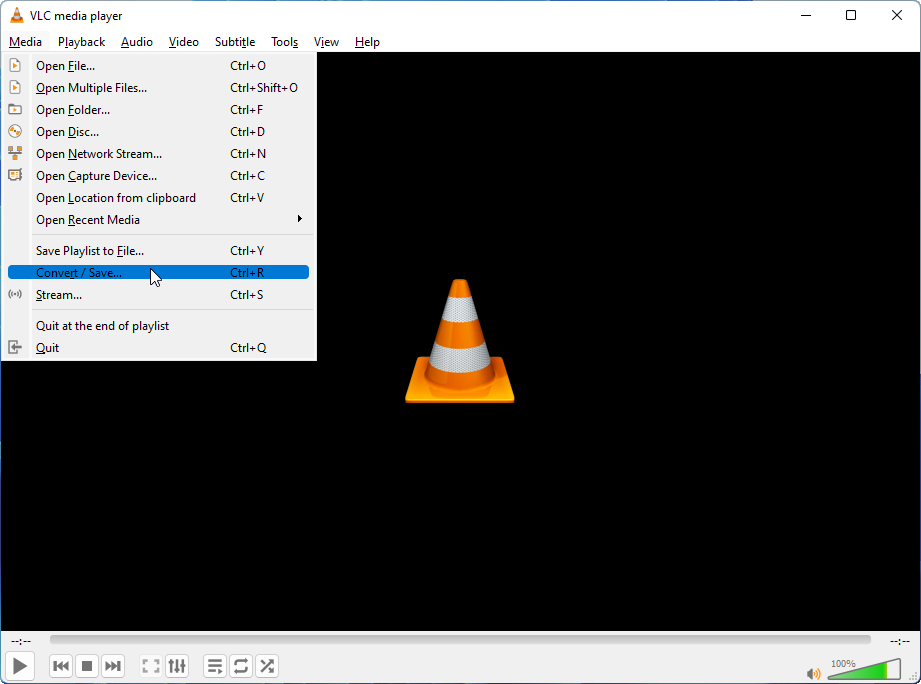
Step 2. Click on Media from the top left and choose Convert/Save in the drop-down list.
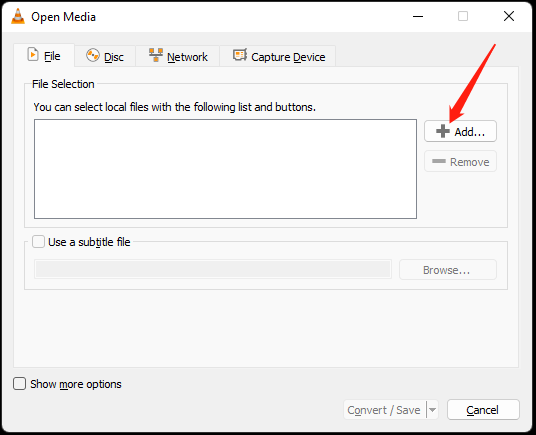
Step 3. In the new window, click the Add button to upload your recording videos.
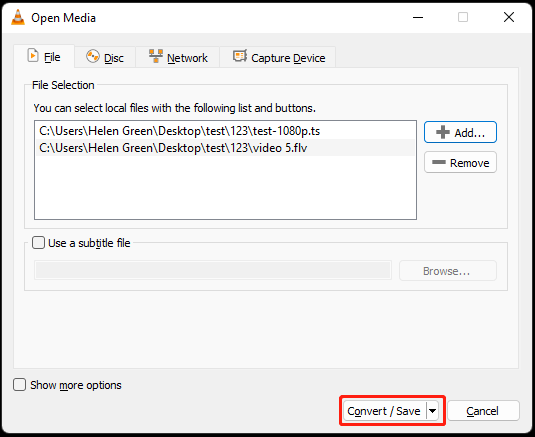
Step 4. Then, click the Convert/Save button to go on.
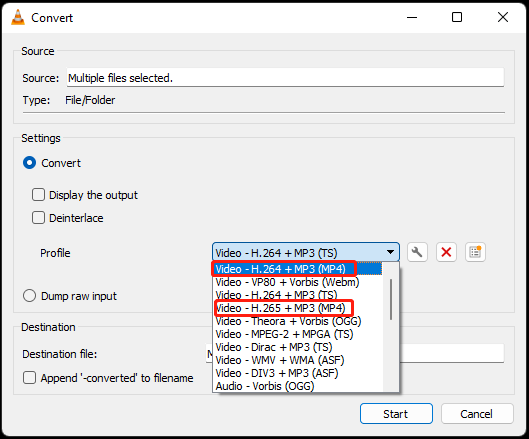
Step 5. Next, expand the output format options and choose a proper MP4 format. Make other choices according to your needs.
Step 6. Finally, click the Start button.
When the converting process is completed, you will find the converted MP4 videos from the location where the source media files are saved.
Until here, you may wonder why not directly record videos in MP4 formats. Of course, you can!
How to Save Screen Recording as MP4?
Although the conversion from other formats of screen recording to MP4 is simple, it still needs some work. Therefore, the most convenient way is to directly screen record to MP4. There are many screen recorders that support export videos in MP4 including MiniTool Video Converter. Yes, MiniTool Video Converter is not only a screen record to MP4 converter but also a direct MP4 recorder.
Let’s have a look at how to capture PC screen activities and save the video in MP4 format.
MiniTool Video ConverterClick to Download100%Clean & Safe
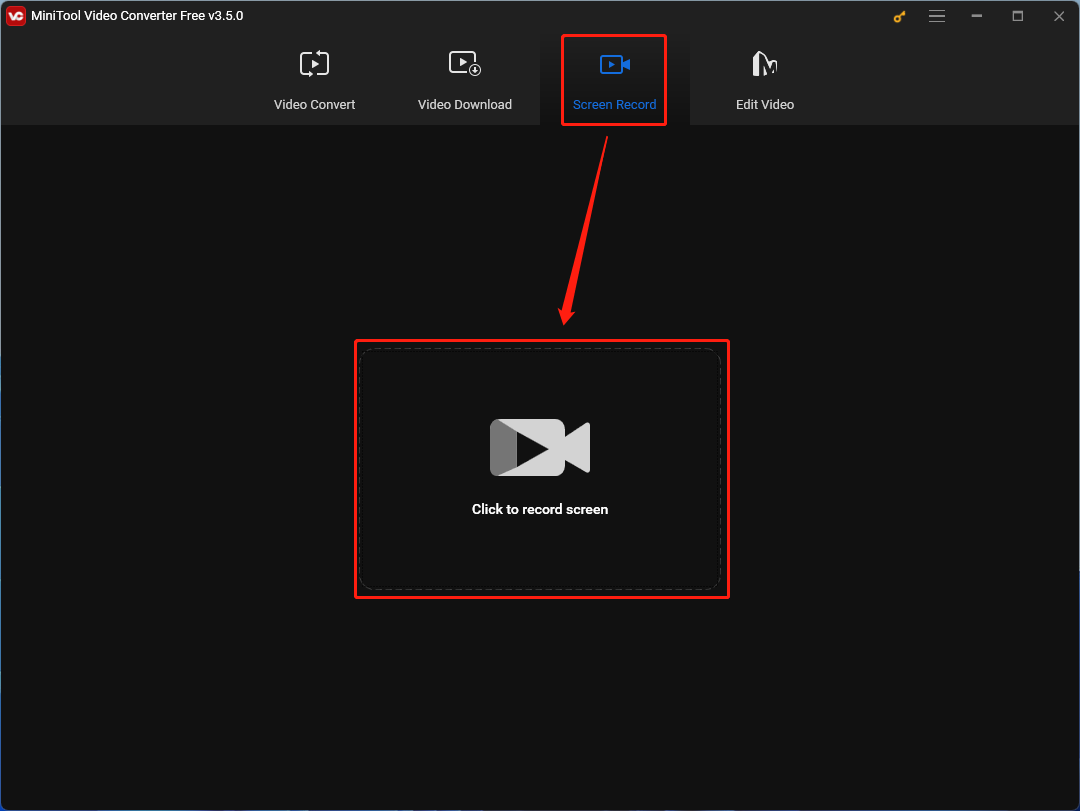
1. After launching MiniTool Video Converter, move to the Screen Record tab from the top menu. Then, click the Click to record screen option.
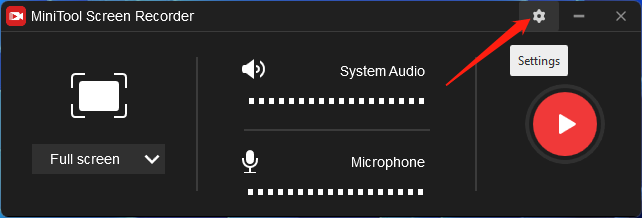
2. Then, specify some recording settings like the recording section and audio recording. Especially, click the Settings icon (cog) in the upper right.
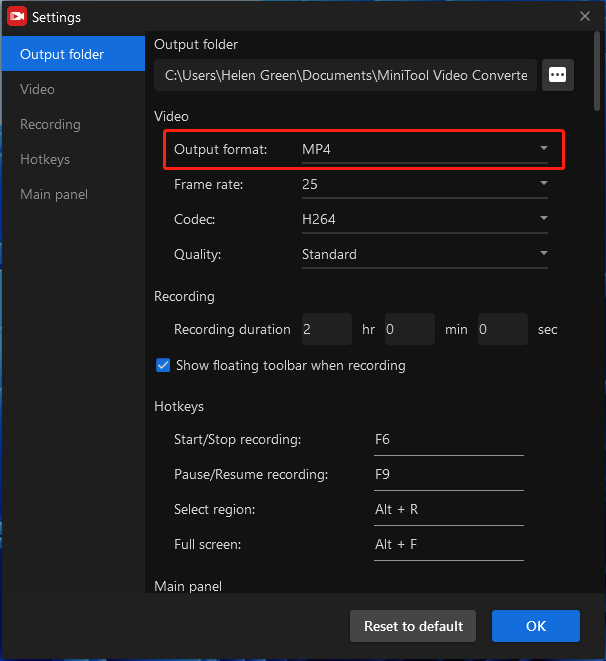
3. Next, you are allowed to do many more configurations for your recording including output folder, output video, and recording hotkeys. Most importantly, you can find the default output video format is set to MP4.
4. After doing all settings, click the big red Record icon to begin recording.
5. Press F6 to stop recording.
Finally, you will get a screen recording video in MP4 file format without any further conversion.
Conclusion
That is all about how to convert screen recording to MP4. If you are a Windows user, you can select MiniTool Video Converter; if you are using Mac devices, you should rely on VLC media player. Or you can choose to directly record in MP4 with MiniTool Video Converter.
If you encounter some problems while using MiniTool Video Converter, please ask help for [email protected].
Also Read



User Comments :