

Large video files can be difficult to store, share, or upload on Windows 11. This post explains how to compress video on Windows 11 with a video compressor, MiniTool Video Converter, as well as trimming the unnecessary parts.
Large files not only consume a significant amount of memory but also load slowly when shared with others or uploaded to other platforms. Compressing the video using a compression tool or trimming out unnecessary parts offers an effective solution.
Why You Need to Compress Video
Compression reduces file size, which means your videos are more manageable when it comes to storage and sharing. In other words, you can compress a video to reduce the file size, thus taking up less disk storage space and requiring lower transmission bandwidth.
Apart from that, sometimes you need to compress a video below a specific MB to send it via social media apps or emails. But how to compress video on Windows 11? This post provides you with several effective tools.
![Watch: How to Compress Audio Files Efficiently [3 Methods]](https://images.minitool.com/videoconvert.minitool.com/images/uploads/2023/08/how-to-compress-audio-files-thumbnail.jpg)
How to Compress a Video on Windows 11 with a Professional Compressor
MiniTool Video Converter comes with a powerful video compression tool that can compress video files without sacrificing quality. You can easily tweak the compression level to get the perfect file size that best suits your needs.
In addition, this application is compatible with almost all video formats, allowing you to quickly compress and convert them to a more compatible format such as MP4, MKV, or WebM. Best of all, MiniTool Video Converter is a free video compressor without watermarks and file size limits and is capable of processing up to 5 videos simultaneously.
Furthermore, in addition to the app's dedicated compression feature, its built-in video cutting tool can also help reduce file size to some extent. This feature supports the import of a wide range of video formats, such as AVI, 3GP, VOB, WebM, WMV, MP4, MOV, FLV, MKV, MPG, MPEG, MXF, M4V, TS, F4V, and more.
Here’s how to compress a video on Windows 11 using MiniTool Video Converter.
 MiniTool Video Converter
-
 Batch convert video/audio files among 1000+ formats.
 - Quickly compress videos for easy storage and transfer.
- Accurately extract subtitles from video/audio files.
- Effectively enhance video quality.

Option 1: Use the Video Compression Feature
- Open MiniTool Video Converter
- Move to the Compress Video section
- Import a video file
- Set compression level or video parameters
- Choose an output format
- Start compression
1: Download and install the software
First, click the button above to download and install the free video compression software on your computer.
2: Access the compression tool
Launch the video compressor and switch to the Compress Video tab on the left sidebar.
3: Add your video
Click the Add Files button at the top to import your target video into the designated area.
4: Adjust the compression settings
Click the Settings icon to open the Compression Settings window. By default, your video will be automatically compressed to 70% of its original size. Based on your original video and need, drag the red handle to the left or right to control the file size. Next, expand the Format dropdown menu to choose the output format: MP4, MKV, or WebM.
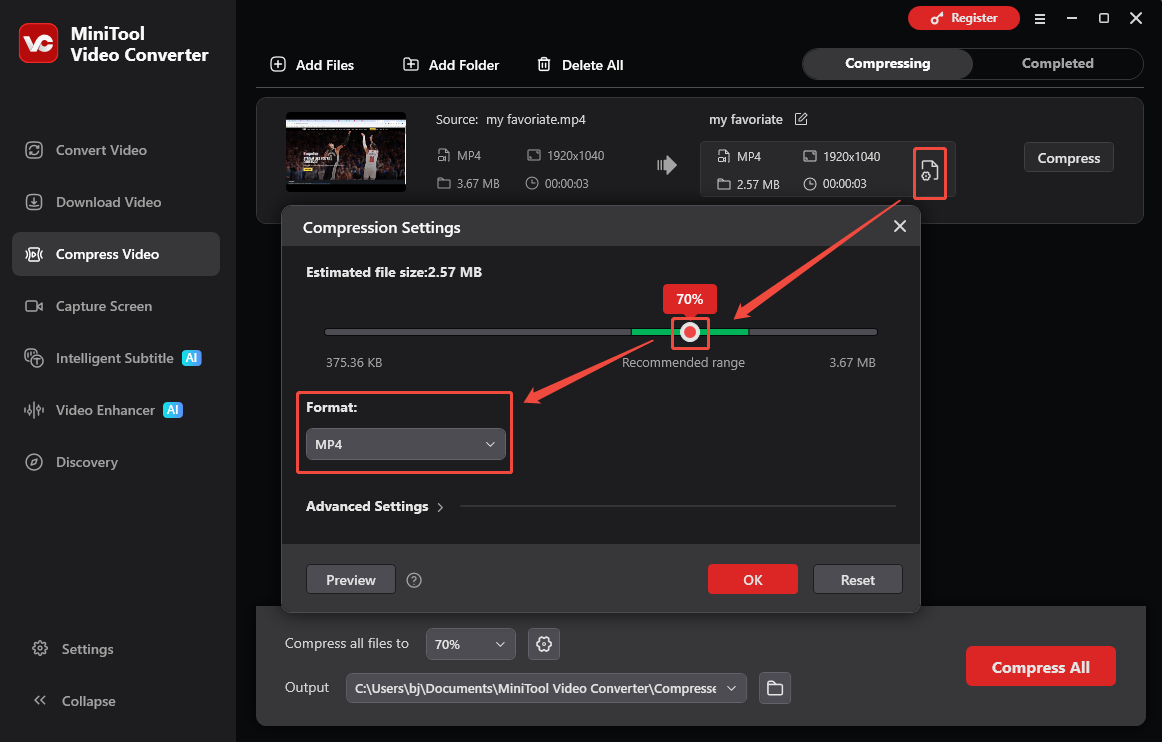
5: Preview the compressed video
Click the Preview button to load a 10-second sample. If you’re satisfied, click OK to continue.
6: Compress and save the video
Then, you’ll be immediately directed to the main interface. Select a folder to store your compressed video, and then click the Compress button to compress the video.
7. Check the compressed video
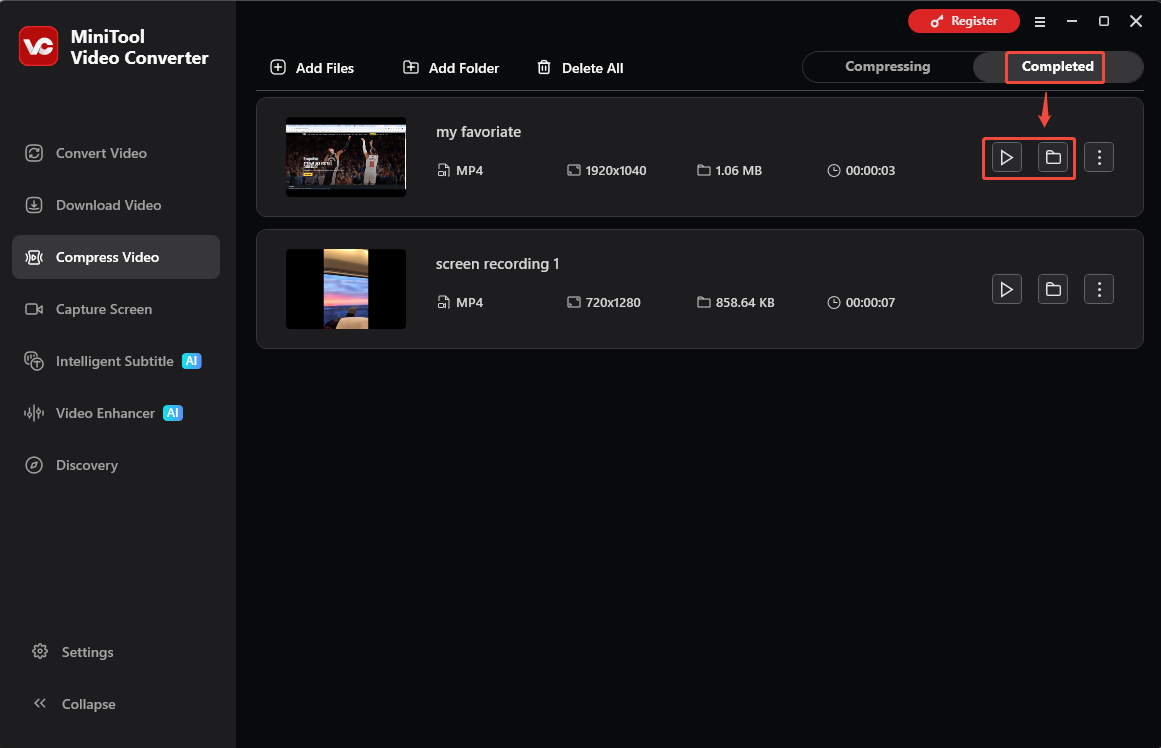
When the compression process ends, the tool will automatically switch to the Completed tab, where you can click the Play icon to view the compressed video and click the Folder icon to locate it.
Option 2: Use the Video Cutting Feature
- Move to the Cut Video section
- Import the target video
- Cut or trim the video
- Preview the video
- Choose the video file save path
- Save the video to a local file
1. Import a video file
Move to the Home page and click the Cut Video option to import the video from a local file.
2. Trim or cut the video
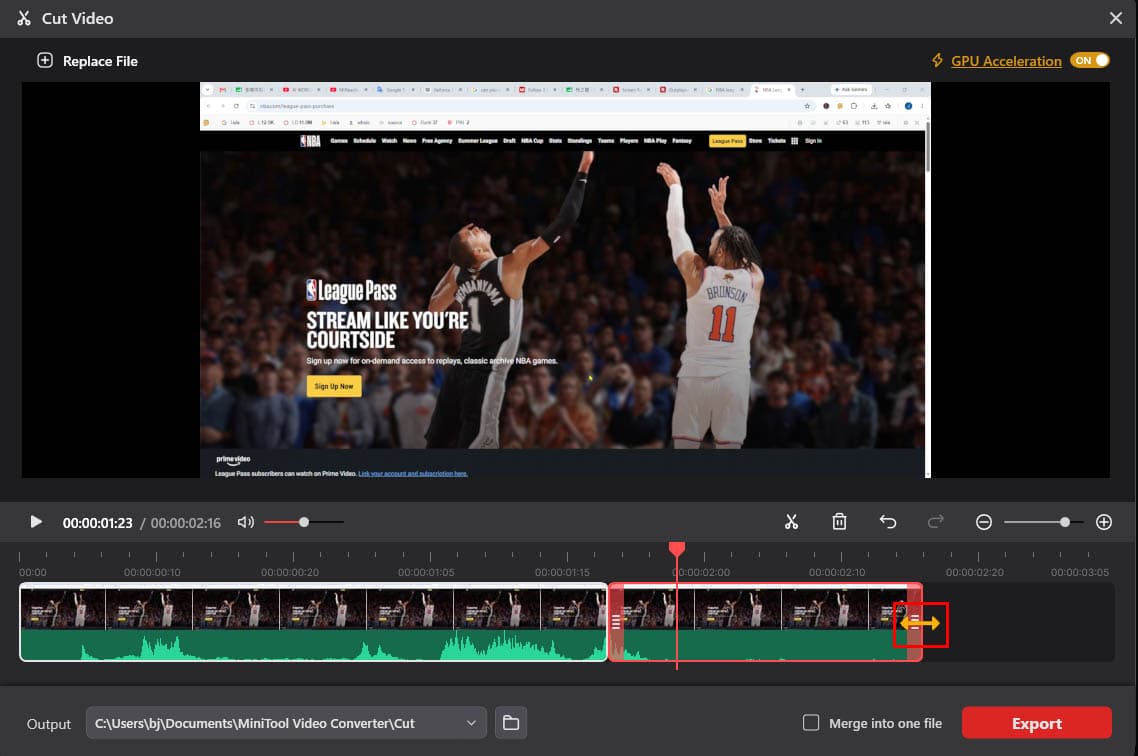
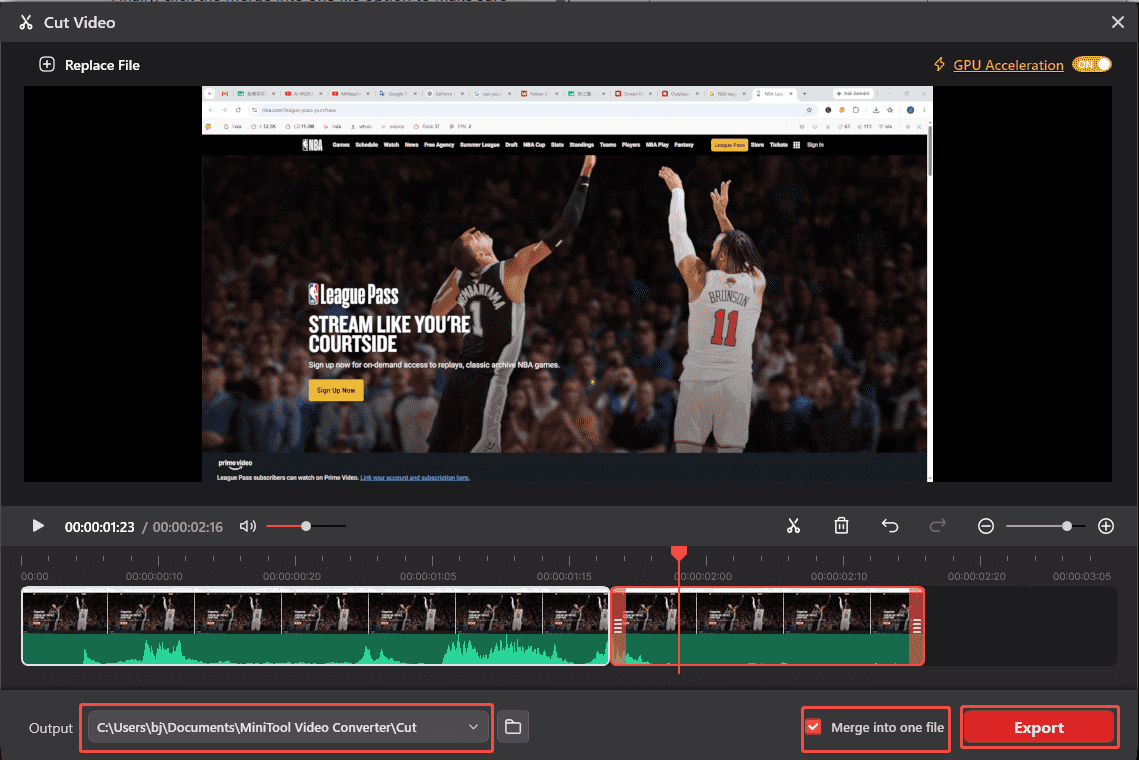
Select the clip on the timeline. Hover your mouse cursor over the start or end point of the clip until the arrow icon appears. Drag the arrow icon inwards to remove unwanted parts.
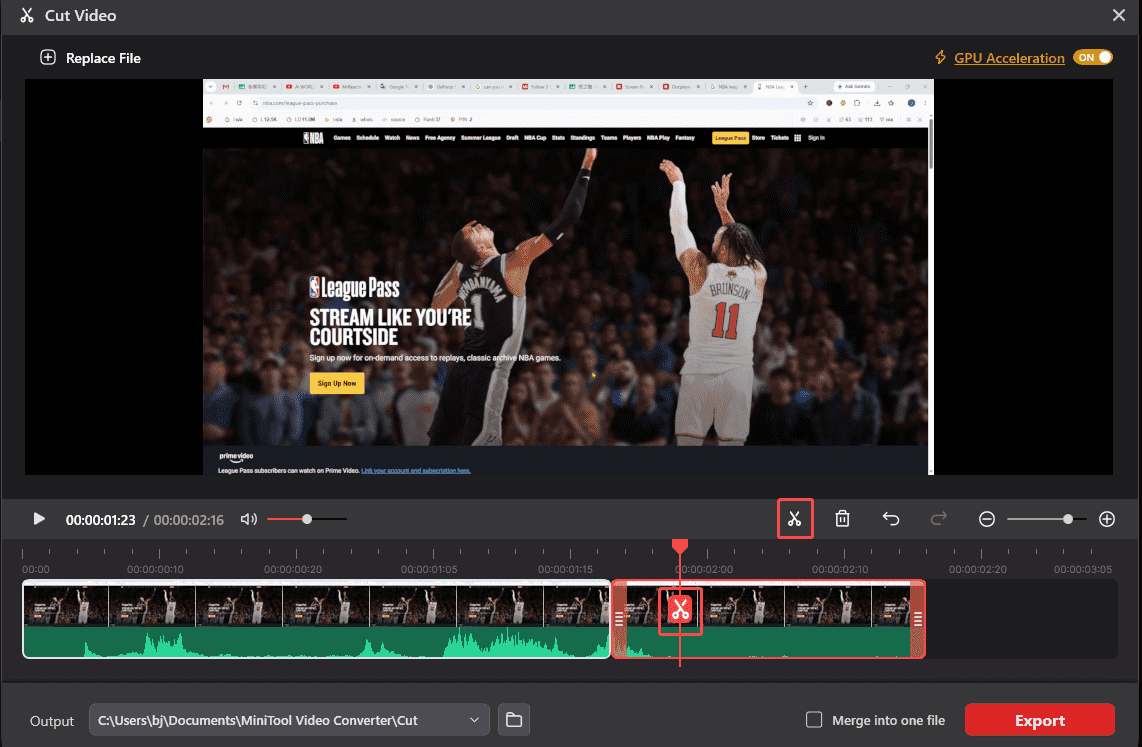
Alternatively, move the handle to set the beginning and end of the unwanted video part, then click the Cut icon to separate them. Next, choose the unwanted part and click the Delete icon to remove it.
3. Preview the video
Click the Play icon to play the edited video and check the result before exporting it.
4. Export the video
Expand the Output option and select the desired save location. Check Merge into one file to combine the clips into one video, then click Export to save it.

Other Methods to Compress a Video on Windows 11
Thanks to the video editing capabilities that come with the Windows 11 operating system, you can also use the Video Editor app in Photos Legacy and Microsoft Clipchamp to compress videos. Both of them can trim videos or do other basic edits, but they offer fewer resolutions to choose from.
The former only supports exporting videos in 1080p, 720p, or 540p, and the latter only supports 480p, 720p, 1080p, and 4K.
Furthermore, you can try online video compressors to shrink the file size in your web browser, such as FreeConvert, OnlineConverter.com, Video Candy, VideoSmaller, and more.

Conclusion
You can compress video on Windows 11 using a powerful video compressor or a video cutting feature to delete unnecessary parts. Just select the right tool based on the preferences of your audience.
Finally, if you encounter any problems while using MiniTool Video Converter, you can send an email to support@minitool.com for instant help.
People Also Ask
About The Author

Position: Columnist
Jade is an experienced multimedia tech writer who has authored hundreds of guides on screen recording, video editing, and software troubleshooting. Dedicated to bridging the gap between complex technical concepts and user-friendly solutions, she specializes in providing clear, actionable advice.
User Comments :