What causes the issue that cannot import MKV to AME? This article explains that MKV file corruption and an inapplicable codec may result in this issue. It also shows 3 excellent methods, including repairing the corrupted MKV file, remuxing the MKV to MP4, and converting MKV to MP4 with the video converter: MiniTool Video Converter.
MKV (Matroska Video) is a multimedia container format. It features unlimited tracks that can contain pictures, videos, audio, and subtitles separately. MKV usually adopts H.265 and H.264 video codecs. Besides, it utilizes AAC and AC3 audio codecs. Therefore, MKV can compress video while maintaining great video quality. What’s more, it can be compatible with the Windows system natively. However, MKV has poor compatibility with QuickTime Player.
AME (Adobe Media Encoder) is a professional encoding, transcoding, and rendering tool developed by Adobe. It supports various formats that are encoded by H.264, H.265, and ProRes. Additionally, AME works with Adobe Premiere Pro and After Effects seamlessly.
Why Can't Import MKV to AME
- MKV File Corruption: If the target MKV file is corrupted during downloading or transferring. It can’t be recognized and imported by AME.
- Incompatible Codecs: AME doesn’t natively support AV1, VP8, or VP9 encoding. If an MKV file uses these video codecs, AME may fail to import the file.
How to Fix Cannot Import MKV to AME Issue
If an MKV file can’t be imported to AME, the following 3 methods may be helpful.
Solution 1: Repair MKV File
The reason for the inability toimport MKV to AME may be unrelated to the software itself. Before uploading an MKV file to AME, it’s crucial to check for video corruption. If the video is corrupted, use MiniTool Video Repair to fix it. Once repaired, AME may be able to recognize and successfully accept this video.
Solution 2: Remux MKV File
Remuxing MKV is also an effective method to solve the import issue in AME. Remuxing can change the container format to make it compatible with AME. For MKV remuxing, I recommend OBS Studio. It is an all-in-one media file processing tool, including the remixing feature. OBS Studio also allows me to change the container format of MKV without encoding the format again.
Below is a guide on how to remux MKV to MP4 with OBS Studio.
Step 1: Download and Install OBS Studio
Download and install OBS Studio on its official website. Then, run it on the computer.
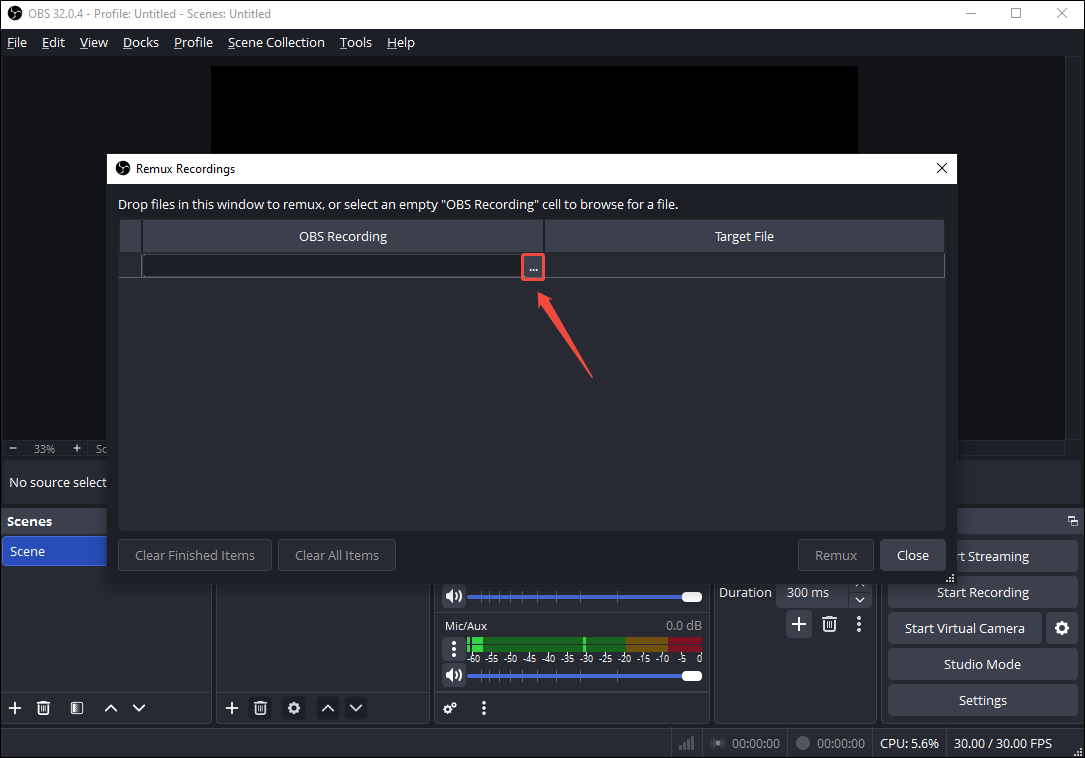
Step 2: Upload MKV File
Go to the File tab and choose the Remux Recordings option to trigger the Remux Recording window. Then, I click on the OBS Recording option and click on the More icon to upload my MKV file.
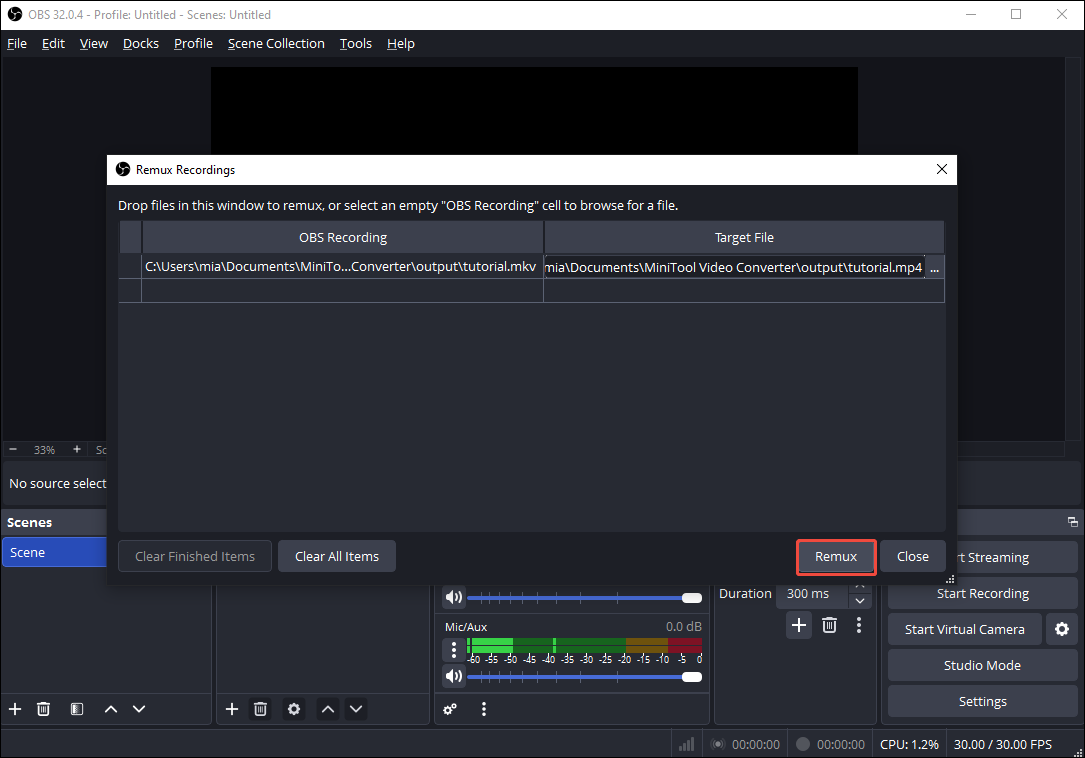
Step 3: Begin the Remuxing Process
After uploading the MKV file, the Target File column will automatically display remux as MP4. Next, I click on the Remux button to begin the remixing process.
Step 4: Check the Remuxed Video
Once this process finishes, click on the OK button in the pop-up window. Then, I check the remuxed file in the same folder as the original MKV file.
Using OBS Studio to remux MKV as MP4 is an easy and quick way for me to import the MKV file into AME.
Solution 3: Convert MKV to Other Formats
If AME doesn’t support MKV, I can use MiniTool Video Converter for the conversion, which is an optimal method to fix the problem that MKV cannot import to AME. It accepts various video conversions between more than 1,000 formats, including turning MKV to F4V, MP4, AVI, MOV, WMV, WebM, and more. In addition, MiniTool Video Converter allows me to convert videos in batches, up to 5 tasks at the same time.
MiniTool Video Converter doesn’t have file size limits. Also, I was never bothered by ads or other bundles during the conversion process. MiniTool Video Converter enables me to customize advanced parameters, such as resolution, frame rate, bitrate, encoder, and more.
MP4 is a universal video format. It is also compatible with AME. In the following section, I would like to show how to convert MKV to MP4 using MiniTool Video Converter.
Step 1: Obtain MiniTool Video Converter
Download and install MiniTool Video Converter on the desktop. Then, launch it.
MiniTool Video ConverterClick to Download100%Clean & Safe
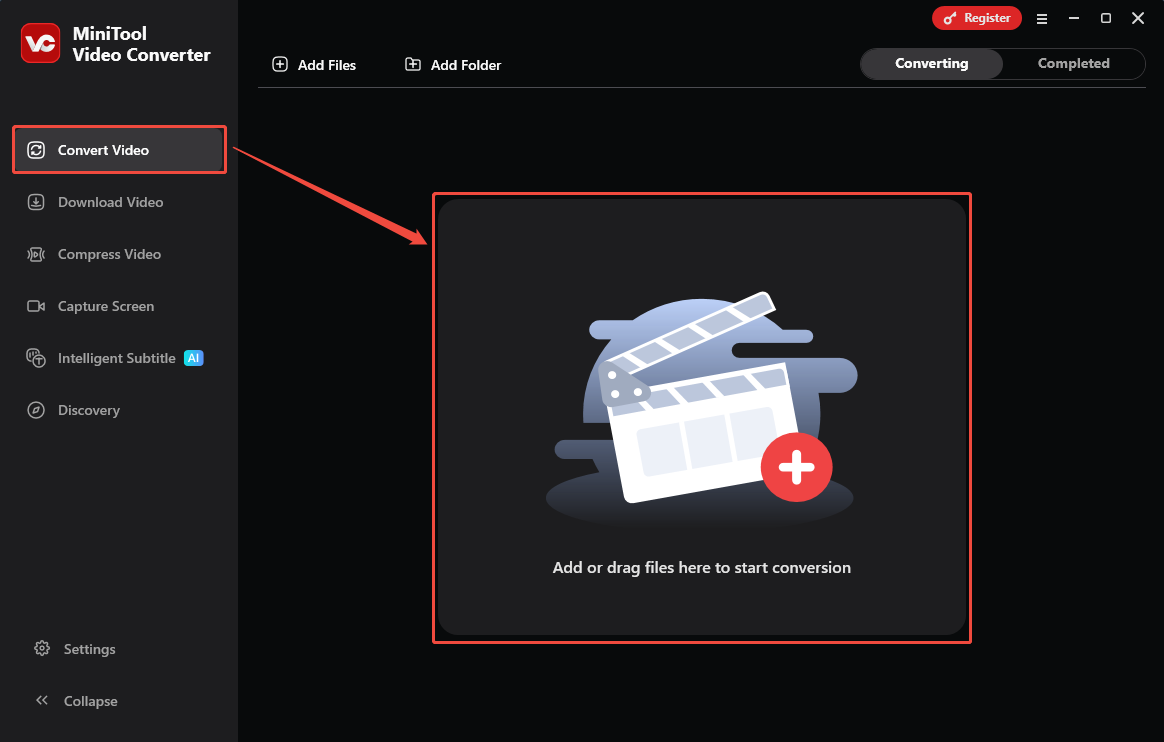
Step 2: Add the MKV Video
When I enter the MiniTool Video Converter interface, I go to the default Convert Video tab. Here, I drag my MKV file into the Add or drag files here to start conversion area to import it.
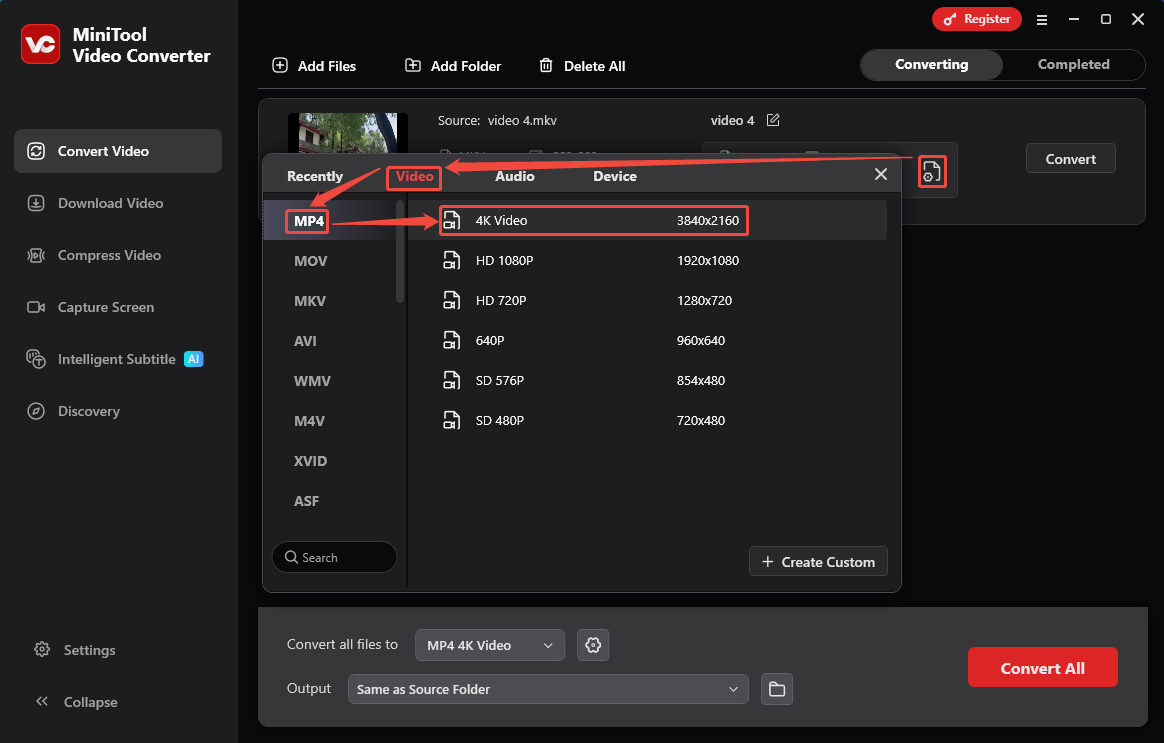
Step 3: Set MP4 as the Output Format
After adding the MKV video, it appears as a conversion task in the interface. Then, I click on the output format settings icon to open the format options window. Here, I go to the Video tab and specify MP4 as the output format. After that, choose a proper resolution for the converted video. I select 4K Video.
Step 4: Start the Conversion
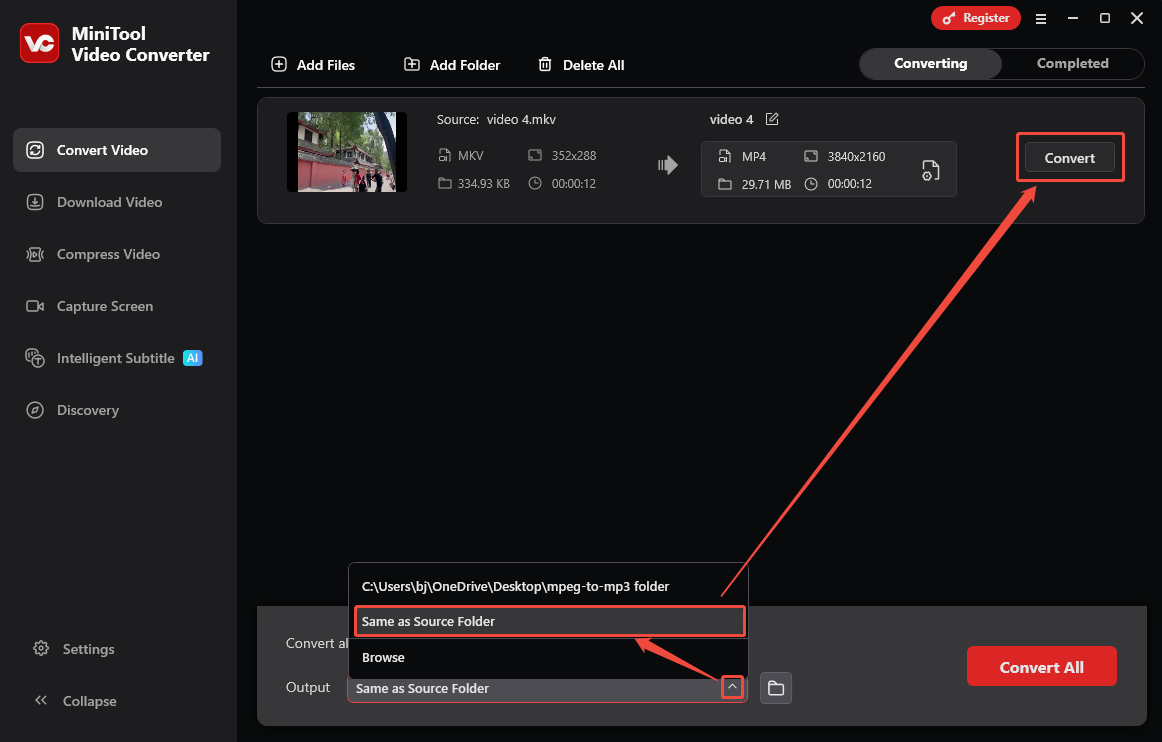
Once the output format is set, expand the Output option at the bottom of the interface to configure a storage location. From there, I pick the Same as Source Folder option. Then, click on the Convert button on the task to start the conversion.
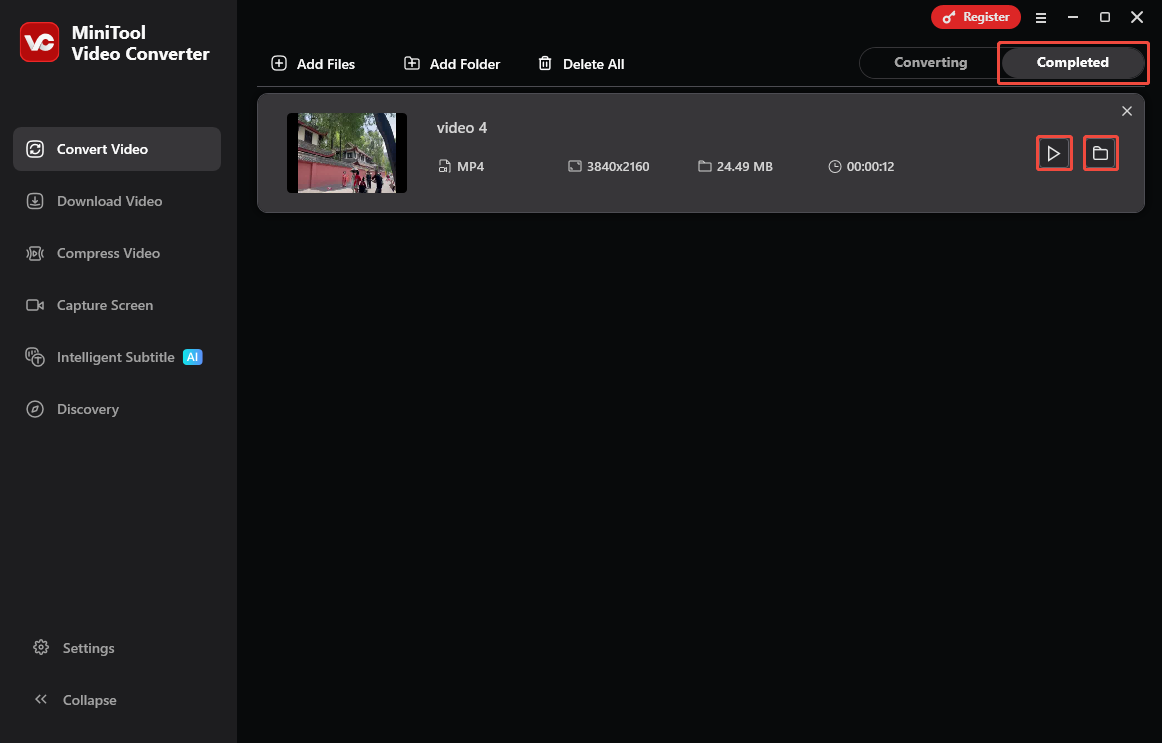
Step 5: Check the Converted Video
As soon as the conversion ends, this converted video will be placed in the Completed tab. Here, I click on the Play icon to preview it. Besides, I can locate the converted video on my computer by clicking on the Folder icon.
MiniTool Video Converter helps me solve the problem that MKV is incompatible with AME quickly and easily by converting MKV to MP4.
The Difference Between Remux and Convert MKV
Remuxing an MKV file refers to moving the contents of an MKV file into another container, such as the most common MP4 file. This operation doesn’t affect video quality or file size. However, converting an MKV file (also known as transcoding) essentially changes the codecs inside MKV. This conversion affects video quality and file size. Therefore, remuxing and conversion are 2 different methods for resolving the inability to import MKV files into AME.
Final Words
Due to the MKV file corruption or the incompatible codecs, we cannot import MKV to AME. This article shares 3 effective methods to solve these problems, including repairing MKV files, remixing MKV to MP4, and converting MKV to MP4 with MiniTool Video Converter.
If you have any questions or suggestions about MiniTool Video Converter, feel free to contact official support via email at support@minitool.com at any time for assistance.
User Comments :