

This post mainly explains 7 methods to fix Android videos not playing on Windows. You can try another player, retransfer the video, run the video playback troubleshooter, update drivers or Windows, convert the video to another format, or repair the Android video if it is corrupted.
Android cameras typically save recorded videos in the MP4 format. Sometimes, an Android video won't play after it’s transferred to a Windows PC. This issue can happen due to file corruption during transfer, an outdated media player, drivers, Windows OS, or missing codecs.
If you can't play Android videos on Windows, try the following fixes.
- Use another video player
- Re-transfer the Android video
- Run the video playback troubleshooter
- Update drivers
- Update Windows OS
- Convert the Android video to another format
- Repair the Android video
Method 1: Use Another Video Player
On a Windows PC, you can play videos with the built-in Movies & TV app, Photos app, or Media Player. If you fail to play the Android video with one of them, try another application. Also, you can use other video players installed on your computer to play Android videos, such as VLC and PotPlayer.
If your Android video can play with another media player, the problem may be with your previous media player. If this is not the case, it may be due to other reasons mentioned before.
Method 2: Re-transfer the Android Video
If an interruption occurred when transferring an Android video to Windows, the video file could become damaged or incomplete, which might prevent it from playing properly. In this case, you can try transferring the Android video to your Windows PC again. After that, play the video once more to see if the issue is resolved.
![How to Fix Videos Not Playing on Android Phone [Ultimate Guide]](https://images.minitool.com/videoconvert.minitool.com/images/uploads/2023/03/videos-not-playing-on-android-phone-thumbnail.jpg)
Method 3: Run Video Playback Troubleshooter
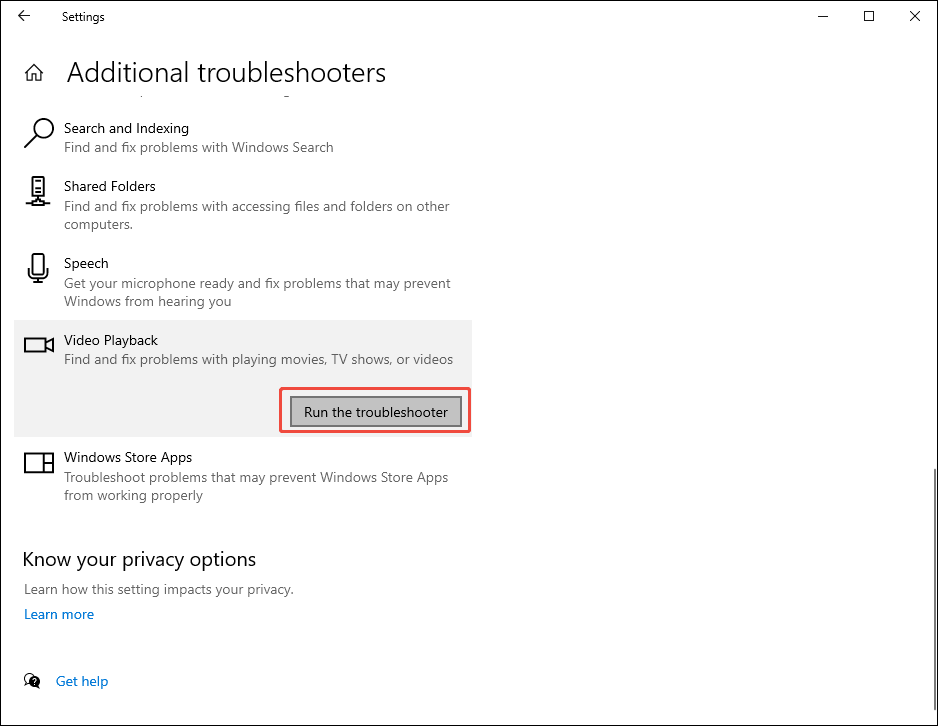
If Windows won’t play Android video files, run the built-in video playback troubleshooter to fix this issue.
1. Press Win + I to open Settings and click Update & Security.
2. Click Troubleshoot on the left and click Additional troubleshooters or Other troubleshooters.
3. On Windows 10: Scroll down, click Video Playback, and click Run the troubleshooter. On Windows 11: Click Run next to Video Playback.
Method 4: Update Drivers
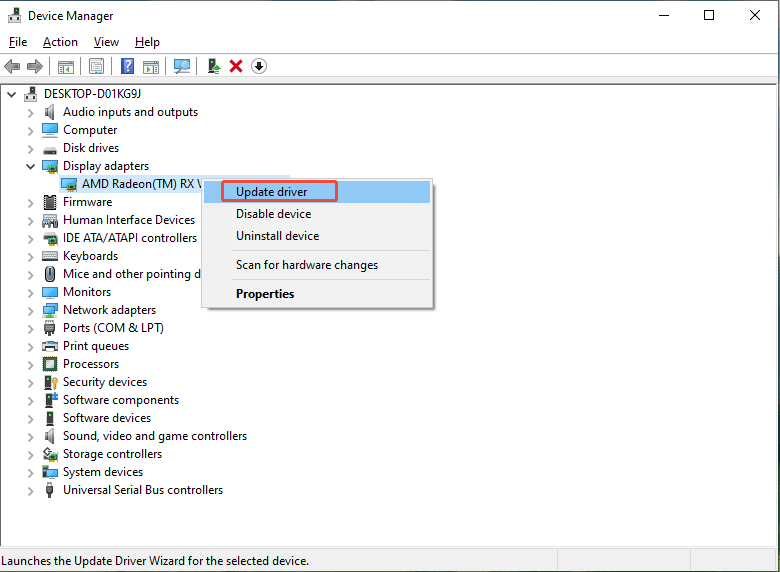
Outdated graphics drivers can also cause Android videos not playing on Windows problems. Update your graphics driver to fix it.
- First, open Device Manager.
- Click Display adapters.
- Right-click the display driver and choose Update driver.
Method 5: Update Windows OS
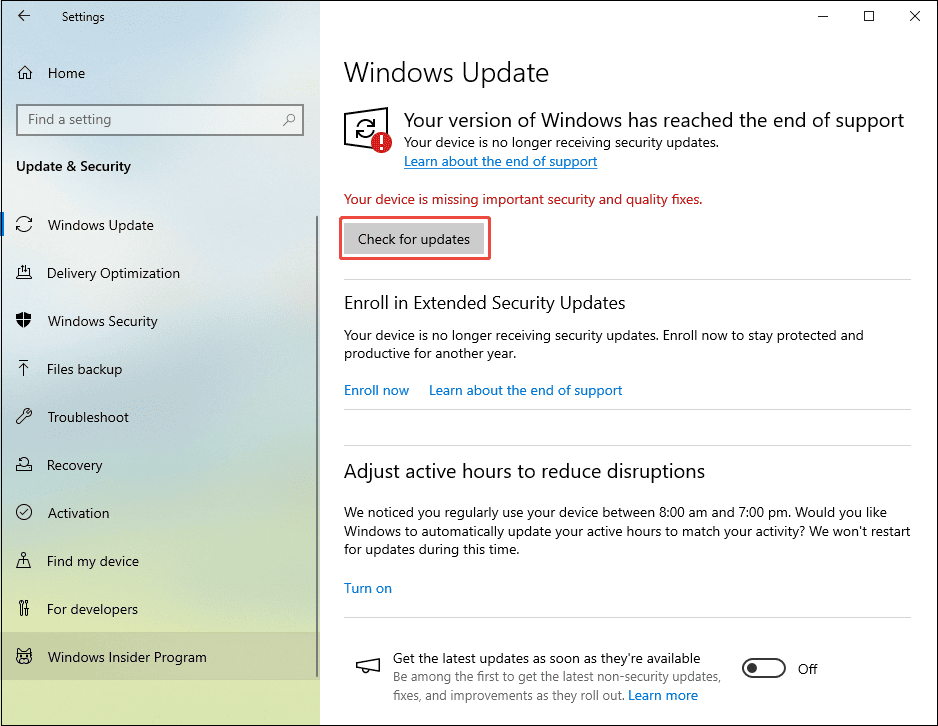
An outdated Windows OS may cause video playback issues. When your Android MP4 files can’t play, update the system to fix the problem.
Press Win + I to open the Settings app, select Update & Security, choose Windows Update, and click Check for updates on the right side.
Method 6: Convert Android Video to Another Format
If your Android video is still not playable on Windows, consider converting the video to another video format. For this task, a professional, free video converter is a good choice. MiniTool Video Converter is one of them.
 MiniTool Video Converter
-
 Batch convert video/audio files among 1000+ formats.
 - Quickly compress videos for easy storage and transfer.
- Accurately extract subtitles from video/audio files.
- Effectively enhance video quality.

The software handles various video and audio formats and allows you to convert between various media formats, such as MP4 to MOV and AVI to MKV. It also lets you change the video encoder, bitrate, resolution, and frame rate. Best of all, it has no file size limit and does not leave a watermark on the converted files.
Here is how to convert an Android video:
- Install MiniTool Video Converter.
- Add the target Android video file.
- Set the output format.
- Choose the output folder.
- Start the conversion.
1: Install the Video Converter
Download and install the video conversion software on your computer.
2: Import the Android Video
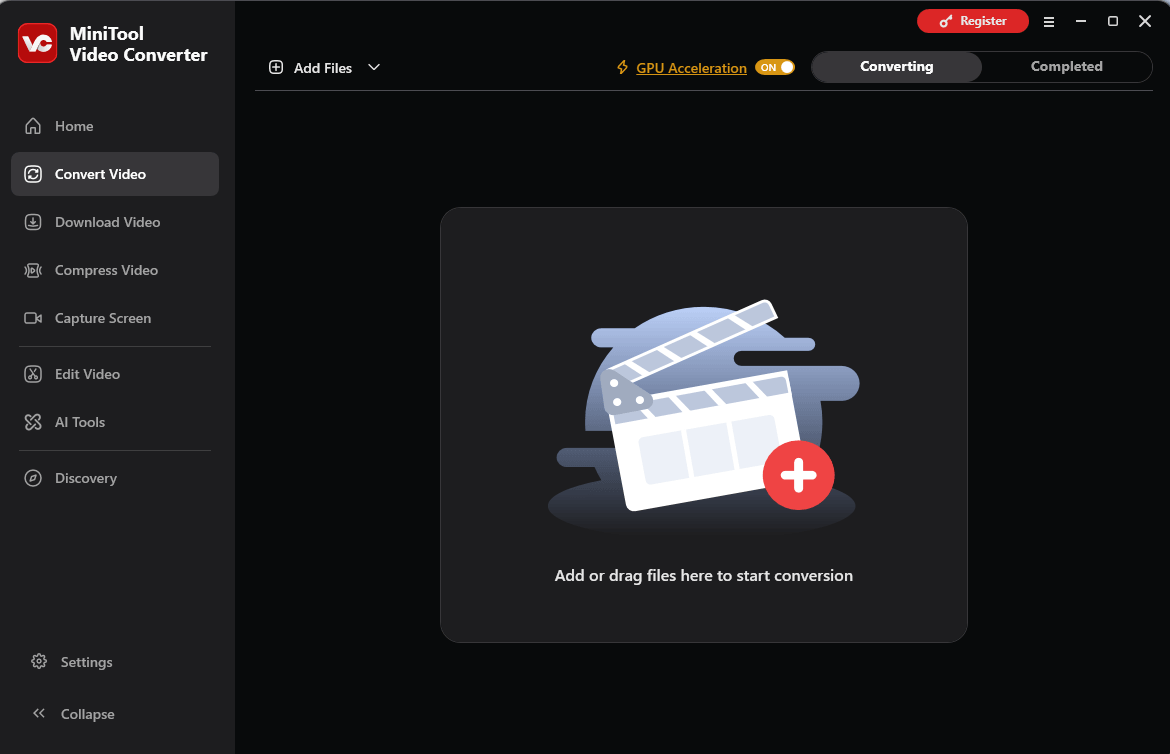
After running the software, switch to the Convert Video tab, and click Add Files at the top to import the deaired video file, or drag and drop it into the application.
3: Select the Output Format
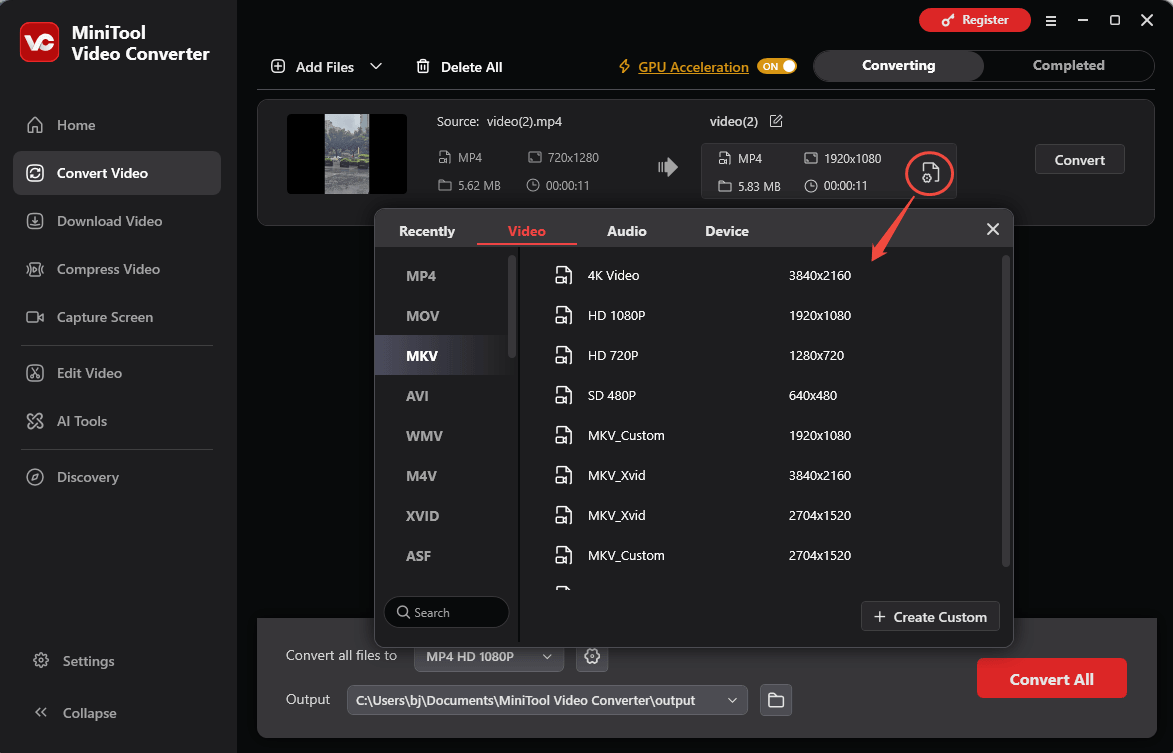
Once the video is loaded, click the Settings icon on the right side. On the next pop-up window, go to the Video tab and choose a video format on the left sidebar.
- MP4 is the first recommended choice, with the best compatibility.
- MOV is ideal for Apple devices.
- MKV is great for HD videos, but slightly less compatible than MP4.
These formats are encoded using the H.264 codec by default. After confirming the video format, choose the desired preset on the right side. You’d better keep the converted video the same as or slightly lower than the original resolution to avoid over-compression.
4: Change the Output Folder
If you do not save the converted video in the default location, click the Output button at the bottom to select another folder.
5: Begin the Conversion
Click the Convert button to start the conversion task immediately. Once done, locate the video and see if it plays properly on your PC.
Method 7: Repair the Android Video
If none of the above methods work, the Android video file itself may be damaged. In that case, repair the video to fix the playback issue. To repair Android videos on Windows, you can try MiniTool Video Repair. It can fix MP4, MOV, M4V, and F4V videos for free, as well as videos from GoPro, Sony, Canon, DJI drones, etc.
MiniTool Video RepairClick to Download100%Clean & Safe

Conclusion
You can easily fix Android videos not playing on Windows by using another video player, re-transferring the Android video, running the video playback troubleshooter, updating drivers, updating Windows OS, converting the Android video to another format, or repairing the file.
Finally, if you encounter problems using MiniTool Video Converter, email support@minitool.com for assistance.
People Also Ask
2. Go to the Convert Video mode and add the MP4 file.
3. Click the Settings icon, go to Video, select MP4, and click + Create Custom at the bottom.
4. Name the custom MP4 format, expand the Encoder menu, and choose MPEG-4 or HEVC.
5. Configure resolution, frame rate, bitrate, and other parameters.
6. Click Create to create the custom MP4 format.
7. Click that format to set it as the output format.
8. Click Convert to start the conversion.
2. Click Organize > Layout > Show menu bar and select Help.
3. Select About Windows Media Player.
4. Click the Technical Support Information link.
5. A page will open in your default web browser. Scroll down to view the installed video and audio codecs.
Alternatively, press Windows Key + R, type msinfo32, and press Enter to open the System Information window. In the left-hand menu, expand Components and expand Multimedia. Click Audio Codecs or Video Codecs to view the installed codecs on your system.
About The Author

Position: Columnist
Cora is a tech writer specializing in digital media workflows, with over six years of hands-on experience in video post-production, media transcoding, and screen capture. Her writing is always clear and practical. Cora also produces in-depth software reviews for users across skill levels to help them find the right tool and enjoy video editing.
User Comments :