Webflow is a popular website-building platform known for its user-friendly interface and ability to create stunning websites. However, it comes with a 30MB video size limit. To break the Webflow video size limit, you can compress the video with MiniTool Video Converter, trim or split the video with MiniTool MovieMaker, and utilize external hosting.
What Is the Webflow Video Size Limit
Webflow is a remarkable platform that empowers designers to create stunning, responsive websites. Does Webflow have a video size limit? Yes. It imposes specific video size limits that vary based on whether the video is used as a standard upload or a background element. Here’s a detailed breakdown of the video constraints, resolution limits, and supported formats.
Webflow Video Size Limit
Webflow allows videos to be uploaded directly to the platform or embedded from external sources like YouTube or Vimeo. However, Webflow has a default file upload limit that is set to 10MB for single-file uploads and 30MB for background video, whether you’re using a free or paid plan.
Webflow Video Resolution
Webflow has certain implicit constraints related to video resolution—Webflow’s built-in video hosting resolution is 720p (1280x720). Even if you upload a 1080p or 4K video, Webflow will transcode it to 720p to ensure fast loading and compatibility.
Webflow Video Format
Webflow supports video formats such as MP4, OGG, and WebM. These limits are in place to ensure good website performance, including fast page load times and effective bandwidth management.

How to Break the Webflow Background Video Size Limit
We already know that the Webflow background video size limit is 30MB. If your video is larger than 30MB, you will not be able to upload it to Webflow successfully. People also ask: Are there free methods that enable you to break the Webflow video size limit? Of course, there are three methods for you to choose from.
- Use a Webflow video compressor.
- Split or trim the video with a video editor.
- Leverage external hosting and share the link to Webflow.
Now, let’s read on for all the details!
Method 1: Compress Videos
The best solution for breaking the 30MB video size limit is to use a Webflow video compressor. In the following part, I recommend two professional video compressors (a desktop application and an online tool) and show you how to use them to compress videos one by one.
Option 1: MiniTool Video Converter (Desktop)
MiniTool Video Converter is a valuable and free video converter I found recently. You may be confused by its name, but it has a built-in video compressor. You can import nearly any video format, like MP4, AVI, MOV, MKV, WMV, WebM, FLV, etc., into MiniTool Video Converter for compression and export the compressed video to MP4, WebM, and MKV formats, less than 30MB. All the compressed videos don’t have watermarks.
What’s more, its video compression feature lets you compress the video to any extent you want, from 100% to 10 % and you can see the estimated size in advance. Plus, MiniTool Video Converter also allows you to compress 2 – 5 videos at the same time to avoid compressing videos one by one.
Here’s how to compress video for Webflow with MiniTool Video Converter.
Step 1. Download and install MiniTool Video Converter
MiniTool Video ConverterClick to Download100%Clean & Safe
Click the green download button above to download and install MiniTool Video Converter on your PC. Once installed, open this application.
Step 2. Import the video to MiniTool Video Converter
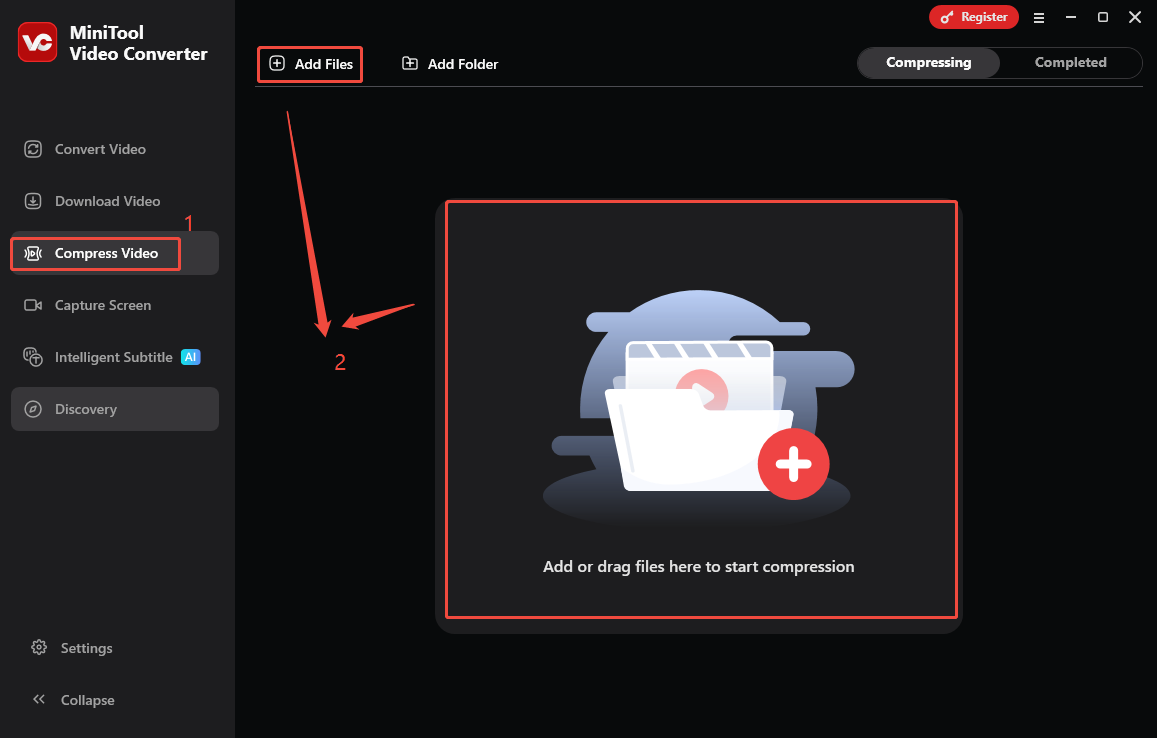
- Switch to Compress Video.
- Click on the Add Files button or the Add or drag files here to start compression region to import the large video. Alternatively, directly drag and drop the video to the middle area.
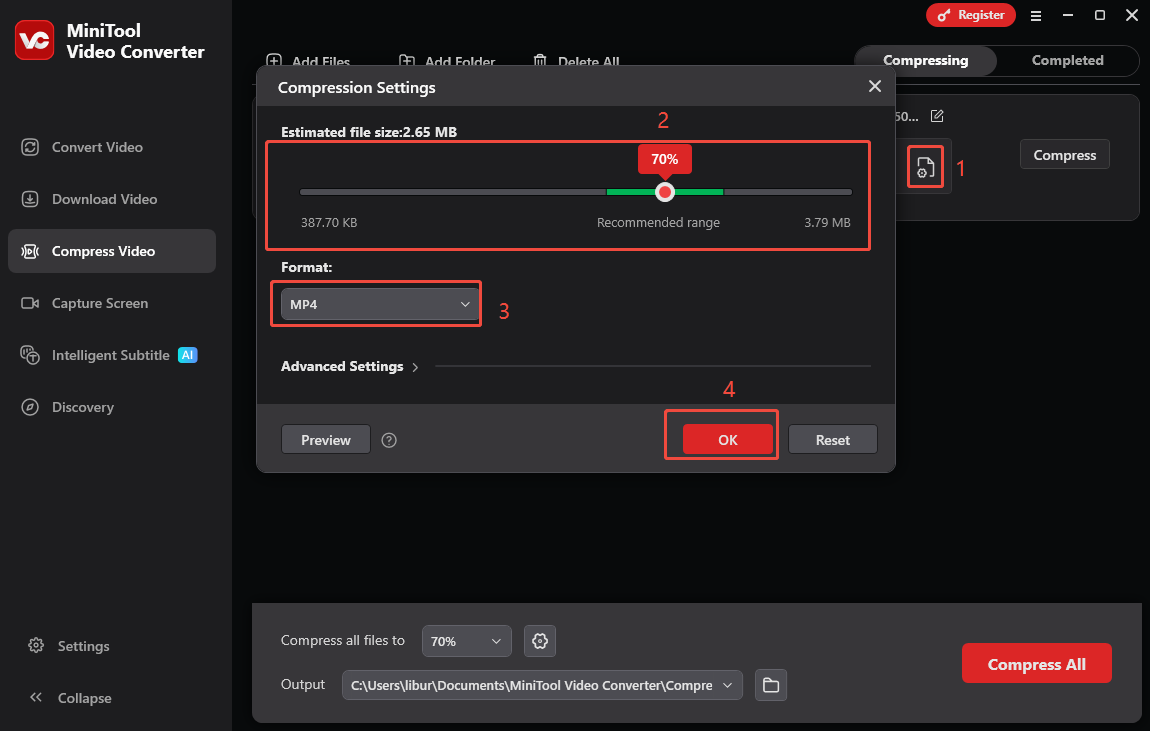
Step 3. Customize the compression settings
- Click the Settings icon and drag the slider to adjust the compression percentage from 10% to 100%.
- Expand the Format option to select a Webflow-supported format as the output format.
- Click Preview to preview the compressed file.
- Click on OK to confirm if you’re satisfied.
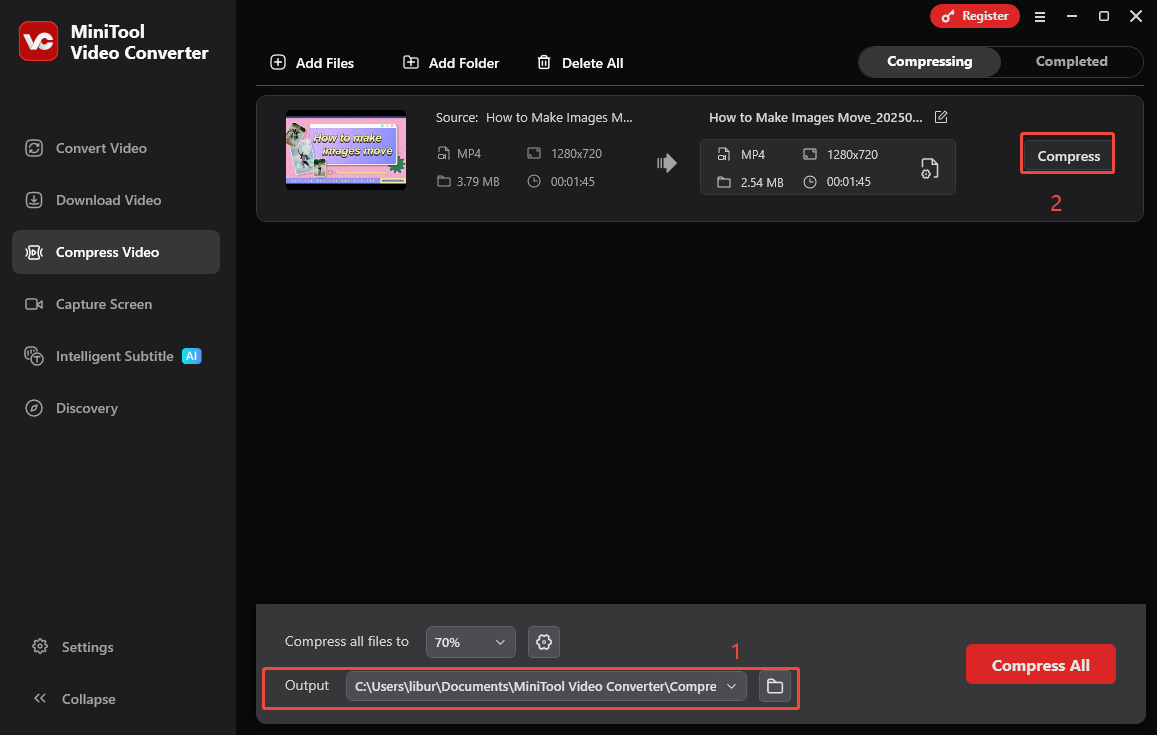
Step 4. Choose a destination folder and start the compression process
- Open the Output option at the bottom and choose a save path for the compressed video.
- Click on Compress to initiate compressing the video.
Step 5. Play or locate the compressed video
After the video is compressed successfully, you will be taken to Completed. Click on the play icon to watch the compressed video, or click on the folder icon to find the saved position.
It’s quite easy to compress videos for Webflow uploading with MiniTool Video Converter. Furthermore, MiniTool Video Converter has three other main functions in addition to video compression, including video conversion, video downloading, and screen recording. You can choose other free functions to use.
Option 2: FreeConvert (Online)
Using an online video compressor is friendly for those who don’t want to download an application or have enough storage space. When I search for an online video compressor from Google Chrome, FreeConvert is listed as the top 1.
FreeConvert is a web-based video compression tool that also has mobile apps for iPhone and Android devices. You can choose to upload videos from devices, Dropbox, Google Drive, and OneDrive. It supports various input video compression formats, including MP4, MOV, AVI, WMV, MKV, FLV, 3GP, and WebM. You can input the target video size (MB/percentage) to better suitable for Webflow uploading requirement.
I try to use FreeConvert to compress my video, and I find the compression process is simple, but the compression speed is rather slow. If you don’t mind, here’s how to compress video for Webflow video uploading with FreeConvert.
Step 1. Visit the website of Webflow
- Open your browser, search for FreeConvert, and enter its main interface.
- Expand the Compress option from the top menu and choose Video Compressor.
Step 2. Upload the video to Webflow
Click the Choose Files button to import the video you want to compress into FreeConvert.

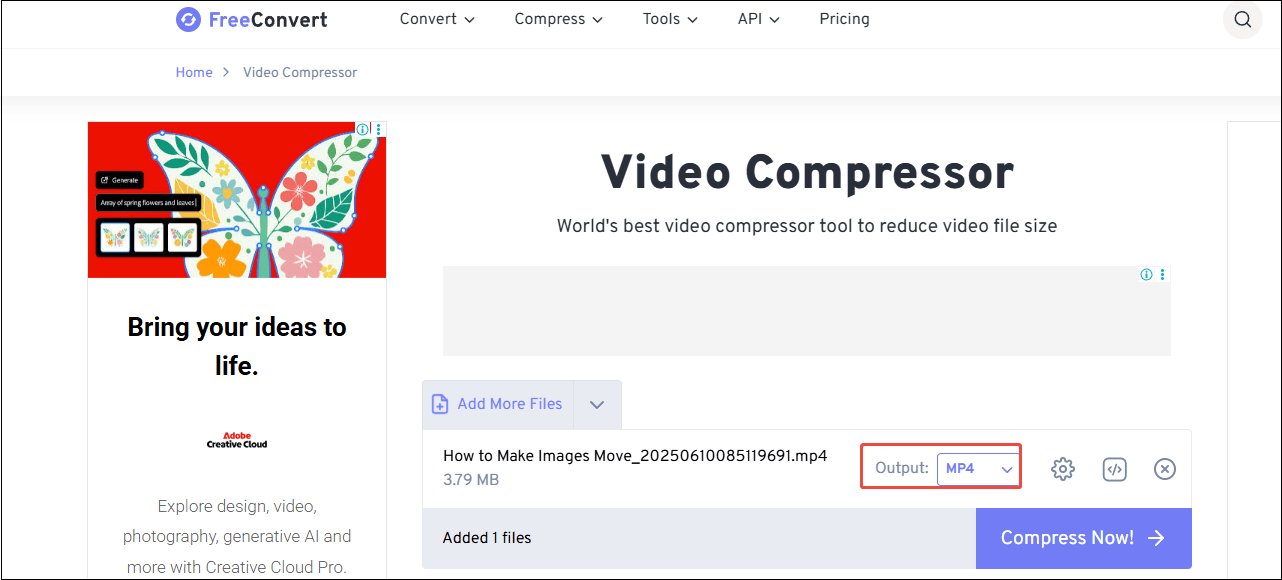
Step 3. Adjust compression settings
- Open the Output option and choose an output format.
- In the Advanced Options window (Optional), you can choose a video codec, a compression method, and a target video size. After that, click the Apply Settings button to save the settings.
Step 4. Compress the video
Click the Compress Now! button to start compression. Once done, click the Download button to save the file to the local folder.
Method 2: Split or Trim Videos
Beyond compressing videos to 30MB for Webflow video uploading, the second method is to use a video editor to trim the video to remove the unwanted parts, or split it into multiple segments and send them to Webflow one by one. MiniTool MovieMaker is the best choice I want to share with you.
MiniTool MovieMaker is a famous video editor with a simple user interface that empowers you to edit videos by trimming, splitting, cropping, reversing, rotating, and performing other editing functions.
Apart from splitting and trimming videos, you can also adjust the playback speed of your video to shorten the time and the output parameters to reduce the video size. Then, you can export videos to Webflow-supported formats, such as MP4 and WebM.
Here’s how to split or trim videos with MiniTool MovieMaker.
Step 1. Download and install MiniTool MovieMaker
Click the download button below to download and install MiniTool MovieMaker on your PC.
MiniTool MovieMakerClick to Download100%Clean & Safe
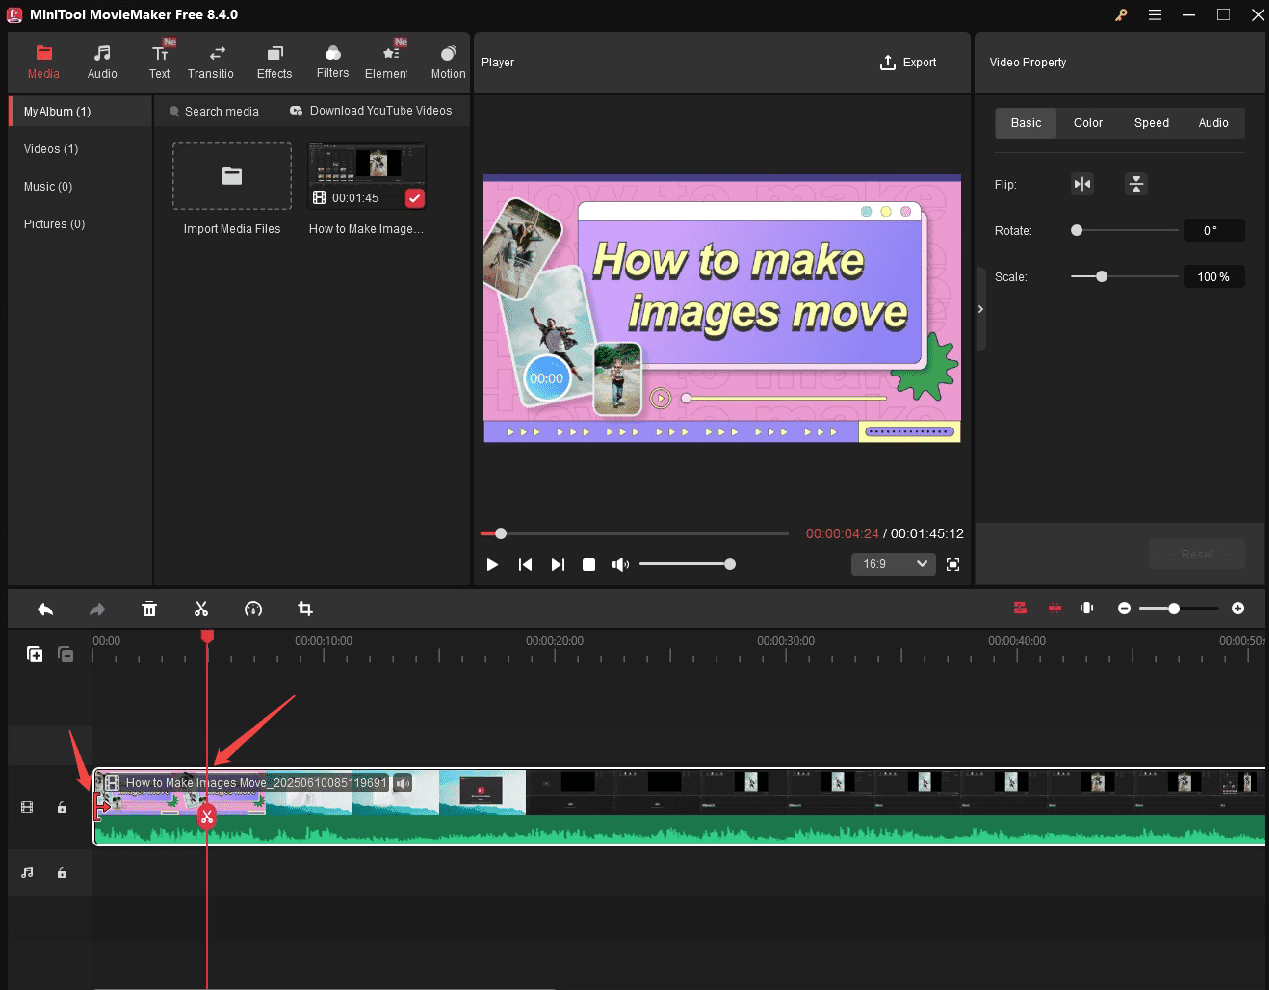
Step 2. Import the video and add it to the timeline
- Launch this program, close the promotion window, and click Import Media Files to add the video you want to compress.
- Drag the added video to the track at the bottom of the interface to add to the timeline. Or, click on the red plus icon.

Step 3. Trim the video
Click on the scissors icon to split the video and remove unwanted video clips. You can also trim off the beginning or end of the video by dragging the arrow leftward or rightward to shorten the video length.
Step 4. Compress the video
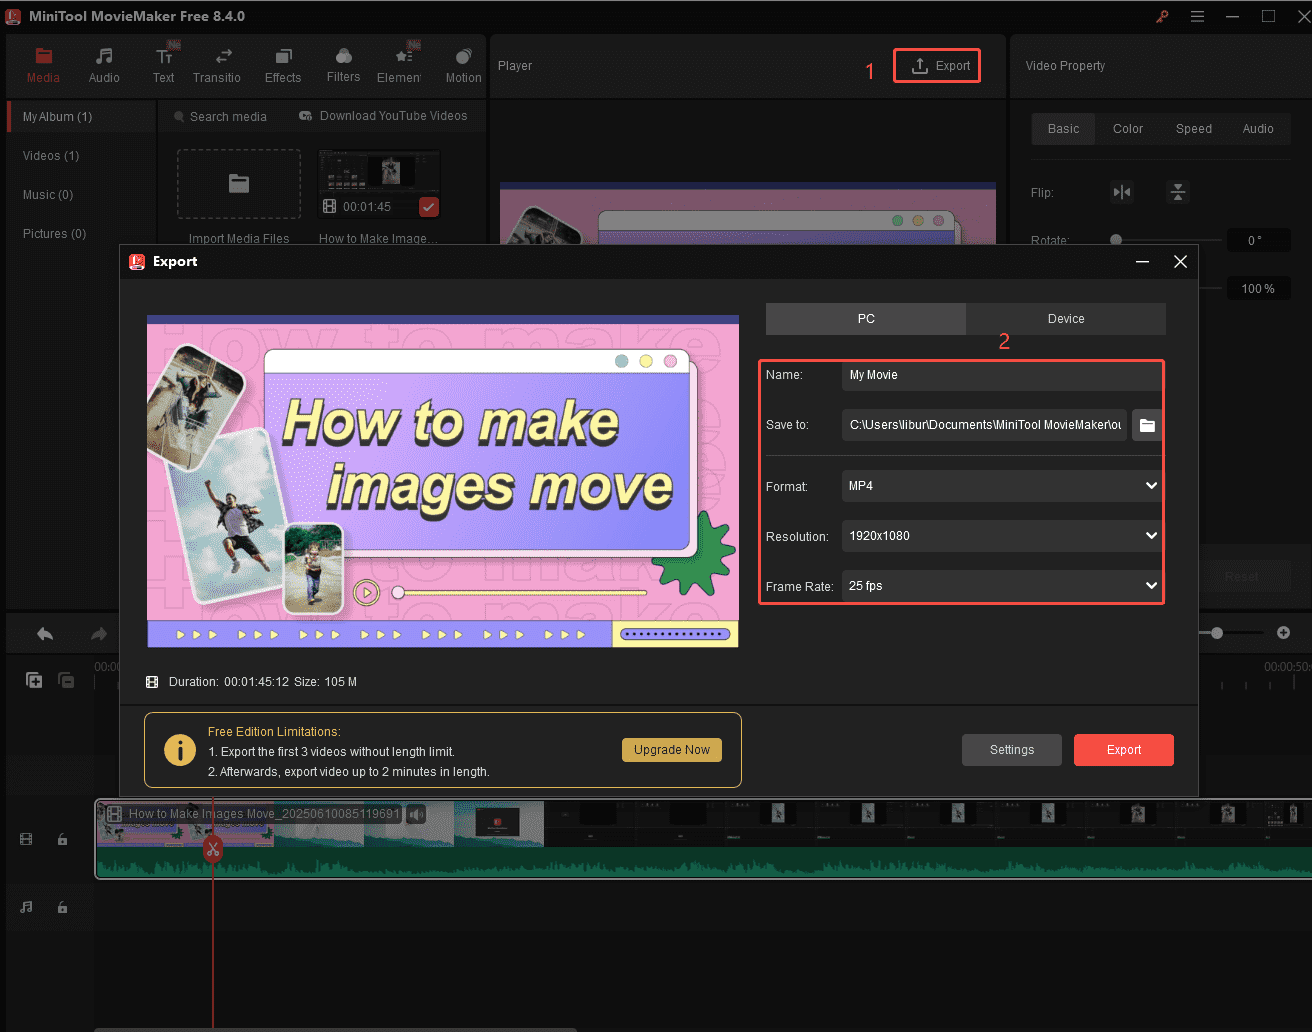
- Click the Export button at the top right of the Player window to access the Export window.
- When the Export window pops up, you can edit the name of the exported video, set the save location, choose the output format, and select a lower resolution and frame rate.
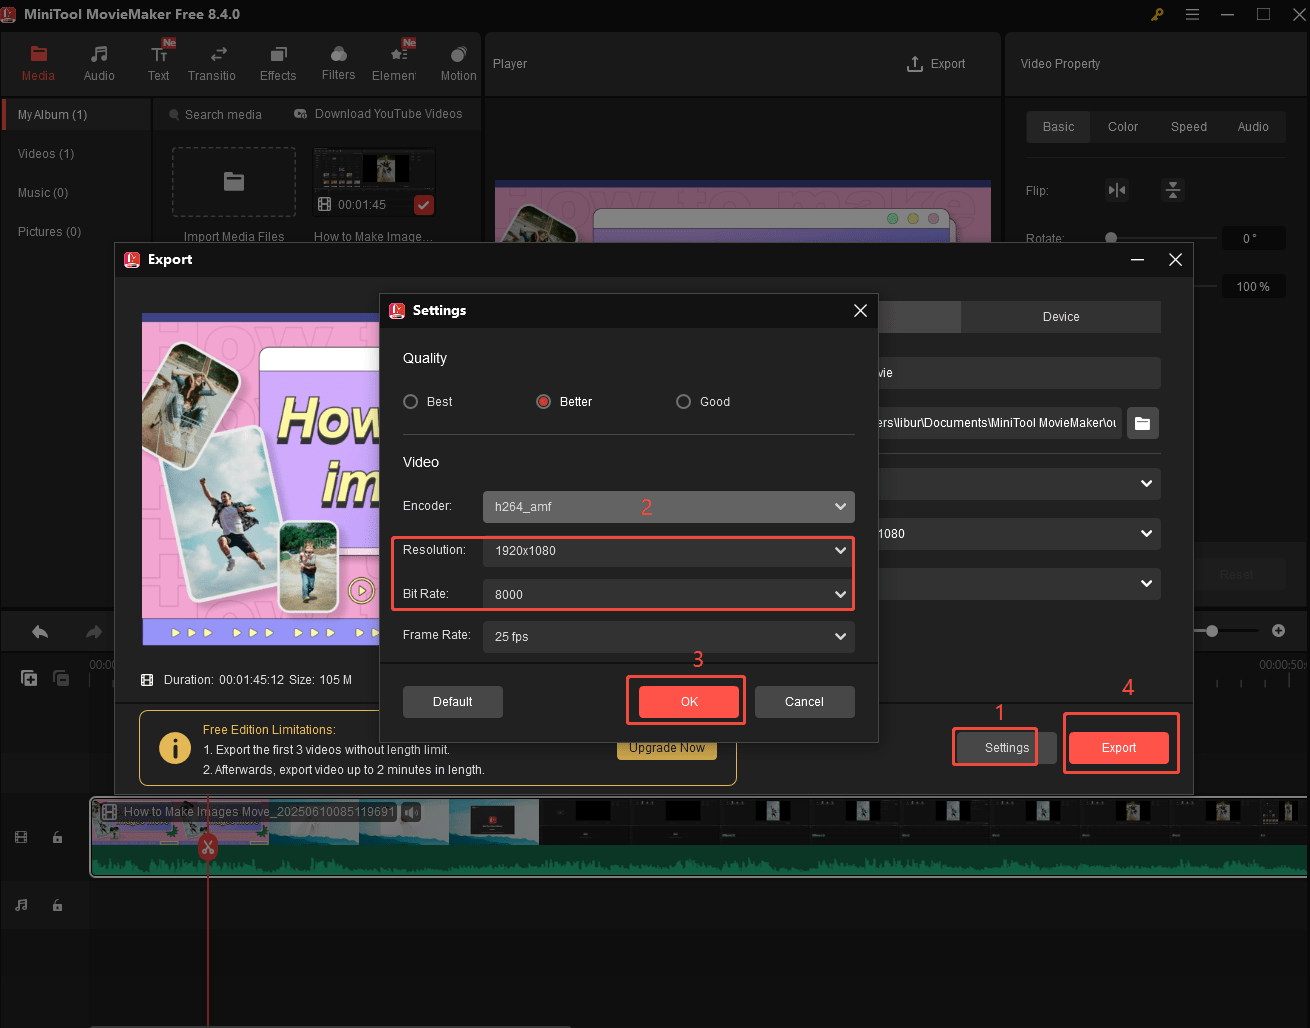
Plus, MiniTool MovieMaker can lower the video size by adjusting the output parameters, such as resolution, frame rate, and bitrate. So, if you’re not satisfied with the video size after you split or trim the video, you can further compress the video by adjusting these parameters before exporting it.
Step 5. Further compress the video
- In the Export window, click on Settings.
- Lower the resolution and bitrate. Then, click OK to save the changes.
- Lastly, click Export to save the video.
All in all, MiniTool MovieMaker has multiple ways to reduce the Webflow video size: Trimming the unwanted parts, splitting the long video into multiple clips, and adjusting the output parameters.
Method 3: Host Videos Externally and Embed Them in Webflow
As we mentioned above, Webflow allows users to embed videos from external sources like YouTube or Vimeo. This is another choice to break the Webflow video size limit. This approach offers several benefits:
- No file size restrictions.
- Stream full HD or 4K videos without compression limits.
- Videos are served from the platform’s CDN, which can improve loading times.
- Easy management and updates without redeploying your entire Webflow site.
YouTube is free, has no upload limits, and reaches a global audience. It’s a great option for casual videos or content you want to share widely. So, we will take YouTube as an example to get the embeddable link.
Please upload the video to YouTube in advance. Then, follow the steps below:
Step 1. Get the video link
Open the YouTube video you have uploaded, click Share > Copy to get the video link.
Step 2. Open your Webflow project and embed the link
- Log in to Webflow and open the project where you want to add the video.
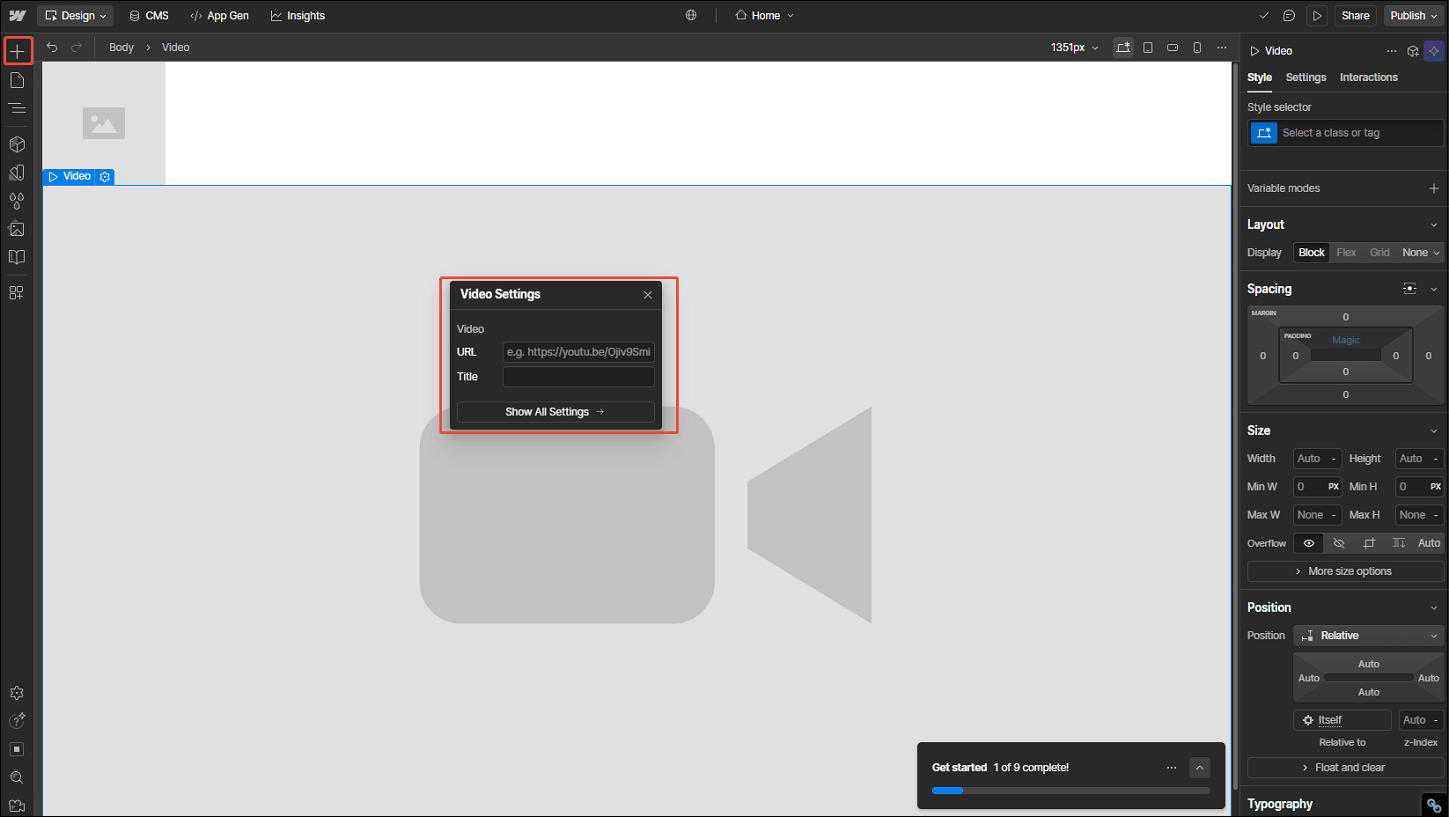
- In Webflow, click on the plus icon in the left sidebar.
- Scroll to the Media section and choose Video onto your canvas, placing it where you want the video to appear.
- Paste the YouTube video URL into the URL field and type the title. Webflow will automatically load a preview of the video.
Final Words
Now, you know that Webflow has a 30MB background video size limit for every user. If you have videos larger than 30MB, how can you avoid the Webflow video size limit?
This post provides you with three feasible methods: compressing videos using a video compressor, such as MiniTool Video Converter and FreeConvert; cropping videos or splitting them with MiniTool MovieMaker and sending them to Webflow one by one; or leveraging external hosting.
Every method above has its own advantages. Feel free to choose the one that suits you best. If you have any questions or suggestions while using MiniTool Video Converter or MiniTool MovieMaker to compress your videos for Webflow, don’t hesitate to get in touch with us via support@minitool.com or contact me directly on X.
User Comments :