

How to compress QuickTime video for a smaller file size? Use the QuickTime Player built-in compression feature to lower the resolution to reduce file size. Or use a video compressor to upload a QuickTime video, adjust the compression level, and start the compression process.
QuickTime Player is a scalable multimedia software developed by Apple Inc. that supports playback, streaming, encoding, and transcoding of various digital media formats. It was once the mainstream standard for digital multimedia and was compatible with Windows and Mac systems. However, with the development of operating systems and browsers supporting MPEG-4 and H.264, Apple discontinued development of the Windows version of QuickTime.

How to Compress QuickTime Video
- QuickTime Player
- MiniTool Video Converter
How to use these compression tools? Below are quick and easy steps.
Quick Steps:
- Choose one of the compressors
- Import the target video
- Adjust the compression settings
- Start the compression
- Check and locate the compressed video
#1 Use QuickTime Player
To compress QuickTime video on a Mac, you can use QuickTime Player. It supports a wide range of formats, including MP4, MOV, AVI, MKV, etc., ensuring compatibility with most digital media files. Beyond playing media files, QuickTime Player offers a user-friendly video compression feature for reducing video size. It lets you compress your video by adjusting the video dimensions, frame size, and bitrate. Let’s see how to compress a video on QuickTime.
1. Launch QuickTime Player on your Mac.
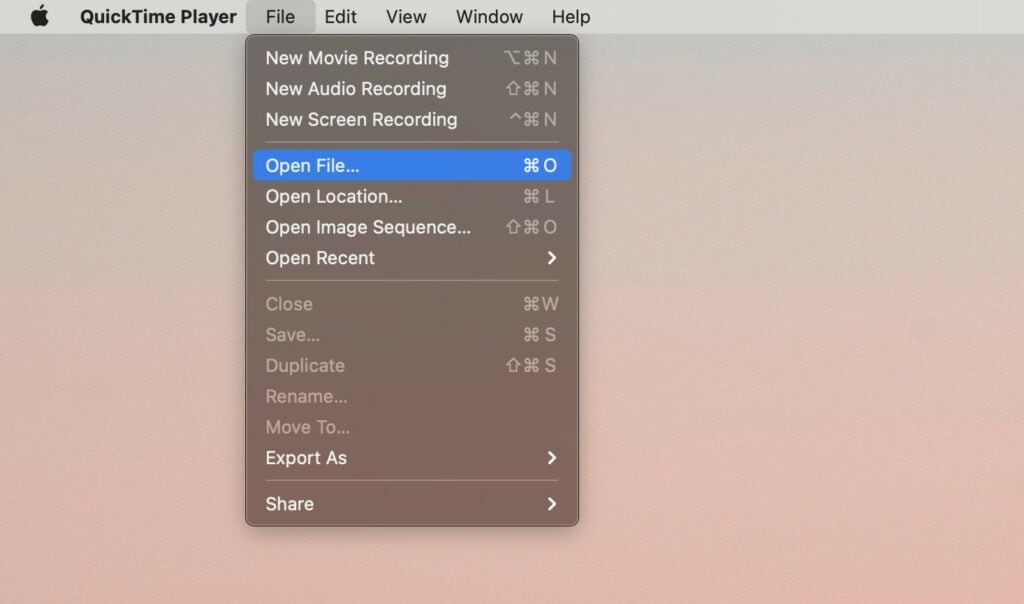
2. Click File > Open File to load the QuickTime video that you want to compress.
3. Click on File > Export As.
4. Choose a lower resolution from the available options to reduce your QuickTime video size.
5. Select a location to save the compressed video and click the Save to button to export the compressed QuickTime video.
In addition, QuickTime Player includes some editing tools. The trim tool allows you to quickly remove unwanted sections from a video, reducing its size accordingly.
#2 Use MiniTool Video Converter
If you are looking for a free and fast video compressor to make your QuickTime videos smaller, you can give MiniTool Video Converter a try. This compressor also supports a wide range of input formats. Whether you want to compress AVI files, MP4 files, MOV files, etc., this tool has you covered. In addition, it also supports batch compression of up to 5 tasks. Let’s see how to make a QuickTime video smaller using MiniTool Video Converter.
1. Obtain MiniTool Video Converter
Download and install MiniTool Video Converter on your computer. Then, launch this program.
MiniTool Video ConverterClick to Download100%Clean & Safe
2. Import Your QuickTime Video
Go to the Compress Video module. Then, click the Add or drag files here to start compression area to add your QuickTime video.
3. Customize the Compression Percentage
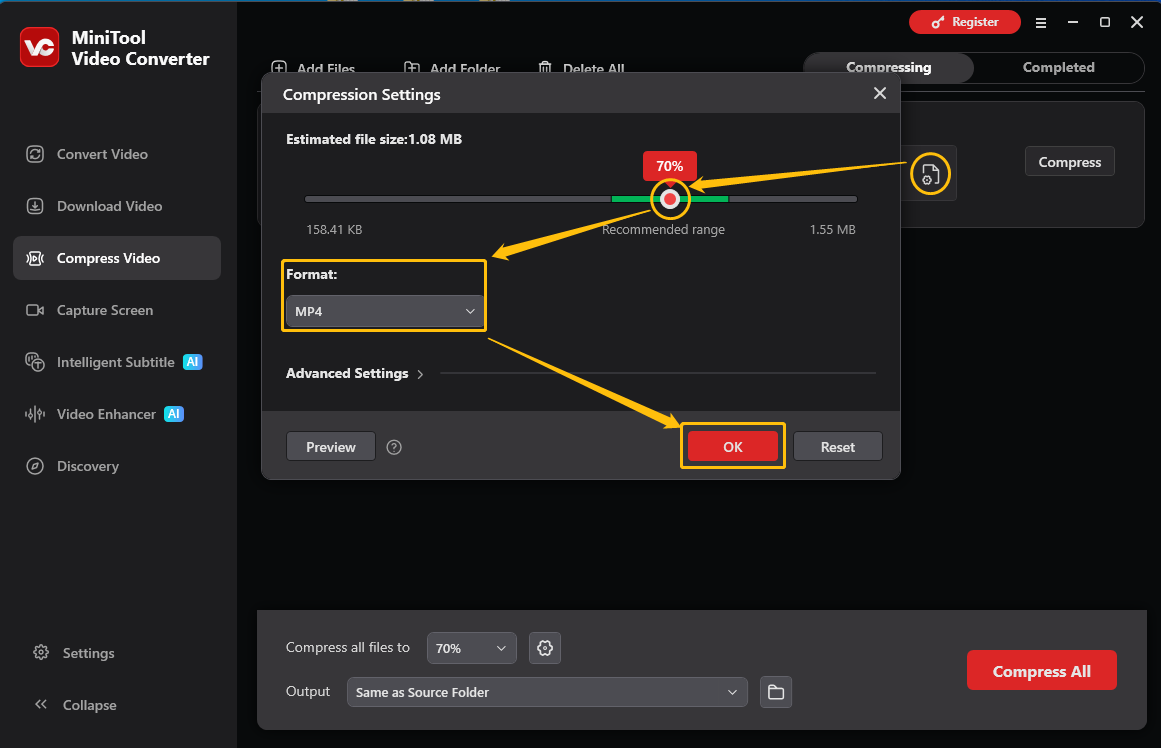
Click the Settings icon to open the Compression Settings window. Move the slider to the left for smaller sizes. You are advised to choose a compression percentage within the recommended range to maintain a balance between size and quality.
Next, expand the Format option to choose an output format for your compressed video. Click OK to save your changes.
4. Begin the Compression
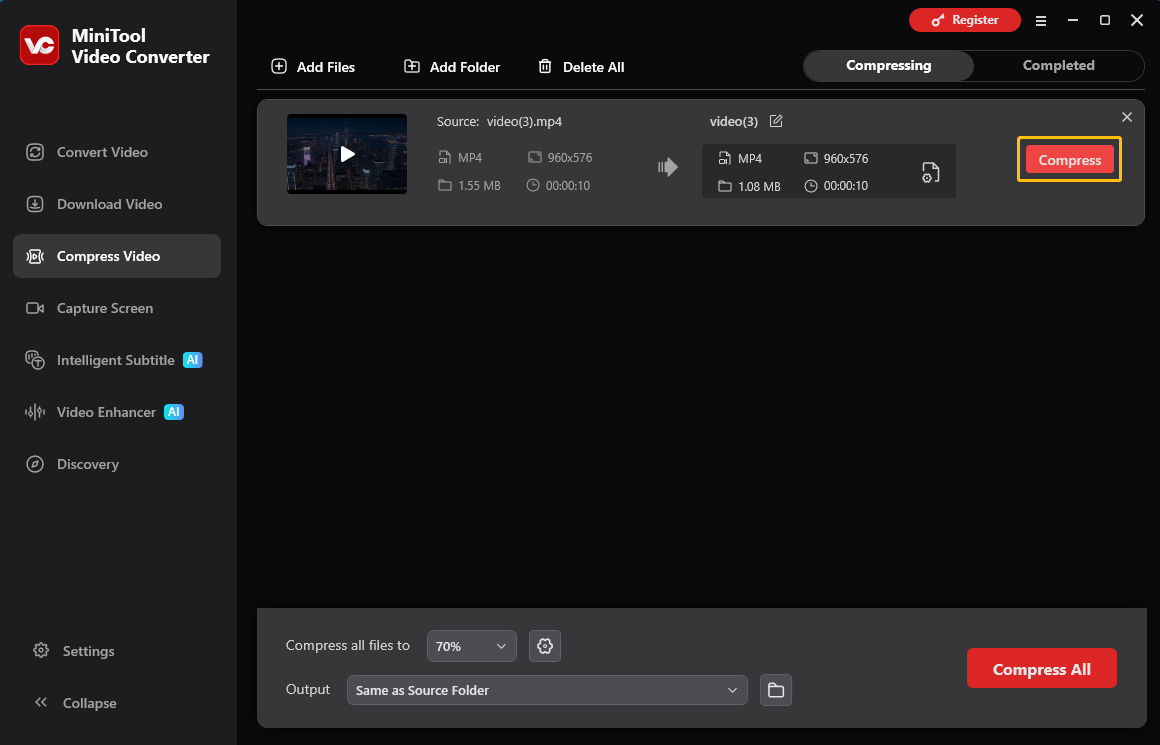
Click Compress to begin the process.
5. Locate the Compressed Video
When the file compression is over, you will be led to the Completed section. Click the Play icon to view the compressed video or click the Folder icon to locate it.
Moreover, MiniTool Video Converter is a video compressor without size limits. It lets you compress videos of any size.
MiniTool Video Converter gives a recommended compression level that balances both video size and quality. It enables you to preview the result so you can make a decision more confidently. Besides, you can get faster compression through hardware acceleration and batch conversion.https://platform.softwareone.com/product/minitool-video-converter/PCP-2111-2396
Why Compress QuickTime Video
Compressing QuickTime videos makes them smaller, which helps with:
- Saving Storage Space: The larger your QuickTime video is, the more storage space it takes. Compression reduces video size, saving space on your computer or cloud storage.
- Faster Uploading and Downloading: Big videos take hours to upload and download over the internet. Compress them to make them smaller, quickening the process and saving valuable time.
- Easier Sharing: Many websites and applications have file size limits for video. If your QuickTime video is too large, you won’t be able to share it. Thus, you need to compress your video to meet the size requirements.
- Bandwidth Saving: Compressed QuickTime videos consume less data when streaming or sending videos.
Conclusion
This article shows how to compress QuickTime video with 2 useful video compression tools, including MiniTool Video Converter and QuickTime Player.
Finally, if you encounter any issues while using MiniTool Video Converter, don’t hesitate to contact MiniTool via support@minitool.com.
User Comments :