Can you screen record on Panasonic Toughbook Laptops easily? How to record screen on Panasonic Toughbook Laptops with no hassle? This free video converter post from MiniTool offers 2 useful ways to show you how to screen record on Panasonic Toughbook Laptops step by step.
Introduction to Panasonic Toughbook Laptops
The Panasonic Toughbook is a brand of durable computers created by Panasonic. The CF-25, the initial model, was unveiled in 1996. The case of every Toughbook model is made of magnesium alloy. Plus, many models feature Liquid-crystal display (LCD) screens. More than that, this Toughbook features a shock-mounted hard drive, a touchpad, a keyboard, and an LCD.
The Panasonic Toughbook is known for its robustness and durability. Professionals who require a laptop can survive harsh conditions frequently choose it. Screen recording is an essential feature no matter which brand of laptop you use. Whether you are creating a tutorial, recording a presentation, or other on-screen activities, screen recording is indispensable. In the following content, I will show you how to record screen on Panasonic Toughbook Laptops. Read on for more.
How to Record Screen on Panasonic Toughbook Laptops with Its Built-in Tool
How to screen record on Panasonic Toughbook Laptops using a built-in tool? You can follow the steps below:
1: Launch the program you want to record.
2: Press the Windows + G key on the keyboard to open the Game Bar.
3: Click the camera icon to open the Capture window. Then, click the Start recording button or press the Windows + Alt + R key to start recording.
4: Once the recording is over, click the Stop button or press the Windows + Alt + R key to end the recording.
How to Record Screen on Panasonic Toughbook Laptops with a Third-party Tool
The following content covers one of the best Windows screen recorders and a guide to screen recording on Panasonic Toughbook Laptops effortlessly.
Best Windows Screen Recorder – MiniTool Video Converter
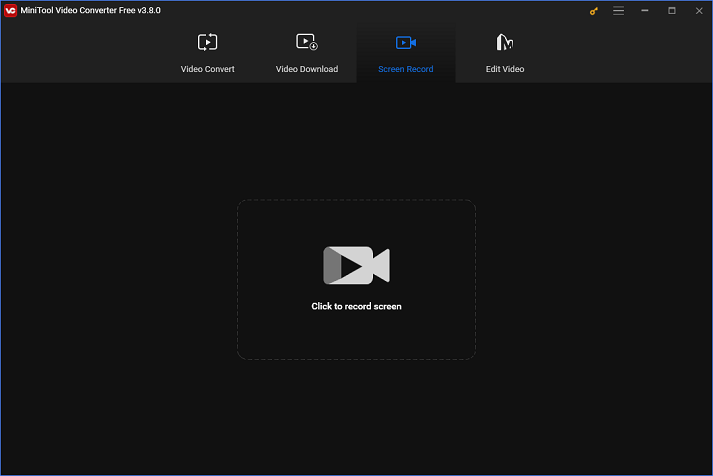
When it comes to screen recorders, MiniTool Video Converter is the first one that springs to my mind. With no ads, bundles, or watermarks, this application enables you to record as long as you want. Any activity on the computer screen you can think of can be captured by it, such as games, TV shows, online conferences, online lessons, online chats, etc.
Moreover, it’s free to record the whole screen by default or specify a recording area. You also have the option to record with system audio and microphone sound simultaneously or separately. Furthermore, this Panasonic Toughbook laptop recorder comes with an adjustable frame rate (50fps, 30fps, 25fps, 20fps, 15fps) and quality (original, standard, high), enabling you to select as you prefer. You can even set a recording duration to end the recording automatically.
Click the download button below to try it!
MiniTool Video ConverterClick to Download100%Clean & Safe
Other features of MiniTool Video Converter:
- It supports converting video/audio files between different formats, including MP4, MOV, MKV, DV, FLV, AVI, OGV, OGG, MP3, etc.
- It provides formats that are compatible with YouTube, Vimeo, Instagram, etc.
- It offers format presets for Apple, Huawei, Android, and Samsung.
- It offers adjustable output parameters, like frame rate, bitrate, sample rate, quality, encoder, etc.
- It empowers you to convert multiple files simultaneously.
- It lets you reduce the file size by changing its resolution, format, etc.
- It allows you to download videos, playlists, music, Shorts, and subtitles from YouTube.
Specific Guide on How to Record Screen on Panasonic Toughbook Laptops
Follow the details below to record screen on Panasonic Toughbook Laptops.
Step 1: Click the download button below to download and install MiniTool Video Converter.
MiniTool Video ConverterClick to Download100%Clean & Safe
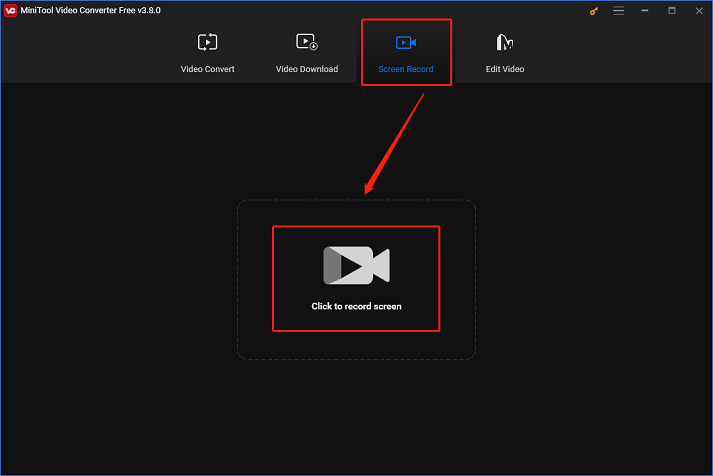
Step 2: Open this software on your computer and enter its Screen Record module. Next, click the Click to record screen region to open the MiniTool Screen Recorder window.
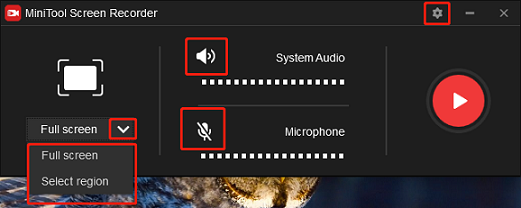
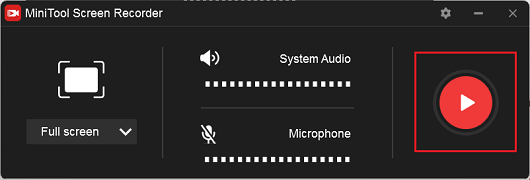
Step 3: In MiniTool Screen Recorder, the default option is to record the full screen. If you want to specify a recording area, click the inverted arrow button next to Full screen to open the drop-down menu and click Select region. Click the System Audio icon and Microphone icon to turn them on or off according to your circumstance. Then, click the gear icon to open the Settings window.
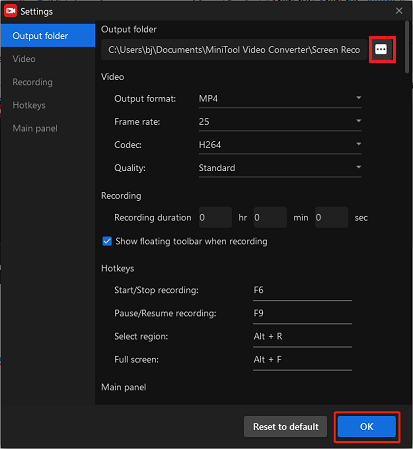
In the Settings window, you can change the frame rate, quality, etc. After that, click OK.
Step 4: Click the red Record button to start recording.
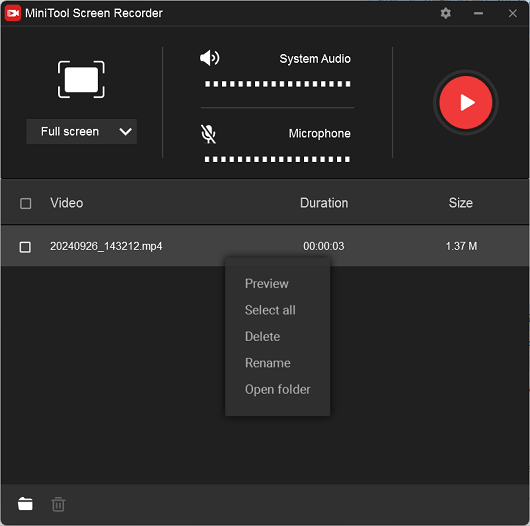
Step 5: Once finished, press F6 on the keyboard to end the recording. The recording will be displayed in the MiniTool Screen Recorder window. You can right-click the target recording to preview, rename, delete, etc.
You can screen record on Panasonic Toughbook laptops smoothly by following the details above.
Bonus: How to Edit Recordings
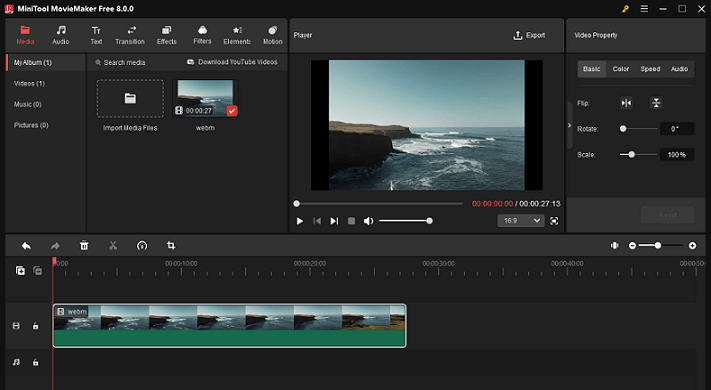
After recording, maybe you want to upload it on social media. Editing the recording first to get more attention or thumbs-ups is a good idea. How to edit your recordings? Never miss MiniTool MovieMaker. It is a free video editor that has no ads, bundles, or watermarks, allowing you to edit videos without hassle. Plus, this application enables you to edit videos by trimming, cropping, reversing, adding effects, transitions, music, filters, and more.
Moreover, MiniTool MovieMaker offers multiple formats, including MOV, MP4, MKV, etc., and output parameters, like frame rate, resolution, etc. It also provides different video templates, allowing you to create videos effortlessly.
Click the download button below and have a try!
MiniTool MovieMakerClick to Download100%Clean & Safe
Other features of MiniTool MovieMaker:
- It can serve as a file converter to finish the conversion process efficiently.
- It can compress files by changing their encoder, resolution, etc.
- It can function as a media player to play files in multiple formats, including MP4, MOV, MKV, MP3, M4A, and more.
- It supports combining multiple videos into one.
- …
Conclusion
This post provides 2 reliable methods to record screen on Panasonic Toughbook Laptops. MiniTool Video Converter is highly recommended for screen recording tasks. Also, if you’re thinking about how to edit your recording, try MiniTool MovieMaker. Hope this article can help you a lot!
You can get in touch with us via [email protected] if you have any questions while using MiniTool Video Converter or MiniTool MovieMaker. Also, you can message me on Twitter. I’ll help you as soon as I can.


![Proven Methods to Record Adobe Connect Easily [Detailed Guide]](https://images.minitool.com/videoconvert.minitool.com/images/uploads/2024/12/record-adobe-connect-thumbnail.png)
![How to Screen Record on Huawei Laptop? [Comprehensive Guide]](https://images.minitool.com/videoconvert.minitool.com/images/uploads/2024/12/how-to-screen-record-on-huawei-laptop-thumbnail.png)
User Comments :