Need to record a partial area of the screen? This post introduces 6 excellent screen recorders and gives you the instructions on how to use them to record part of the screen on Windows and Mac.
When you record live streaming, video call, or gameplay on your PC, you probably don’t want your desktop icons and bookmarks to appear in your recording. Therefore, recording a certain area of the screen is the right choice.
To record part of the screen, here are some screen recorders with the custom area recording option.
Screen Recorder | Price | Supported Operating Systems | Watermark |
Free | Windows | No | |
OBS Studio | Free | Windows, macOS, Linux/Unix | No |
Bandicam | Free/Paid | Windows | Yes |
Microsoft PowerPoint | Paid | Windows, macOS | No |
Mac built-in screen recorder | Free | macOS | No |
QuickTime | Free | macOS | No |
How to Record Part of Screen on Windows
Game bar is a great screen recording tool for Windows. It lets you record gameplays, videos, and more. But the Game bar can’t be used to record a certain part of the screen. So, this part offers you 4 Game bar alternatives that support recording a specific region.
MiniTool Video Converter
MiniTool Video Converter is a professional video converter, but it also can function as a screen recorder and a YouTube video & audio downloader. It’s 100% free, with no time limits and watermarks.
MiniTool Video ConverterClick to Download100%Clean & Safe
You can use this software to record the entire screen or select a certain region to record on Windows. Also, MiniTool Video Converter allows you to record audio from the computer and the microphone and record mouse clicks. The recordings can be saved in various video formats such as MP4, WMV, MKV, AVI, MOV, FLV, TS.
If you need to record desktop audio, just use the Video Convert function to convert the recorded video to MP3 or other audio formats.
Take the steps below to record a specific region of the screen.
Step 1. Launch MiniTool Video Converter.
Download and install MiniTool Video Converter. Run this program immediately.
MiniTool Video ConverterClick to Download100%Clean & Safe
Step 2. Open MiniTool Screen Recorder
Tap on Screen Record, and click the camera icon to open the MiniTool Screen Recorder tool.

Step 3. Adjust the Output Settings
Click the gear icon from the MiniTool Screen Recorder window. In the Settings window, you are able to change the output folder, output format, frame rate, codec, quality, set the recording duration, and change keyboard shortcuts.
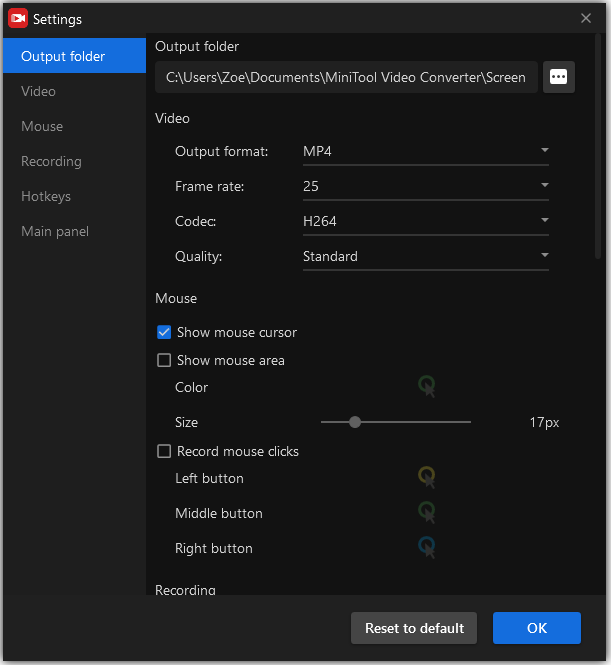
Default keyboard shortcuts for MiniTool Screen Recorder
- Start/Stop recording: F6
- Pause/Resume recording: F9
- Select region: Alt + R
- Full screen: Alt + F
Step 4. Choose the Recording Mode “Select Region”
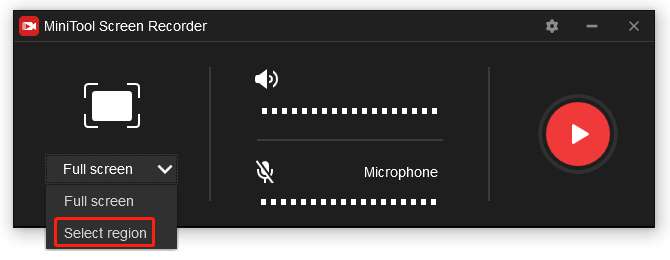
First, enable either the system audio or the microphone, or both of them based on your needs. Then click the down arrow next to Full screen. From the drop-down menu, choose the option Select region.
Step 5. Record Part of Screen
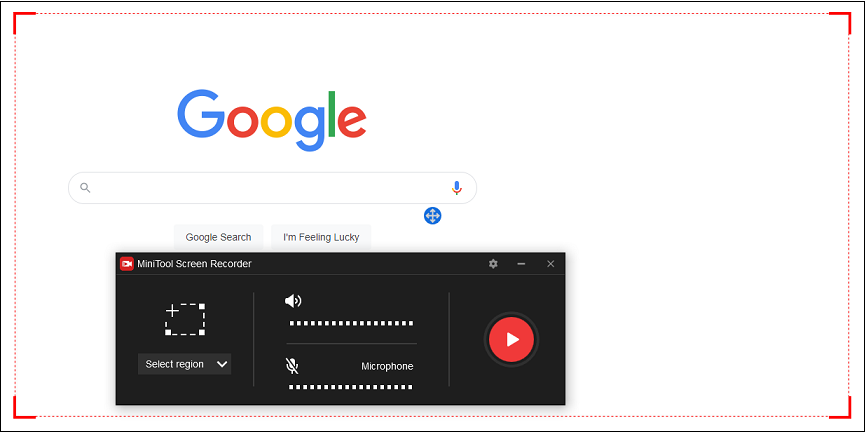
Drag to select the area of the screen you want to record. Drag this icon in the middle of the recording area to move the selection box. If you want to reselect the recording region, choose the Full screen mode and choose Select region again to customize the recording area.
When you are ready, press the red Record button or the F6 key to start recording.
Step 5. Check the Recording
To stop the recording, press the F6 key. Then right-click on the recording and select Open folder to check it.
OBS Studio
OBS is a powerful screen recorder and live streaming software. It’s free, open-source and cross-platform. It doesn’t put any watermark on your output recordings and lets you record without time limits.
OBS supports webcam recording, game capture, image slideshow, audio output/input capture, live streaming, etc. But you can record videos in audio format.
With the complicated interface and many options, OBS is hard to learn for some users. If you want to learn more about OBS, see this post: How to Use OBS Screen Recorder & OBS Alternative.
Here’s how to record a certain part of your screen with OBS.
Step 1. Download OBS from its official website, open the installation package, and follow the on-screen wizards to complete the installation.
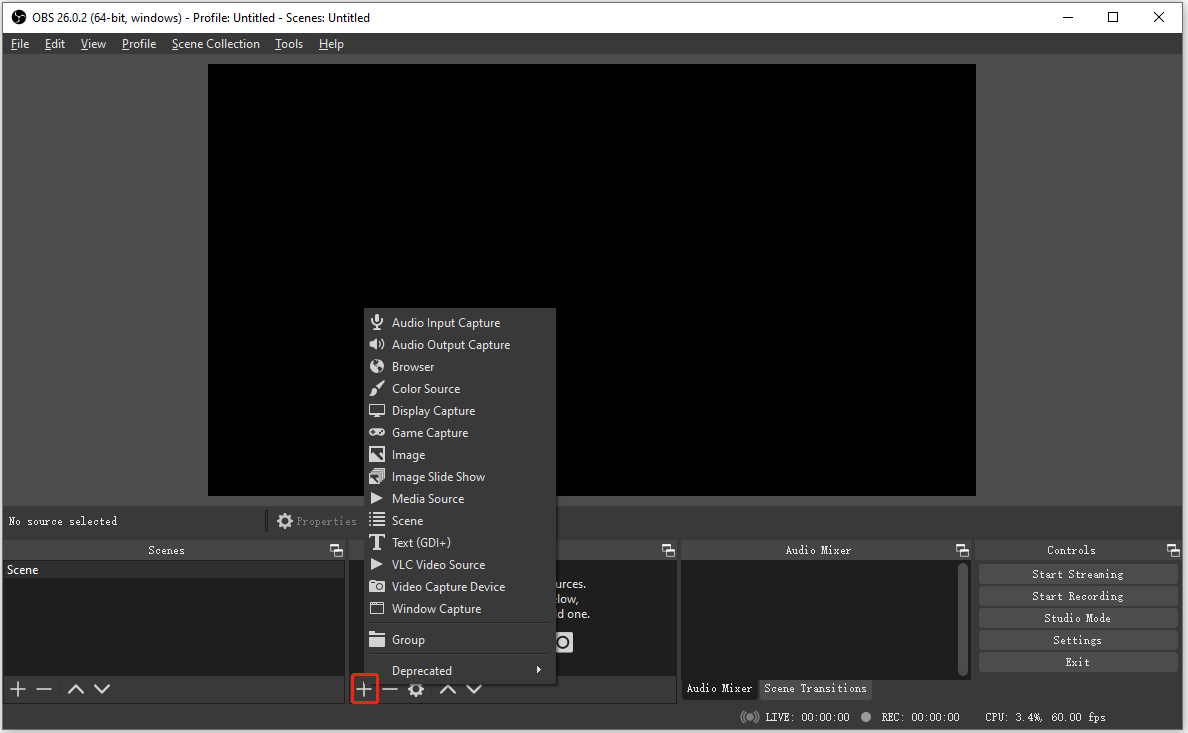
Step 2. Open OBS to get the main UI and set up the recording settings.
Step 3. In the Sources tab, click the + and select Display Capture. If you need to record internal audio and capture sound from your microphone, add the Audio Input Capture and Audio Output Capture.
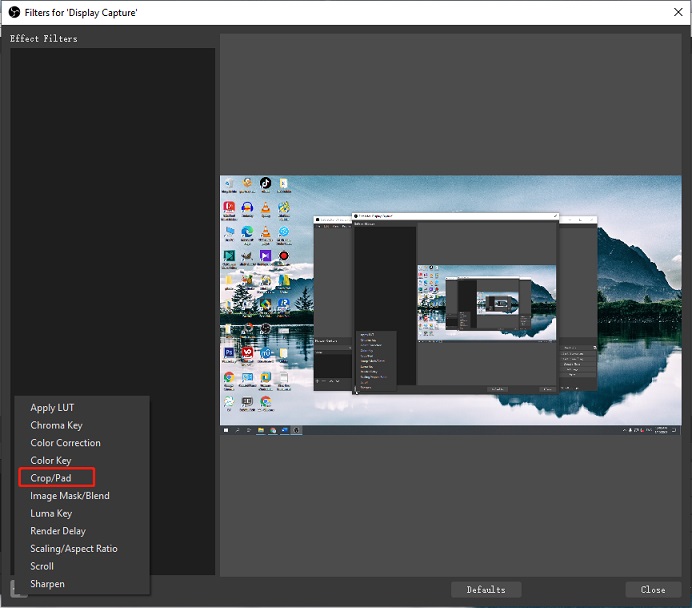
Step 4. Choose Display Capture and right-click on it. Then select Filters from the popup window.
Step 5. In the Filters window, click the plus icon in the lower-left corner of the window. Then choose the Crop/Pad option.
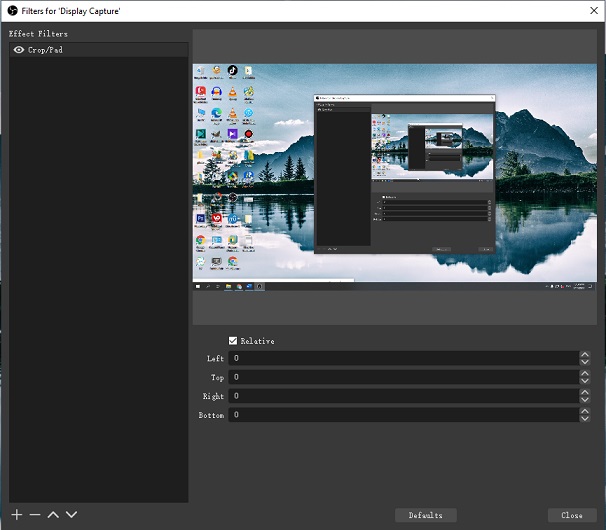
Step 6. The Filter name window pops up. If you don’t want to change the filter name, click OK to go on.
Step 7. Enter values in the boxes of Left, Top, Right, Bottom to crop the display capture. When you are done, click Close to close the Filter window
Step 8. Then click Settings in the Controls tab and configure the output settings. After that. Click Apply > OK.
Step 9. In the Controls tab, click the Start Recording button. To finish the recording, just press on Stop Recording. Click the File button in the top left corner of the window and choose Show Recordings to check the recording.
Bandicam
Another screen recorder you can use to record part of the screen is Bandicam. It’s a popular screen recorder with a simple interface and rich functionality. It’s capable of recording your webcam, setting recording at a specific time, making a chroma key video, drawing on your screen in real-time. More importantly, Bandicam enables you to record 2D/3D games at 480 FPS and capture 4K UHD videos.
However, the free version of Bandicam is limited. With the free version, you can only record for up to 10 minutes each time. The free version doesn’t have the scheduled recording function and will place a watermark on your recording.
Here’s the step-by-step guide to capture a specific area of the screen.
Step 1. Launch Bandicam after you install it on your computer.
Step 2. Tap on Video, you can change the output format, fps, codec, quality, etc. If you want to choose a new folder to save your recording, click on General and click the three dots to select a folder.
Step 3. Click the down arrow to display all the screen recording modes. Select the option Select a recording area from the drop-down window.
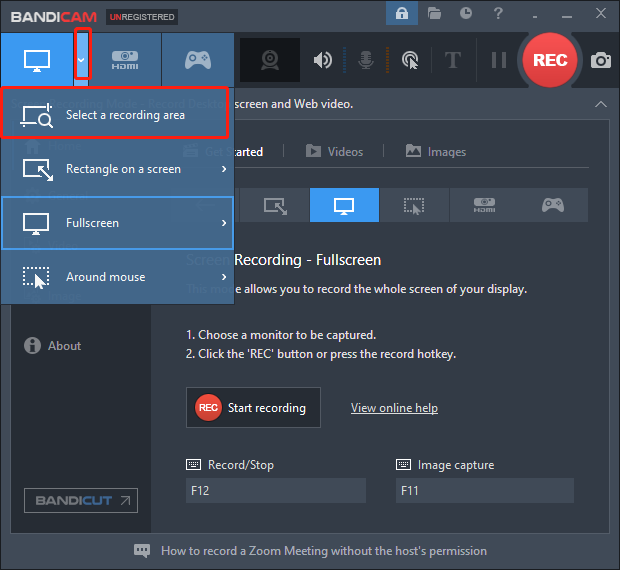
Step 4. Select the area that you want to record and adjust the size of the recording window. Click on REC in the top right of the window to start recording.
Step 5. Click the camera icon to take a screenshot or draw on the screen by clicking the pen icon while you are recording.
Step 6. Click the red Stop button to end the recording. Go to the General tab, click Open next to the save path and you will see your recording.
Microsoft PowerPoint
Many people do not know that Microsoft PowerPoint can be used to record desktop screens. You can use it to record your presentations, videos, or others without the need to install third-party tools.
Compared to other screen recorders, Microsoft PowerPoint has only the basic recording options such as capture audio, select area, and record pointer.
Here’s how:
Step 1. Open PowerPoint on your PC.
Step 2. Tap on INSERT and go to the Media section. Click Screen Recording.
Step 3. Then a dock will appear with 5 options (Record, Stop, Audio, Select Area, and Record Pointer). Select the part of your screen you want to record and click the Record button.
You can also use keyboard shortcuts to control your recording.
- Select Area: Windows + Shift + A
- Start Recording: Windows + Shift + R
- Stop Recording: Windows + Shift + Q
- Record Audio: Windows + Shift + U
- Record Pointer: Windows + Shift + O
Step 4. Press the Windows + Shift + Q keys to stop the recording and the video will be automatically embedded in your slide.
Step 5. To save the video, right-click on the video and choose Save Media as. Select a folder to save the video and rename the file.
How to Record Part of Screen on Mac
For Mac users, they can use Screenshot and QuickTime Player to record a certain part of the screen.
Screenshot
Screenshot is a screenshot tool and a screen recorder that allows you to capture still images of your screen and record the entire screen or a specific area of it. But the Screenshot app is only available in macOS Mojave 10.14 and later.
Let’s see how to record part of the screen on Mac using Screenshot.
Step 1. Press the Command + Shift + 5 keys to open the Screenshot tool.
Step 2. At the bottom of your screen, you will see the screenshot toolbar. In the toolbar, click the button next to Options and select a portion of your screen to record.
The Options allows you to change the output folder, set the timer, change the microphone, and more.
Step 3. Next, click on Record. When you want to finish the recording, press the Command + Control + Esc keys or click the Stop button at the top of your screen.
Also read: Solved - How to Screen Record on iPad and iPhone
QuickTime Player
QuickTime Player is an app preinstalled on macOS. It’s not just for video and audio playback but also for screen recording and audio recording. Files recorded with QuickTime Player are saved in MOV and use much space on your Mac. To reduce your recording file size, you can convert MOV to MP4.
Here’s how to use QuickTime to record part of the screen.
Step 1. Open QuickTime Player.
Step 2. In the top menu bar, click File and select New Screen Recording from the drop-down menu.
Step 3. In the Screen Recording window, click the down arrow icon next to the Record button and adjust the recording settings.
Step 4. Hit the Record button and drag to select a portion of the screen to record. Tap on Start Recording.
Step 5. Press the Command + Control + Esc keys to stop recording.
Related article: How to Stop QuickTime Screen Recording on Mac
Conclusion
To record part of the screen on Windows 10, I suggest you use MiniTool Video Converter because it’s free, simple to use, without time limits and watermarks. To record a portion of your screen on Mac, you can try QuickTime Player if your computer doesn’t have the Screenshot app.
If you encounter some problems when using MiniTool Video Converter, please contact us via support@minitool.com.
User Comments :