To record desktop audio, you can use a desktop audio recorder or a screen recorder allowing recording screen with the system audio. This post lists the 6 best desktop audio recorders and teaches you how to record desktop audio with them.
Is there any software to record desktop audio or record screen with only internal audio? How to actually record audio playing on your Mac computer? Don’t worry, in this post, I’ll show you how to record desktop audio on Windows, Mac and online.
6 Desktop Audio Recorders to Record Audio from PC
- Windows Voice Recorder
- Audacity
- MiniTool Video Converter
- QuickTime
- ScreenFlow
- Screen Capture
Part 1. Record Desktop Audio on Windows
For Windows users, here are three desktop audio recording software out there: Windows Voice Recorder, Audacity and MiniTool Video Converter.
Windows Voice Recorder
The first audio recording software I’d like to recommend is Windows Voice Recorder. It’s the built-in voice recorder on Windows, which allows you to record voice through your microphone and trim unwanted parts of your recordings. It’s a voice recorder that records external audio only, so how to use Windows Voice Recorder to record desktop audio on your computer?
Follow the below steps!
Step 1. Tap the search icon on the taskbar and search for “Settings”.
Step 2. Open the Settings app and click on System.
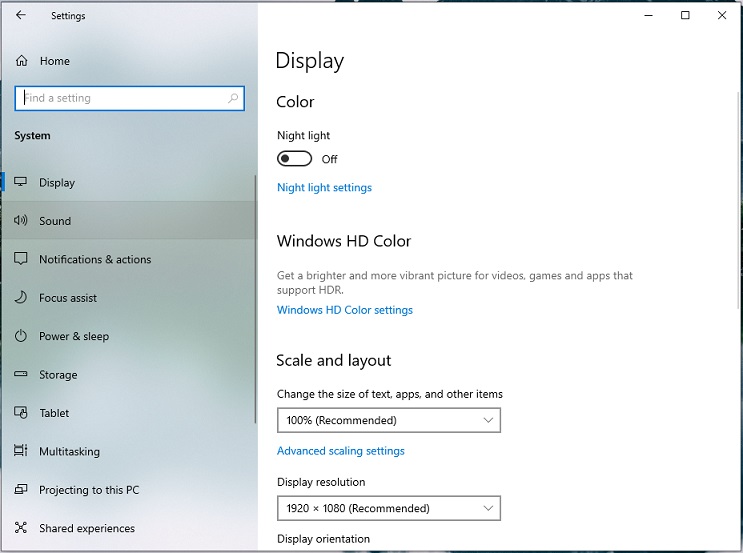
Step 3. From the left pane, click on Sound and choose the Sound Control Panel option under the Related Settings.

Step 4. After you access the Sound window, switch to the Recording tab. Click on Stereo Mix and choose Enable.
Step 5. Click the Set Default button and then click OK to save changes.
Step 6. Click the search icon and enter “voice recorder” in the search bar. Click the Open to run Voice Recorder.
Step 7. Find and play the audio file you want to record. Then click the blue Record button.
Step 8. Click the Stop button to end the recording.
Audacity
If you still can’t record internal audio with the Windows Voice Recorder, you can try Audacity. It’s a free and open-source audio recorder and editor. It supports recording audio in high quality through a microphone or mixer and comes with audio editing features like cutting, merging, removing vocals from a song, and reducing background noise in the audio. Besides that, Audacity supports VST, LV2, LADSPA and other plugin-ins.
Here’s how to record desktop audio with Audacity.
Step 1. Go to the Audacity website and navigate to DOWNLOAD > WINDOWS. Then it will be downloaded automatically.
Step 2. Open the installer and follow the on-screen instructions to complete the installation. Run Audacity.
Step 3. Drop down the Audio Host (MME) list and choose Windows WASAPI. Then make sure that Playback Device is the Speakers and choose the Speakers (Realtek High Definition Audio) (loopback) option from the Recording Device box.
Step 4. Click the red Record button and play the audio file you want to capture.
Step 5. Go back to Audacity and click the Stop button when the playback is finished.
Step 6. Then cut out the unnecessary sections of the audio track.
Step 7. Click on File in the top-right corner of the window and choose Export > Export to MP3. Select a folder to save the recording, edit its metadata tags and click OK.
MiniTool Video Converter
Unlike Audacity, MiniTool Video Converter only records screen with the internal audio or external audio in the following formats: MP4, MKV, AVI, WMV, MOV, FLV, and TS. Although MiniTool can’t directly record desktop audio, it can function as a video conversion tool to convert recordings to audio formats like MP3, WAV, WMA, M4A and so on.
Another advantage of this screen recorder is it supports setting the duration of the scheduled recording. For example, if the recording duration is set to 1 hour, MiniTool Video Converter will automatically stop and save the recording after 1 hour.
Others Features of MiniTool Video Converter
- Free to use, without watermarks.
- Support any popular import and output video & audio formats.
- Convert multiple files at once.
- Download video & audio from YouTube.
- Convert MP3 to video.
Let’s see how to record desktop audio on Windows with MiniTool Video Converter.
Record screen with the system audio
Step 1. Download and install MiniTool Video Converter. After installing the software on your computer, open it.
MiniTool Video ConverterClick to Download100%Clean & Safe
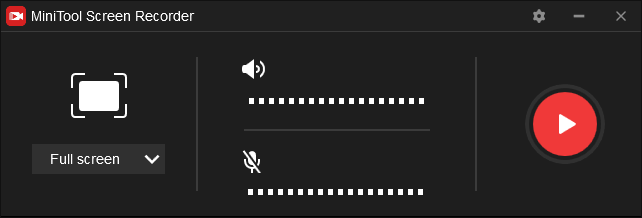
Step 2. Find the Screen Record tool and tap on it. Then click the camera icon to go on.
Step 3. On the MiniTool Screen Reorder window, you can click the settings icon to change the recording settings. After that, click the sound icon to enable the system audio.

Step 4. Click the Record button and play the audio that you want to record.
Step 5. Click the F6 button when you want to end the recording.
Step 6. Right-click on the recording and choose the Open folder to locate the file. Then close the MiniTool Screen Recorder window.
Related article: How to Record Your Computer Screen? Top 3 Ways
Convert the recording to MP3
Step 1. Click on Video Convert and click the Add Files to import the file you just recorded.
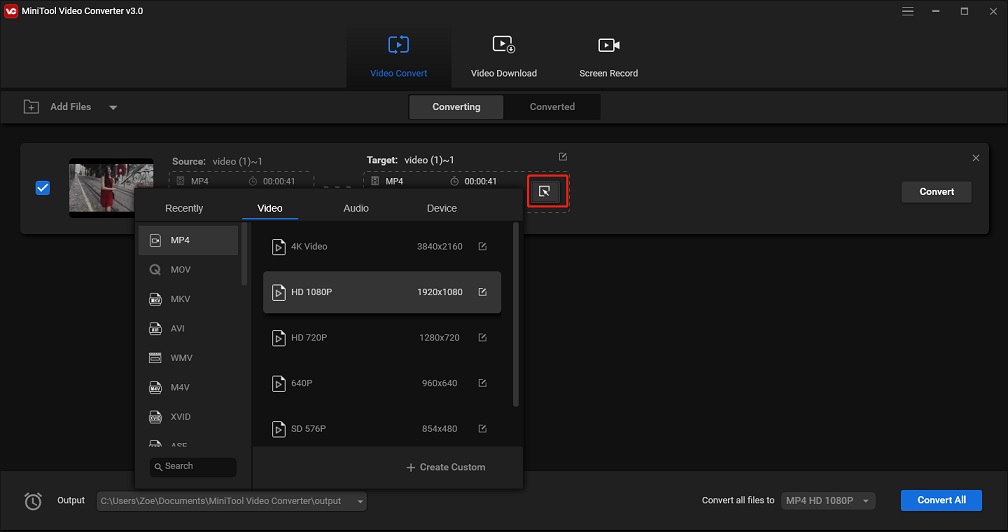
Step 2. Click this icon to open the output format window and switch to the Audio tab. Next, select MP3 as the output format.

Step 3. Press on Convert to extract MP3 from the recording.
Step 4. When the process is finished, click on Converted and then click the Show in folder button to find the converted file.
Part 2. Record Desktop Audio on macOS
This part will show you how to record desktop audio with QuickTime and ScreenFlow on macOS.
QuickTime
QuickTime is the native video player on Mac computers. It also has a screen recording feature but it only records audio through your microphone. If you want to record internal audio on macOS, you must install a virtual audio device tool like BlackHole, Loopback or Soundflower.
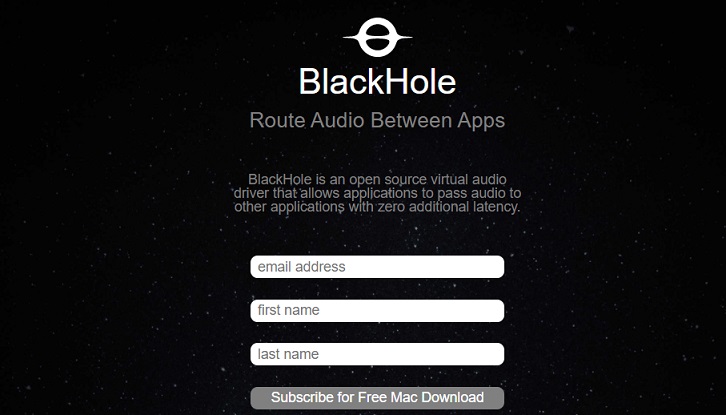
Later, I’ll teach you how to set up BlackHole and how to record computer audio with QuickTime. Blackhole is an open-source virtual audio driver that allows you to screen record with the system audio on Mac computers.
Here’s how:
Step 1. Visit https://existential.audio/blackhole/ to access the BlackHole website.
Step 2. Here you will need to enter your email address and name. Tap on Subscribe for Free Mac Download and it will send you the download link.

Step 3. Click the link and download the BlackHole app. Double-click it to install this app on your pc.
Step 4. Tap on the search icon to search for “Audio MIDI Setup”. Open it and you can see all the audio devices.
Step 5. Click the + in the lower-left corner of the window and select the Create Multi-Output Device.
Step 6. In the Multi-Output Device tab, check the Use button next to BlackHole 16ch audio device and check the Drift Correction button. Then rename your Multi-Output Device.
Step 7. Click the + and create an Aggregate Device. Check the Use buttons of Built-in Microphone and BlackHole 16ch and give the Aggregate Device a name.
Step 8. Go to System Preferences > Sound > Input and choose the audio device you just created. Click on Output and choose the newly created device.
Step 9. Now, you can launch QuickTime and head over to File > New Audio Recording to start recording the desktop audio.
ScreenFlow
Recording desktop audio with QuickTime is too complicated? Here recommend ScreenFlow to you. It’s a powerful screen recorder and video editor. It can record music playing on Mac and your voice using a microphone. The output format can be AIFF, M4V, MOV, MP4, or GIF.
As a video editor, ScreenFlow gives you the options to add subtitles, apply transitions, add images, and offers you a library of stock videos, etc. It costs $129.99.
Here’s how to record audio coming from your Mac computer with ScreenFlow.
Step 1. Launch the ScreenFlow app after installing it on your computer.
Step 2. Click on File in the top menu bar and choose New from the drop-down menu.
Step 3. In the New Recording tab, check the Record Computer Audio option.
Step 4. Play the audio file and hit the Record button to start recording.
Also read: Top 15 Websites to Download Free Stock Footage with No Watermark
Part 3. Record Desktop Audio Online
Screen Capture
Wondering how to record computer audio online? Try the excellent online screen recorder – Screen Capture. By using this tool, you can capture audio from a browser, video playback, speakers online without any screen recording software. It’s free and easy to use but comes with some drawbacks such as can’t change the output format, put a watermark on output videos and has no audio editing tools.
Here’s how:
Step 1. Visit the Screen Capture website.
Step 2. Check the Sound icon to record the system audio.
Step 3. Then press the Start Recording button and allow Screen Capture to use your microphone.
Step 4. When you are done, download the recording from the website.
Conclusion
This post tells you how to record desktop audio in 6 effective ways! Now, you can choose a suitable desktop audio recorder and record audio coming from your computer!
If you have any questions about MiniTool Video Converter, please contact us via [email protected] or leave a reply!
How to Record Desktop Audio FAQ
Most Android devices can record screen with audio with their built-in screen recorders.
- Play the audio you want to record.
- Swipe down the status bar and tap on Screen Recorder to start recording.
- After ending the recording, you can find the recording file in the Gallery.


User Comments :