As a Toshiba laptop user, you need to record activities happening on the screen, like online lectures, video conferences, presentations, game tutorials, and others. How to screen record on Toshiba laptops? As we know, Toshiba laptops are running on the Windows operating system. Hence, you can use the built-in screen recording tools and Windows screen recorders to take a screen recording on Toshiba laptops. Below are step-by-step tutorials. Let’s have a look.
How to Screen Record on Toshiba with Xbox Game Bar
Xbox Game Bar is the built-in screen recorder for Windows 10 or 11. It is preinstalled on your PC without the need to download or install any software. It can meet your basic recording needs. You can use it to record the whole screen with audio from the system and microphone. Additionally, it enables you to take screenshots. However, it doesn’t support recording the selected region, desktop, and File Explorer. You can refer to the below steps to screen record on Toshiba.
Step 1. Open the activity you want to record and then press Win + G to launch Xbox Game Bar.
Step 2. Click the Capture icon at the top menu bar and click the Start recording option to begin the recording. Or you can press Win + Alt + R to start recording. Also, you can click the Take screenshot option to capture a still picture.
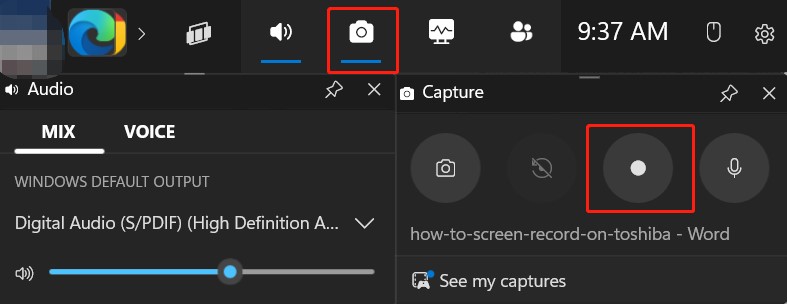
Step 3. To finish the recording, you can hit the Stop recording option or press Win + Alt + R.
How to Screen Record on Toshiba via Snipping Tool
Snipping Tool is an easy-to-use screenshot program developed by Microsoft, which has features for recording screens and taking screenshots. You can choose the recording area according to your needs. Below is how to screen record on Toshiba laptop using Snipping Tool.
Step 1. In the Start Search box, type into “snipping tool” and click Open to run it.
Step 2. Switch from the Snip tab to the Record tab, press Win + Shift + R or click the + New button, click and drag the cursor to choose the recording area, and then click Start to begin the recording.
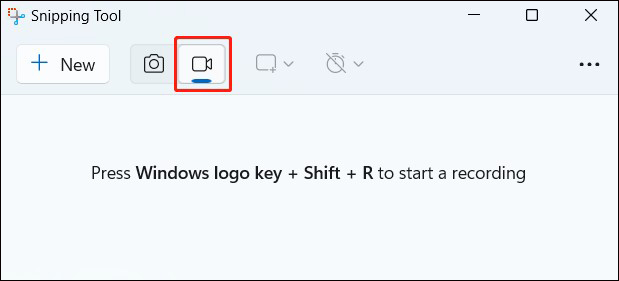
Step 3. Finally, click the Stop recording option to end the recording.
How to Screen Record on Toshiba Laptop by MiniTool Video Converter
Besides, third-party screen recorders are also worth a try. MiniTool Video Converter is a completely free screen recorder that can help you record the 4K screens at standard, high, and original quality. With it, you can easily record high-quality videos and save them in MP4 format. Furthermore, it provides you with several options for recording frame rates, including 50fps, 30fps, 25fps, 20fps, and 15fps.
In addition, MiniTool Video Converter is a file converter for video and audio files. It supports converting to or from various formats, such as MKV, M4V, 3GP, MP4, WebM, AAC, M4A, etc. You can also use it to download videos, audio, playlists, and subtitles from YouTube.
Here’s how to screen record on Toshiba with MiniTool Video Converter.
Step 1. Click the button below to download and install MiniTool Video Converter.
MiniTool Video ConverterClick to Download100%Clean & Safe
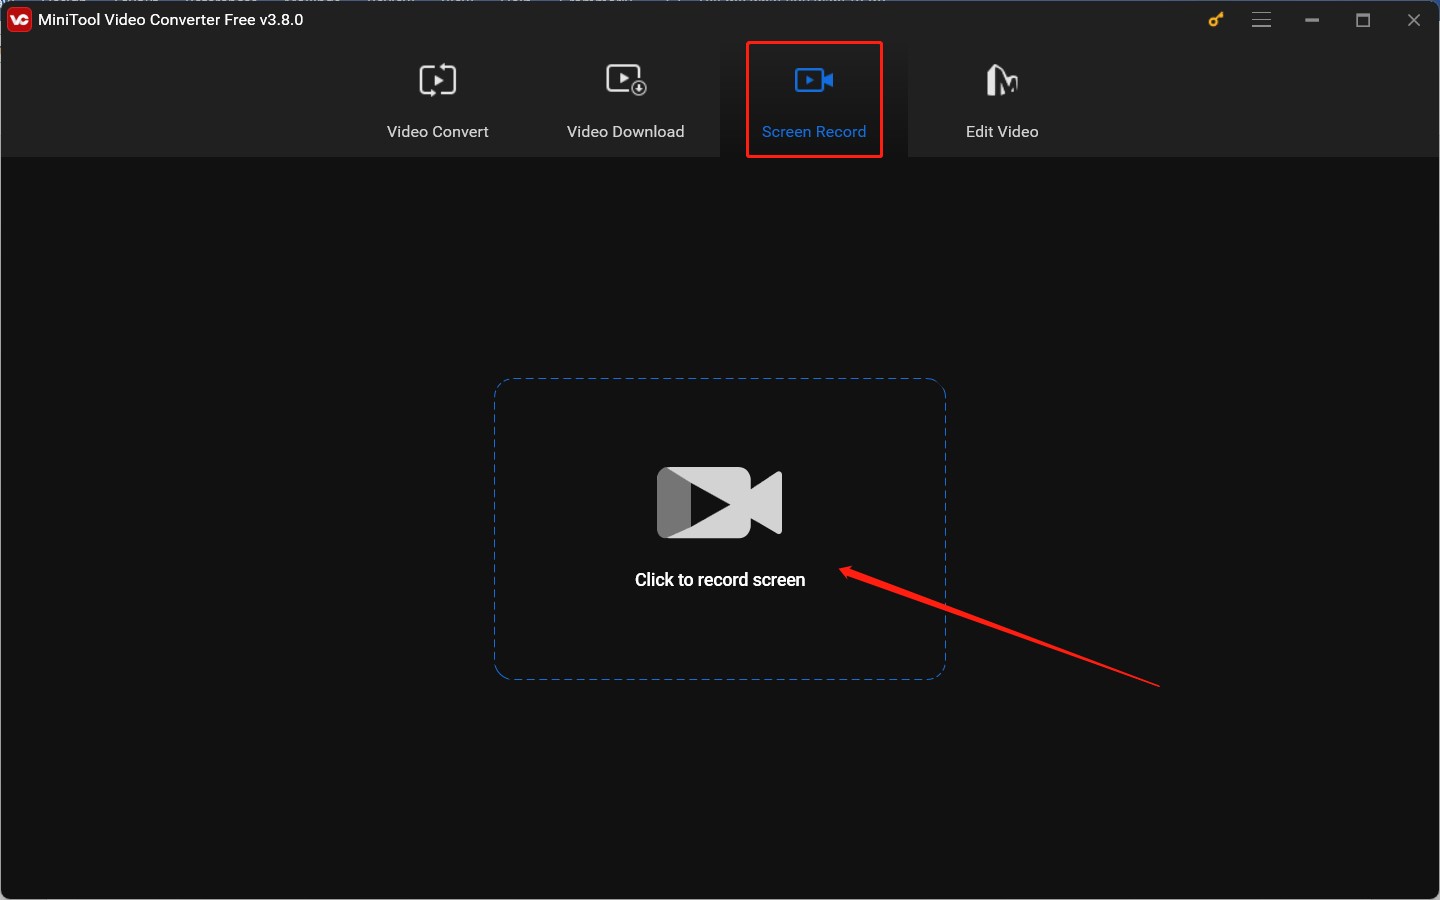
Step 2. Run MiniTool Video Converter, switch to the Screen Record module, and hit the Click to record screen area to access MiniTool Screen Recorder.
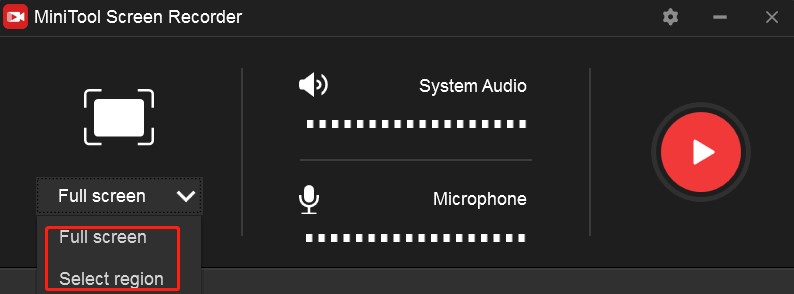
Step 3. Set the recording area and audio source. You can choose to record the full screen or selected region with the option to record the system audio and microphone sounds or not.
Step 4. Click the gear icon to adjust other recording settings, like recording saving path, frame rate, quality, and others. Then click OK to save the changes.
Step 5. Click the red Record button or press F6 to start the recording process. During the recording process, you can press F9 to pause and resume. To end the recording, just press F6 again.
Other Useful Screen Recorders for Toshiba Laptop
What’s more, there are many Windows screen recording applications for Toshiba. In this section, we have rounded up a list of useful screen recorders for Toshiba laptops.
- Bandicam
- OBS Studio
- Snagit
- EaseUS RecExperts
- …
Conclusion
How to screen record on Toshiba? You can use MiniTool Video Converter or the built-in recording tools of Windows. You can follow the above guidance and have a try.




User Comments :