Want to record audio from computer? In this post, you will learn the 4 best free ways to record internal audio on computer. Besides, it will teach you how to extract audio from video (with MiniTool Video Converter) and download audio from YouTube.
Audio recording software is a must in daily life because audio recording is all that is needed on many occasions, such as recording background music from videos, recording meetings, recording live streams, etc.
There are various audio recorders on the web. How to choose a suitable audio recorder? How to record audio from computer? In this post, I will pick out the 4 best audio recorders and teach you how to record desktop audio on computer step by step.
4 Best Audio Recorders That You Should Try
- Audacity
- QuickTime Player
- OBS
- Chrome Audio Capture
Method 1. Record Audio from Computer with Audacity
Windows has a built-in audio recorder, but it only supports recording sound through the microphone. You can use it to record conversations, important lectures and more, then cut out unwanted sections of the recording. However, if you need to record system audio from computer, Audacity is a great choice.
Audacity is a professional audio editing program and audio recorder. It’s free, open-source, powerful, and cross-platform, available for Windows, macOS, Linux, and other operating systems. Audacity is capable of capturing audio playing on the computer and recording your voice from the microphone. It can save recordings as WAV, MP3, OGG and other audio formats. It’s easy to use and lets you record audio in high quality.
Let’s see how to record audio from computer with Audacity.
Step 1. Open the Audacity website and click on DOWNLOAD AUDACITY to get the download page.
Step 2. Download Audacity for your Windows operating system and open the installer in the Downloads folder. Follow the instructions to install it on the computer.
Step 3. Then open Audacity after the installation. Click the Audio Host box and get a drop-down menu. Choose Windows WASAPI from the drop-down menu.
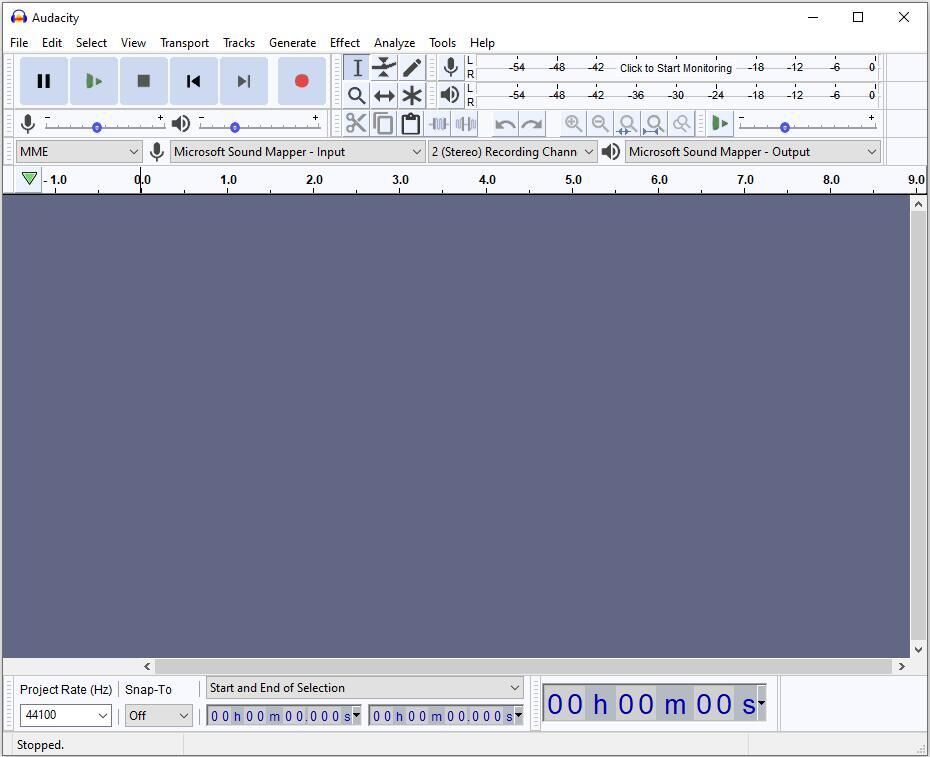
Step 4. Tap on Recording Device next to Audio Host and choose Speakers (Audient iD4) (loopback) from the drop down menu.
Step 5. Find the audio that you want to record and minimize the window.
Step 6. Go back to the main user interface of Audacity and click the red Record button to start recording. Then play the audio.
Step 7. In the end, stop the audio recording and save the file as the wanted audio format.
Main Features
- It’s free to use.
- It works on most operating systems.
- It’s available in 36 languages.
- It can import and export files in MP3, WAV, AIFF, OGG, and other popular audio formats.
- It supports recording internal audio and external audio.
- It allows you to cut, copy, and paste audio.
- It can remove vocals from a song, edit music tags, remove background noise from audio, etc.
- It offers lots of digital effects and plug-ins.
Method 2. Record Audio from Computer with QuickTime Player
Mac users can’t record internal audio coming from computer with its native programs. To record audio from computer, the best easiest way is to use third-party desktop audio recorders. If you don’t want to install any audio recorder on the computer, here is a free way to record system audio on Mac computer – use QuickTime Player with Soundflower.
QuickTime is a macOS-only media player as well as a screen recorder. It allows you to record screen with audio, and record voice from your microphone, but it won’t let you record system audio from computer. To fix that, you can install a Soundflower extension that allows you to record audio from computer (not microphone). This extension is free and safe.
Now, let’s follow the step-by-step guide to learn how to record audio from computer using QuickTime Player.
Step 1. Download the Soundflower installer, run it, and complete the installation.
Step 2. Click the search icon and type “Audio MIDI Setup” in the search bar. Then you will see two audio devices: Soundflower (2ch), and Soundflower (64ch).
Step 3. Click the + in the lower-left corner of the window and choose Create Aggregate Device. Rename it and tick the soundflower 2ch box and built-in microphone boxes.
Step 4. Click the + again, choose Create Multi-Output Device and give it a name. Then tick the soundflower 2ch and built-in output boxes.
Step 5. Go to System Preferences > Sound. Switch to the Output tab and select the screen record w/ audio option.
Step 6. Now, you can open QuickTime Player and click on File on the menu bar. Select the New Audio Recording option from the drop-down menu.
Step 7. From the Audio Recording window, click the down arrow icon and make sure that the quicktime audio input option is checked.
Step 8. Play the audio file and click the Record button to start recording.
Main Features
- It’s free of charge.
- It works on macOS.
- It can record video on a computer with audio and capture voice through a microphone.
- It supports multiple video and audio playback.
- It can edit video and audio files, such as trimming, splitting, and combining.
Method 3. Record Audio from Computer with OBS
OBS (also known as Open Broadcaster Software) is designed for live streaming and recording. It’s free and open-source and compatible with most operating systems including Windows, macOS, Linux, etc. It’s powerful and packed with lots of useful tools.
With OBS, you can capture any sound from computer including internal and external audio. What’s more, it allows you to record streaming videos and gameplays. Aside from that, this tool can be used to stream on Twitch, YouTube, and other popular platforms.
How to record audio from computer using OBS? Take the following steps.
Step 1. Download, install, and launch OBS.
Step 2. On the main interface of OBS, click on Settings in the Controls section.
Step 3. After opening the Setting window, click on Output to adjust the output settings. Here you can change the save path, recording quality, and recording format. Click the Apply button to save the changes and press OK.
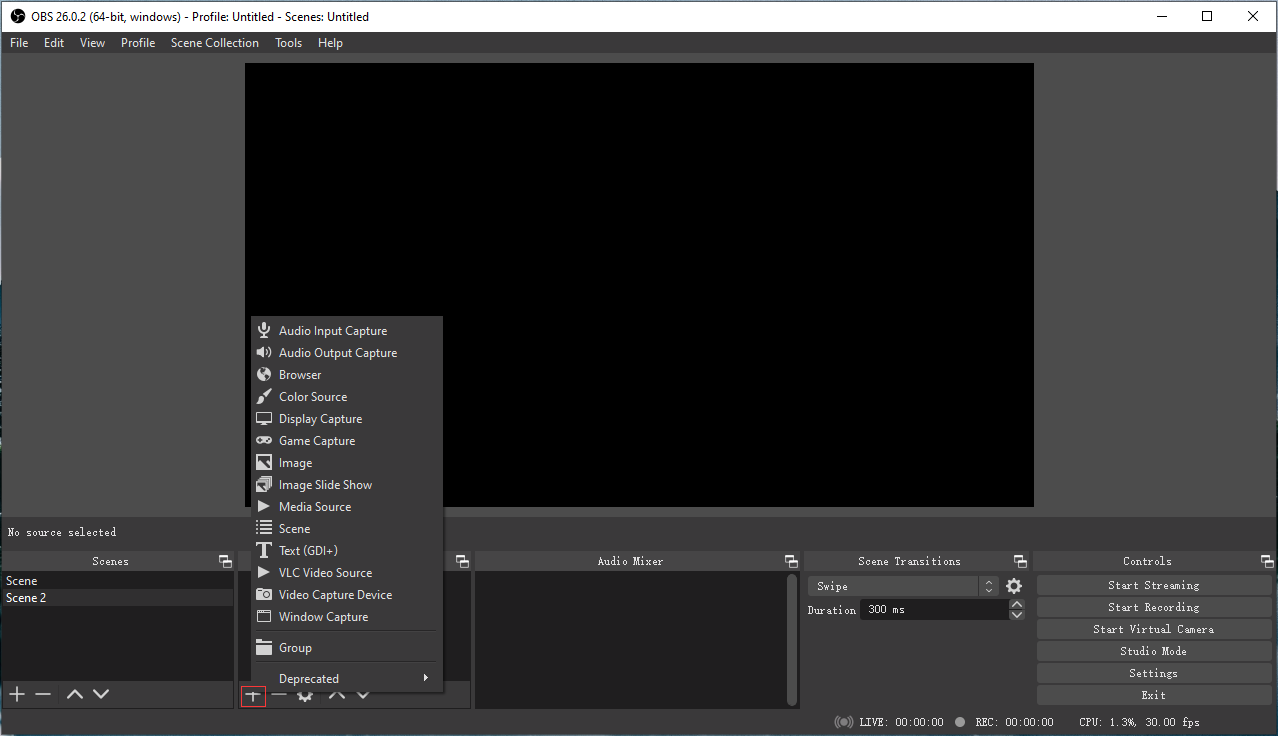
Step 4. In the Sources section, click the + to add a source. Select the Audio Output Capture option from the popup window, and click on OK to create a new source.
Step 5. Later, open the web browser (or open the application) and find the audio you want to record.
Step 6. Click on Start Recording in Controls and then play the audio file.
Step 7. Tap on Stop Recording to end the recording.
Main Features
- It’s free and open-source.
- It supports the following output format: FLV, MP4, MOV, MKV, TS, and M3U8.
- It’s available in 59 languages.
- It supports recording streaming video and audio.
- It lets you start live.
Method 4. Record Audio from Computer with Chrome Audio Capture
Is there any way to record audio from computer online? Try Chrome Audio Capture! This is a Chrome extension that allows you to capture audio playing on the current tab. With it, you don’t need to install audio capture software and capable of recording the audio file you want on the tab easily and quickly.
This Chrome extension supports exporting audio files to MP3 or WAV and lets you control recording using hotkeys. Moreover, you can select the audio quality you desire.
Remember, this audio recording tool only works in Chrome web browser.
Let’s see how to record audio from computer online with Chrome Audio Capture.
Step 1. Open your Chrome web browser and type “chrome web store” in the search bar. Hit the Enter key.
Step 2. In the left panel, input “chrome audio capture” in the search box and hit the Enter key.
Step 3. Chose the first option and click the Add to Chrome button to continue.
Step 4. From the popup window, click on Add extension to download and install this extension on the browser
Step 5. After installing Chrome Audio Capture, you can go to the target website and play the audio file.
Step 6. Tap the Chrome Audio Capture icon behind the address bar, click the Options button to choose the wanted output format and quality and save the changes. Then tap on Start Capture or press and hold “Ctrl + Shift + S” to start recording audio playing on the current tab.
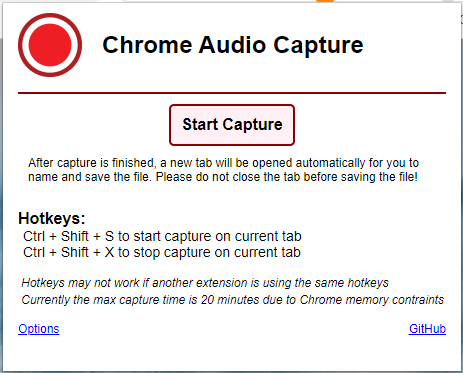
Step 7. To stop recording, click on Save Capture or press and hold “Ctrl + Shift + X”.
Main Features
- It’s free to use.
- It runs in Chrome web browser.
- It can save recordings as MP3 or WAV format.
- It can change the audio quality.
- The recording time is limited to 20 minutes.
See also: 4 Best Streaming Audio Recorders in 2020
How to Extract Audio from Video
Accidentally record computer audio in video format? Don’t worry, you can use MiniTool Video Converter to extract audio from video. It helps extract MP3, WAV, M4A, AAC, WMA, AIFF, M4B, or OGG from recordings in any popular video format.
Furthermore, this video converter also enables you to download YouTube videos in MP3 or WAV format.
Here’s how to extract audio from video with MiniTool Video Converter.
Step 1. Download MiniTool Video Converter by clicking the Free Download button and install it on your computer.
MiniTool Video ConverterClick to Download100%Clean & Safe
Step 2. Launch the program and import the recording from your computer.
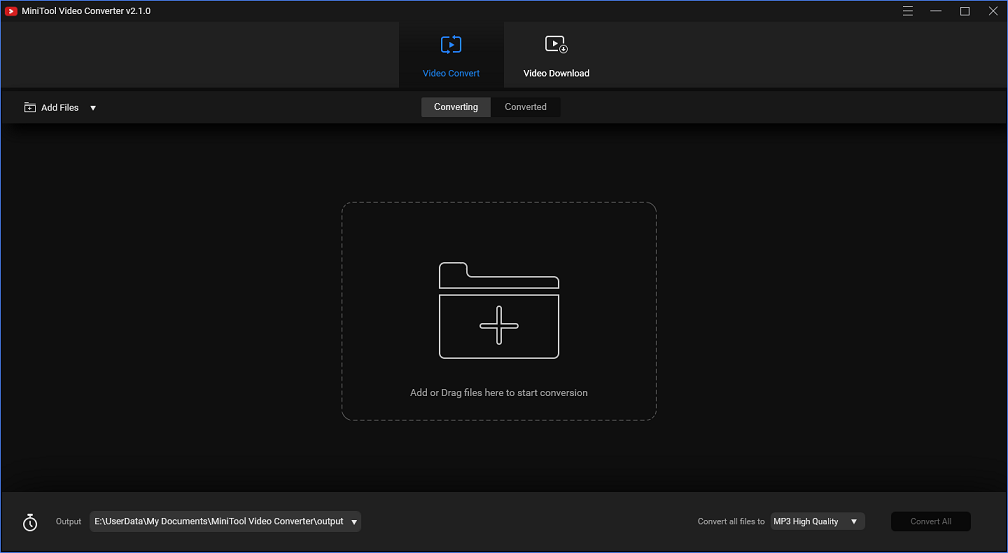
Step 3. Click on Convert all files to box and switch to the Audio tab. Then choose the output audio format and quality you want.
Step 4. In the end, tap on Convert to extract audio from the video.
Conclusion
Do you want to record audio from computer? Try the top 4 best free ways listed in this post. If you encounter any problems when using MiniTool Video Converter, please contact us via [email protected] or leave a reply!
Record Audio from Computer FAQ
- Visit the 360 Converter website.
- Go to Audio to Text and click on Go.
- Click on Choose Files to upload the audio file.
- Select the language used in the audio file and set the start/ end time.
- Check I agree to Term & Condiftions and tap on Start Conversion.
- Once the conversion is done, save the text file.
- Open the SAVEMP3 website.
- Copy the URL of the song you want to download.
- Paste the link in the search bar.
- Then click on MP3 to download the audio file.



User Comments :