How to record gameplay on PC for free? This post introduces how to capture awesome gameplay video clips by using Windows built-in free Game Bar or third-party top game recording software. MiniTool, a top software provider, releases easy and free screen recorder, video editor, video converter, video downloader, and more.
You might want to record your gameplay footages to upload to YouTube, Twitch, Facebook, etc. and show others the best performance of playing a game like Minecraft, World of Warcraft, and League of Legends. So, how to record gameplay on PC for free?
With one of the best free game recording software in market, you can easily record your gameplay like Xbox or PS4 games with high quality and upload to social media sites. Below we introduce some popular free tools with detailed guides.
MiniTool Video ConverterClick to Download100%Clean & Safe
How to Record Gameplay on PC for Free with Game Bar
You can record gameplay for free on Windows 10 PC by using the Windows built-in free game recording software, Game Bar. To capture gameplay video with Game Bar, please follow the steps below.
Step 1. Turn On Windows 10 Game Bar
Game bar is automatically installed in Windows 10. If you don’t know it and haven’t used it before, you should firstly check if it is enabled.
You can press Windows + I to open Settings. In Settings, click Gaming -> Game Bar. Turn on the option “Record game clips, screenshots, and broadcast using Game bar”.
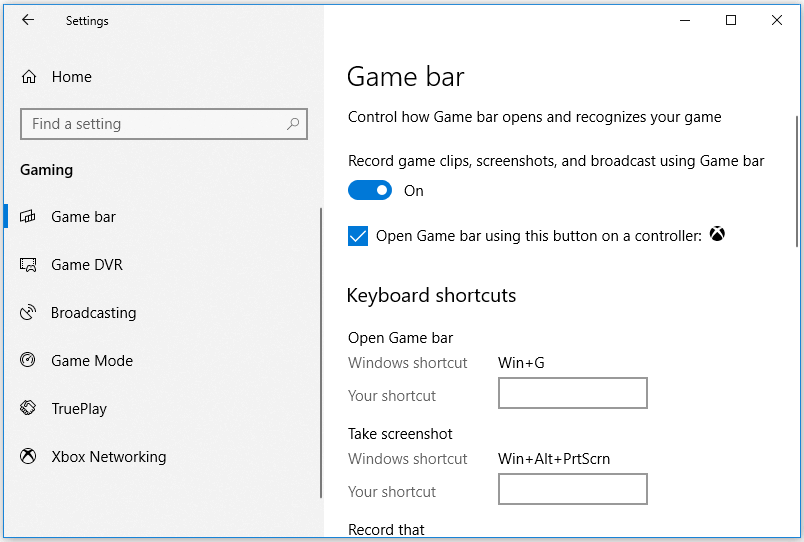
Step 2. Open Game Bar
Next you can open the game you want to record, and quickly open Game Bar on PC by pressing the shortcut key Windows + G. In the pop-up window, tick “Yes, this is a game.” box. Windows Xbox Game Bar is opened now.
Step 3. Start Recording Your Gameplay
Then you can click the Start Recording button (shortcut key: Windows + Alt + R) in Game Bar, and start playing the game. This Windows 10 free game capture software will automatically record your gameplay video.

If you want to record microphone voice along, you can turn on the mic recording.
To stop the game recording, you can click the red stop button.
To check the recorded gameplay video files, you can go to your user account Videos -> Captures folder. Videos are saved as .mp4 files. Screenshots are saved as .png files.
If you want to enable background recording feature and automatically record your gameplay videos with Game Bar, you can go to Start -> Settings -> Gaming -> Game DVR, and toggle on the “Record in the background while I’m playing a game” option.
How to Record Gameplay on PC via MiniTool Video Converter
If your computer doesn’t meet the hardware requirements of using Game Bar, you can turn to another top free game recording application.
MiniTool Video Converter is an eary-to-use, clean and free screen recorder for Windows. You can use it to select any area on your PC to record. Therefore, you can use it to record any of your gameplay video. You can select MP4, WMV, AVI, MOV, MKV, FLV or TS as the recording format. The default format is MP4. Full screen recording is also supported.
In addition to screen recording, MiniTool Video Converter can also convert video or audio format, and download YouTube videos in MP4.
Download and install MiniTool Video Converter on your Windows PC or laptop. Check how to use it to record gameplay video on PC with 3 simple steps below.
MiniTool Video ConverterClick to Download100%Clean & Safe
Step 1. Run MiniTool Video Converter. Click Screen Record. Click Click to record screen to open MiniTool Screen Recorder window.
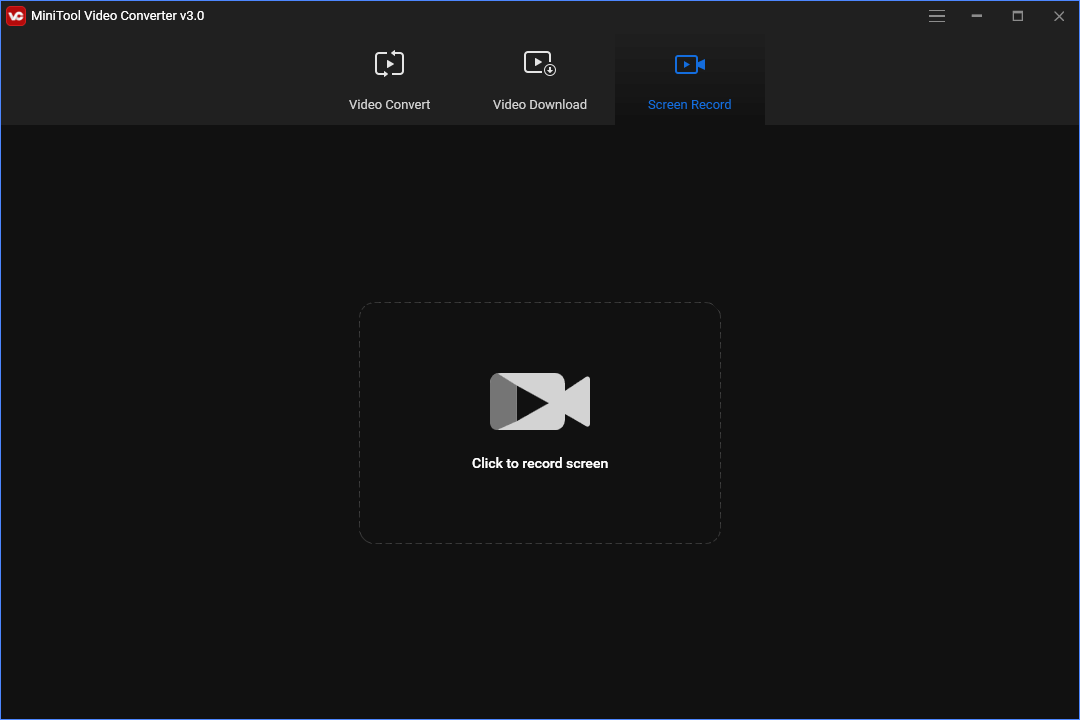
Step 2. Click the down-arrow icon to select Full screen or Select region.
You can make your gameplay window to fill the screen and record a full screen video for the footage. Alternatively, you can click Select region and drag your mouse to select the gameplay window to record. After selection, click Record button and it will start recording.
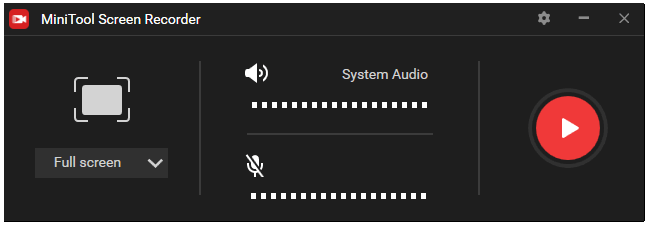
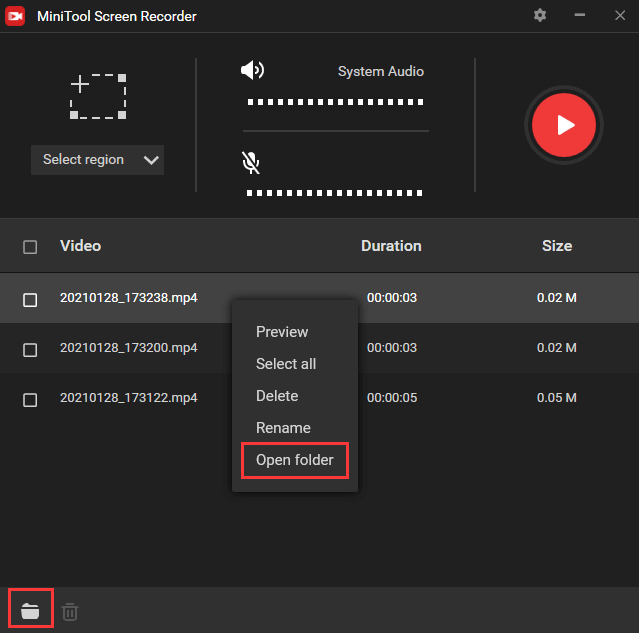
Step 3. Press F6 to stop the recording process and the recording file is listed. You can double-click it to play the video.
To check the video file, you can right-click it and choose Open folder or you can click the Open folder icon at the bottom-left corner to find your video.
How to Convert Gameplay Video to Other Formats
If you want to convert video to another preferred format, you can launch MiniTool Video Converter and click Video Convert module. Click Add Files to add your source files to MiniTool Video Converter, and click Edit button under Target section to choose a preferred output format. Click Convert button and it will convert video to target format at fast speed.
MiniTool Video ConverterClick to Download100%Clean & Safe
How to Record Gameplay on PC with Other Game Recording Software
Bandicam Game Recorder
To record gameplay on your Windows 10 PC, you can also use third-party gameplay capture software for Windows 10/8/7. Bandicam Game Recorder allows you to record up to 4K UHD video and upload a captured game video to YouTube. This free screen recorder for Windows 10 is capable of simultaneously recording webcam while recording gameplay.
With Bandicam, gamers can record game sound and microphone sound simultaneously on Windows 10 computer. To record your gameplay on PC with Bandicam, you can follow the steps below.
Step 1. Launch Bandicam and click Game Recording mode on the main UI.
Step 2. Start to play the game you want to record. Click the red REC button in Bandicam to start recording the game playing video. You can also press F12 to start or stop the recording.
Step 3. After the recording is completed, you can click Home -> Video in Bandicam. You can check the recorded gameplay clips. Select one video file to play, edit, upload or delete it.
Screencast-O-Matic Screen Recorder
As for how to record gameplay on PC, you can also try Screencast-O-Matic. Screencast-O-Matic is a 2-in-1 screen recorder and video editor. You can use this best gameplay capture software to record anything on your PC screen, e.g. record gameplay footages, websites content, video tutorials, how-to videos, software instructions, YouTube videos, presentation videos, etc.
After the recording, you can also use this game recording software to edit the recorded video like trim video, add texts and transitions, speed up or slow down video with its built-in video editor. And you can instantly share your video to Facebook, Twitter.
For how to record games on Windows with Screencast-O-Matic, you can check the steps below.
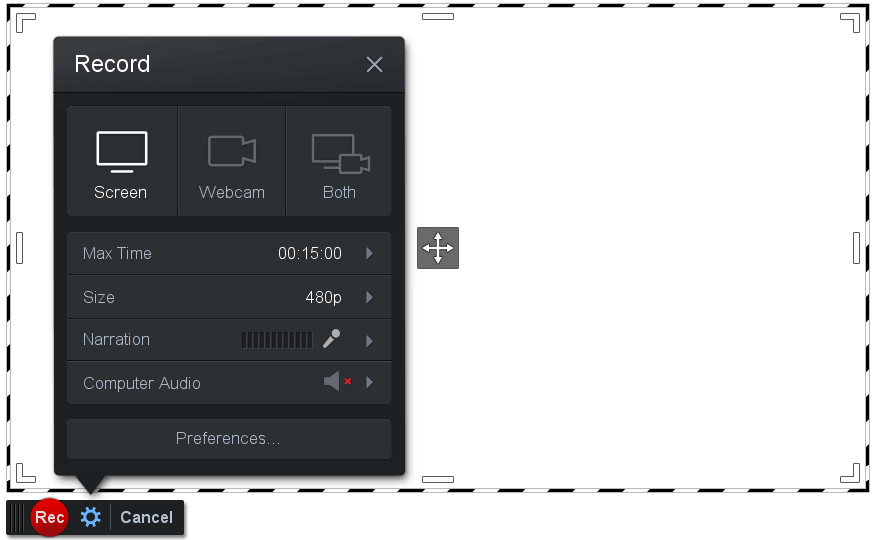
Step 1. Open Screencast-O-Matic Screen Recorder. Select Screen, Webcam, or Both.
Step 2. Next you can click Size to choose to record a window, a resolution or full screen.
Step 3. Then you can play the target game. Click the red Rec button to start recording the gameplay video on PC.
How to Record Gameplay on PS4
If you want to record and share gameplay on PS4, it is easy. PS4 has a built-in video recording feature. You can record a gameplay video that’s about to begin and record a 15 minutes video. Besides, PS4 also allows you to easily save a great game playing video that just happened because PS4 always records the last 15 minutes of gaming in the background.
How to Record PS4 Gameplay
To record PS4 gameplay video, you can follow the instructions below.
Step 1. When you get ready to record, you can just double-press the Share button on your PS4 controller. And PS4 will automatically start recording and continue to record for 15 minutes by default. You can change the default recording time.
Step 2. When recording, you can see a recording flag on PS4 screen. To stop the recording manually, you can double-press the Share button on your controller again.
Step 3. To check the recorded PS4 gameplay video file, you can open the Capture Gallery folder on your PS4.
How to Edit and Share PS4 Gameplay Video
PS4 also lets you edit and share your gameplay video. Check how to do it below.
- You can select Capture Gallery on PS4 Home screen.
- Select the video you want to edit and share, and press Options button.
- Next you can choose Trim. On Trim window, you can choose to trim 10 second intervals, 5 second intervals, 1 second intervals. To trim the start and end part more precisely, you can choose 5 or 1 second intervals.
- Then you can use the D-pad on PS4 controller to locate the start and end point. When you scroll to the start point, you can choose Start Here. When you locate the end point of the video, select End Here. Then select OK.
- Choose to save the video clip as a new video or overwrite the old recording video.
- To share the PS4 gameplay, you can go back to Capture Gallery on PS4 Home screen, select the target video and press Share button on PS4 controller to choose a social media service to share the video.
How to Change the Default Recording Time on PS4
- On PS4 Home screen, you can press Share button on controller.
- Select Sharing and Broadcast Settings option from the Share menu.
- Select Video Clip Settings -> Length of Video Clip, and choose a preferred video length from 30 seconds to 60 minutes.
How to Edit and Share Your Gameplay Video
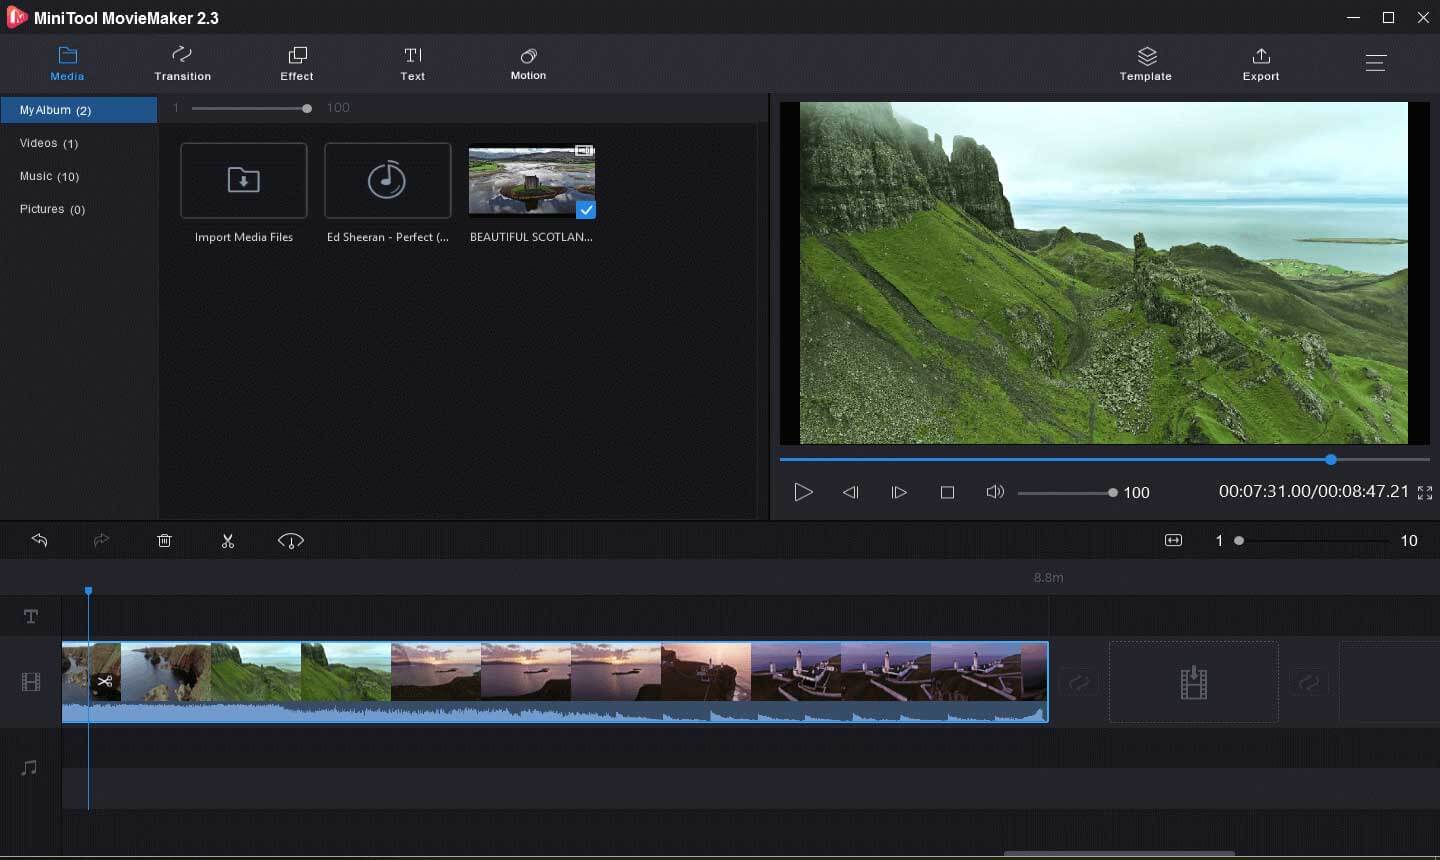
Some of the gameplay recording software also lets you edit and upload the gameplay video to YouTube. But if it doesn’t have the video edit feature, you can use the easy and free video editor MiniTool MovieMaker to edit the gameplay clips.
MiniTool MovieMaker allows you to easily trim video, split video, add transitions, effect, background music, subtitles, motion effect to video, add music to video, etc. This program lets you edit and export video to various formats.
MiniTool MovieMakerClick to Download100%Clean & Safe
- Launch MiniTool MovieMaker, and click Import Media Files to load source video file. Then drag the video file to the timeline.
- Next you can do some edits to the video, e.g. trim video to remove unwanted beginning and ending parts, split the video and delete unwanted parts, add effects and transitions to video, etc.
- After the editing, you can click Export button to choose an output format and resolution to save the video.


User Comments :