In this article published by the best free video converter, there are 4 methods and steps to help users to convert their CDA files to MP3.
CDA to MP3
The Meaning of CDA (CD Audio)
CDA represents the file extension for CD Audio shortcut file format: .cda. Used by Microsoft Windows, CDA refers to the audio tracks saved on a CD. It should be noted that a CDA file is not an audio file. In contrast, it only refers to the way that Windows uses to let people access an Audio CD index.
In addition, the CDA files are actually CD-only song files that contain no actual PCM sound wave data. Furthermore, the CDA files tell exactly where each track on the disc starts and stops. Therefore, it’s not surprising that people said they can’t play a CDA file directly on Windows.
According to some users, some audio editing and CD creation tools can load .cda files as though they are actual audio data files. However, that’s not the fact. To play the audio tracks, users need to convert CDA to another file format.
I find that .cda to MP3 is widely talked about since MP3 is one of the most popular file formats that can be supported by almost all systems and programs. Can you convert a CDA file to MP3 so as to play the song tracks on a computer without a CD? In fact, it is possible to convert CDA to MP3.
How to Convert CDA to MP3
If you want to use a media player to play the audio tracks by copying the CDA files from CD and then pasting them to your computer, you’ll feel disappointed. Nothing will happen except that .cda files become useless after copy & paste.
Well, how can you convert CDA to MP3? There are 4 methods that can help you.
- Use Windows Media Player.
- Convert with iTunes.
- Turn to a third-party media file converter.
- Convert CDA to MP3 Online.

Method 1: Convert CDA to MP3 with Windows Media Player
Windows Media Player (WMP) is the official and default media player in Windows operating systems. Undoubtedly, WMP is a wonderful and easy-to-use tool. However, you may not know that the Windows Media Player can also be used to convert .cda to MP3 easily. First, you should check whether the WMP works properly on your computer or not. Then use it as a CDA to MP3 converter for converting .cda files to .mp3 files.
How to Convert CDA to MP3 in Windows Media Player
This method is only available for Windows users since Windows Media Player is exclusive to Windows computers.
- Insert the target audio CD that contains the CDA files you want to convert and make sure it’s detected on your computer.
- Open Windows Media Player the way you like. Here’s the most direct way to open it: press Windows + S -> type WMP into the search box -> click Windows Media Player from the search results or press Enter.
- Select Tools from the WMP menu bar which is located at the top of the window.
- Select Options from the submenu you see.
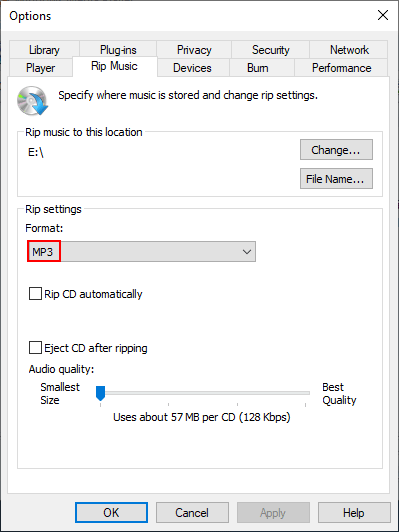
- Shift to the Rip Music tab (from the Player tab).
- Select a storage path for converted MP3 files: move to the Rip music to this location section -> click on the Change button -> specify a proper location with enough free space -> click on the OK button in the Browse For Folder window to confirm.
- Select MP3 as the output format and move to the Rip settings section -> click on the downward arrow under Format -> choose MP3 from the drop-down menu.
- Check Rip CD automatically/Eject CD after ripping according to actual needs.
- Drag the slider below to specify the Audio quality.
- Click on the Apply button and then the OK button at the bottom.
- Now, take a look at the left sidebar of WMP.
- Right-click on your CD drive from the list and then select Rip CD to library from the context menu.
- Wait for the ripping process to be completed. Then, you can go to check the rip music location you selected in step 6 to check the MP3 files converted from CDA.
Once the .cda to MP3 conversion is done, you should close the WMP completely and eject the CD from your PC.
- Close any apps that may be using this CD drive.
- Open File Explorer (formerly known as Windows Explorer).
- Right-click on your CD drive from the drivers list.
- Choose Eject from the context menu.
Method 2: Convert CDA Files to MP3 with iTunes
Step 1. Insert CD and Open iTunes
- Insert the target audio CD and make sure it’s showing up.
- Open iTunes. You may skip this step if iTunes is on the startup program list.
Step 2. Enable MP3 Encoder
- Click Edit from the top menu bar if you’re using iTunes on a Windows computer. Or click iTunes at the top left if you’re running iTunes on a Mac.
- Choose Preferences from the bottom of the drop-down menu.
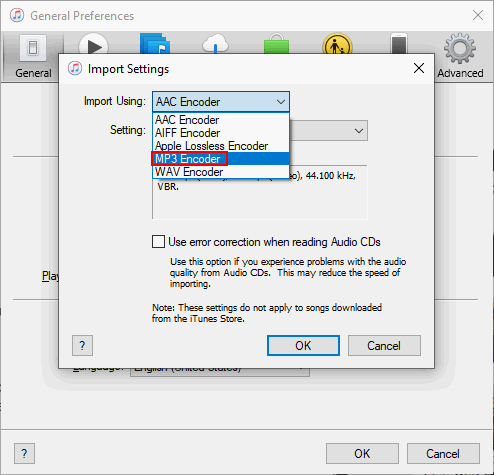
- Look for the Import Settings button under the General tab and click on it.
- Click on the down arrow after Import Using to see the drop-down encoder list.
- Choose MP3 Encoder and click OK to close the Import Settings window.
- Click OK again to close the preferences window.
Step 3. Convert the CDA File to MP3
- Click on the CD icon (round, disc-shaped icon) located below the top menu bar. It’s on the left side of the Library.
- Then, your CD will be imported into iTunes automatically.
- Select the target CDA file from the song list (you can also select all songs to convert).
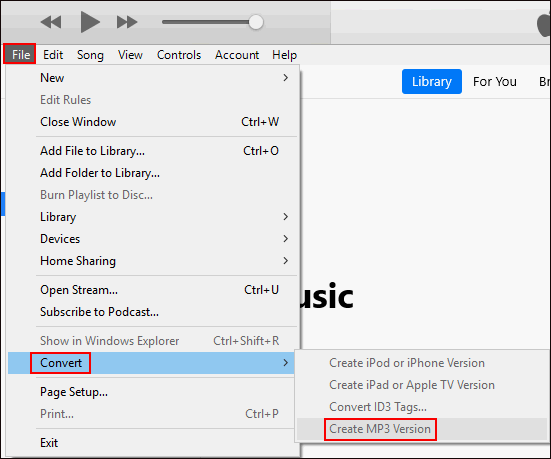
- Click the File menu in the upper left corner.
- Navigate to the Convert option in the drop-down menu.
- Select Create MP3 Version from the bottom of the pop-out window.
- Wait for the conversion from .cda to .mp3 to complete.
- Now, you can view the MP3 files by clicking Recently Added under the Library in the left sidebar.
- If you want to view the MP3 files on a local drive, please do these things: select the MP3 file -> choose File from the menu bar -> click Show in Windows Explorer.
- The folder that holds the converted MP3 files will open.
Method 3: Use CDA to MP3 Converter
Noticing people’s demands for converting CDA to MP3, the software manufacturers developed and released lots of tools to work with the conversion from .cda to MP3. These tools are called CDA to MP3 converters and we’ll show you how to convert CDA files to MP3 by using two of them.
Format Factory
Format Factory is an ad-supported freeware multimedia converter that can help you convert various kinds of audio, video, and picture files. Furthermore, Format Factory enables users to rip CDs and DVDs to other file formats, including MP3. So, it’s a good choice for you to convert CDA to MP3 format.
- Download Format Factory and then install it properly on your computer.
- Insert your CD containing the CDA file and launch Format Factory the way you like.
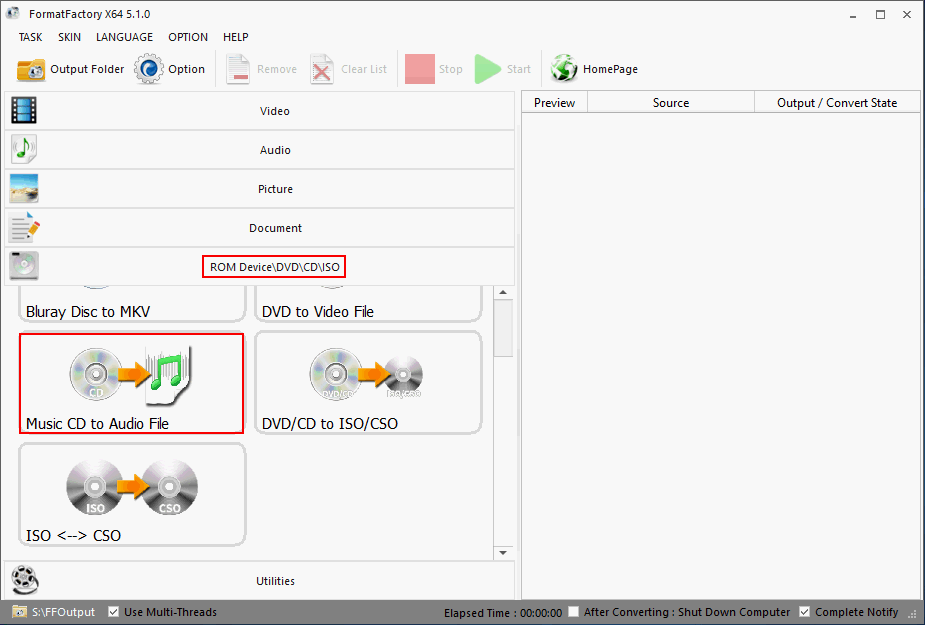
- Click ROM Device/DVD/CD/ISO in the left sidebar.
- Select Music CD to Audio File and then you’ll see a prompt window.
- Select your CD under CD Driver by clicking on the down arrow.
- Make sure the MP3 is selected for the Output Setting.
- Click on the High quality button on the right side of the MP3 to choose another quality level. This step is optional.
- Click on the Convert button at the top right.
- Wait for the conversion to finish completely.
- Then, you can go to check the converted file on the computer.
VLC Media Player
The VLC Media Player (also called VLC) is a free open-source, portable, cross-platform media player tool developed by the VideoLAN project. It's also a streaming media server to help you stream media over the networks and to transcode the multimedia files. VLC supports all common audio and video file formats, including DVD-Video and video/audio CD. You can also use this tool to convert CDA to MP3.
- Download the VLC Media Player and then install it on your PC.
- Insert your CD into the computer and run VLC.
- Select the Media menu in the upper left corner.
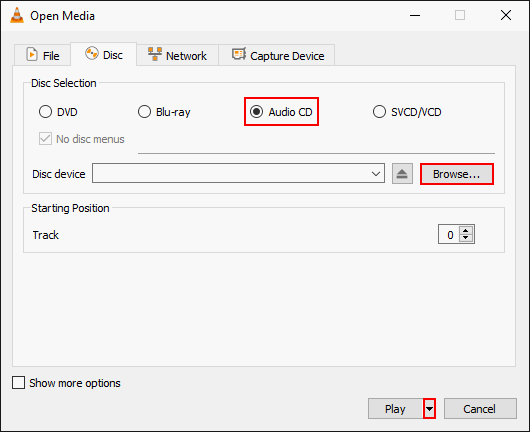
- Choose Open Disc from the drop-down menu.
- Select Audio CD under Disc Selection.
- Click on the Browse button to select and open the target CD.
- Click on the down arrow at the bottom to replace Play with Convert.
- In the Convert window, please choose Audio – MP3 for Profile.
- Then, click on the Browse button at the bottom right to choose a destination.
- Now, click on the Start button and wait until the conversion is finished.
Bonus Tip: Anything to MP3
MiniTool Video Converter is an all-in-one free video converter, helping users convert a media file to audio, video, and even specific device supported format in 3 easy steps. Though MiniTool Video Converter doesn't support CDA now, it is a good choice when you want to convert audio/videos of many other formats (over 1000+ popular output formats).
3 Steps to Convert Audio/Videos to MP3 Files
First, you need to download, install and launch the MiniTool Video Converter.
MiniTool Video ConverterClick to Download100%Clean & Safe
Step 1: Choose one or more videos and audio that you want to convert
You can click the Add Files button and double-click the file you want to select in the pop-up interface to complete the file import. Meanwhile, after clicking the Add Files button, you can also click the file you want to select in the pop-up interface and click the Open button.
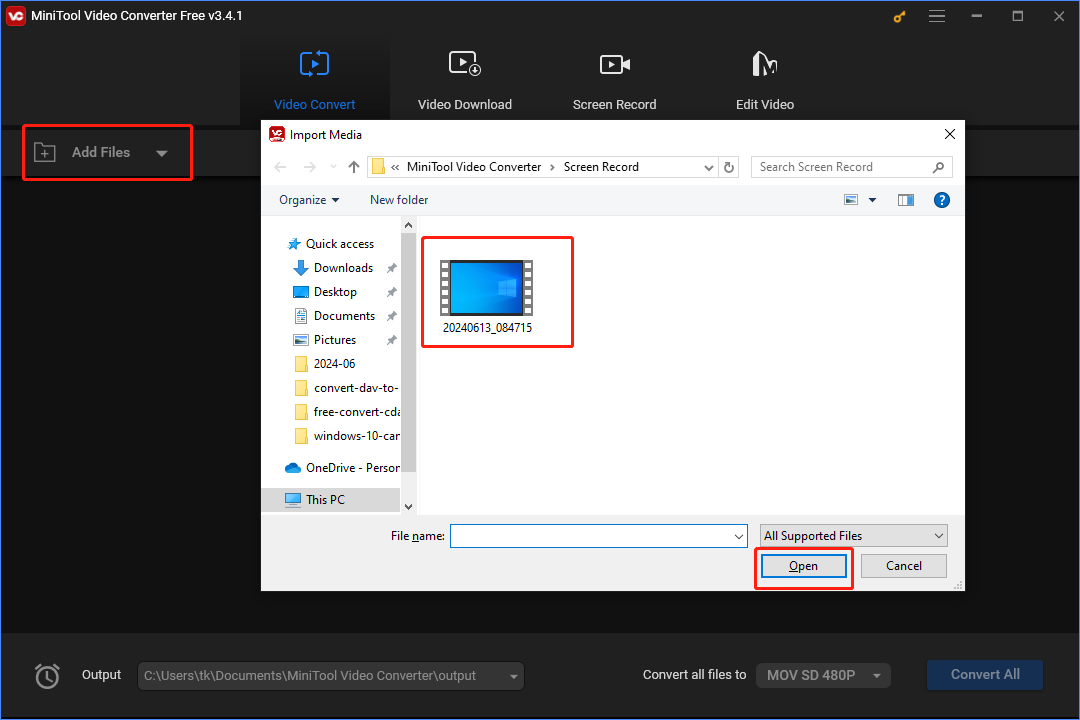
To import the files you want to convert, you can also click the big add icon (+) in the middle.
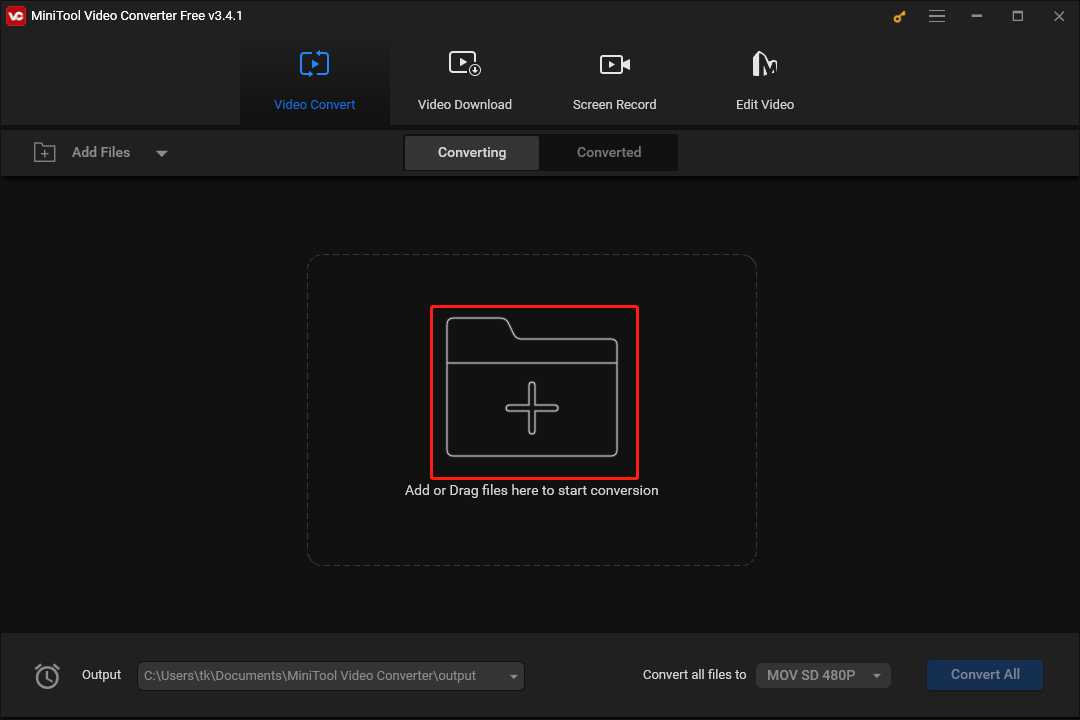
You can still import your files by dragging and dropping the files.
Step 2: Choose output settings
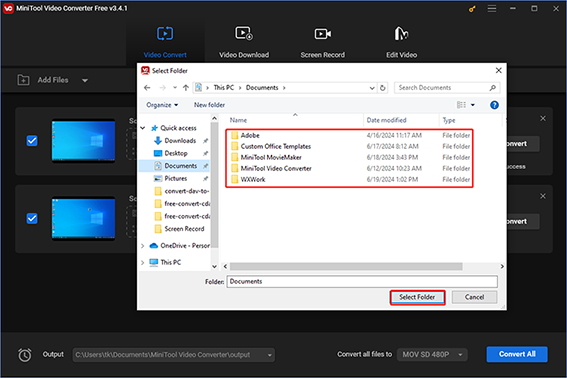
You can click the inverted triangle in the bottom left of the software and then click the Browse button in the menu that pops up.
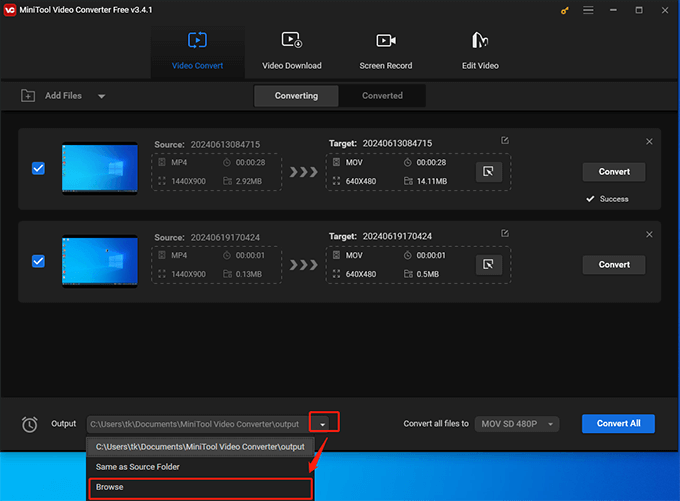
After clicking the Browse button, you can Navigate to the folder that you want to keep the converted MP3 files and click Select Folder.
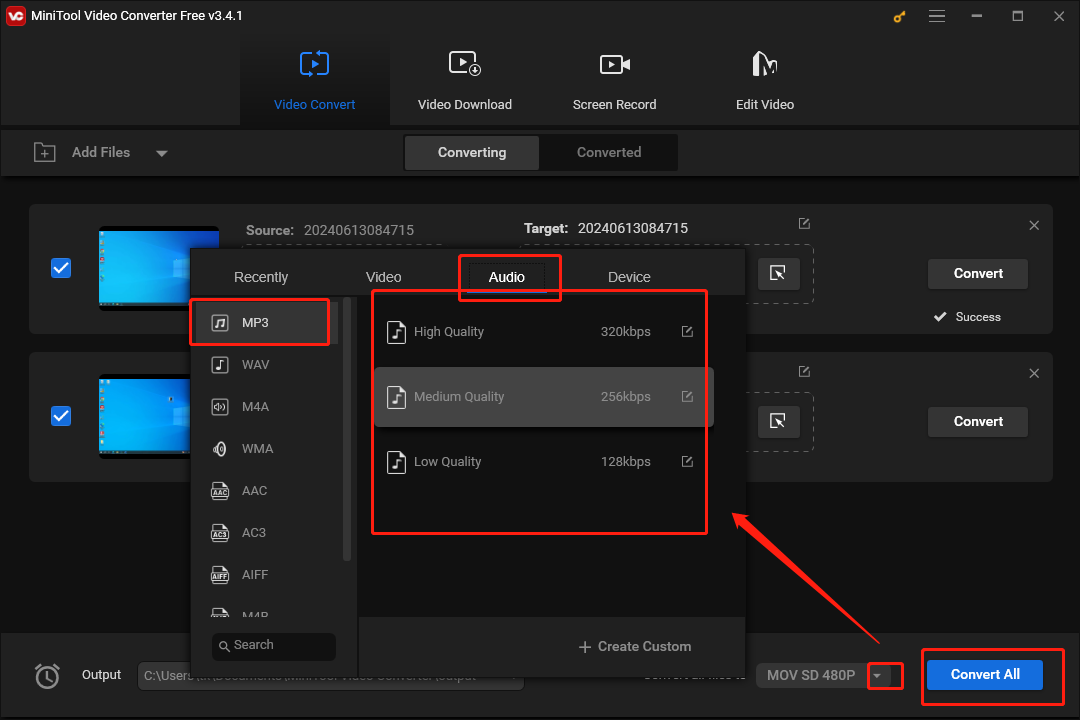
You can click the inverted triangle on the left of blue Covert All and then click on the Audio in the interface that pops up. Then you need to choose MP3 in the left list and choose the appropriate audio quality in the right list.
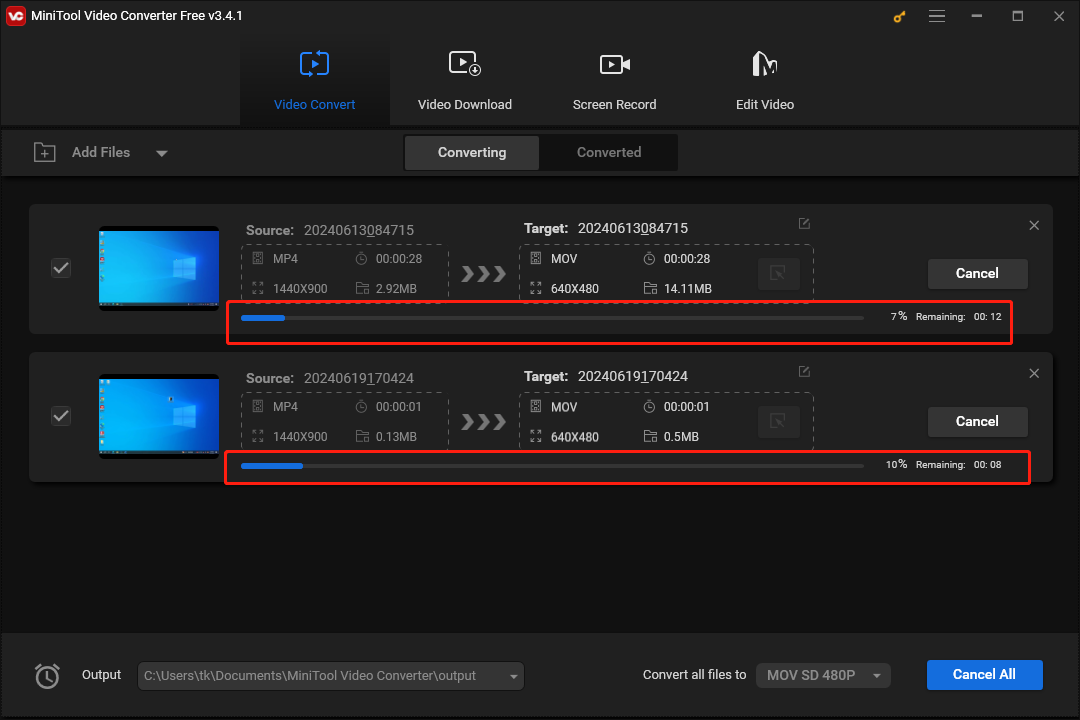
Step 3: Convert the files to a MP3 format
You need to click the blue Convert All button. Then, you need to wait for the conversion process to be completed and you can see the progress of the conversion through the blue progress bar.
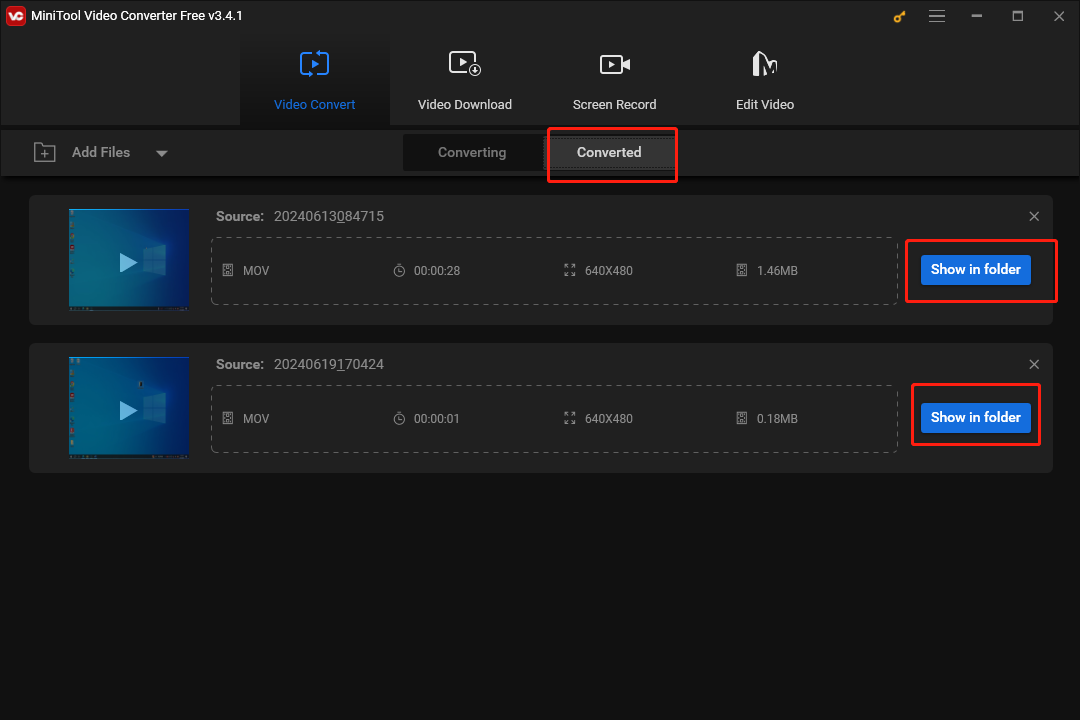
Once the conversion is completed, you will find Success at the bottom right of each task list.
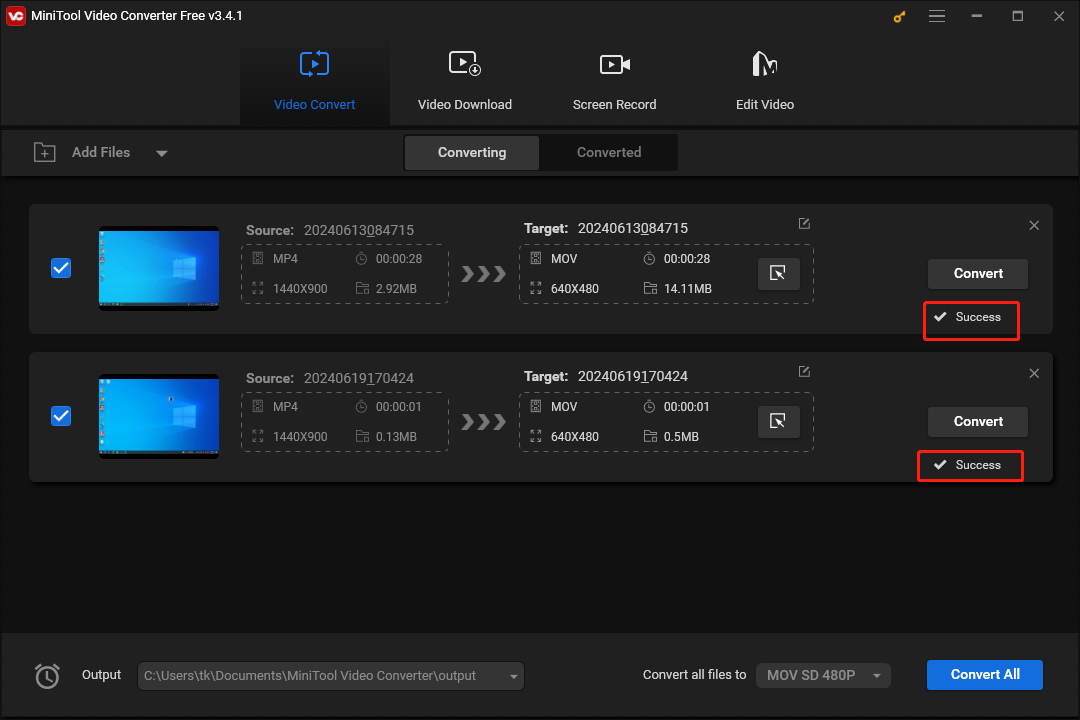
After the conversion task is completed, you can click the Converted button and click the Show in folder button to check the converted MP3 files.
Method 4: Convert CDA to MP3 Online
There are also some free websites allowing users to convert CDA to MP3 online. We’ll introduce only one of them to explain the conversion process briefly.
Convertio
- Pay a visit to the official website to avoid any potential risk.
- Click Choose Files or click on the search folder icon (Dropbox, Google Drive, or direct URL icon). Also, Convertio allows you to drag and drop the target file there.
- Navigate to the CDA file you want to convert. Select it and click Open.
- Click on the down arrow between the file name and the green READY message.
- Select Audio in the left pane and choose MP3 in the right pane.
- Click on the red Convert button.
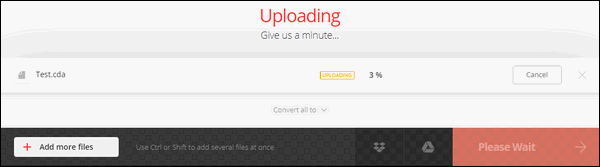
- Wait for the uploading and converting process.
Don’t worry that it is difficult to convert CDA to MP3 online. The steps to use other local/online CDA to MP3 converters are similar.
Conclusion
Though CDs are not as popula as they used to be, there are still numerous people who use them. CDA is the file extension of CD audio, so it’s no wonder that some people are asking about the conversion from CDA to MP3. By converting their song files to MP3 files, they are able to store music files on computers, play audio tracks in ordinary players, and reduce the size of their song files.
Please don’t worry if you don’t know how to convert CDA to MP3. In this article, there are 4 methods (including converting CDA to MP3 online) to help you finish the conversion from .cda to MP3. If you have any question while using MiniTool Video Converter, you can contact us via support@minitool.com.
About The Author

Position: Columnist
With over 6 years of experience as a tech writer, Eien specializes in creating clear, simple guides for video conversion, transcription, screen recording, etc. He stays connected with the tech community and its readers to understand the real-world problems users face. By combining their feedback with his own hands-on testing, Eien always provides proven solutions to complex software problems in time.
User Comments :