Recently, I have found many of you are searching for help to solve the “There was an error decompressing audio or video” issue in the Adobe Community and some forums. Some of you said you failed to import MP3 into Premiere Pro. What factors lead to that audio import failure Premiere Pro? How to fix that issue? In the following content, you’ll learn 4 feasible solutions. Now, let’s get started.
Why Can’t I Import Files into Premiere Pro?
“There was an error decompressing audio or video” issue occurs when you import certain audio or video files into Premiere Pro. What are the reasons? I have read and collected various information and summarized the following possible causes. Let’s check them one by one.
Cause 1. Unsupported Format
Not all video and audio formats are supported by Premiere Pro. Once Premiere Pro doesn't support video or audio formats, you can't import them.
Cause 2. Incompatible Codec
Container formats can use different codecs. For example, MP3 can use FLAC, Opus, and other codecs. If the audio or video codec used in files is not compatible with Premiere Pro, the “There was an error decompressing audio or video” issue can also occur.
Cause 3. Corrupted Media Cache Files
In normal circumstances, media cache makes media files and projects run smoothly. However, corrupted media cache files can cause various issues, such as “Premiere Pro crashed”, “There was an error decompressing audio or video”, and “video playback lag”.

Fix “There Was an Error Decompressing Audio or Video”
According to the possible causes of “There was an error decompressing audio or video”, we can take appropriate steps to fix that issue. Below are 4 workable solutions.
Fix 1. Change Audio or Video Format
Firstly, you need to check whether the format or codec of the file is supported by Premiere Pro. If not, you should use a file converter to change the format or codec. MiniTool Video Converter is highly recommended, which is a free yet powerful file converter for video and audio conversions. It supports converting video and audio files from and to a wide range of formats, including but not limited to MKV, MP4, MOV, M4V, AVI, ASF, MP3, and WAV.
Additionally, MiniTool Video Converter can also transcode video and audio codecs. You can use it to fix the video or audio codec not supported error. With its batch conversion feature, you can convert up to 5 files at the same time. Follow the steps below to change the file format with MiniTool Video Converter.
Step 1. Click the button below to download and install MiniTool Video Converter.
MiniTool Video ConverterClick to Download100%Clean & Safe
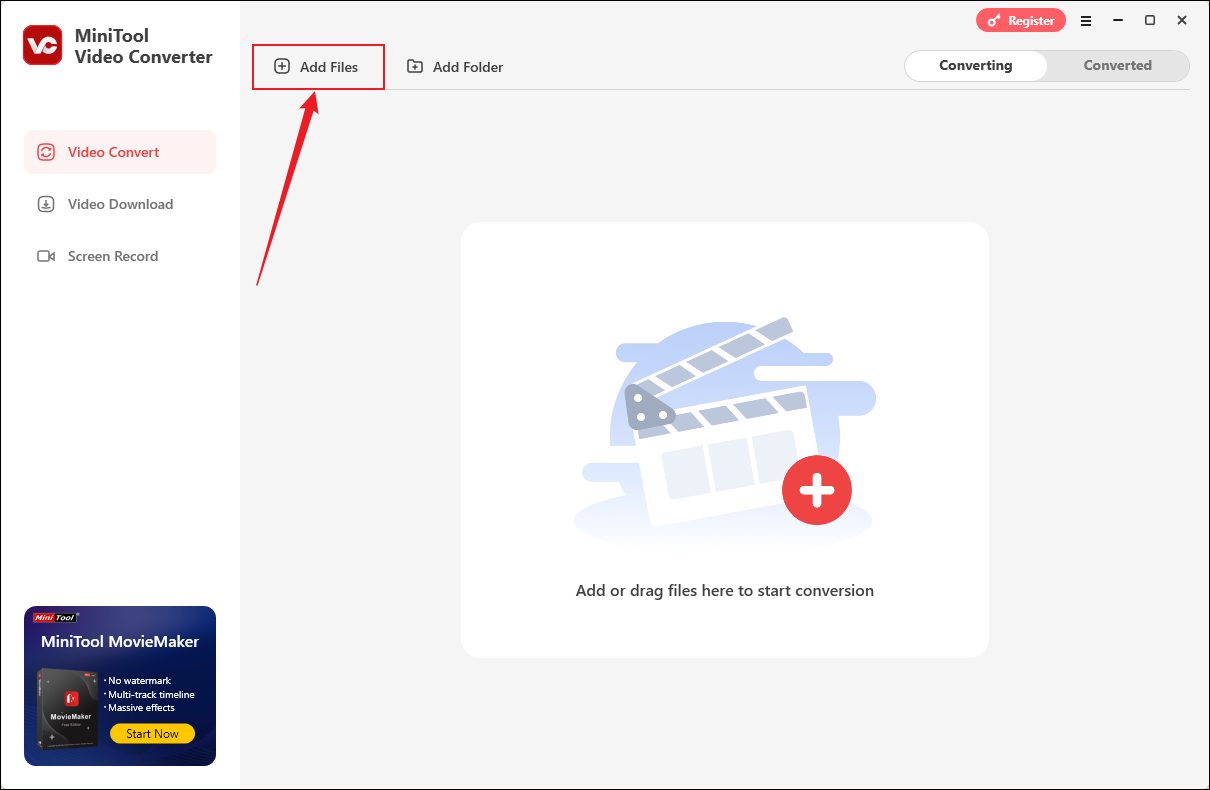
Step 2. Run this free file converter and click the Add Files option to import the target file.
Step 3. Click the gear icon circled in the screenshot below to enable the output format window, and then switch to the Video or Audio tab. Take Video as an example.
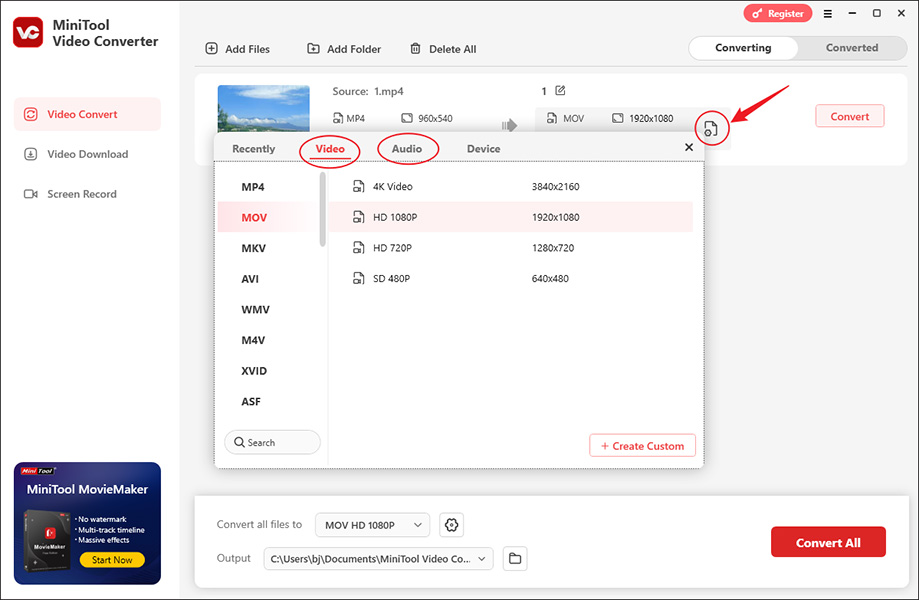
Step 4. Choose a video format supported by Premiere Pro and select a preferred video quality.
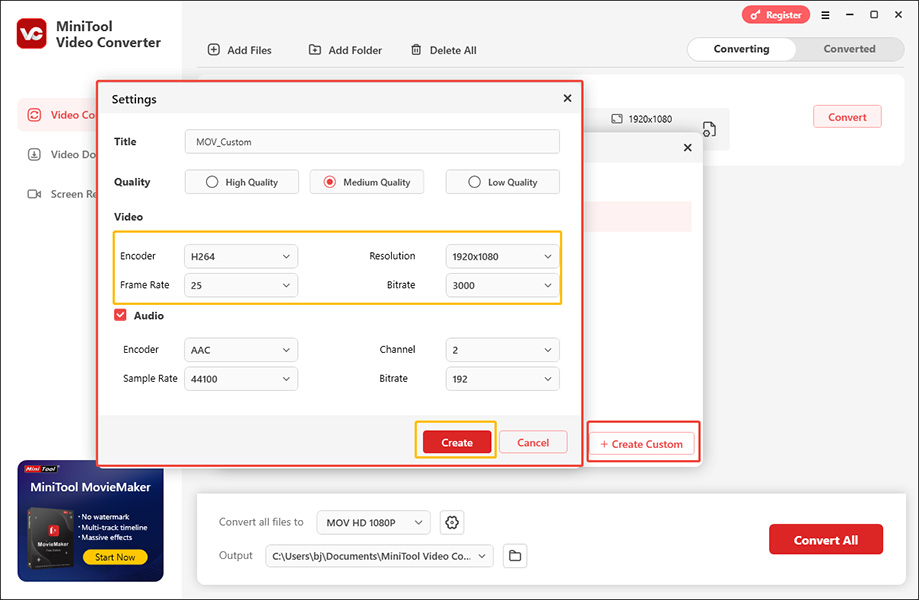
Furthermore, you can click + Create Custom. Here, you can change the encoder, resolution, frame rate, and bitrate of the video file. If your video file has an audio track, you can also adjust the encoder, channel, sample rate, and bitrate of the audio. Then remember to click Create to save the changes. Next, choose the newly created format.
Step 5. Click the Convert button to activate the conversion process. Once the conversion process is over, you’ll be guided to the Converted section, where you can play and locate the converted file.
Fix 2. Rename the File Extension
In addition to using a file converter to change the format, sometimes, you can also try to rename the file extension. For instance, you can rename .mp3 to .wav, .m4a, or .aiff. Here’s a guide on how to rename the file extension on Windows.
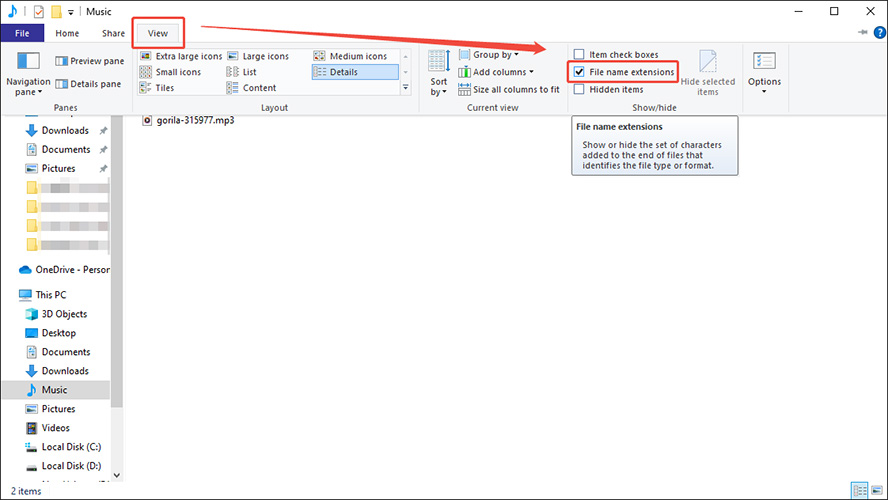
Step 1. In the File Explorer, click the View tab and tick the File name extension checkbox.
Step 2. Right-click on the target file and choose the Rename option.
Step 3. Then, change the file extension from .mp3 to .wav, .m4a, or .aiff. Finally, click Yes to confirm the operation.
The way to change file formats by changing file extensions is not always recommended, since it may cause files to be damaged.

Fix 3. Clear Media Caches in Premiere Pro
From the above, we know that the “There was an error decompressing audio or video” issue can also be caused by corrupted media cache files. To make Premiere Pro run properly, you can try to clear Premiere Pro cache. Just refer to the detailed instructions below:
Step 1. Run Premiere Pro to get to its home interface.
Step 2. Click the Edit tab, choose the Preferences option from the list, and then select the Media Cache tab from the left sidebar.
Step 3. Click the Delete button next to Remove Media Cache Files, choose the Delete all media files from the system option, and click OK.
Fix 4. Update or Reinstall Premiere Pro
Sometimes, the outdated versions of Premiere Pro can also cause the “There was an error decompressing audio or video” error. You’d better update your Premiere Pro to the latest version. Alternatively, you can reinstall Premiere Pro to reset its settings and resolve potential problems.
MiniTool MovieMakerClick to Download100%Clean & Safe
To Wrap Things Up
How to resolve the “There was an error decompressing audio or video” issue that occurs when importing files into Premiere Pro? The most effective way is to change the video or audio format to formats supported by Premiere Pro. Hopefully, this article will be helpful to you. If you have any questions in the process of using MiniTool Video Converter, you can contact us via support@minitool.com.
About The Author

Position: Columnist
Olivia is always full of enthusiasm for life and loves to record. She often records beautiful and memorable moments of life with her camera and then uses some editing tools to put the photos, videos and audio together. She also has a passion for writing and offers suggestions to readers on images, audio, videos and news. To provide more professional articles and solve problems for readers, she is continuing to learn multimedia as well.
User Comments :