Brief Review of 240FPS Videos
240 FPS videos refer to video clips with a frame rate of 240fps (frame rate per second). That is to say, 240 images are displayed within a single second of the video. Thus, the video will be smoother, especially for slow-motion videos.
240 FPS Video Samples
Where to download 240fps videos? If you don’t have the equipment such as a 240 fps HD video camera to create 240 fps videos by yourself, you can still enjoy them online. Just search for “240fps video” and you will get many websites providing the target frame-rate videos like the below ones:
- YouTube
- Pexels: free downloading is available without any watermark.
- Shutterstock: pay for downloading.
- Videvo
- Storyblocks: pay for downloading.
- POND5: free downloading is available with a watermark.
240 FPS Video Cameras
The following are some popular 240FPS video cameras.
GoPro Hero10: there is a 240 FPS video test shot by this camera youtube.com/watch?v=XrALAgIhyM8.
- GoPro Hero9
- Sony A7S III
- Sony ZV-1 & Sony A1
- DJI Pocket 2
- Panasonic GH5S
- Apple iPhone 13 Pro
How to Convert 240FPS Videos to Lower Frame Rate?
Even if you have a 240-fps video, you may not have a compatible player or computer display to enjoy it. Thus, you may need to convert it to a video with a low frame rate which occupies much less storage space on the hard disk drives.
Then, how to transfer a 240 FPS video to a low fps? First of all, you need a professional and reliable video frame rater converter such as MiniTool Video Converter, which enables you easily and quickly convert videos from one frame rate to another. The following is a tutorial on the conversion process.
MiniTool Video ConverterClick to Download100%Clean & Safe
Step 1. Download, install, and launch MiniTool Video Converter on your Windows PC.
Step 2. Click the Add or Drag files here to start conversion option to upload your 240fps video.
You can add multiple videos for batch conversion.
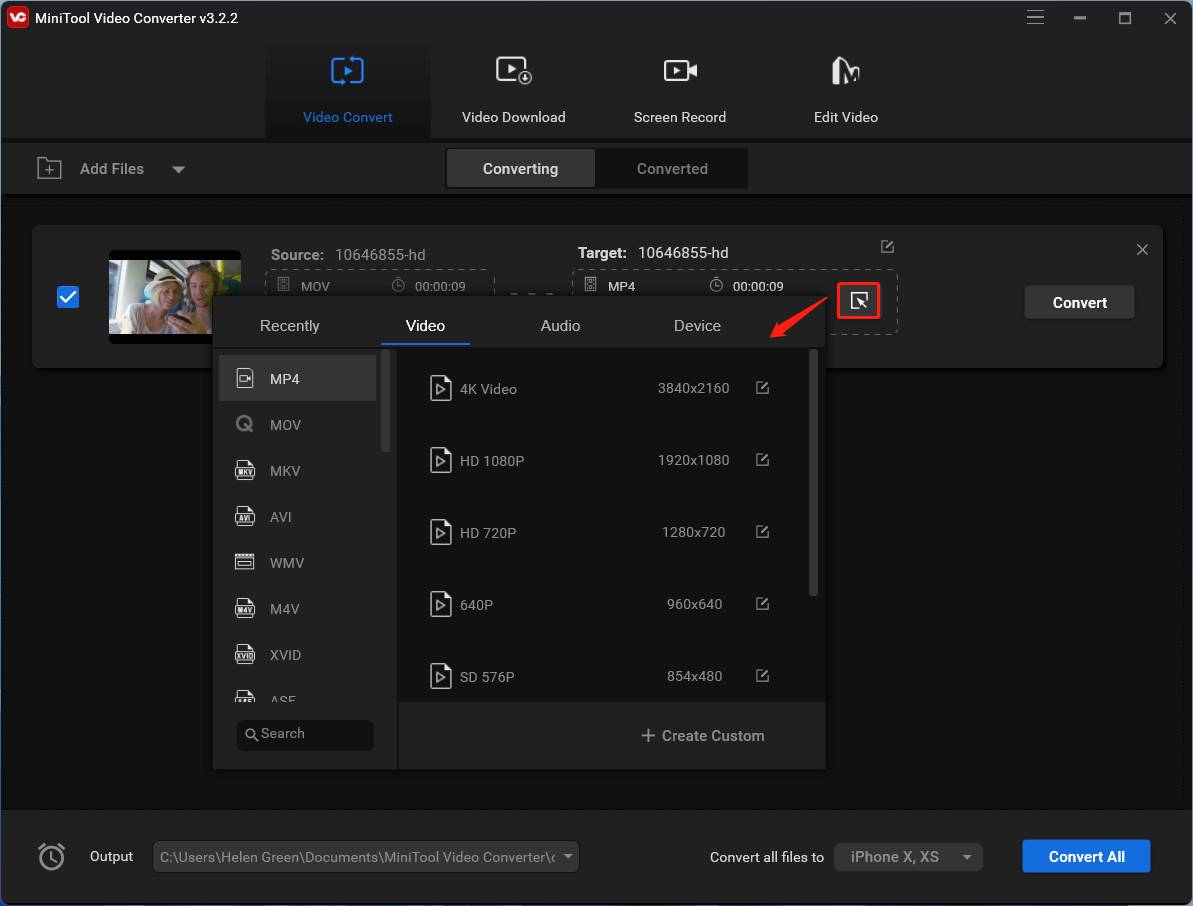
Step 3. When the video is successfully uploaded, you will see a conversion task listed on the screen. Just click the settings icon (a square with an arrow pointing inward) to launch a smaller new window.
Step 4. In the new popup, go to the Video tab from the top menu, find the file format of the target video in the left panel or you can choose a new file format, and select a video resolution.
Step 5. Click the settings icon behind the chosen resolution or click the Create Custom option in the lower right.

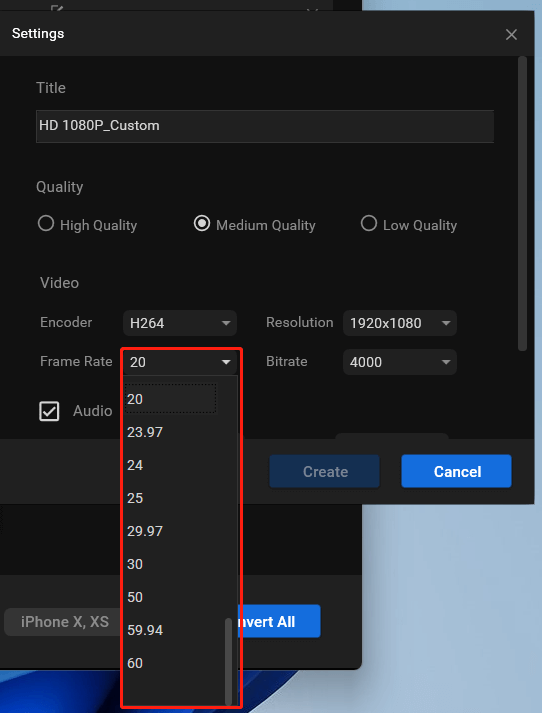
Step 6. In the next window, choose a Frame Rate you prefer under the Video section. besides, you can modify other parameters of the video: video encoder, video resolution, video bitrate, audio encoder, audio channel, audio sample rate, as well as audio bitrate.

MiniTool Video Converter supports the below frame rates:
- 12 fps
- 15 fps
- 20 fps
- 97 fps
- 24 fps
- 25 fps
- 97 fps
- 30 fps
- 50 fps
- 94 fps
- 60 fps
However, sometimes, not all of the frame rates are available for selection. For example, if you choose a 4K video format, 12FPS, 15FPS, and 20FPS are unavailable since they are very unsuitable for such a high resolution.
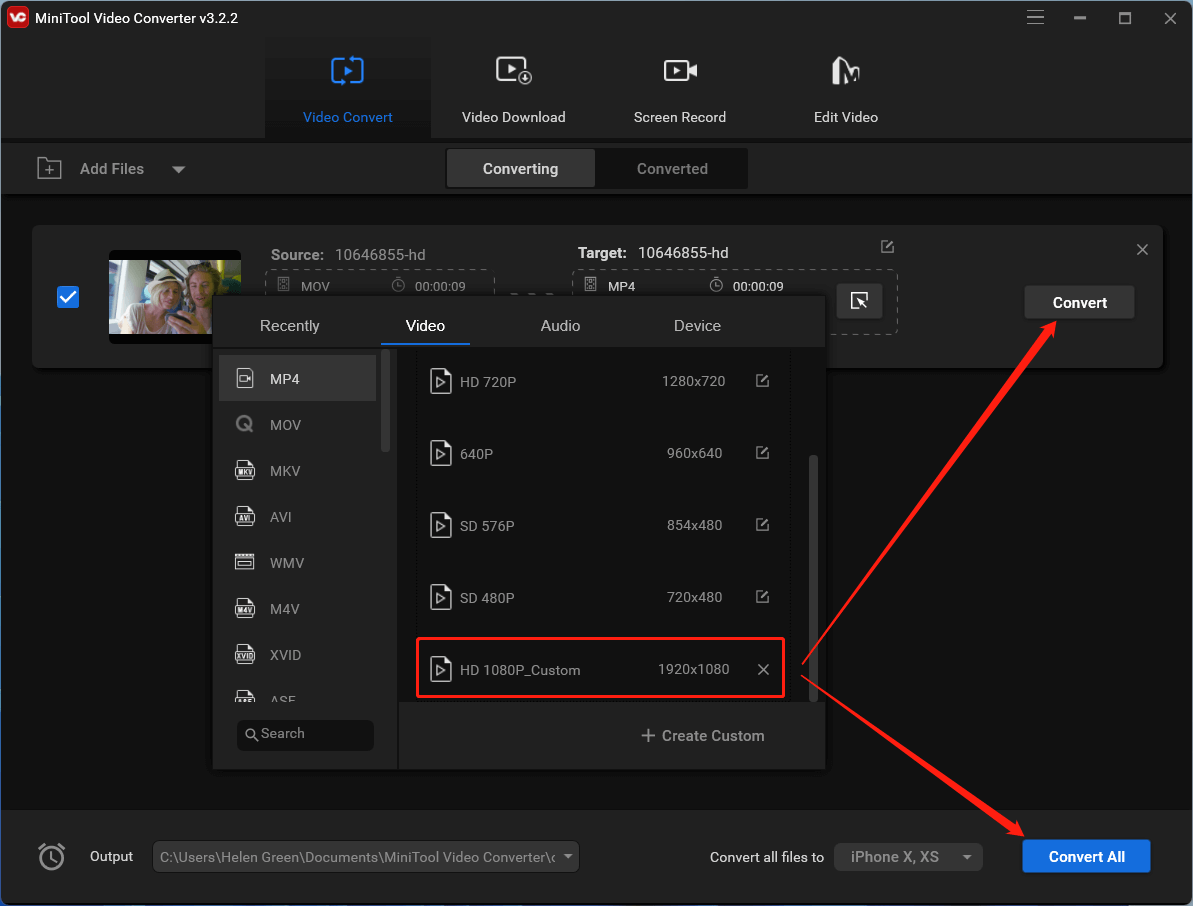
Step 7. When all settings are done, click the Create button, and don’t forget to select your customized file format option back in the first pop-up window.
Step 8. Finally, click the Convert button to start the conversion.

If you want to convert multiple files simultaneously, you need to set up the converted videos’ formats one by one. If you plan to convert them into the same format, just do your settings from the Convert all files to option. Finally, when completing all settings, click the Convert All button.
Also read:


User Comments :