This article shows you how to zip a video file on Windows. To shrink video file size further, you’ll also learn to compress video with MiniTool Video Converter and Clideo. This article also compares these two compression methods and recommends the tool best suited for your compression task.
Imagine that you have just finished recording a video, or you have just downloaded a movie from a website, only to find that the file takes up too much storage space on your computer. What will you do? Like most people, I would probably zip the video directly on my computer without hesitation.
ZIP effectively reduces video file sizes through lossless compression technology. It identifies and locates duplicate data, replacing redundant sections with efficient code to ensure that every single bit of the original content is preserved intact. During the extraction process, the ZIP algorithm performs the reverse operation, thereby enabling the precise reconstruction of the data.
Zipping offers extensive compatibility across major platforms, including Windows, macOS, Linux, Android, and iOS. This makes it incredibly useful when I am running low on storage space or need to send large files via email or messaging apps.
The following paragraph will show you how to zip a video and other methods to reduce video file size.
How to Zip a Video File on Windows
In the professional world, mastering the ability to zip a file is a crucial skill that can significantly boost work efficiency. Furthermore, rather than sending multiple separate files, zipping and consolidating them into a single folder is more time-efficient and ensures that all relevant documents are delivered simultaneously.
How to convert large video into zip file on Windows? Here is how I do:
Step 1. Select Videos
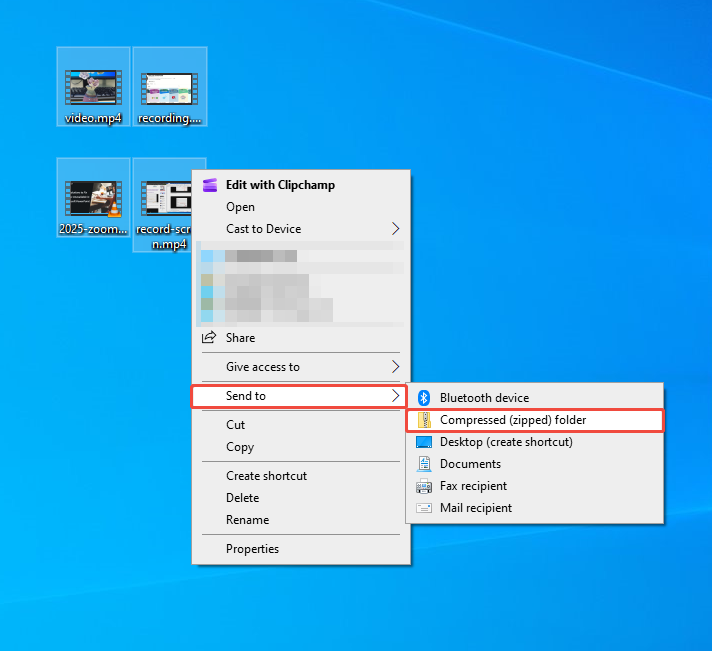
On Windows, no additional software is required to zip a video. So, I select the video that I want to compress first. If I want to compress multiple videos, I can hold down the Ctrl key and click on these video files.
Step 2. Right-click Videos and Zip Them
After selecting the video, I right-click, hover the cursor over the Send to option in the drop-down menu, and then select Compressed (zipped) folder.
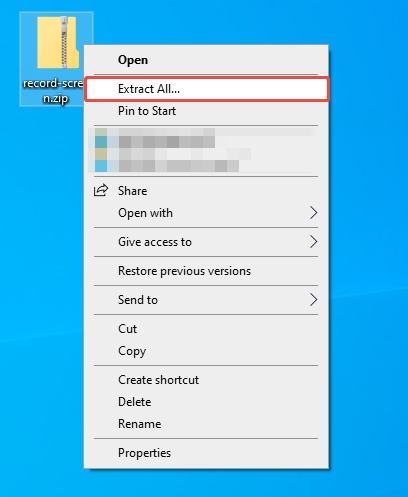
Step 3: Check the Zip File
Zipping videos doesn’t delete my original videos. It simply creates a new compressed folder with the files I selected. These zip files are usually saved right alongside my original videos, so I can easily locate them.
How to unzip a zip folder? Just right-click it and select Extract All.
Although ZIP compression can reduce the size of video files, the reduction is typically negligible. In some cases, it may not save any storage space at all. If I wish to further reduce my video file size, I would go to a specialized video compression software, such as MiniTool Video Converter.
How to Shrink Video Size Further
Here are two video compressors I use regularly. One is a desktop application, and the other is a web-based tool. I will outline their features and the complete compression steps.
1. MiniTool Video Converter
MiniTool Video Converter is my favorite tool for compressing videos. I’ve used it for years to convert file formats (sometimes this also reduces file size), but I recently discovered its excellent video compression feature. This application can effectively compress videos, reducing their size from 100% down to 10% of the original. I typically adjust the compression intensity based on my target file size requirements.
Furthermore, MiniTool Video Converter supports a wide variety of video formats, including MP4, MOV, MKV, WMV, M4V, AVI, VOB, MPG, WebM, and more. If I wish to reduce a video’s file size even further, I can also fine-tune various parameters, such as bitrate, resolution, and frame rate.
What’s more, MiniTool Video Converter is one of the few video compressors I have used that does not add a watermark. How do I use it to compress videos? Follow the guide below.
Step 1. Download and Install MiniTool Video Converter
Download the MiniTool Video Converter installer, run it, and follow the prompts to install it on a PC in seconds.
MiniTool Video ConverterClick to Download100%Clean & Safe
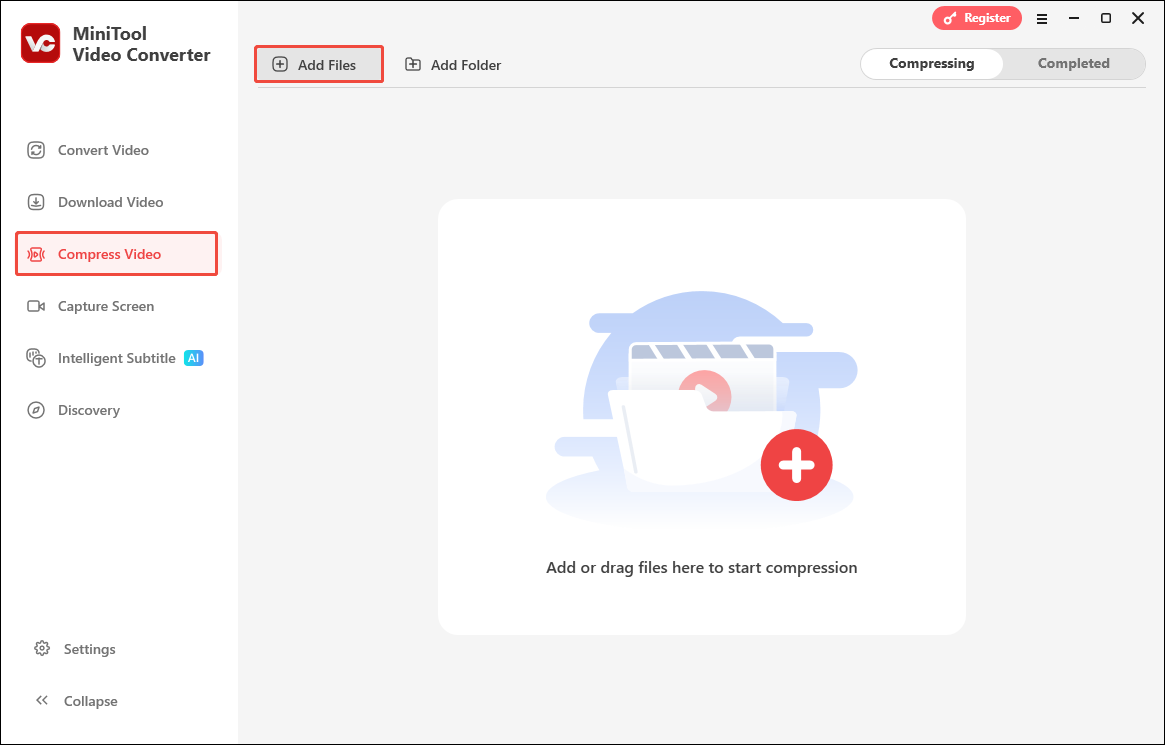
Step 2. Import Target Video
Go to the Compress Video tab. Then, click Add Files to import the video I want to compress.
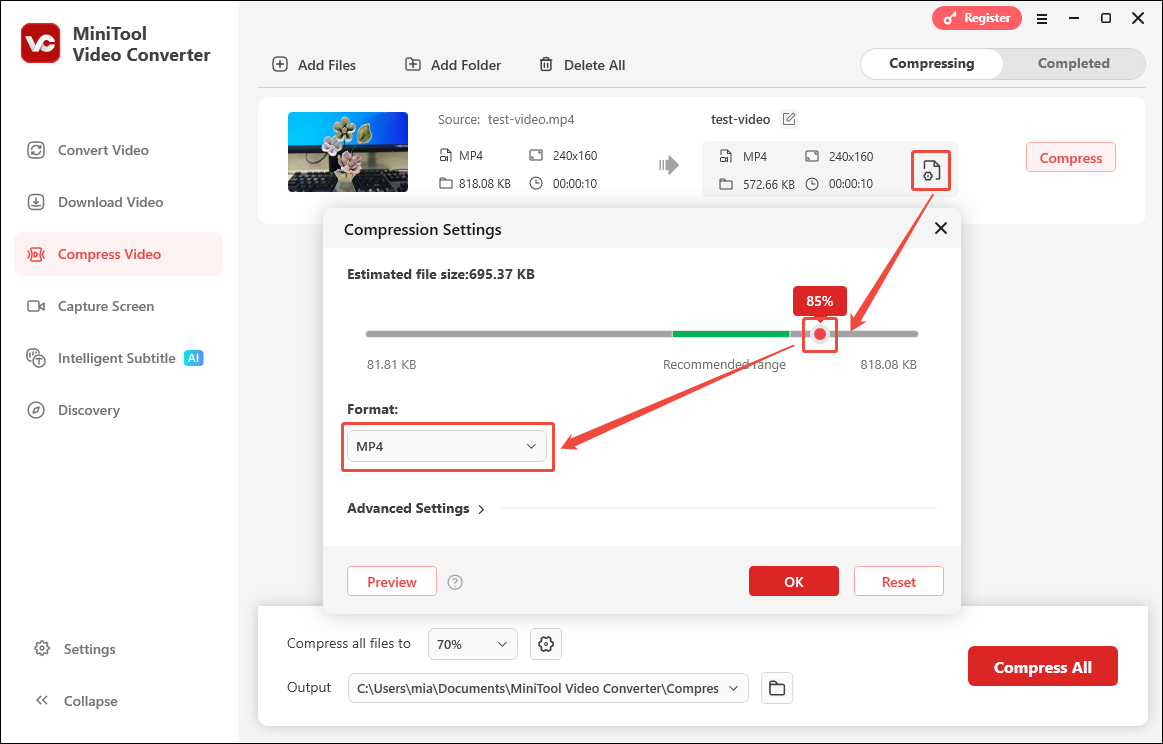
Step 3. Set the Compression Level
Click the settings icon to open the Compression Settings window. Then, I usually adjust the compression level based on my target file size. For example, if I need the video under 700 KB, I move the slider while watching the estimated size in the top-left corner. Once it drops below the file size I want, I stop adjusting.
Step 4. Select the Output Format
Expand the Format option and select the output format. Here I select MP4.
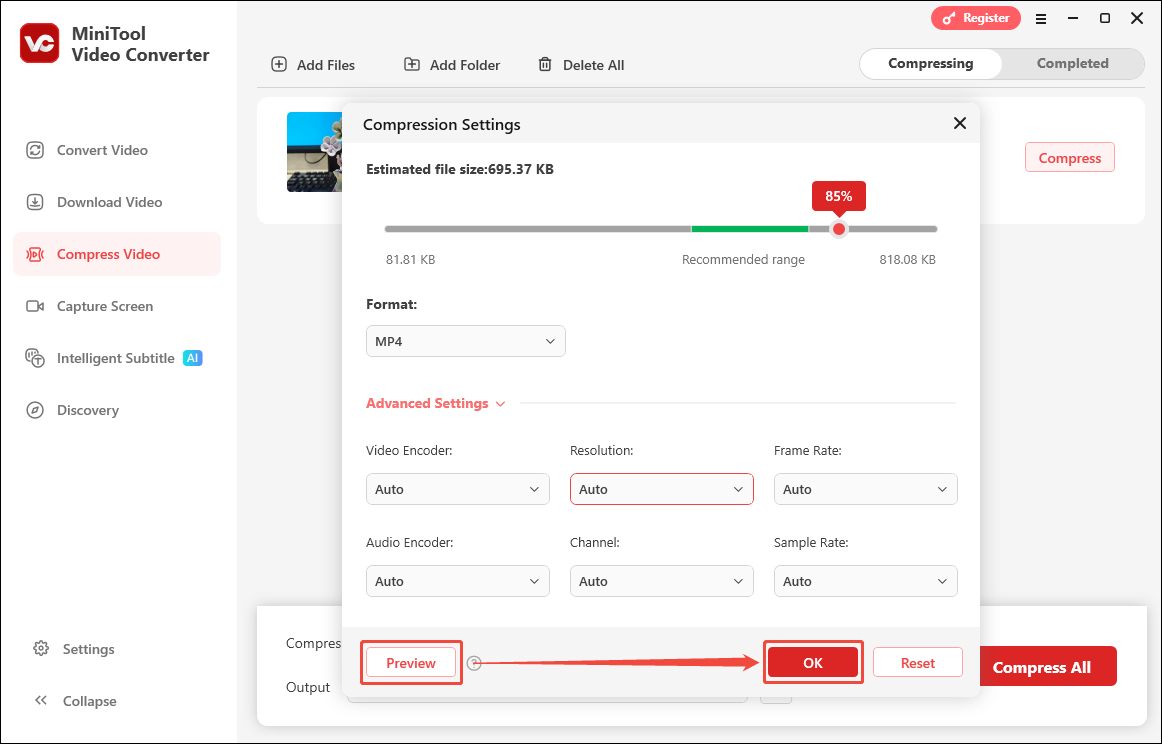
Step 5. Preview the Video
Next, I click Preview to check the video quality at my chosen compression level. If it looks good, I click OK to confirm all compression settings.
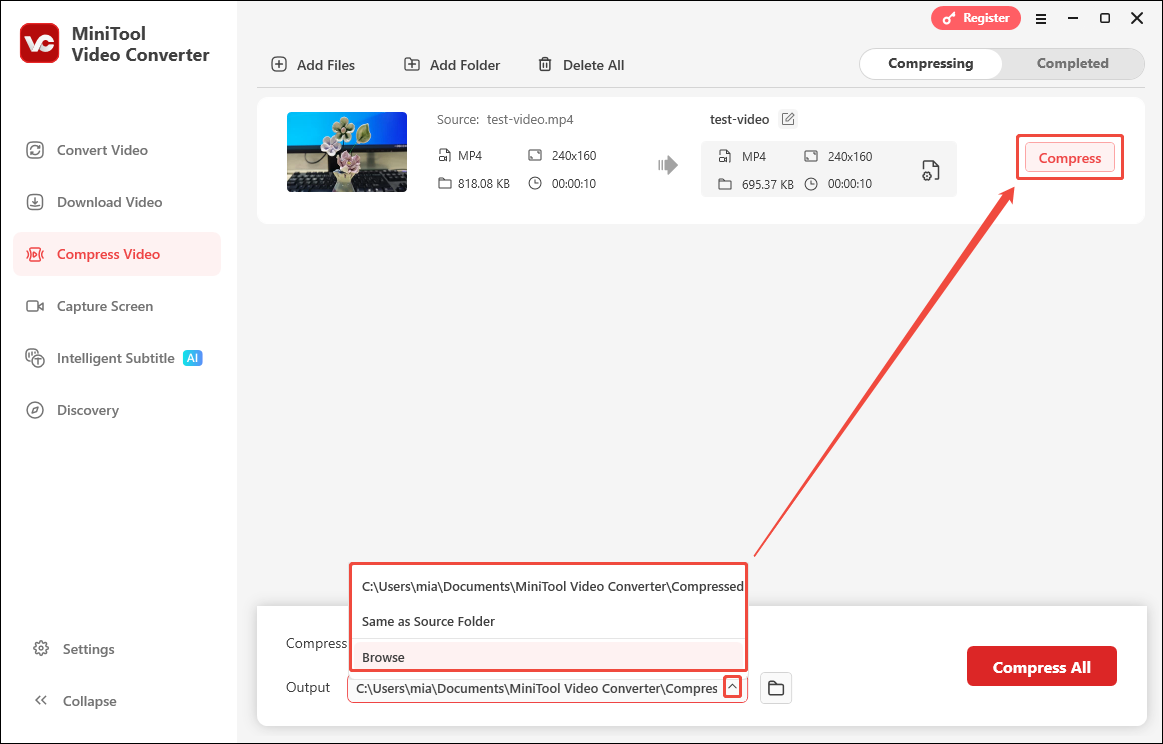
Step 6. Choose Save Location and Start Compression
Next, I expand the Output tab and browse for my preferred save location. With the destination set, I click Compress to start the compression process.
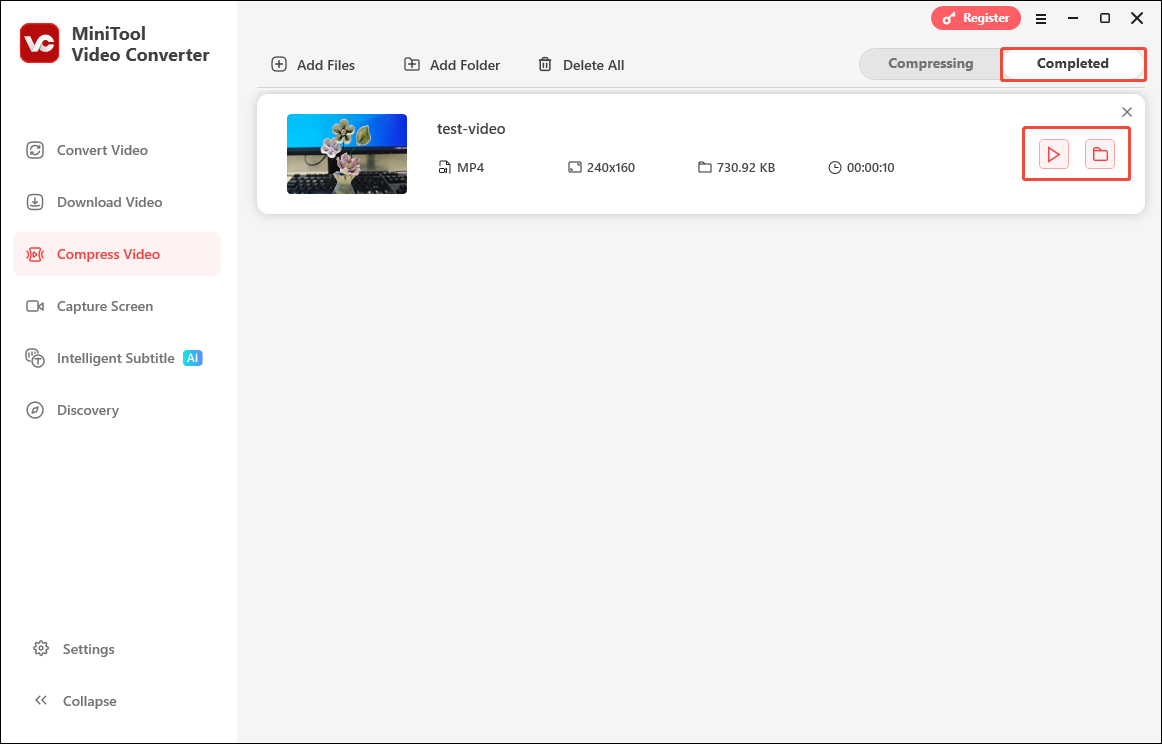
Step 7. Find the Compressed Video
When my conversion is done, I will land on the Completed tab. From there, I hit the play icon to check it out and click the folder icon to see where it’s saved.
MiniTool Video Converter delivers video compression with flexible export formats. In addition to compression and conversion, the software offers advanced features, including automated subtitle generation and speech-to-text transcription for both video and audio content.
2. Clideo
Clideo is known as a web-based video editing tool. However, it also supports compressing video. It offers multiple compression modes, including Basic, Strong (faster), and Superb (smaller size). Additionally, I found that Clideo offers advanced customization options, including resolution adjustment and encoding format selection, such as H.264 or H.265.
The platform also features a dedicated audio removal option. If I don’t want the video to have sound, I can simply check this box before compression. However, free users can only upload single files up to 500 MB, and the compressed videos will feature a watermark.
Here is a guide on how I use Clideo video compressor to shrink video size:
Step 1. Navigate to Clideo’s Video Compressor Page
Go directly to https://clideo.com/compress-video.
Step 2. Import the Video I Want to Compress
Click the Choose file option to add the video I want to compress.
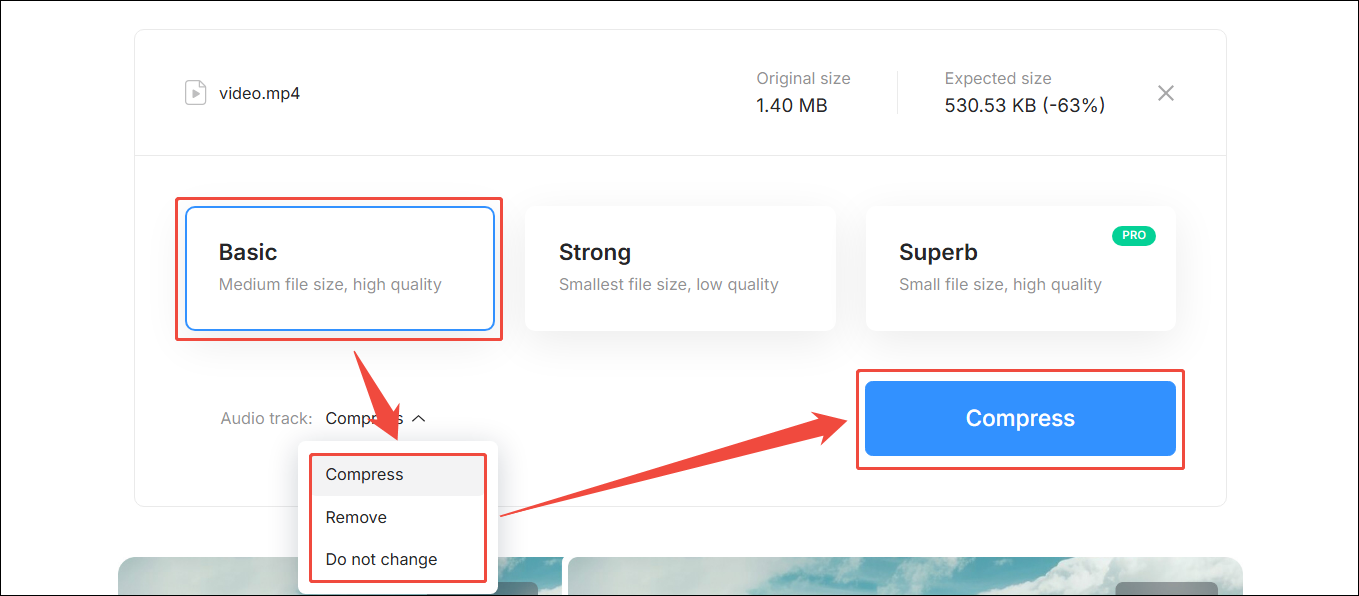
Step 3. Choose the Compression Level and Start Compressing
Once the video is uploaded, I choose the Basic compression level. Then I open the Audio track options and decide whether to compress the audio, remove it, or leave it as is. Finally, click the Compress button to start compression.
Step 4. Download the Compressed Video
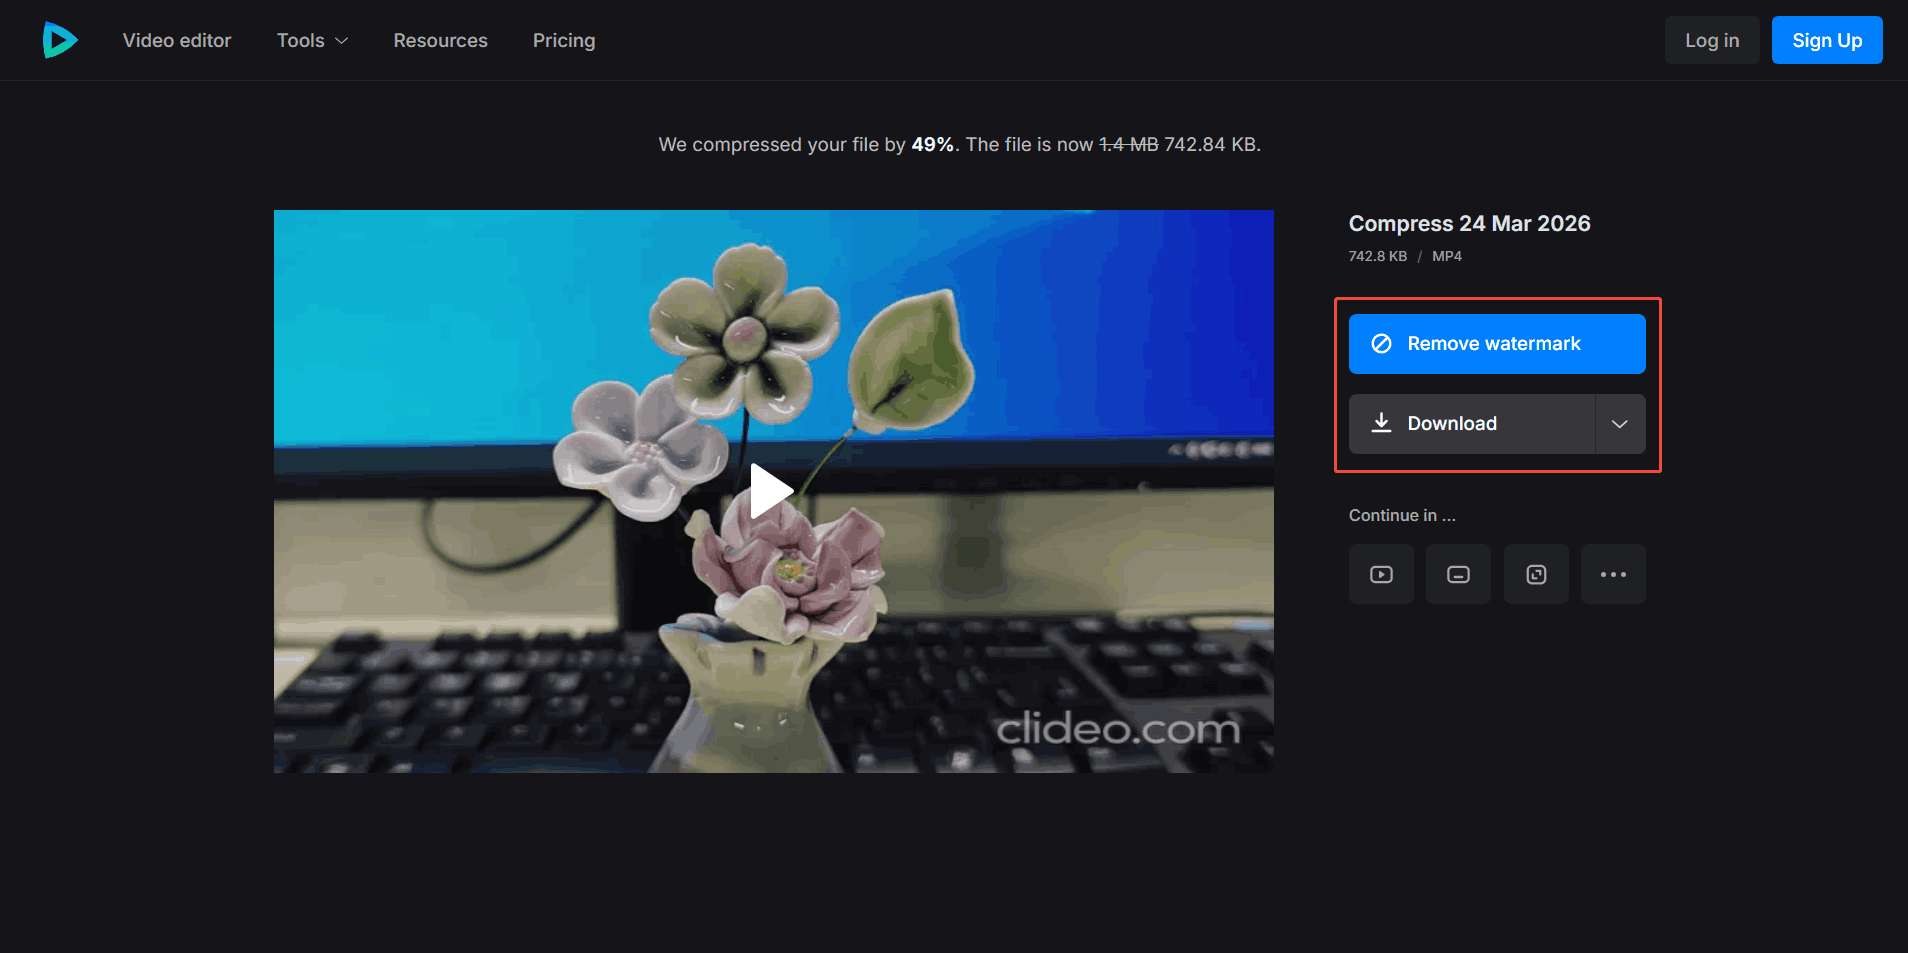
Once my video is compressed, I notice a watermark in the bottom-right corner. To remove the watermark, I need to click Remove watermark and then upgrade my plan. Since I am a free user and don’t want to pay for the plan, I can only click Download to save the video with the watermark.
MiniTool MovieMakerClick to Download100%Clean & Safe
Compared to packaging videos into a ZIP archive, using desktop or online video compression tools to reduce file size is undoubtedly a better approach. The compression efficiency of these specialized tools is far greater than that of ZIP compression.

Zipping a Video vs. Compressing a Video
In the previous section, I introduced two methods for compressing videos: directly using ZIP and using compression tools. Which method is better? What are the differences between them? To answer this, I will analyze these methods based on performance, compression effectiveness, application scenarios, processing speed, and file management capabilities.
1. Performance
ZIP compression performance depends on the CPU’s ability to process file compression. This compression method doesn’t analyze the video frame by frame. Instead, it reorganizes the existing data into a compressed file without changing the original data. After decompression, the video plays exactly the same as before. However, video compression software uses complex calculations to reduce data size, which places high demands on the computer’s CPU or GPU.
In summary, ZIP compression performs significantly better because it requires very few CPU resources. Video compressors, on the other hand, require substantial computing power and time-consuming frame-by-frame analysis.
2. File Size Reduction
While ZIP compression can technically reduce file size to some extent, the reduction is minimal. For modern video formats, such as MP4 and MOV. Since videos in these formats are already heavily compressed, using ZIP barely makes the file any smaller. In some cases, the file size may even grow larger after zipping because of extra metadata added to the archive.
On the other hand, dedicated video compression tools can dramatically shrink video file sizes. Some tools even allow users adjust video parameters like resolution, bitrate, and frame rate to shrink the video file size further. Professional video compression software can easily turn a 1 GB video into a 100 MB file, or make it even smaller than that.
3. Purpose and Use Case
For me, the primary purpose of ZIP compression is not merely to reduce file size, but also to archive multiple individual files together, thereby making the files on my computer more organized. Furthermore, this method of archiving also facilitates file transfer.
On the other hand, the primary purpose of video compression is to reduce file size to accommodate the storage limitations of mobile devices, meet website upload requirements, or speed up video streaming and sharing. However, compressing video usually involves some sacrifice in image quality.
4. Speed
There is a significant difference in processing speed between zipping and compression. Zipping is remarkably fast in terms of speed. It usually takes just a few seconds or minutes to complete. This is because zipping simply repackages existing data without analyzing the video content frame by frame. Video compression, on the other hand, is much slower. The compression process requires re-encoding and can take several minutes or longer, depending on the video's length and complexity.
5. Final File Format
Zipping preserves the original format entirely. Typically, the result of zipping is a .zip or .rar archive file, while the format of the video file itself remains unchanged. For instance, an MP4 file remains in MP4 format after extraction. The video quality and other metadata are preserved intact.
However, many video compression tools allow users to export videos in a variety of formats, thereby fundamentally altering the file’s structure. For instance, an MP4 file can be exported in MKV format after compression. Personally, I think using a compressor to compress videos is much more flexible, because it enables easy format conversion to meet the specific requirements of various social media platforms and devices.
Conclusion
In this article, I showed how to zip a video file. While ZIP compression is convenient, it results in only a negligible reduction in file size. Therefore, I recommend using a video compressor, such as MiniTool Video Converter or Clideo, to significantly reduce file size. Notably, videos compressed using MiniTool Video Converter do not contain a watermark!
If you encounter any difficulties while using MiniTool Video Converter, please email support@minitool.com for help.
User Comments :