Why Can’t I Save Videos to My USB Drive?
Many users are unable to save videos to their USB drives. There are many reasons for this, including video files that are too large. Below, I will explain three of the most common reasons.
Reason 1. FAT32 File Size Limit
Some users keep receiving “not enough free space” messages when saving a video to a USB drive, even though there's plenty of free space. What caused this problem? This is likely due to limitations of the FAT32 File Size Limit.
FAT32 is a file system developed in 1995 for organizing data on storage devices. This system is used in some USB drives and memory cards. Its most notable feature is that it only allows storing files smaller than 4GB. In 1995, most people's files wouldn't exceed 4GB. But today, 4GB files are very common.
To enable your USB drive to store a single video file larger than 4GB, you can first back up the data on the USB drive, and then reformat the USB drive as exFAT (Extended File Allocation Table) or NTFS (New Technology File System).
Reason 2. Write Protection Is Enabled
If your USB drive is write-protected, it may prevent your videos from being saved to it. You can try disabling write protection on the USB. Some USB drives have a physical lock switch. Pressing it will turn off write protection. If you don't have this button, you can use the following method to remove write protection from a USB drive in Windows:
Step 1: Open Command Prompt as Administrator
Press Win + R on your keyboard, search “diskpart”, and then select Run as administrator. Ctrl+Shift+Enter.
Step 2: Start Diskpart
Type “list disk” and press Enter on your keyboard. Then, you will see the different discs connected to your computer.
Step 3: Select USB
Type “select disk X” (replace X with your USB’s number) and press Enter.
Step 4: Clear Attributes
Type “attributes disk clear readonly” and press Enter.
Step 5: Exit
Type exit and restart your computer if needed.
Reason 3. Not Enough Storage Space (Video File Too Large for USB)
If your USB drive doesn't have enough storage space and the video you want to save is too large, the video may fail to save to the USB drive. In this case, you can try deleting some unnecessary files from the USB drive. On condition that you don't want to delete files, you can compress the video you want to transfer to the USB drive.
How to Reduce File Size for USB
If the video file too large for USB, you can try to compress it with a video compressor. MiniTool Video Converter offers free video compression functionality to meet your compression needs.
MiniTool Video Converter is a Windows-based application that supports compressing videos up to 8K. It supports multiple video formats, including MP4, MKV, AVI, WMV, MOV, VOB, etc. Regardless of the video file size, it can be uploaded to this software for compression. You can compress your videos an unlimited number of times.
What’s more, MiniTool Video Converter's compression function supports processing up to five files simultaneously. In addition, the compressed video will not have a watermark. how to reduce file size for USB with this video compressor? Follow the steps below:
Step 1: Download and Install MiniTool Video Converter
Simply click the button below to download MiniTool Video Converter and follow the on-screen instructions to install it. Then, launch this application.
MiniTool Video ConverterClick to Download100%Clean & Safe
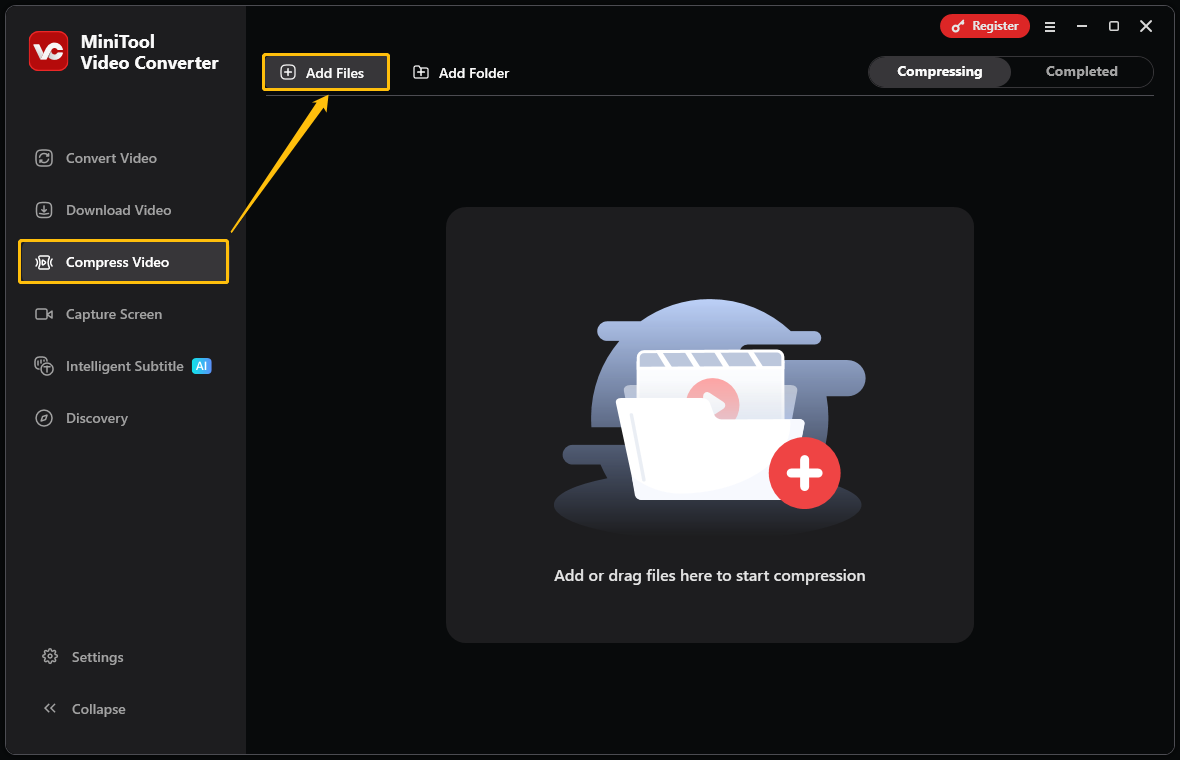
Step 2: Import Your Video
Switch to the Compress Video tab and click Add Files to import the video you want to compress.
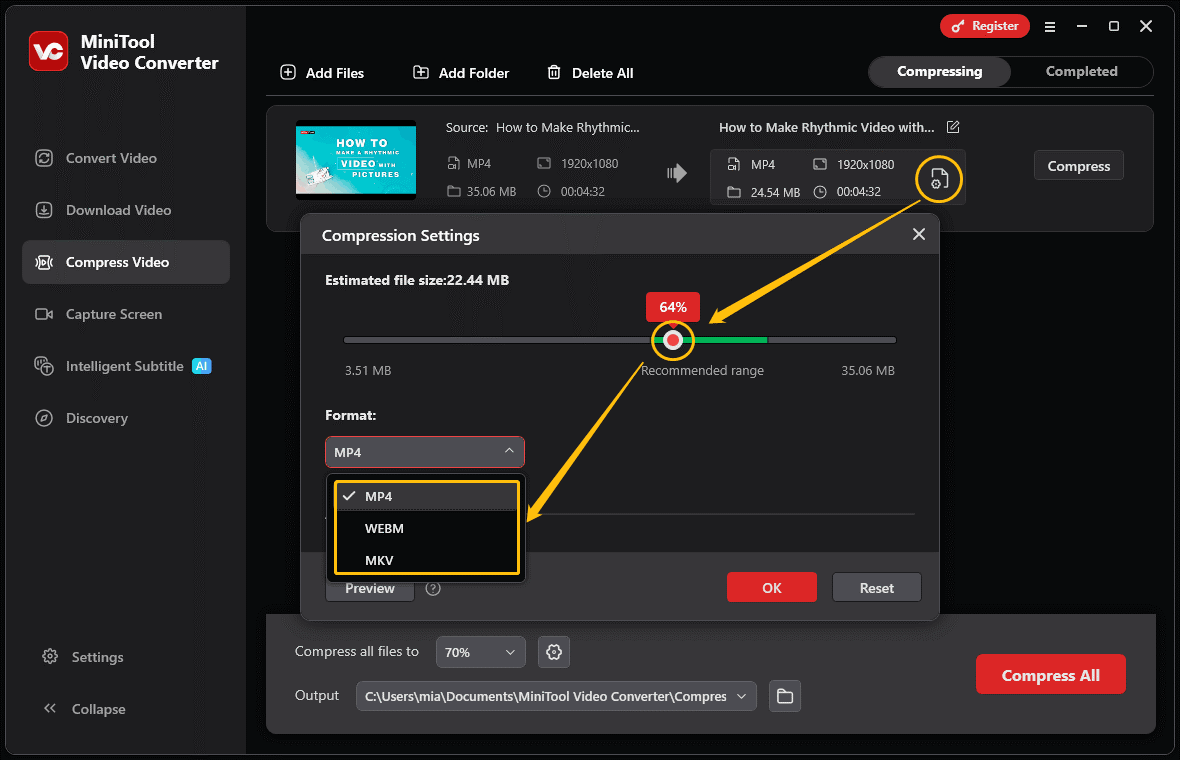
Step 3: Set the Compression Level
Click the gear icon to open the Compression Settings window. Then, you can set the compression level by dragging the red dot on the slider.
Step 4: Choose an Output Format
Unfold the Format menu and select the output format you want.
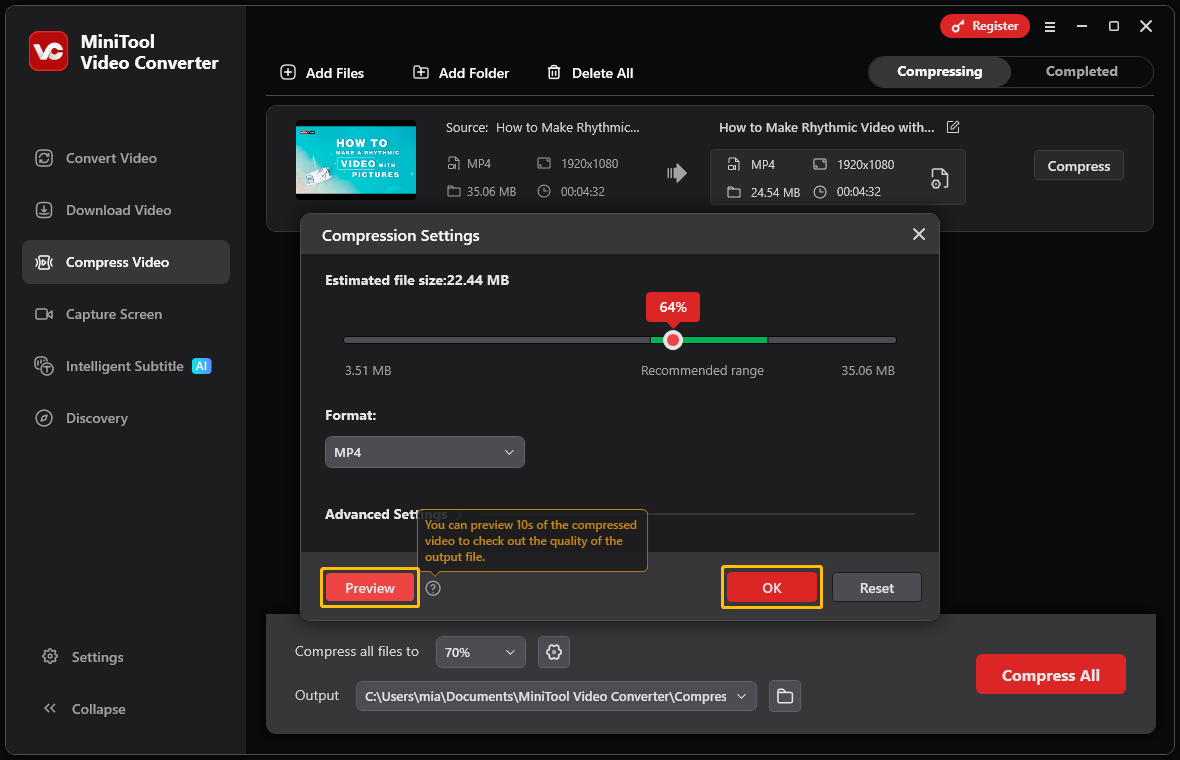
Step 5: Preview the Video (Optional)
If you want to know the video quality under the compression level you set, you can click the Preview button. Then click OK to confirm all your changes.
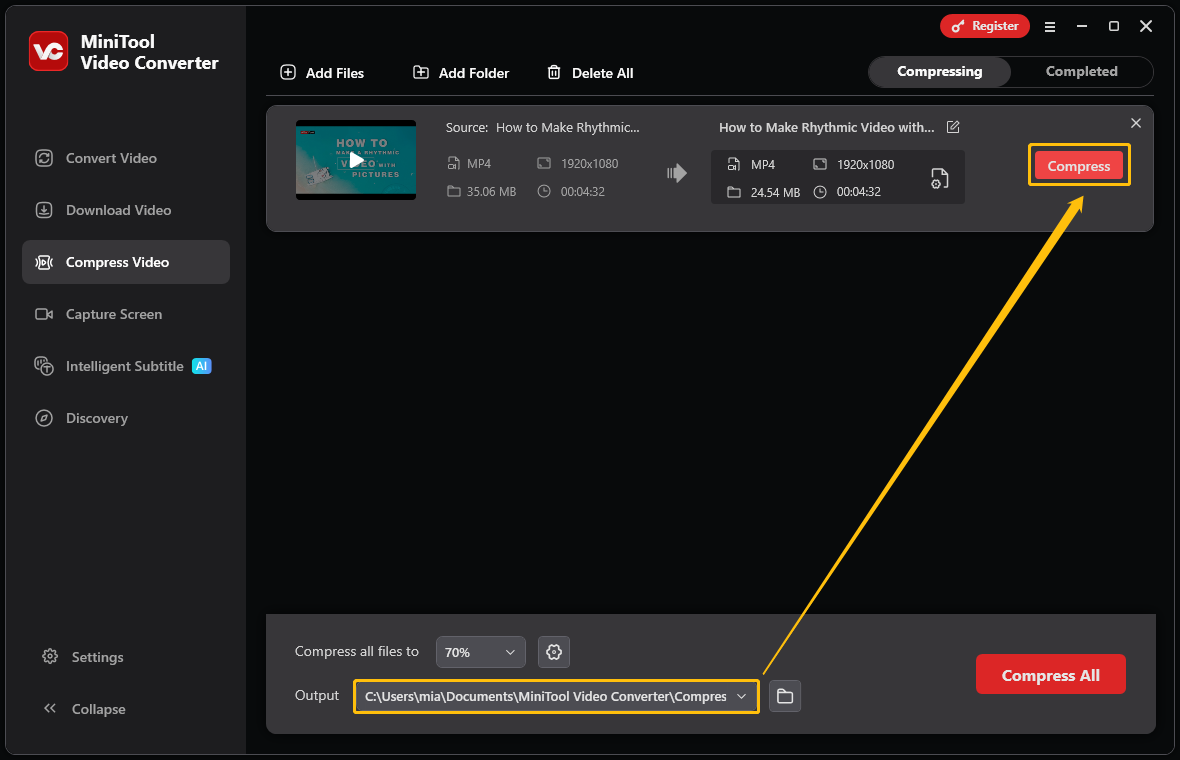
Step 6: Set the Save Destination
Expand the Output option and choose a folder to save the compressed video.
Step 7: Start Compression
Click the Compress button to start the compression process.
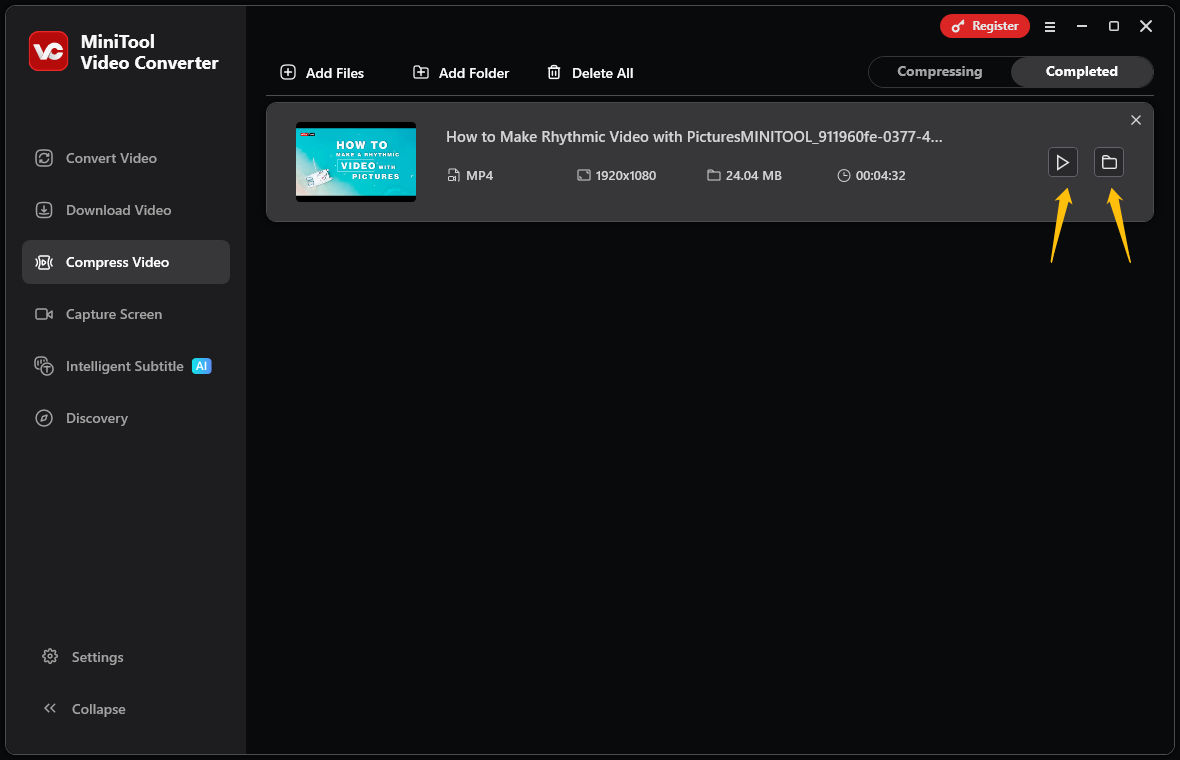
Step 8: Locate the Compressed Video
Once the video compression is complete, the software will redirect to the Completed interface. Here you can see the compressed video. Click the play icon or the folder icon to watch and locate the compressed file.
You can import several videos at once and compress them in one go. Beyond that, MiniTool Video Converter also handles video and audio format conversions, turns speech into text, generates subtitles for a video, and more.
Conclusion
This post analyzes three reasons why USB drives fail to save videos and provides solutions. If your video file too large for USB, you’ll need to use MiniTool Video Converter to compress it.
User Comments :