Do you know what vertical videos are? Why do we need to record vertical video? And how to record vertical video on PC? The answers to all those questions can be found in this post from the free video converter from MiniTool.
With the growing prevalence of social media platforms and people’s mobile viewing habits, vertical videos have become increasingly popular. Thus, learning to record vertical videos is essential when sharing your video online.
Before diving into the methods of recording a vertical video, you may want to know the definition of a vertical video.
What Is a Vertical Video?
A vertical video is a video that has a portrait orientation, like holding your phone or camera upright, which makes the height of the screen greater than its width. This type of video is commonly used for filming people or objects that are tall and thin, such as individuals standing up or buildings. In contrast, a horizontal video, also known as a landscape video, is often used for shooting wide and panoramic scenes, as this kind of video has greater width than its height.
Then what is a vertical video aspect ratio? The aspect ratio is the proportional relationship between the width and height of an image or screen. It is represented as two numbers separated by a colon, width: height. Take the aspect ratio - 16:9 as an example, it means for every 16 units of width, there are 9 units of height. The most widely used vertical video aspect ratio is 9:16.
This aspect ratio is commonly used by social media platforms such as TikTok, Instagram Stories, and Snapchat. It has a width of 9 units and a height of 16 units. It fits perfectly on smartphone screens when held vertically, creating a fully immersive visual experience and convenient for one-handed operation.
Why Do We Need to Record a Vertical Video?
The aspect ratio of a video has a huge impact on the viewing experience, though often ignored by people. A suitable aspect ratio can enhance the visual appeal of images and videos, making them more immersive and enjoyable. An incorrect aspect ratio can result in distorted or stretched visuals. Why do content creators need to record a vertical video? Here are some key reasons for recording vertical videos.
Vertical videos themselves have many advantages:
1. Immersive experience. Vertical videos can offer an immersive experience by filling the user's field of vision, leading to higher engagement levels. They are particularly effective for storytelling that emphasizes the subject or action rather than the surrounding environment. This vertical framing can create a sense of intimacy and immediacy that is harder to achieve with horizontal formats.
2. Ease of creation. Modern smartphones are equipped with powerful cameras that make it easy to record high-quality vertical videos. Many editing apps and tools are optimized for vertical videos, allowing creators to edit, add effects, and share content quickly and efficiently. This ease of production encourages more people to create and share vertical content.
Other factors like the popularity of social media also promote people recording vertical videos. See as follows:
1. Mobile optimization. Nowadays, more and more people prefer watching videos on their phones, and the majority of smartphone users tend to use their smartphones in a vertical orientation, which is the natural way for them. Vertical videos are tailor-made for those people’s watching habits. They fill the entire smartphone screens, allowing people to scroll the content without the need to rotate their phones. This makes the viewing experience more comfortable and seamless for people.
2. Social media preferences. Social media has gained more and more significance in modern society. It has been an indispensable tool for staying connected with friends and family. It’s also a central hub for communication, entertainment, education, and more.
Social media platforms like TikTok, Instagram Stories, and Twitter's Fleets embrace vertical videos as the primary way to share and engage with content. These platforms have seen increased user engagement with vertical content, thus it’s of great importance for content creators to adapt to this trend to maximize reach and impact.
3. Marketing and advertising. Businesses and marketers have recognized the power of vertical video in reaching consumers on the go. Vertical ads are more likely to be viewed in their entirety compared with horizontal ones, as they fit naturally within the user's scrolling experience. As such, brands are incorporating vertical videos into their marketing strategies to better connect with their target audiences.
In conclusion, we record vertical videos because of their own features, the acceptance of social media, and more. They offer a more personalized and convenient way to watch videos on mobile devices, leading to increased engagement and a more immersive experience. As technology continues to adapt to the changing needs of consumers, the importance of vertical video will likely continue to grow.
It’s safe to say that you already know the definition of a vertical video and why we need to record portrait videos. So how to record vertical video on PC?
How to Record Vertical Video on PC?
Since computer screens' width is typically greater than the height, making it suitable for landscape videos. When we watch videos with a 16:9 aspect ratio on our computers, the video fills the entire screen space perfectly without any black bars or white edges. However, vertical videos cannot fully occupy the screen space, resulting in black bars or blank areas on the sides or top of the screen. So how to record vertical videos without black areas? The following gives you several quick and easy methods to help you record vertical videos without any hassle.
The market offers numerous options for screen recording applications. MiniTool Video Converter stands out from the crowd and is highly recommended for you to accomplish it.
MiniTool Video Converter
MiniTool Video Converter is free video converter software for Windows users. It supports various video and audio formats. It can convert MP4 to MOV, MP4 to MP3, and more.
In addition to its converting feature, MiniTool Video Converter also offers a screen recording service. It allows users to record their computer screen without any watermark, making it ideal for creating tutorials, capturing important moments during gameplay, etc. It also supports various output formats. No doubt it is a great method to record vertical video on Windows.
Here are the main features of its screen recording function:
- Free, no watermarks, and no time limits.
- Clean and user-friendly interface. The software has an intuitive user interface that makes the recording process a breeze. Users can record vertical videos with it in just a few simple steps even if they are novice users.
- Supports various output formats. It ensures the recorded videos can be shared and played by a greater range of devices and software.
- Supports users to customize converted videos. Users can choose the parameters of the recorded video, like resolution and frame rate, configure hotkeys, and more.
- Custom recording area. Users can record the full screen or their desired regions.
Now, download and install MiniTool Video Converter on your computer and let the fun begin.
MiniTool Video ConverterClick to Download100%Clean & Safe
See as follows to record vertical video on Windows with MiniTool Video Converter.
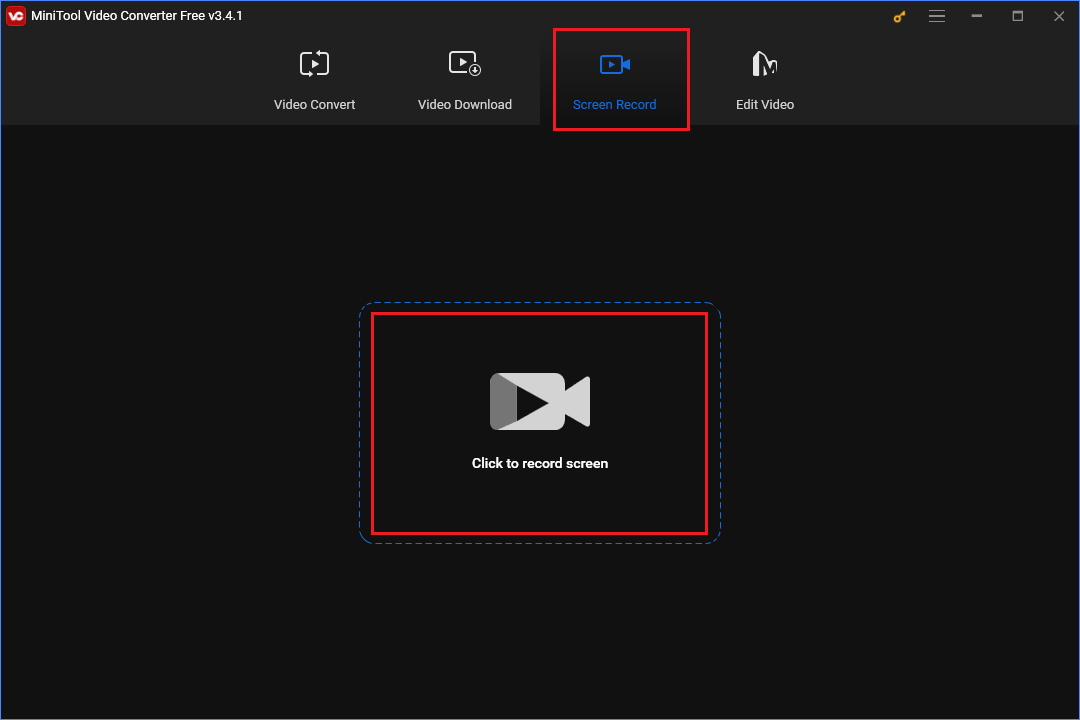
Step 1. After launching MiniTool Video Converter, select Screen Record and click Click to record screen in the middle of the main interface.
Step 2. Click Full screen and choose Select region on the down-drop menu. Left-click the mouse and move it to choose the area that perfectly matches the vertical video that you tend to record.
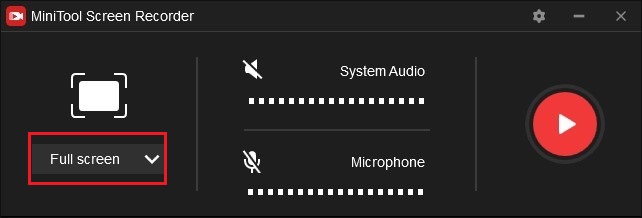
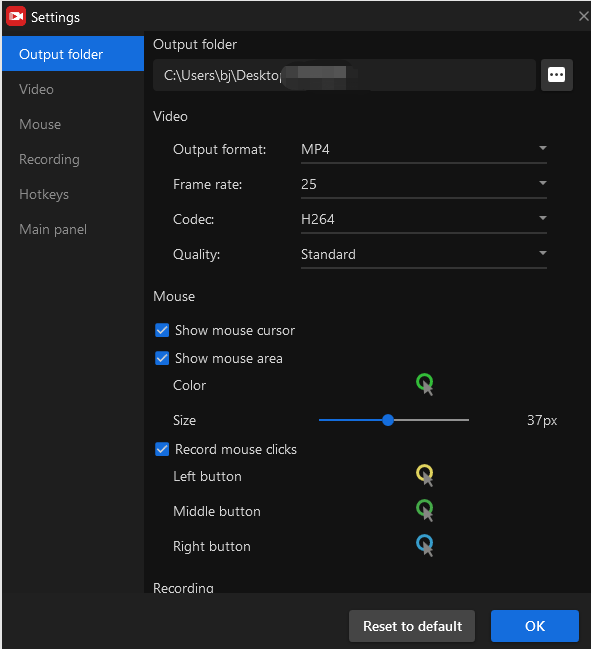
Step 3. (Optional) The System Audio and Microphone are turned off by default. Click the System Audio to record the system sound, or click Microphone if recording microphone sound is needed. Click the Settings icon. You can choose the output folder, output format, and more in the Settings window.
Step 4. Click the red Record button or F6 to start recording the vertical video. Press F9 to pause it if needed.
Step 5. Click F6 again to stop the recording.
Step 6. Once finished, the recorded video will automatically appear on its list. You can double-click or right-click it, and select Preview to play it.
MiniTool Video Converter also has a lot of advantages in terms of converting. It allows users to convert videos and audio in a vert short time. It can also batch-convert videos, which allows users to convert multiple media files simultaneously. This software has numerous other advantages, however, due to space limitations, I will refrain from elaborating on them one by one here. They await your discovery.
Want to record vertical video with ease? MiniTool Video Converter is the right move.Click to Tweet
Other Methods to Record Vertical Videos
Are there other converters to record vertical videos? How to record video on Mac?
The following presents 5 more tools to help you record vertical video on Mac or Windows.
1. WorkinTool Capture Screen Recorder
WorkinTool Capture Screen Recorder is also handy screen recording software for Windows users. It has many advantages, but also a disadvantage. See as follows:
Pros:
- No watermarks or time limits.
- Intuitive user interface and simple operations. This software has a clean interface and simple operations, making users easy to navigate and use.
- Multiple output formats. The software supports many output formats such as MP4, MOV, and AVI, meaning the recorded videos can be viewed and shared on a wide range of devices and platforms.
- In-Recording Editing Tools. While recording, users can add annotations like text, arrows, or freehand drawings. They can also customize the brush thickness and color to suit their preferences.
Cons:
- It is paid software offering a trial period for users.
2. iMovie
If you are a Mac User, iMovie is a good choice. Made by Apple, iMovie is video editing software packed with a range of video effects and tools like color correction and image stabilization. In addition, it’s a good tool for recording vertical video on Mac.
Pros:
- Completely free.
- Easy to Use. It is designed to be accessible to users with little or no video recording or editing experience.
- No download and installation necessary. iMovie is a built-in application on Mac. It doesn’t require additional downloads or installations.
Cons:
- Few custom recording settings. For example, the range of resolutions and frame rates are limited.
3. QuickTime Player
QuickTime Player is a media player built into macOS. It’s powerful to playback with some basic editing features. It’s also packed with a screen recording feature.
Pros:
- No fee, no watermarks, and no time limits.
- No need to download and install. It’s pre-installed on Apple devices, so users don’t need to go through the hassle of downloading and installing it.
- Simple recording process. Its clean and intuitive interface makes the recording porcess a walk in the park.
Cons:
- Sound recording limitation. QuickTime Player may not be able to capture system sounds by default. To fix it, third-party software such as SoundFlower is needed.
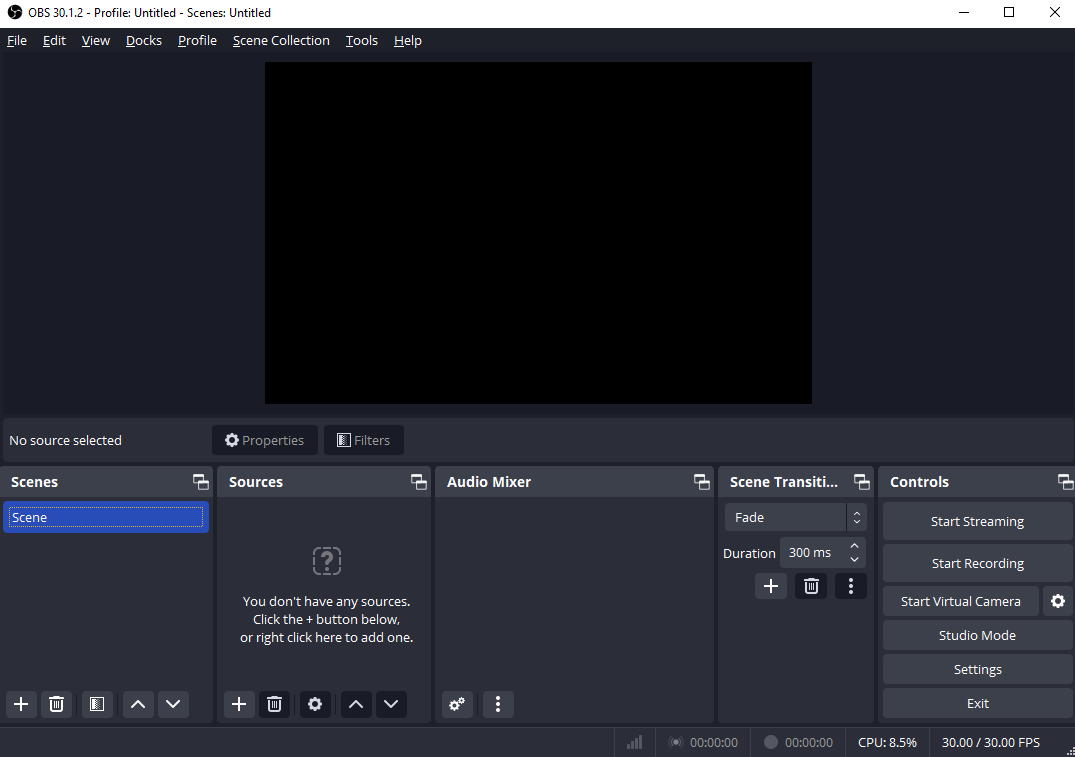
4. OBS Studio
OBS Studios is a powerful and versatile application for video recording and live streaming for Mac, Windows, and Linx users. It boasts numerous advantages yet harbors a flaw.
Pros:
- Recoding without fee, watermarks, or time limits.
- Cross-platform compatibility. It can be used on Windows, Mac, and Linx.
- Various customization options. Users can choose the resolution, frame rate, and more of the recorded video.
Cons:
- Beginner unfriendly. OBS Studio has a complex user interface with many settings and options, which can be overwhelming for those new to screen recording software.
5. EaseUS RecExperts
EaseUS RecExperts is an all-rounded screen recorder on Mac and Windows. Users can use it to record online meetings and presentations, create tutorials, and more.
Pros:
- Multiple regions of recording. You can record the video in the aspect ratio of 16:9, 9:16, and 1:1.
- Multiple screens recording. Users can record more than one screen at a time.
- Beginner-friendly. It’s simple to use. You can record, edit, and save the video in a few steps.
- Ai adds. This feature can auto-split and stop recording and offers a green screen effect for recording.
Cons:
- It’s not free.

Conclusion
Vertical videos have been a trend on social media. Knowing how to record vertical video is essential for content creators. MiniTool Video Convertor, undoubtedly, is a great tool to accomplish it with its handy and practical features.
If you have any questions about MiniTool Video Converter, contact us via support@minitool.com.
User Comments :