A timelapse is a film technique that compresses hours of a video into a few seconds. Considering that, some of you want to screen-record timelapse, this free file converter post recommends five credible timelapse screen recorders and guides you to make timelapse videos.
Do you want to make a timelapse digital art video? If yes, you’ve come to the right place. First, you need to record the process of your digital painting with a timelapse screen recorder. Then, you can use a video editor to turn it into a timelapse. Finally, share the timelapse with your friends. Now, let’s get started!
Part 1. Top 5 Free Timelapse Screen Recorders to Record Timelapse
To record your painting process on the computer, the following timelapse screen recorders are very helpful.
MiniTool Video Converter
MiniTool Video Converter is the best timelapse screen recorder that I want to recommend. In the following content, I will introduce this screen recorder and show you how to record the screen using MiniTool Video Converter.
Overview of MiniTool Video Converter
MiniTool Video Converter is a watermark-free screen recorder with an intuitive interface, which means that this application is an ideal choice for novices. More than that, this offline screen recorder never cost you a dime. Plus, MiniTool Video Converter enables you to record a wide range of computer activities without time limits.
More importantly, MiniTool Video Converter will save all your recording files in the MP4 format, which brings more convenience to the file sharing and recording playback. Also, it allows you to preset the recording duration, realizing the automation of screen recording.
How to Use MiniTool Video Converter as a Timelapse Screen Recorder
Below is a specific guide on how to use MiniTool Video Converter to record what you want.
MiniTool Video ConverterClick to Download100%Clean & Safe
Step 1. Click on the download button above to download and install MiniTool Video Converter on your computer. Then, launch it.
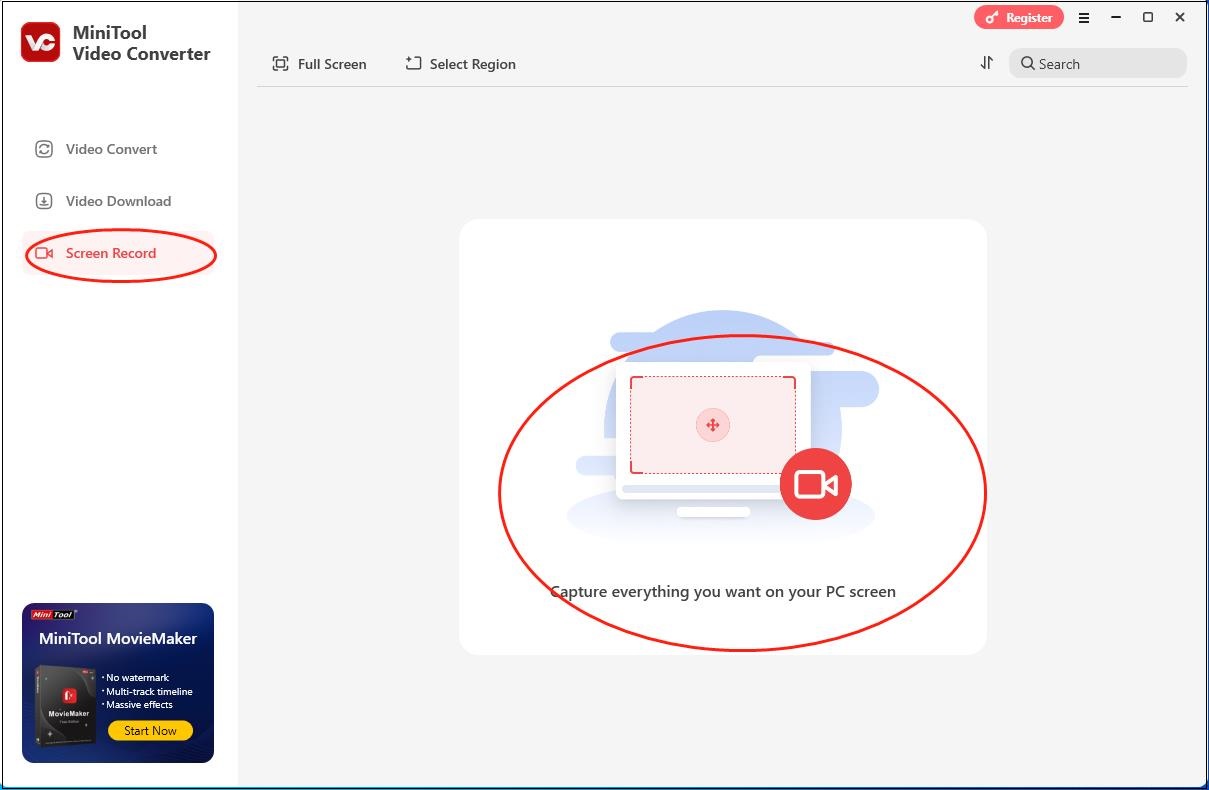
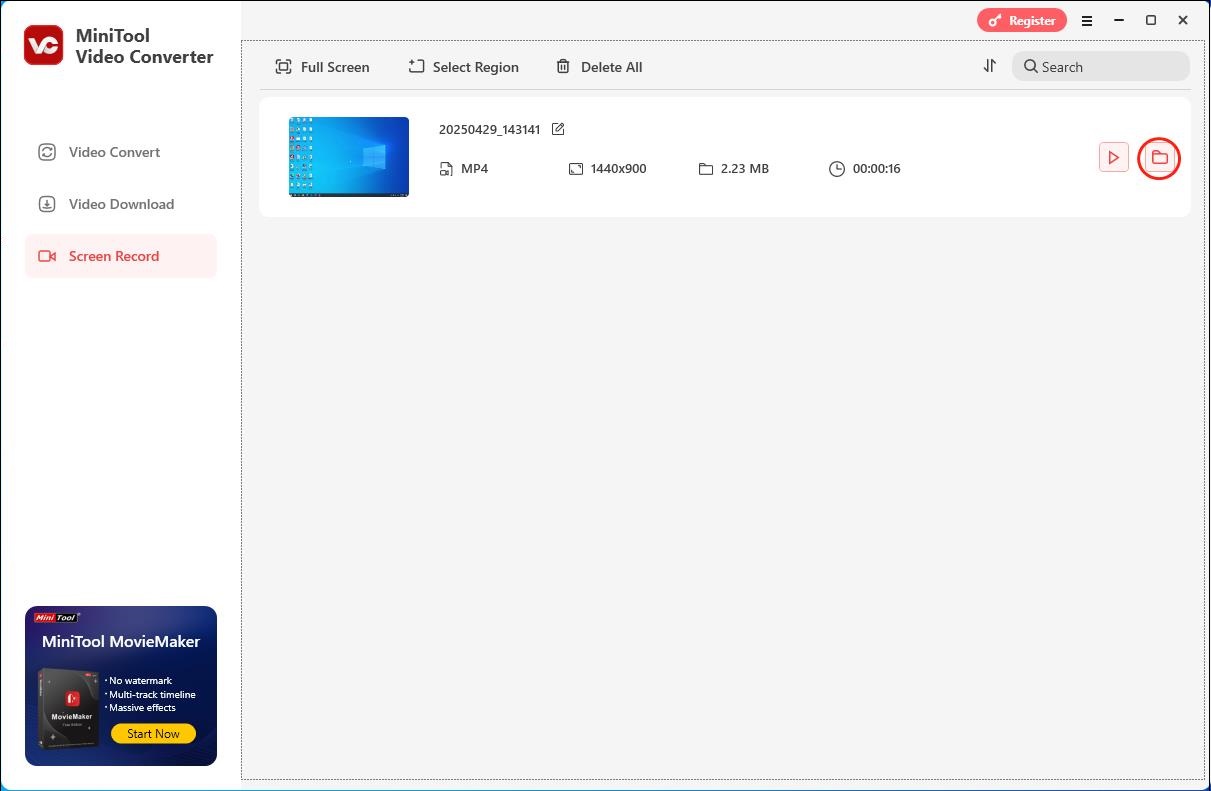
Step 2. Navigate to the Screen Record module and click on the Capture everything you want on your PC screen region to access the MiniTool Screen Recorder panel.
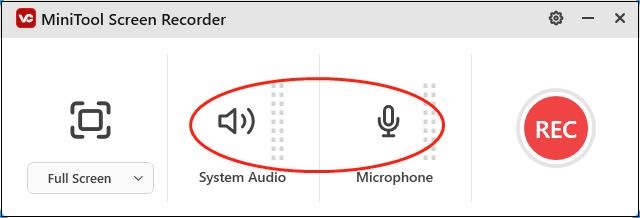
Step 3. Click on the System Audio icon and Microphone icon to manage the audio recording based on your needs.
Step 4. MiniTool Video Converter will adopt a full-screen recording mode by default. If you want to customize the recording area, just press the Alt + R keys to make a choice.
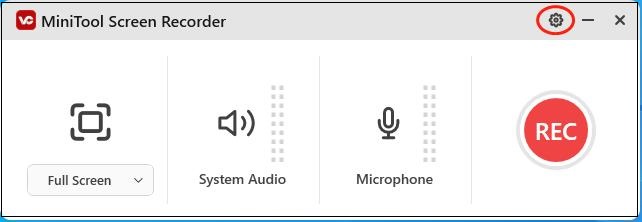
Step 5. Click on the upper-right gear icon to access the Settings interface.
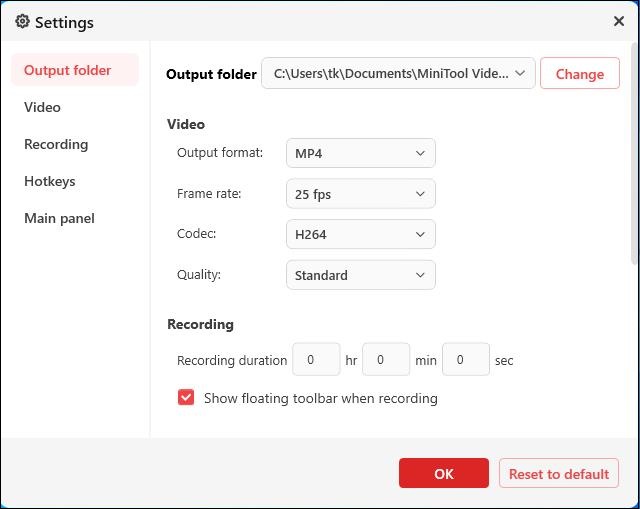
In the Settings interface, you can choose a saving path for your recording file. Meanwhile, you are free to set the recording quality as high quality, standard quality, or original quality. In addition, the frame rate options, including 15fps, 20fps, 25fps, 30fps, and 50fps, are available. Finally, click on the OK button to confirm the changes that you have made.
Step 6. Press the F6 key to activate the recording task. After a 3-second countdown, start the computer activity that you want to record.
Step 7. Once you have recorded what you want, end your recording by pressing the F6 key.
Step 8. Click on the folder icon to locate and check the recording file.
As you can see, MiniTool Video Converter is an easy-to-use timelapse screen recorder.
More than a Timelapse Screen Recorder
MiniTool Video Converter is beyond a timelapse screen recorder.
- It supports various audio/video conversion tasks such as AVI to MP4, MKV to MP3, MOV to AIFF, and so on.
- It allows you to download playlists, songs, films, Shorts, and other content from YouTube.
- It enables you to compress large files by adjusting the encoder, audio channel, frame rate, sample rate, bit rate, and resolution.
If you want MiniTool Video Converter, just click on the download button below to have a try.
MiniTool Video ConverterClick to Download100%Clean & Safe
OBS Studio
OBS Studio is a well-known open-source software for video recording and live streaming. The ease of use and open-source features make it a popular choice among streamers.
It allows you to set up numerous scenes and switch between the scenes seamlessly. It’s capable of capturing scenes from multiple sources smoothly and clearly without lagging and monitoring 8 different scenes simultaneously. During the recording process, you can add images, webcam, or other elements to the scene.
It’s also a perfect timelapse screen recorder that can record all kinds of screen activities for long hours.
Here’s how to capture your screen activity with this free timelapse screen recorder – OBS Studio.
Step 1. Go to OBS’s official website. OBS is available for Windows, macOS, and Linux. Download the version you need and install it on your computer.
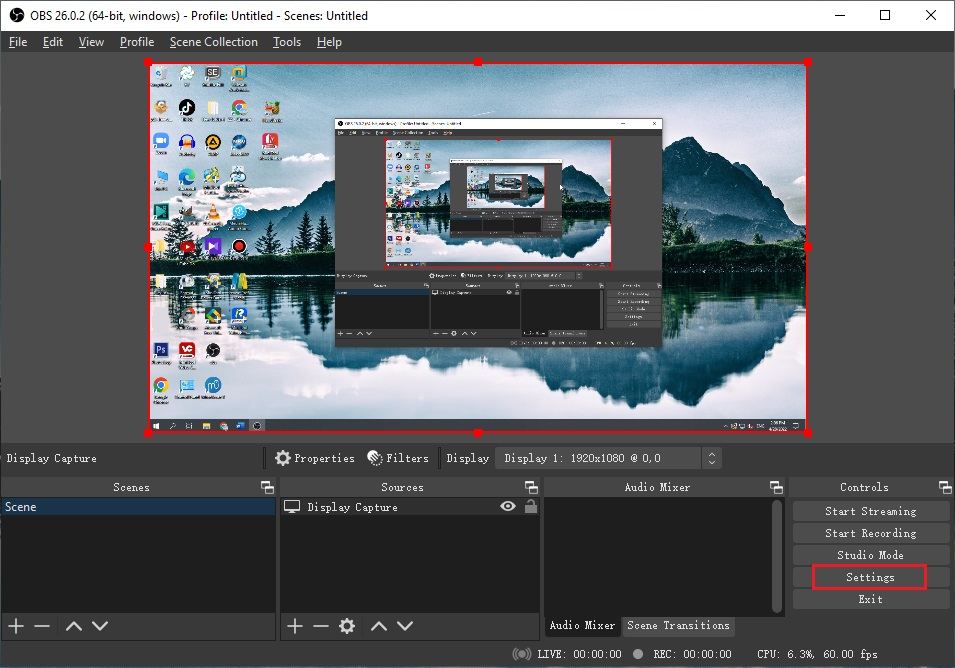
Step 2. Open OBS and you’ll need to add a source. In the Sources tab, click the + and choose Display Capture from the popup window. Then create a new source and complete the setup.
Step 3. Then you can adjust the output settings before recording. Click on Settings in the Controls tab. Click Output and make changes to the recording settings. If you’d like to change the frame rate, go to the Video tab and change the FPS value. After that, click Apple > OK.
Step 4. Now, click the Start Recording button at the bottom right of the window. After the completion of the recording, click Stop Recording. At the top left corner of the window, click File > Show Recordings to find the recorded video.

Bandicam
Bandicam is an HD timelapse video recorder for Windows. You can use it to record computer screens and 2D/3D gameplays at 4K UHD. It features real-time drawing, DirectX/OpenGL recording, webcam overlay, mouse effects, scheduled recording, and chroma key. Bandicam also lets you add a logo to a video and take screenshots. You can capture screenshots and save them as BMP, PNG, and JPEG.
After recording, you can directly upload recordings to YouTube and Vimeo.
Bandicam only supports two output formats AVI and MP4. It offers a free version, but the free version has some limitations. However, Bandicam doesn’t support scheduled recording. It has a 10-minute recording time limit and puts a watermark on an output video.
How to use Bandicam to record your screen? The steps are:
Step 1. Download Bandicam. Once you have installed Bandicam on your PC, open it.
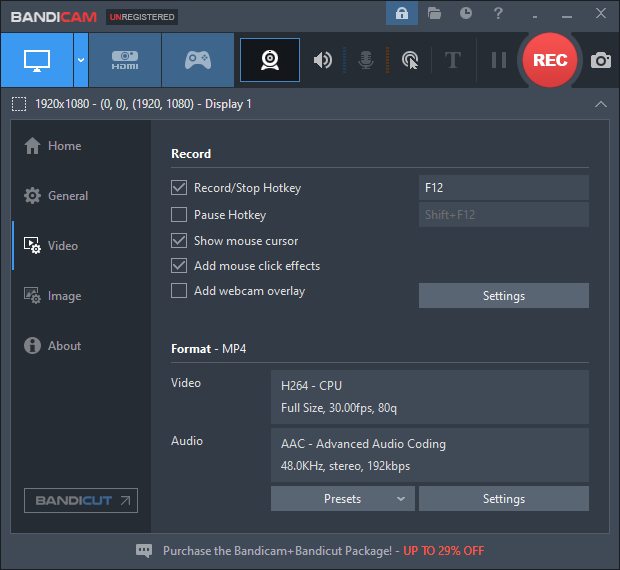
Step 2. Click on Video. Here you can add webcam overlay, logo, mouse click effects, and change the Video/Audio settings. To adjust the video settings, click Settings to change the output format, video size, FPS, codec, and quality. Click OK.
Start recording at a specific time: In the General tab, click Settings under Scheduled Recording. Click Add to create a scheduled recording task.
Step 3. At the top left of the window, click on Screen Recording Mode and select a recording mode from the drop-down list.
Step 4. Click the REC button to start recording. Next, hit the camera icon to take a screenshot while recording. Click the pencil icon to draw on the screen. Then, click Stop to end recording.
Debut Video Capture
Debut Video Capture is a timelapse screen recorder developed by NCH Software. It’s available for Windows and macOS. It can record videos in formats like AVI, WMV, FLV, MP4, MPG, MOV, etc., add video effects to recorded video, correct the color of recording, replace background with video or picture, and add text, webcam overlays to recording.
Debut Video Capture provides you with all the needed recording features and you can record anything on your computer screen without hassle.
Additionally, you are able to share your recordings to YouTube, Vimeo, or Flickr, and burn them to DVD.
Take the following steps to record your screen using Debut Video Capture.
Step 1. Download Debut Video Capture from the NCH Software website. Follow the on-screen wizards to finish the installation and launch it.
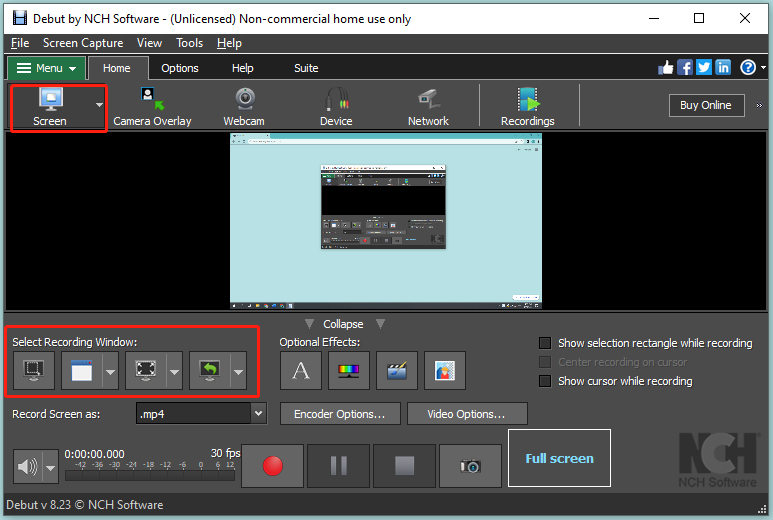
Step 2. In the main interface, click the down arrow next to the Screen button and select a recording mode. Or choose a recording window under Select Recording Window.
Step 3. Then you can select an output format for your recording. Expand the Record Screen as a list and choose the desired format.
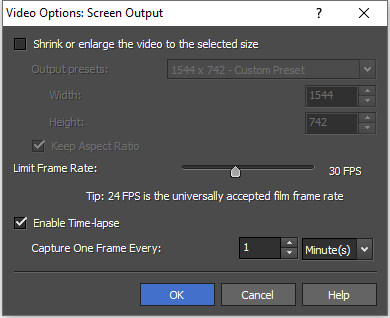
Step 4. To record a timelapse video, click Video Options. Enable the timelapse video recording option and enter the value in the Capture One Frame Every box. Click OK to apply the changes.
Step 5. Press the red Record button to record the timelapse video. After finishing the recording, navigate to File > Manage Recordings… to check the recorded file.
CamStudio
CamStudio is a free timelaspe screen recorder for Windows. It’s free with a simple and clean interface. It records all your screen activities and exports as AVI. This screen recorder offers a set of tools for recording such as adding text, showing or hiding the cursor, and highlighting a certain area. Also, it can be used to do color correction and change video format.
CamStudio has its own Lossless Codec. Compared with other popular codecs, it produces a smaller file size and delivers higher quality.
Here’s how to record timelapse videos for free with CamStudio.
Step 1. Download and install CamStudio. Run it.
Step 2. Click Region and set the recording area. You can choose Region, Fixed Region, Window, or Full Screen.
Step 3. If you want to adjust the settings, click Options.
Step 4. When you are done, click on File in the upper left corner and choose the Record option.
Step 5. If you want to end the recording, click on File again and click on Stop.
You may also like: 6 Best 4K Screen Recorders for Windows and Mac
Part 2. How to Convert Normal Video into Timelapse Video
How to make a timelapse video from your recording? You can turn video into timelapse by changing the video speed.
MiniTool MovieMaker is an easy-to-use timelapse maker. You can speed up a video by 50X or slow it down by 0.01X. Meanwhile, this video editor comes with many editing features such as splitting, trimming, reversing, combining, etc. There are a wide variety of effects, transitions, 3D LUTs, animated stickers, and text used to enhance your video.
Let’s see how to convert video to timelapse with MiniTool MovieMaker.
Step 1. Download MiniTool MovieMaker by clicking on the download button below. Then, install and run this application.
MiniTool MovieMakerClick to Download100%Clean & Safe
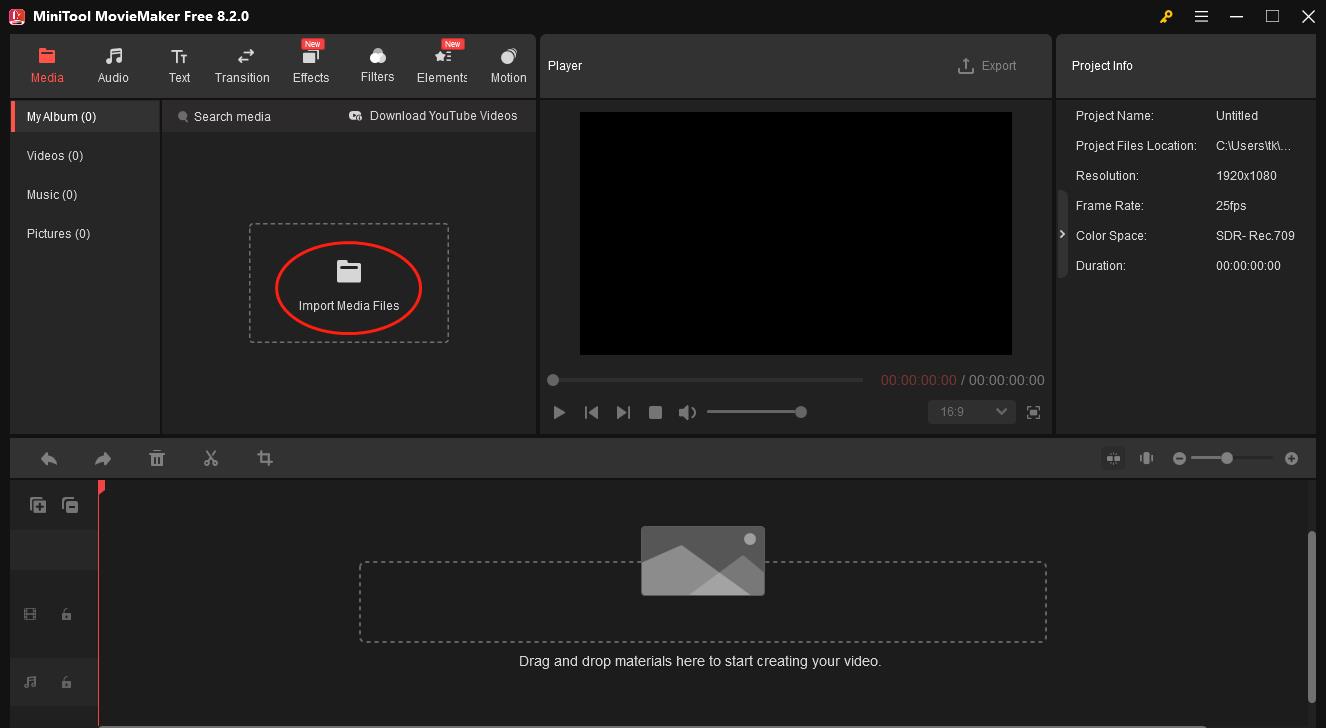
Step 2. Import the video file into MiniTool MovieMaker by clicking on the Import Media Files area. Then, drag and drop it to the timeline.
Step 3. Choose the Speed option. Click on Fast and select the speed you want. If necessary, utilize the editing features to optimize your videos.

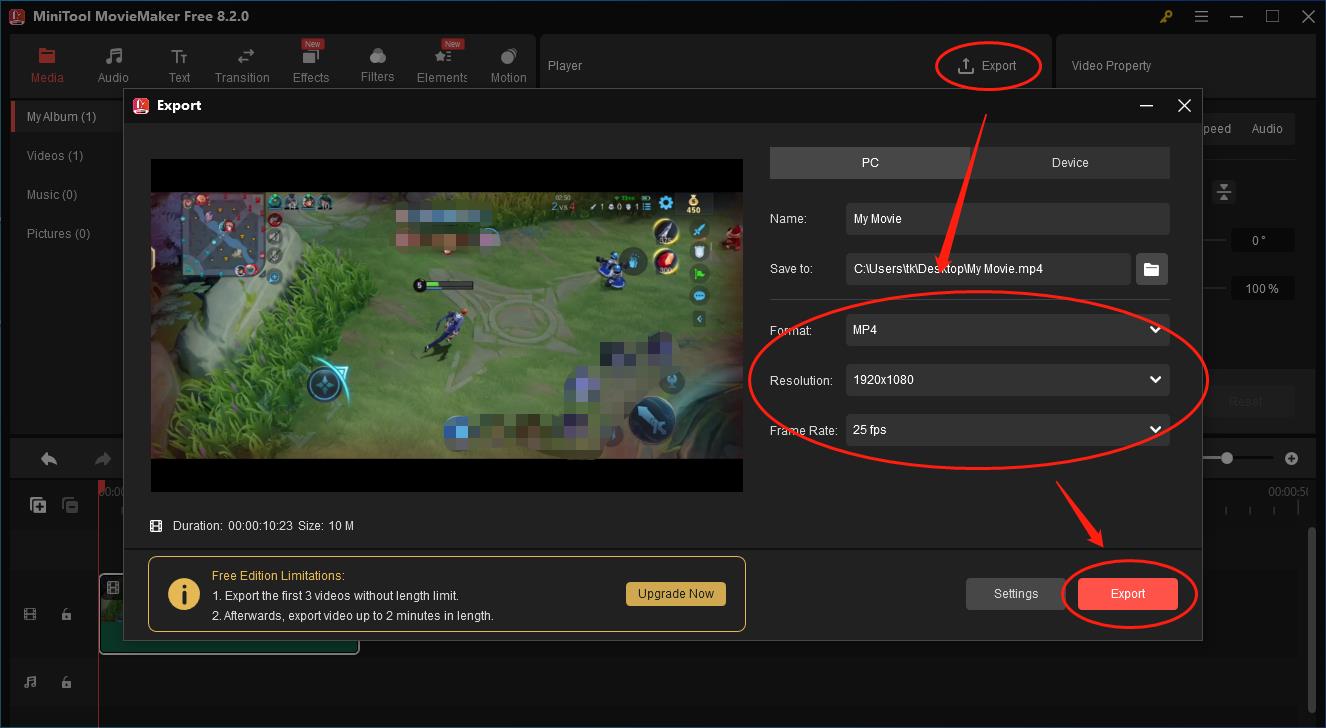
Step 4. Once the video editing is over, click on the Export icon to access the Export window where you can set the frame rate, resolution, and output format. After setting the parameters, click on the Export button to export the video.
Step 5. Once the video exporting is done, click on the Find Target button in the pop-up window to locate and check your video file.
With the above-detailed steps, you can make timelapse videos effortlessly.
Conclusion
These five timelapse screen recorders are free and feature-rich. Just pick the one that suits your needs. If you have any questions or suggestions about MiniTool Video Converter or MiniTool MovieMaker, please contact us via support@minitool.com or share your thoughts with me on Twitter!
About The Author

Position: Columnist
With over 6 years of experience as a tech writer, Eien specializes in creating clear, simple guides for video conversion, transcription, screen recording, etc. He stays connected with the tech community and its readers to understand the real-world problems users face. By combining their feedback with his own hands-on testing, Eien always provides proven solutions to complex software problems in time.
User Comments :