For those who want to record Celeste gameplay, this article recommends 3 efficient screen recorders, including Xbox Game Bar, MiniTool Video Converter, and iTop Screen Recorder, to help you capture Celeste without lag. Moreover, you can also read this article to know how to edit your game recording.
What Is Celeste
Celeste is a narrative-driven action game developed by Maddy Makes Games, released in 2018. Since then, the game has launched on multiple platforms, including Nintendo Switch, Windows, Linux, macOS systems, etc.
In the game Celeste, players guide Madeline, a protagonist grappling with depression, to help her overcome challenges stemming from her multiple personalities and ultimately conquer Celeste Mountain. This fusion of narrative and gameplay, coupled with its refined control system, has earned widespread acclaim from players.
![How to Record Video on PC Windows 10 [Solved]](https://images.minitool.com/videoconvert.minitool.com/images/uploads/2020/11/capture-record-videos-windows-10-thumbnail.png)
How to Record Celeste Gameplay on PC
If you want to capture the thrilling moments of Celeste and share Celeste video game videos on social media to call for more people to discover this fun game. You can check out these three efficient screen recording tools to easily capture Celeste gameplay.
1. Use Xbox Game Bar
The Xbox Game Bar is a built-in game overlay for Windows, compatible with most PC games. It lets you access various features without leaving your game, such as taking screenshots, recording gameplay, and chatting with friends within the Xbox Game Bar.
Now, you can read the following guide to record Celeste gameplay.
Step 1: Launch Celeste
Launch Celeste on your computer and make sure it’s ready.
Step 2: Open the Xbox Game Bar
When you want to record Celeste gameplay, press Windows + G to launch the Xbox Game Bar.
Step 3: Control Recording Audio
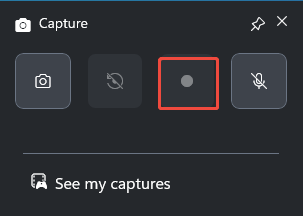
1. Click on Capture in the Widget Menu to enter the Capture panel.
2. Then, click the Microphone to turn on or off the microphone function during the recording process.

Step 4: Start Recording
Click the Start recording icon in the Capture panel or press the shortcut keys Windows + Alt + R to start recording Celeste gameplay.
Step 5: End Recording
To stop the recording, click the Stop recording icon in the Capture panel or press Windows + Alt + R again.
Although the Xbox Game Bar allows users to record their screen without installing any additional software, it can only capture the active window. This means switching between different programs will interrupt the recording. Therefore, I highly recommend using powerful third-party screen recording software. For more details, please continue reading the information below.
2. Use MiniTool Video Converter
For unlimited screen recording, I strongly recommend using the free screen recorder for Windows, MiniTool Video Converter. As a professional screen recorder, MiniTool Video Converter allows you to capture every detail of your full screen or a specific area, including gameplay, video calls, live streams, and more.
Additionally, it supports simultaneous recording of both system audio and microphone sound, or you can choose to record only one of these audio sources. Notably, no watermarks will be added to any recorded videos.
Therefore, MiniTool Video Converter is a reliable choice for game recording. Now, you can follow the detailed instructions to record Celeste with MiniTool Video Converter.
Step 1: Download and Install MiniTool Video Converter
Click the button below to download and install MiniTool Video Converter on your PC.
MiniTool Video ConverterClick to Download100%Clean & Safe
Step 2: Set the Recording Region
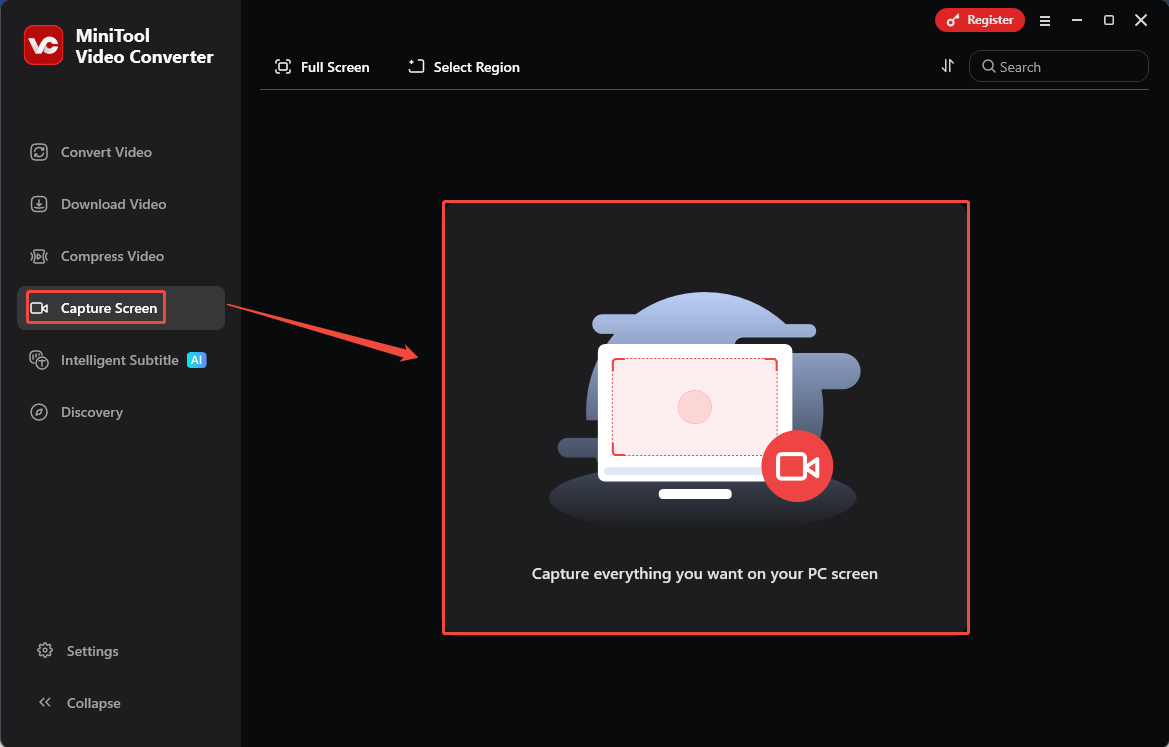
1. Launch MiniTool Video Converter after you install it.
2. Go to the Capture Screen module and click anywhere within the gray box in the middle of the page to open the MiniTool Screen Recorder panel.
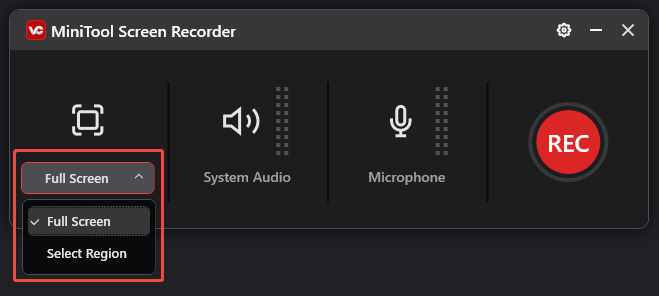
3. Click the drop-down box on the left to choose the recording region.
Step 3: Control the Audio Recording
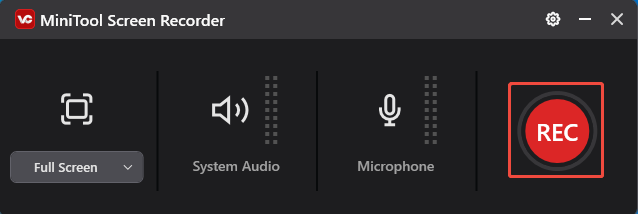
Similarly, in the MiniTool Screen Recorder panel, click the System Audio icon or the Microphone icon to determine if you want to record the audio from the system or the microphone.
Step 4: Start and End Recording
1. Click on the REC button in the MiniTool Screen Recorder panel or press the hotkey F6 to start the recording process of Celeste. After a 3-second countdown, it will record the gameplay.
2. When you want to stop the recording process, just press F6 again.
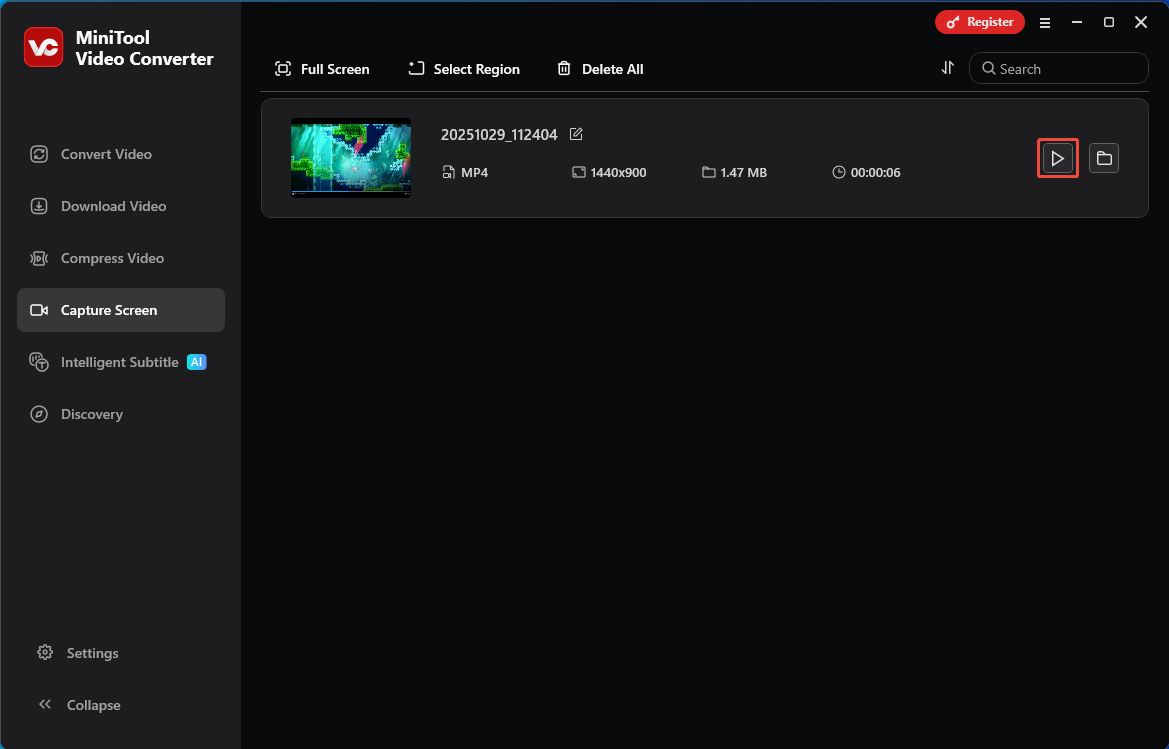
Step 5: Check the Recorded Videos
Once the recording ends, you will automatically be redirected to the Capture Screen interface to view your captured Celeste gameplay. Then you can click the Play icon to review the video.
3. Use iTop Screen Recorder
iTop Screen Recorder is an easy-to-use Windows screen recording tool that supports full-screen, specific area, and single-window recording. It can also simultaneously capture webcam and audio. Furthermore, by leveraging hardware acceleration technologies from manufacturers like Intel and NVIDIA, iTop Screen Recorder enables smooth, lag-free game recording.
So, let's dive into the smooth gaming recording experience brought by iTop Screen Recorder now. Here's a detailed walkthrough of the capture process:
Step 1: Download and Install iTop Screen Recorder
Visit the iTop Screen Recorder website to download and install it on your PC.
Step 2: Control Audio Recording
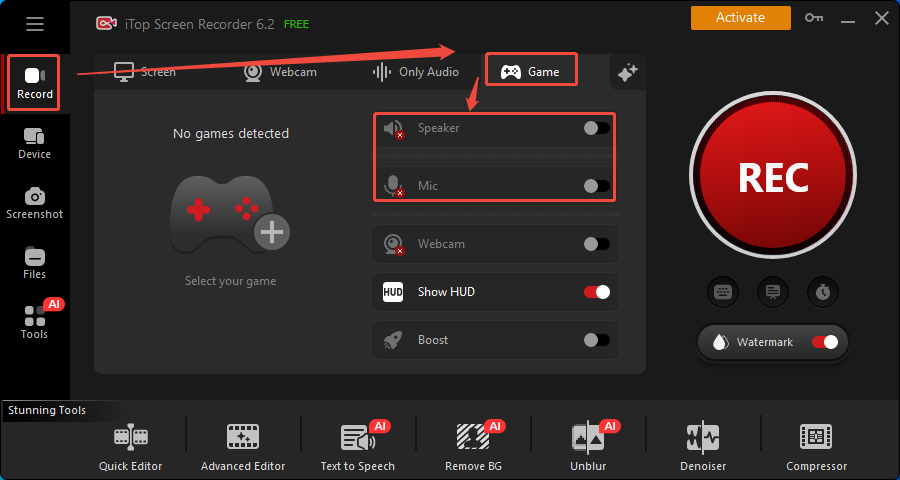
1. Launch iTop Screen Recorder and click on Record in the left-hand menu bar. Then choose the Game mode to automatically or manually identify the game you want to record.
2. Click on Speaker or Mic to choose whether to record audio from the system or the microphone.
Step 3: Start and End Recording
1. Click the REC button or press Ctrl + F9 to start recording Celeste gameplay. During the process, you can press Ctrl + F10 to stop or resume recording.
2. To end the recording process, click on the Stop icon or press Ctrl + F9 again.
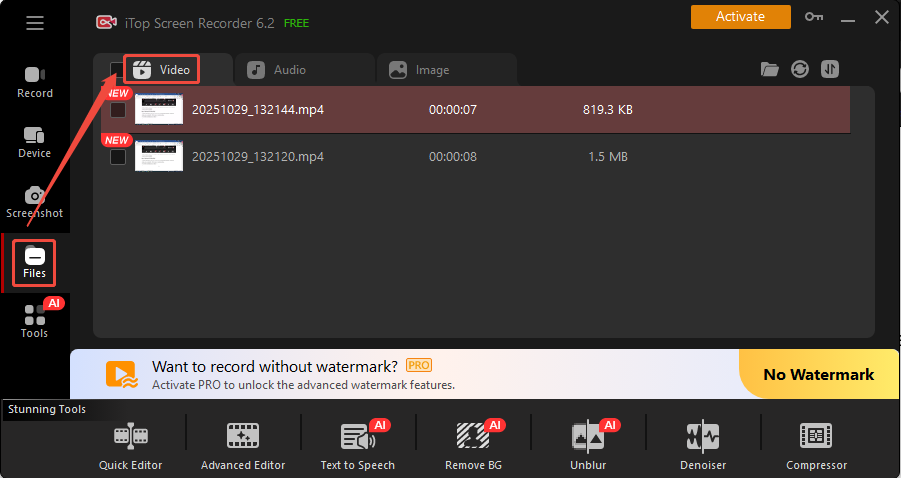
Step 4: Check the Recorded Video
After the recording process ends, you can click on Video under the Files module to play the recorded video.
While iTop Screen Recorder allows us to capture gameplay footage without any delay, videos recorded by regular users will feature a watermark. If this bothers you, you can decide whether to become a member based on your needs.
These three professional screen recorders each have their strengths, but overall, MiniTool Video Converter stands out as the superior choice. Not only does it enable watermark-free recording without requiring a membership, but it also supports unlimited recording duration.
Bonus: How to Edit Your Game Recording
If you want to get more viewers for your social media platform, you can edit Celeste gameplay before you upload it. I highly recommend using the video editing software for gaming that I frequently use, MiniTool MovieMaker.
MiniTool MovieMaker is a professional video editing software suitable for both beginners and professional editors, offering a variety of editing features such as video cropping, reversing, flipping, and more.
Besides, MiniTool MovieMaker also offers a wide range of materials, such as transitions, filters, elements, and many more, allowing you to freely select and add them to your recorded videos. If you can't wait to make your Celeste gameplay more impressive, click the download button below to start using MiniTool MovieMaker for editing the recorded Celeste videos.
MiniTool MovieMakerClick to Download100%Clean & Safe
Conclusion
To record Celeste gameplay without any lag, you can choose and try any of the three recommended screen recording tools above. After recording your screen, use the free video editing software MiniTool MovieMaker to edit the recorded footage and make it more eye-catching.
If you encounter any issues or have suggestions while using MiniTool Video Converter or MiniTool MovieMaker, please feel free to email us at support@minitool.com or send a message to us on X for assistance.
About The Author

Position: Columnist
Jade is an experienced multimedia tech writer who has authored hundreds of guides on screen recording, video editing, and software troubleshooting. Dedicated to bridging the gap between complex technical concepts and user-friendly solutions, she specializes in providing clear, actionable advice.
User Comments :