#Way 1. Check Microphone Settings
The first solution to QuickTime Player not recording sound is to check the microphone settings. To record screen with audio, your Mac should allow QuickTime to use the microphone.
Step 1. Select the Apple menu at the top left.
Step 2. Choose System Preferences > Security & Privacy > Privacy.
Step 3. All applications that require microphone access are displayed on the right side.
If QuickTime doesn’t get the permission, tick the box of QuickTime Player.
Step 4. Relaunch QuickTime Player and try to record again.
#Way 2. Modify QuickTime Settings
If you don’t choose the built-in microphone as the sound input device, you might face the QuickTime screen recording no sound issue. You can start a new recording and select a microphone to record audio.
Step 1. Open QuickTime Player.
Step 2. Click on File and choose New Screen Reccording.
Step 3. In the Screen Recording pop-up window, click the arrow next to the red circle button, and select Internal Microphone. Or click Options and choose MacBook Air Microphone.
Related: Solved – How to Stop QuickTime Screen Recording on Mac
#Way 3. Check & Modify Sound Input Settings
Another fix for QuickTime screen recording no audio is to check the input sound settings. If you turn off the volume or it’s too low, you should increase the input volume.
Step 1. Click the Apple menu and select System Preferences > Sound.
Step 2. Go to the Input tab.
Step 3. Choose your Mac’s native microphone if there’s an external device.
Step 4. Drag the slider towards the right side to turn up the input volume.
#Way 4. Modify QuickTime Player Preferences
When your QuickTime Player doesn’t record audio, you can check and modify the application’s preference.
Step 1. Launch your Mac and click the Edit option.
Step 2. Choose Preferences option and go to the Audio tab.
Step 3. Check the box of Safe mode (waveOut only) and click Apply.
Step 4. Relaunch QuickTime and check if it records audio.
Also read: [Fixed] QuickTime Player Can’t Open MP4 on Mac and Windows
#Way 5. Update QuickTime Player
To fix QuickTime not recording audio, you can also try to update QuickTime. Open it, choose QuickTime Player and Update Existing Software. If a update is available, follow the onscreen instructions to update to the latest version of QuickTime.
Tip: How to Record Screen with Audio on Windows for free
MiniTool Video Converter is a free screen recorder for Windows. It allows you to record your computer screen with a watermark and time limit.
MiniTool Video ConverterClick to Download100%Clean & Safe
Step 1. Download and install MiniTool Video Converter on your Windows PC.
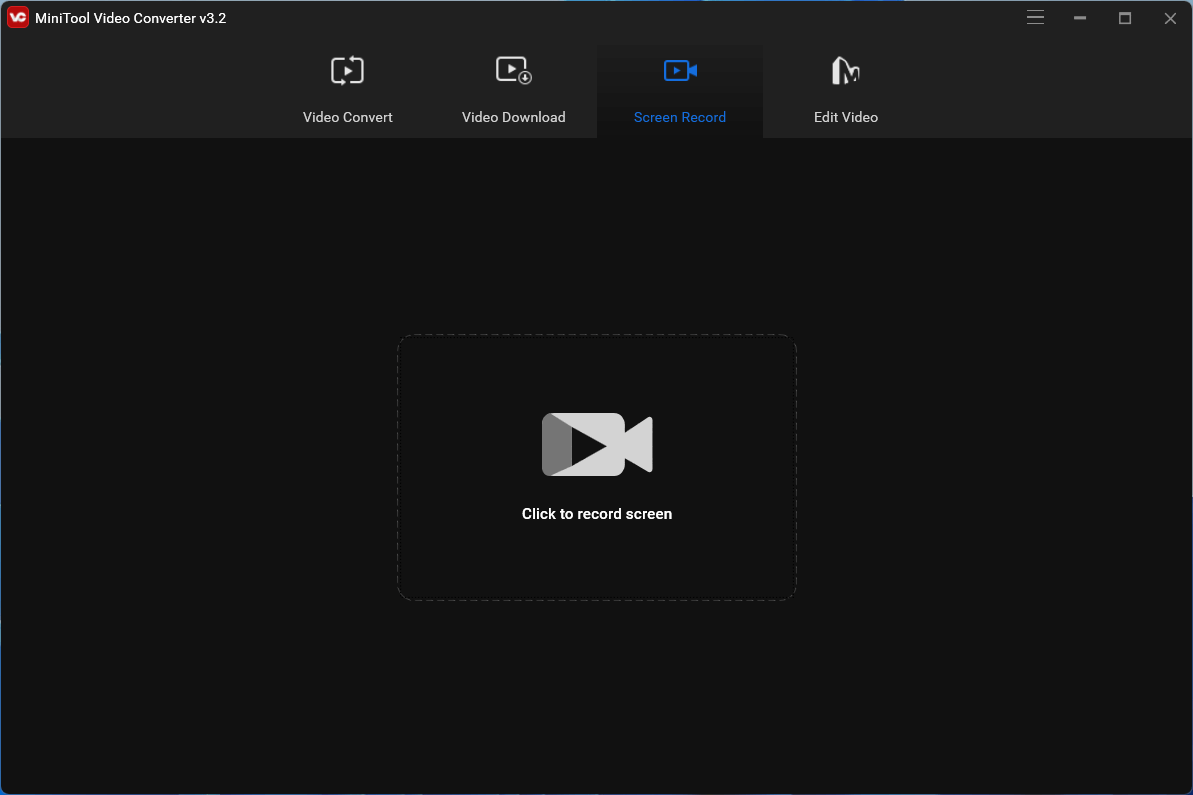
Step 2. Open MiniTool Video Converter, click the Screen Record tab, and tap the Click to record screen to activate MiniTool Screen Recorder.

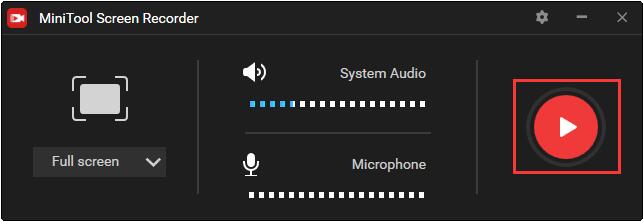
Step 3. Choose from Full screen or Select region to choose recording area.
Step 4. Choose if you want to record the system audio or sound from microphone.
Step 5. Click the Settings icon at the top right corner of MiniTool Screen Recorder to choose an output folder, output format, and other settings, and click OK.
Step 6. Click the Record button or press F6 to start recording.

Step 7. To stop the recording, press F6.
Conclusion
That’s all about the 5 methods to fix QuickTime screen recording no audio.


![[Solved] How to Record on Snapchat Without Holding the Button](https://images.minitool.com/videoconvert.minitool.com/images/uploads/2022/05/how-to-record-on-snapchat-without-holding-the-button-thumbnail.jpg)

User Comments :