TeamViewer is known as a remote access and remote computer control software that enables you to monitor and control other devices remotely. Furthermore, it enables you to contact others via online meetings or chats. How to record TeamViewer session or meeting for later check or sharing? In this post released by the free file converter from MiniTool, you will find ways for TeamViewer screen recording.
Fortunately, TeamViewer provides a built-in screen recording feature to capture the sessions, meetings, or other chats. But it has some drawbacks. For example, it exports recordings in TVS format or can only be viewed within TeamViewer. To solve those problems, you can use a third-party screen recorder. Now, let’s explore this useful post!
How to Record TeamViewer Session via Built-in Screen Recording Feature
In this part, we will show you how to record Teamsviewer session or meeting manually and automatically. Here’s step-by-step guidance.
#TeamViewer Screen Recording Manually
Step 1. Download, install, and launch TeamViewer. Then enter the session code to connect to another device to start a session.
Step 2. In the top toolbar, click the Files & Extras tab and click the Start session recording option to begin recording.
Step 3. When you want to end the session recording, you can click the Stop button.
#TeamViewer Record Session Automatically
Step 1. After opening TeamViewer, click the gear icon in the upper right corner to open the TeamViewer options window.
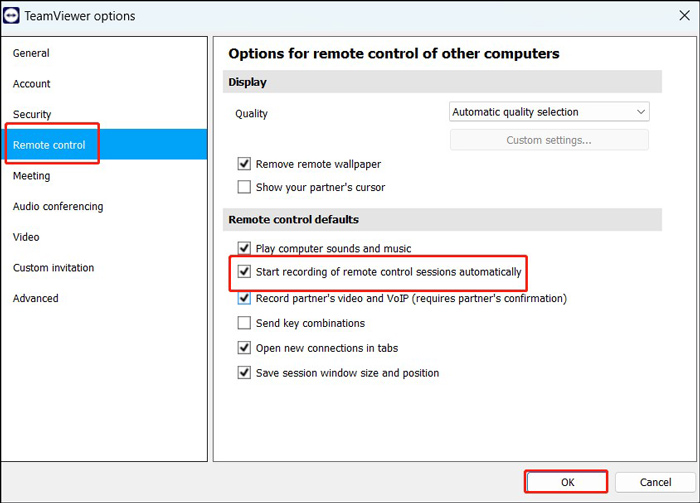
Step 2. Click the Remote control option in the left panel and tick the Start recording of remote control sessions automatically checkbox.
Step 3. Navigate to the Meeting option and tick the Auto record meeting checkbox.
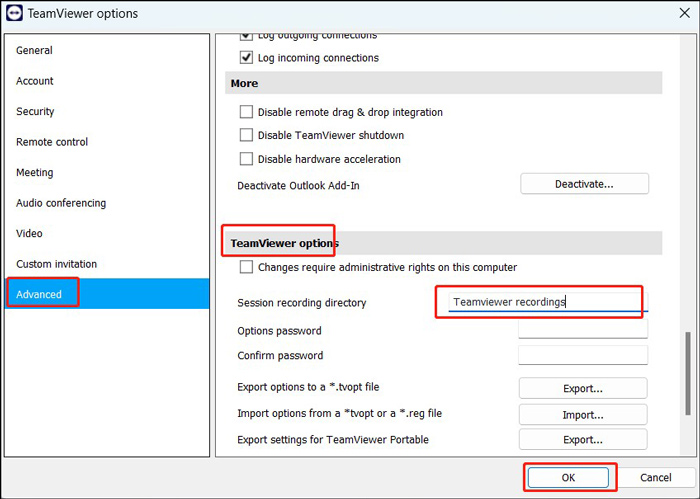
To choose a specific saving folder for those TeamViewer recordings, you can go to Advanced. Then scroll down to the TeamViewer option section, type the desired folder into the Session recording directory box, and click OK to save the changes.
Step 4. After making those settings, you can go to connect another device to start meeting and then the recording will start automatically.

Recommended Way for TeamViewer Screen Recordings
If you want to capture TeamViewer sessions in a common format like MP4 or want to view TeamViewer recordings without TeamViewer, you can try a third-party screen recorder to capture sessions or meetings.
MiniTool Video Converter is highly recommended, which is a completely free screen recorder that helps you to record any activities happening on the screen without time limits and watermarks. Also, it allows you to record a screen with the option to add audio from a microphone or system. What’s more, you can use it to get an MP4 TeamViewer recording in high quality.
Here’s how to record TeamViewer session with MiniTool Video Converter:
Step 1. Click the below download button to get and install MiniTool Video Converter on your Windows PC.
MiniTool Video ConverterClick to Download100%Clean & Safe
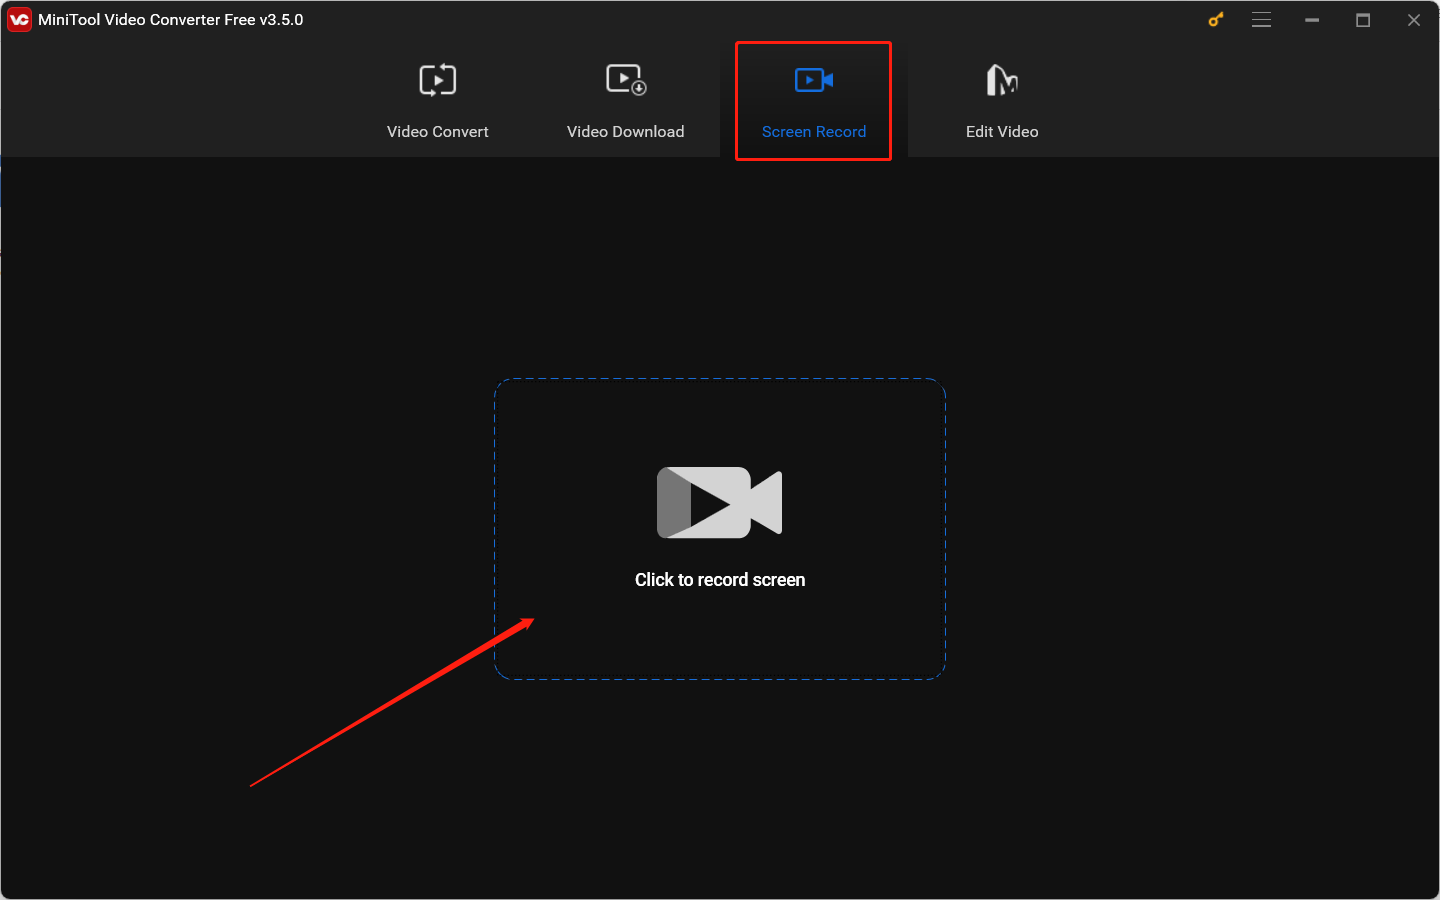
Step 2. Run this free program, switch to the Screen Record tab, and click the Click to record screen area to open MiniTool Screen Recorder.
Step 3. Select the recording area and audio. You can keep the default Full screen option or choose the Select region option to capture a part of the screen. Also, you can decide whether to record audio from the system or a microphone.
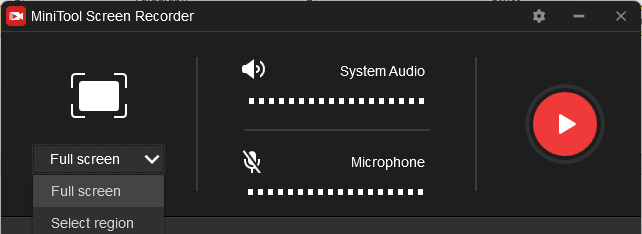
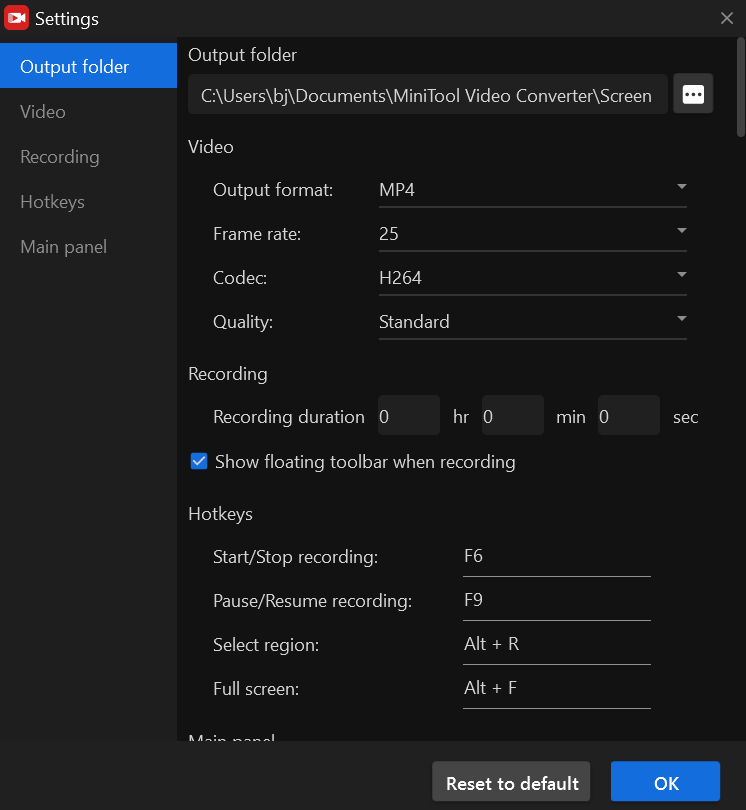
Step 4. You can click the gear icon to adjust other settings like the saving path, bitrate, or quality of the recording. Don’t forget to click OK to apply those changes.
Step 5. Open TeamViewer and start a session. Next, you can press the default F6 key and the recording will begin after a 3-second countdown.
Step 6. After the session ends, you can press F6 again to finish the recording. The recording will appear in the list of MiniTool Screen Recorder. You can right-click on the recording to rename, delete, preview, or locate it.
![How to Record on Firestick Easily [Detailed Guidance]](https://images.minitool.com/videoconvert.minitool.com/images/uploads/2024/04/how-to-record-on-firestick-thumbnail.jpg)
Wrapping Up
What is the best way for TeamViewer screen recording? You can use its native screen recording feature to record TeamViewer session manually or automatically. Also, you can use MiniTool Video Converter to capture an MP4 TeamViewer recording in high quality. Now, it’s your time to choose a preferred way to record your TeamViewer session or meeting.
About The Author

Position: Columnist
Olivia is always full of enthusiasm for life and loves to record. She often records beautiful and memorable moments of life with her camera and then uses some editing tools to put the photos, videos and audio together. She also has a passion for writing and offers suggestions to readers on images, audio, videos and news. To provide more professional articles and solve problems for readers, she is continuing to learn multimedia as well.
User Comments :