How to Record Google Earth on Windows
If you are a Windows user and want to record Google Earth touring, MiniTool Video Converter is the best screen recorder you can try. MiniTool Video Converter is a versatile tool that can be used for screen recording, video/audio conversion, as well as YouTube videos/song downloading. As a free screen recorder, it enables you to record the entire screen or selected regions and decide whether to record audio or not.
More importantly, it allows you to record your screen without time limits, and you can customize the output parameters like quality, format, codec, and frame rate to make your recording better. It is also a screen recorder that is suitable for beginners with its simple operation and user-friendly interface. Here’s guidance on how to record Google Earth using MiniTool Video Converter.
Step 1. Download MiniTool Video Converter by clicking the below download button and install it on your computer.
MiniTool Video ConverterClick to Download100%Clean & Safe
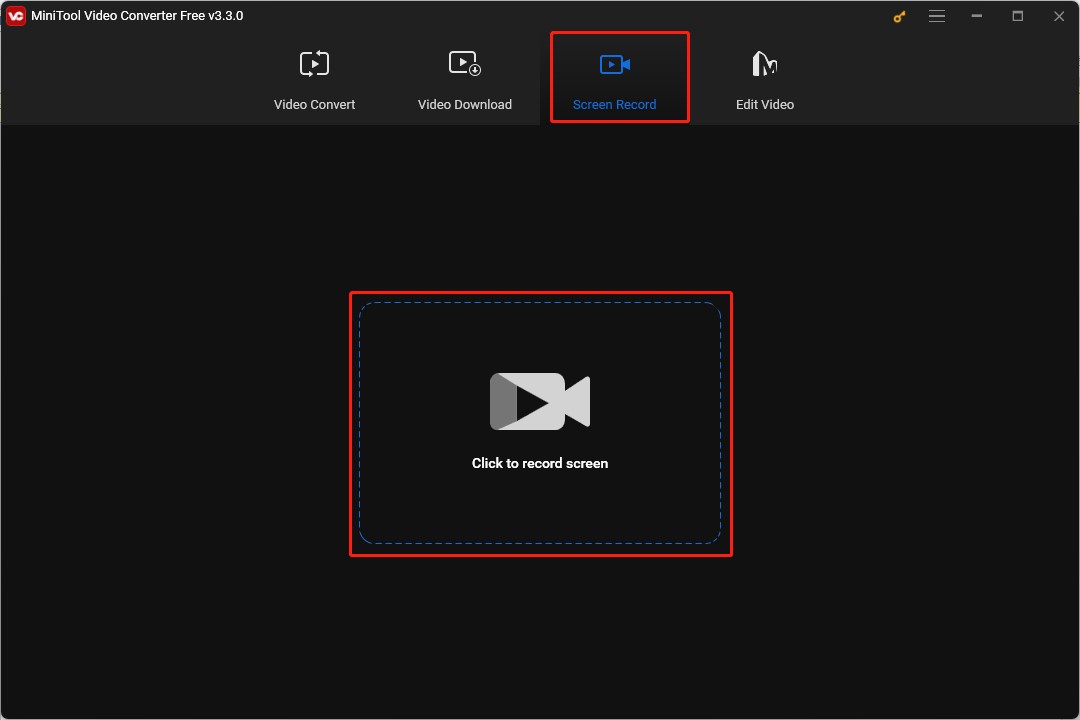
Step 2. Open MiniTool Video Converter, click on the Screen Record tab on the top menu and click the Click to record screen area.
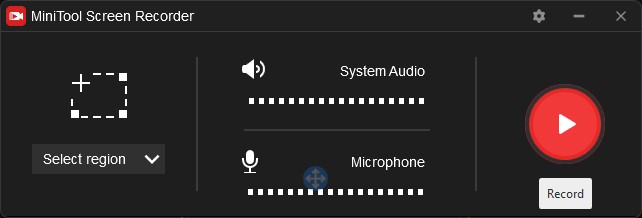
Step 3. Choose the Select region option to record the Google Earth area and select whether to record audio or not.
Step 4. Click the red button or press F6 on the keyboard to start recording, press F9 to pause and resume recording, and press F6 to stop recording.
How to Record Google Earth on Mac
OBS is an open-source screen recorder and can help you capture video from Google Earth. You can use it to record anything on your computer screen, adjust recording parameters, and save the recording in the video format you need. What’s more, OBS is a Mac webcam recorder that can record your screen and webcam at the same time to make a professional-looking video. Below are steps to capture video from Google Earth with OBS.
Step 1. Download and install OBS Studio on your Mac.
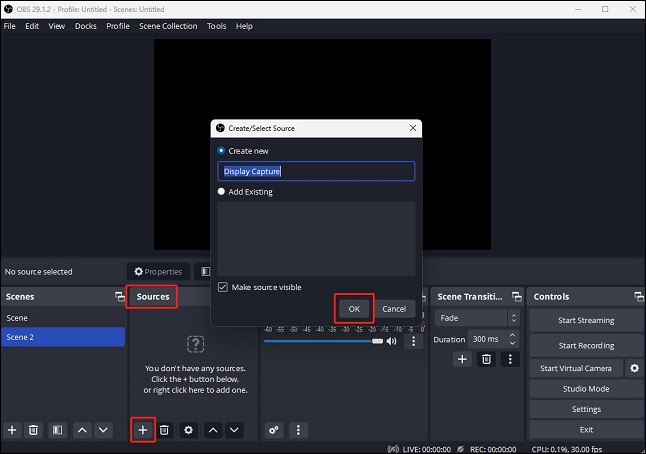
Step 2. Launch OBS Studio, click the plus icon in the Sources section, click the Display Capture option, and click OK.
Step 3. Click on the Setting button in the Controls section to customize the output settings.
Step 4. Click the Start Recording button to begin recording and click the Stop Recording button to finish the recording.
How to Record Google Earth Online
FlexClip is a web-based screen recorder that can record screen and webcam separately or simultaneously. Moreover, you can use it to record the whole screen, application windows, or browser tabs. You can use it to record Google Earth on a web browser or Google Earth Pro on a desktop. Here’s how:
Step 1. Visit the FlexClip website for screen recording: https://www.flexclip.com/tools/screen-recorder/
Step 2. Click on the Start Recording button, choose the Screen Only option, and click the Next Step button.
Step 3. Choose to record system audio, audio from a microphone, both a microphone and system audio, or no audio according to your need. Then click on the Start Recording button.
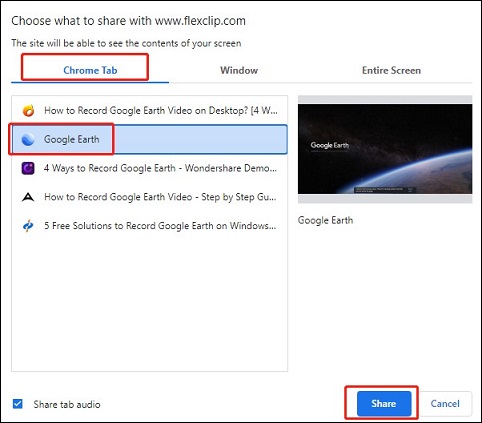
Step 4. Click the Google Earth option under Chrome Tab and click Share to start recording.
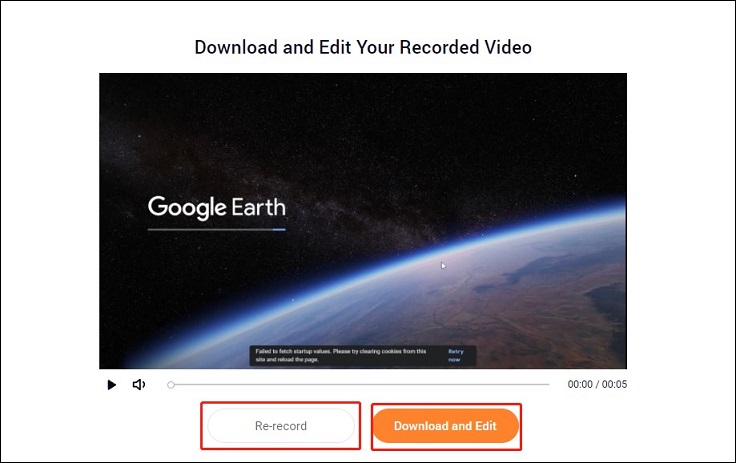
Step 5. Click the Stop Recording button to end the screen recording, click Download and Edit to download that recording to your local folder and the FlexClip video editor will open automatically. If you are not satisfied with that recording, you can click the Re-record button.
Bottom Line
The above recommends three useful methods to record Google Earth for you. You can choose one method from them and have a try by yourself.


![7 Best Screen Recorders for Mac You Can Try [Free & Paid]](https://images.minitool.com/videoconvert.minitool.com/images/uploads/2023/07/best-screen-recorder-for-mac-thumbnail.jpg)

User Comments :