OBS Studio is open-source software for screen recording and live streaming. It can help you record a specific window. After reading this MiniTool Video Converter post, you will know how to record a specific window in OBS.
We need to capture a specific window for some applications or browser pages. Most of the screen recorders in the market only support recording the full screen but not the specific window or area. OBS is a good screen recorder that can help you record a specific window. To help you know how to record a specific window in OBS, the following content gives you detailed guidance.
How to Record a Specific Window in OBS
This part will give you detailed steps and guide you on how to make OBS record a specific window. Now, let’s get started.
Step 1. Download OBS from the official website and install it on your computer.
Step 2. Open the application, browser page, or other windows you want to capture and launch OBS.
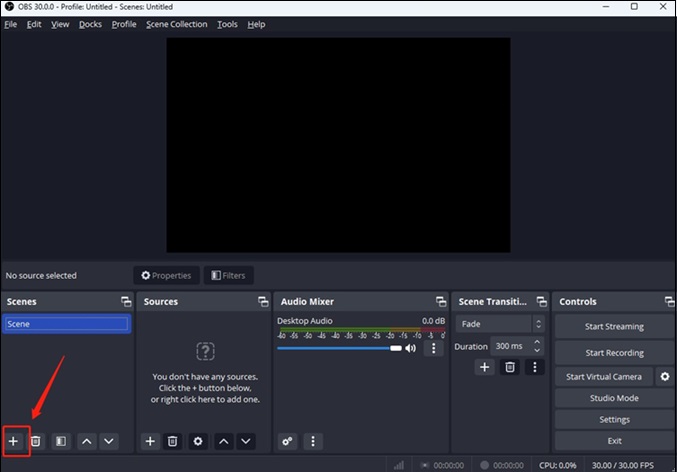
Step 3. Click the plus (+) icon in the Scenes section to create a new scene. A popup will appear, you just need to enter the name of the new scene and click OK.
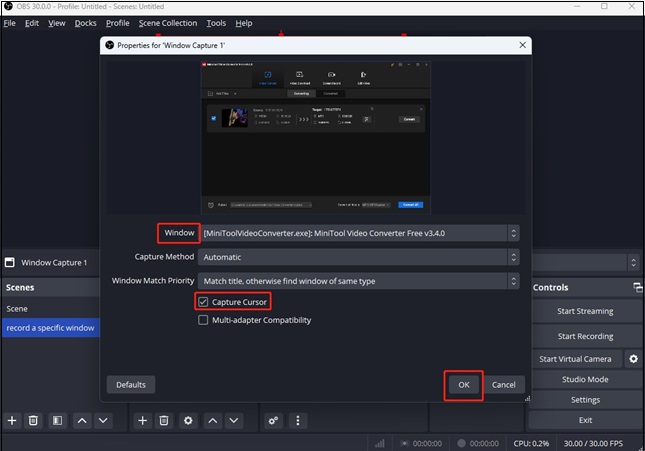
Step 4. Click the plus (+) icon in the Sources section to choose a new source to record. To capture a specific window, you should click the Window Capture option. Enter the name of the new source and click OK. In the new popup, you can expand the Window dropdown to choose the window you want to capture or decide whether to capture the cursor movement. Then click OK to save the changes.
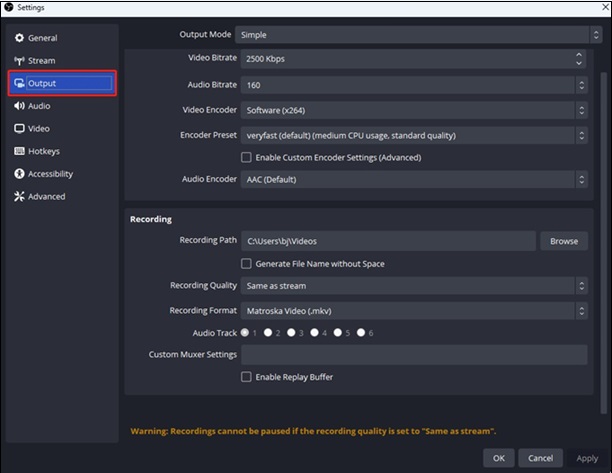
Step 5. After finishing the above settings, you can preview the recorded window on the main screen. Click the Settings button to open the Settings window, click Output to adjust the output parameters like recording path, quality, format, and audio track, and click OK.
Step 6. You can click the Start Recording button in the Controls section to record the specific window. If you want to end the recording process, you can click the Stop Recording button.
Best OBS Alternative to Record a Specific Window Easily
Though OBS is a useful tool to capture a specific window, MiniTool Video Converter is an easy-to-use screen recorder to record the whole screen or selected region. MiniTool Video Converter is a good alternative to OBS. It has an intuitive interface and user-friendly operation. What’s more, it enables you to use the cursor to choose the recording area according to your needs. Here’s guidance on how to record a specific window with MiniTool Video Converter.
Step 1. Click the below download button to get the installation package of MiniTool Video Converter and install it on your desktop.
MiniTool Video ConverterClick to Download100%Clean & Safe
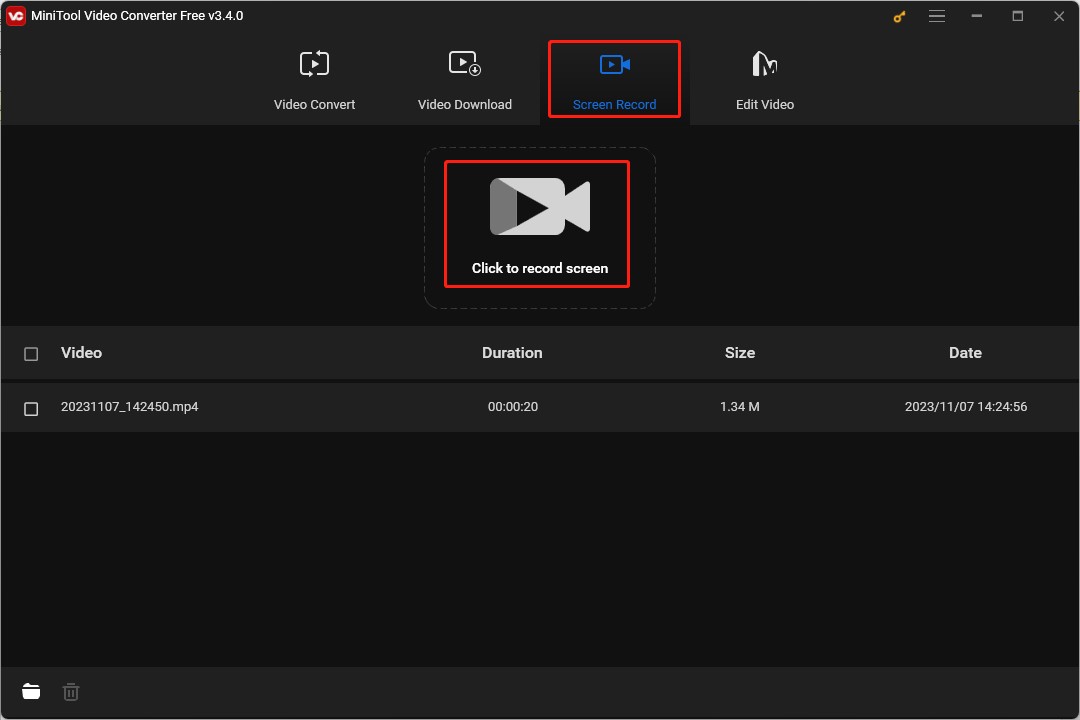
Step 2. Open the window you want to capture and launch MiniTool Video Converter. Click the Screen Record tab and click the Click to record screen area to access the screen record panel.
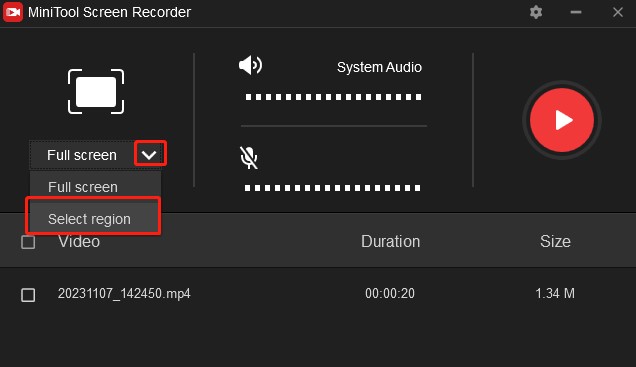
Step 3. Click the inverted arrow next to Full screen, choose Select region, and drag the cursor to choose the window area as the recording area. Also, you can choose to record the microphone and system audio simultaneously or separately.
Step 4. Click the Settings icon to personalize the output parameters like output format, frame rate, codec, quality, and others. Then click OK to save the changes.
Step 5. Click the Record button or press the F6 key on the keyboard to start recording and press F6 again to end the recording.
MiniTool MovieMakerClick to Download100%Clean & Safe
Conclusion
OBS is a good screen recorder to capture a specific window. The above content has shown you how to record a specific window in OBS and you can try it out by following the instructions above!
You may also like:


![7 Ways to Capture Video from Website [Windows/Mac/Phone/Online]](https://images.minitool.com/videoconvert.minitool.com/images/uploads/2023/11/capture-video-from-website-thumbnail.jpg)
![Solved: How to Record Viber Calls Easily [PC/Phone]](https://images.minitool.com/videoconvert.minitool.com/images/uploads/2023/10/record-viber-calls-thumbnail.jpg)
User Comments :