This post from MiniTool Video Converter will show you how to compress video size in Adobe Media Encoder and give you an alternative way to shrink video size.
Many people are wondering if they can compress videos in Adobe Media Encoder. The answer is positive. It’s hard to view or work with a large video file, and to resolve this problem, you can compress it with little quality loss. In this post, you’ll learn how to make Adobe Media Encoder compress video.
How to Compress Video Size in Adobe Media Encoder
Here’s a step-by-step guide on how to compress videos with Adobe Media Encoder.
Step 1. Launch Media Encoder on your computer, click File at the upper left corner, and choose Add Source to open the video you’d like to compress. You can also directly send a large video file from Premiere Pro or After Effects to Media Encoder to compress it.
Step 2. Adobe Media Encoder provides various presets including options for YouTube, Facebook, Twitter, and Vimeo with different resolutions. You can choose a preset according to your needs by clicking Preset Name > Web Video Preset.
Also, you can select the most popular video format H.264 (MP4). In the dropdown list of H.264, you’ll see options with different resolutions and frame rate. Generally speaking, lowering these two parameters will make the video file size smaller.
For instance, if you want to compress 4K video, select 1080p, and if you compress 1080P video, choose 720p.
Step 3. Once you click a preset, the Export Settings window opens, and you can see the estimated file size at the bottom right corner. In this window, you can also change the bitrate to reduce the file size, and click OK to save your settings.
Step 4. Click the green arrow in the upper right corner to start the compression process.
![[5 Ways] How to Fix Adobe Media Encoder Not Working Issues?](https://images.minitool.com/videoconvert.minitool.com/images/uploads/2022/09/adobe-media-encoder-not-working-thumbnail.png)
An Alternative Way to Reduce Video File Size
Adobe Media Encoder makes it easy to compress video file size, but it’s not free to use. If you need a free alternative to Media Encoder for video compression tasks, MiniTool Video Converter is a strong choice. As the name suggests, it’s a professional free video converter that allows you to convert between a wide variety of formats. It offers multiple customizable settings like video resolution, frame rate, bitrate, and encoder to give you full control over conversion and compression. You can also adjust these parameters to make your video file smaller.
Prefer a simpler approach? MiniTool Video Converter has a free video compressor with no watermark and file size limit that allows you to reduce the size of various video formats, requiring no technical knowledge.
Follow the steps below to compress your video with MiniTool Video Converter easily and effortlessly.
MiniTool Video ConverterClick to Download100%Clean & Safe
Step 1. Run this powerful video compressor after installation. Go to the Compress Video tab and add your target video by clicking on the middle area.
Step 2. Click the Settings icon to open Compression Settings.
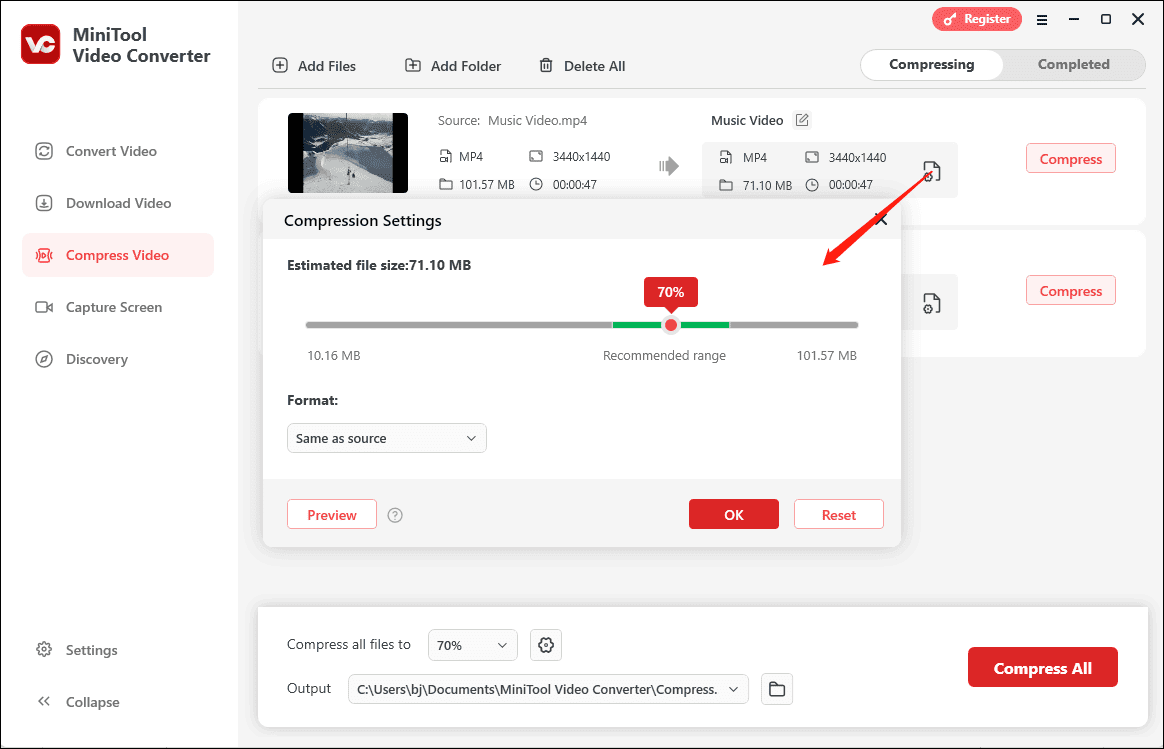
Next, you need to:
- Adjust the compression level: By default, MiniTool Video Converter compresses videos to 70% of their original size. To reduce the file size further, you can move the slider to the left. However, you’d better stay within the recommended compression range to achieve a good balance between file size and video quality.
- Choose the output format: From the Format dropdown menu, select your preferred output format: MP4, MKV, or WebM.
Step 3. Before processing, click Preview to view a 10-second sample of the compressed video. If everything looks good, click OK to save your settings.
Step 4. Then, you’ll return to the main interface of MiniTool Video Converter. Select the output destination and click Compress to begin the task.
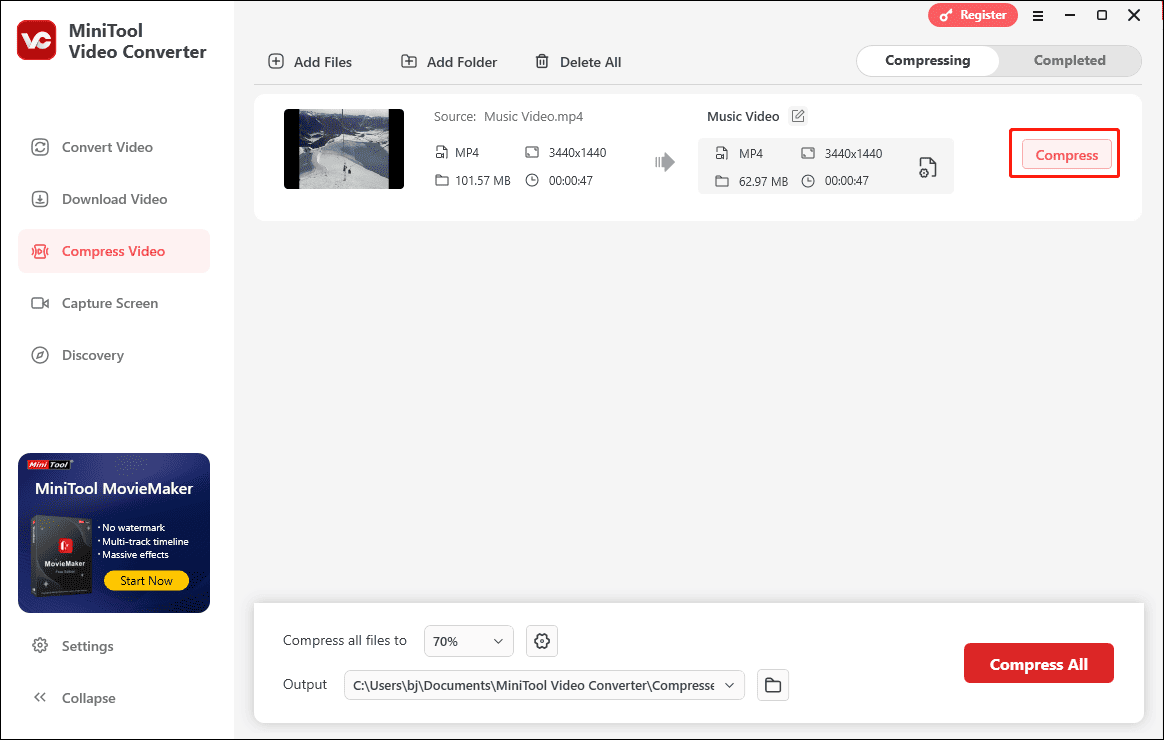
After processing, the video will appear under the Completed tab. You can play it by clicking the Play icon, and find it on your computer by clicking the Folder icon.
Conclusion
Large video files can be difficult to use or view on some devices. For example, each video-sharing site or other platform has different file size requirements for uploading videos. If a video exceeds the size limit, it can’t be shared or sent.
To fix this, you need to reduce the file size. This post will tell you how to compress video size in Adobe Media Encoder and MiniTool Video Converter, and choose the way that suits you.
Also read:
About The Author

Position: Columnist
Cora is a tech writer specializing in digital media workflows, with over six years of hands-on experience in video post-production, media transcoding, and screen capture. Her writing is always clear and practical. Cora also produces in-depth software reviews for users across skill levels to help them find the right tool and enjoy video editing.
User Comments :