This article explains how to upscale video to 8K using two methods. One method involves using a video editing tool such as Premiere Pro. The other method is to use MiniTool Video Converter, an AI-powered video enhancement tool. It also explains the benefits of upscaling video and why the output video looks blurry.
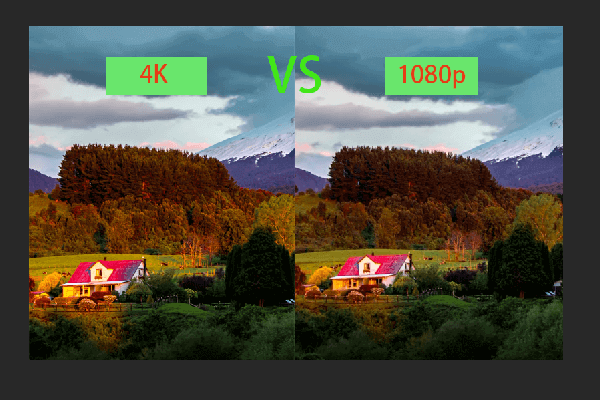
As we all know, the higher resolution generally translates to better video quality. This is because high-resolution videos have a greater pixel density, resulting in a sharper, clearer image. Common resolutions, listed from lowest to highest, include 240p, 360p, 480p, 720p, 1080p, 1440p, 2160p, and 4320p (8K). Currently, 8K UHD (7680 × 4320 pixels) represents the highest available video resolution option.
How to upscale a video to 8K resolution? Generally speaking, there are two methods. One involves using traditional video editing software, such as Premiere Pro, to increase the resolution to 8K manually. The other entails utilizing AI-powered tools to upscale the video intelligently.
How to Upscale Video to 8K
I tried out two different tools for upscaling video. Below are the steps for each one.
Method 1: Use MiniTool Video Converter
MiniTool Video Converter is an 8K video enhancer. It includes three video enhancement modes: video upscaler, anime enhancer, and video denoiser. Using an AI model, MiniTool Video Converter can generate new pixels while upscaling the video, making the final video clearer. If you want to convert 1080p video to 8K, this application can be an excellent choice.
Below, I will take a 1080p video as an example to demonstrate how I used MiniTool Video Converter to convert a video to 8K resolution.
Step 1: Download and Install MiniTool Video Converter
Download and install MiniTool Video Converter following the on-screen prompts, then launch the application.
MiniTool Video ConverterClick to Download100%Clean & Safe
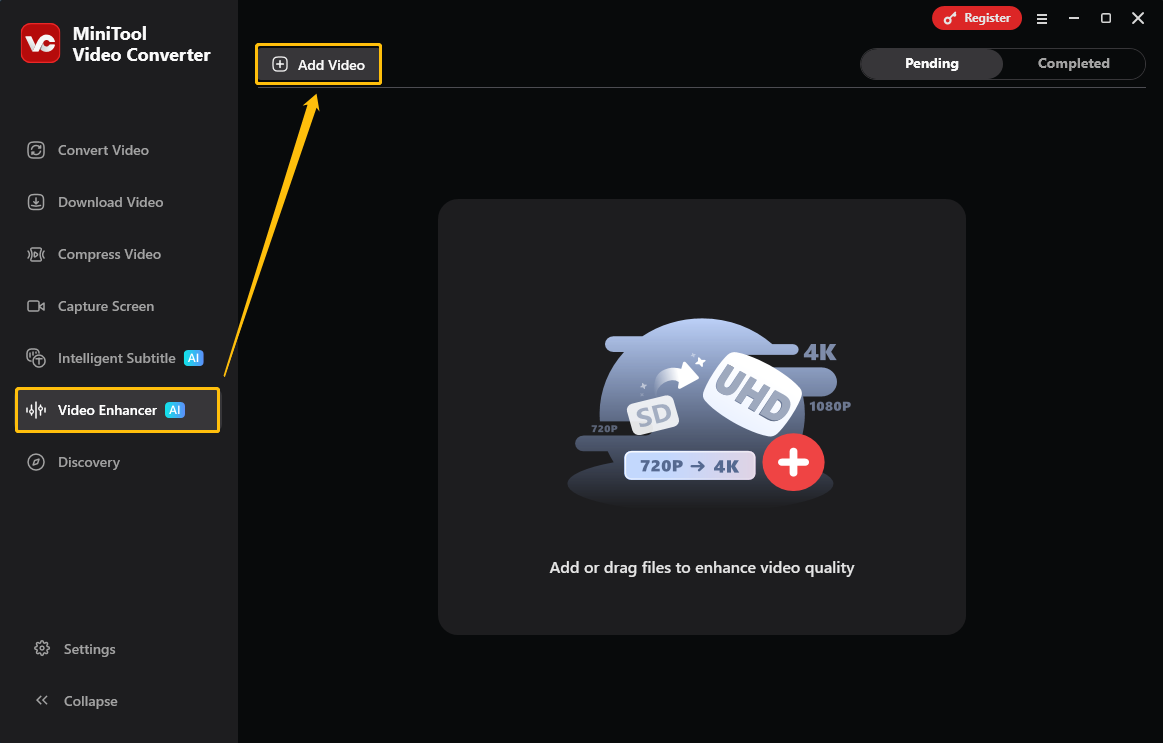
Step 2: Import the Target Video
On the left menu, choose the Video Enhancer tab. Then, click the Add Video option to import the target video.
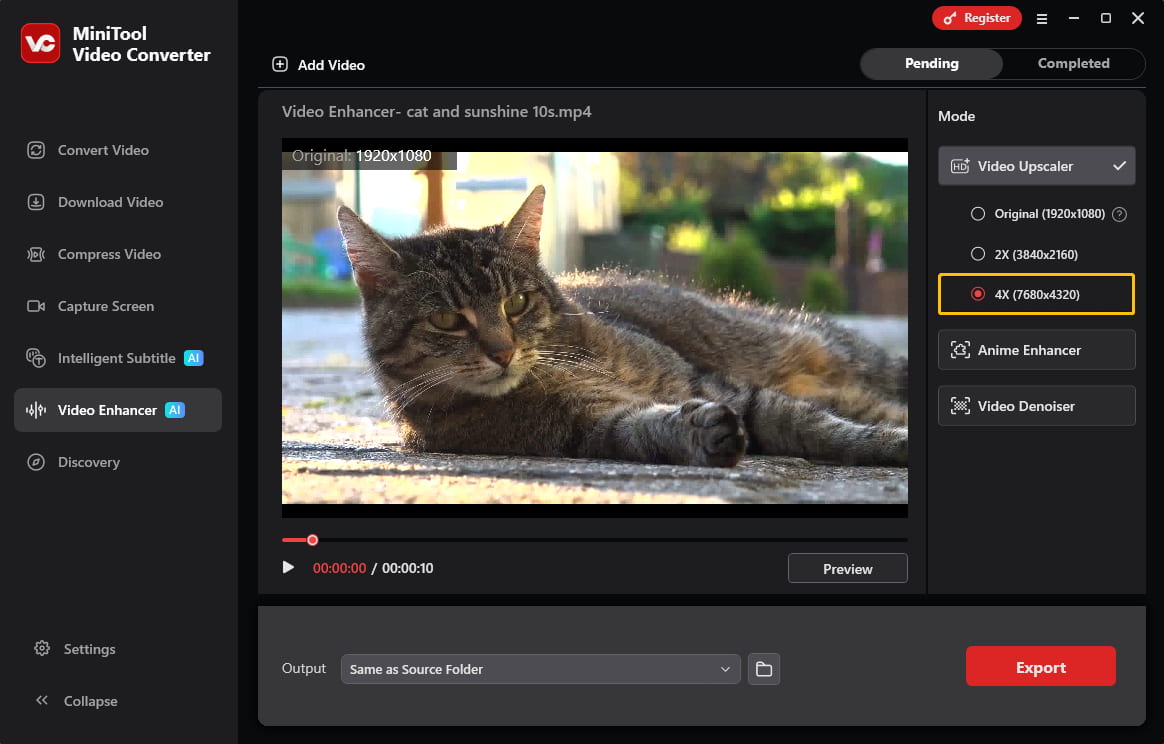
Step 3: Choose the Enhance Mode
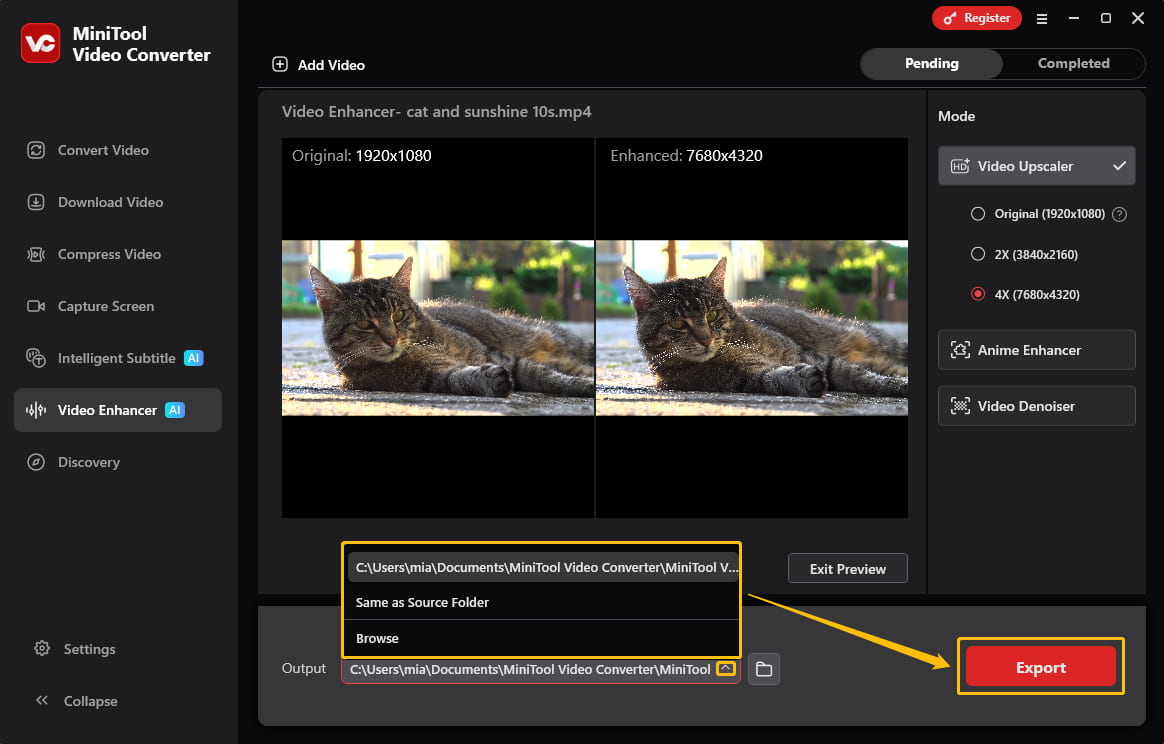
Once the video is imported, the enhancement options appear on the right. To upscale my 1080p video to 8K, I selected Video Upscaler and set it to 4X.
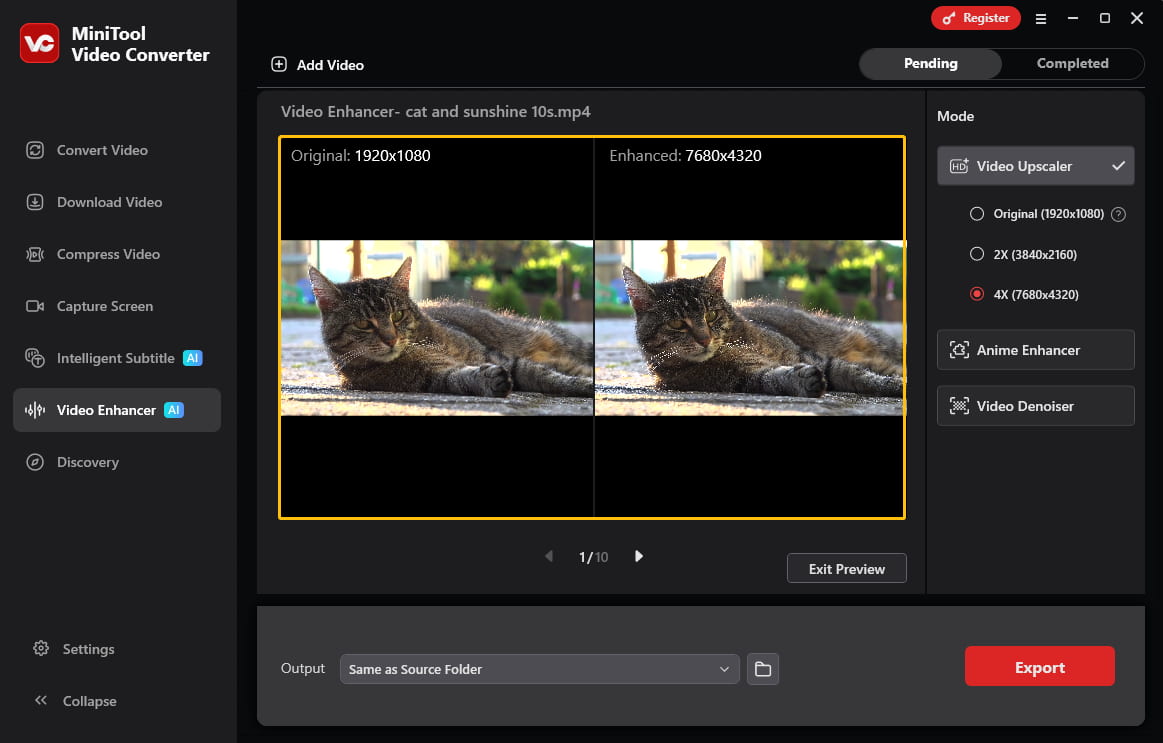
Step 4: Preview to Check the Effect
After selecting the upscale option, click the Preview option to check how the video looks after enhancement. MiniTool Video Converter generates a preview by extracting key frames, letting users compare the original and enhanced versions side by side.
Step 5: Set Output Folder
Expand the Output section at the bottom of the interface and choose a folder to save the enhanced video.
Step 6: Export the Video
Once satisfied, click Export in the bottom-right corner and save the final enhanced video.
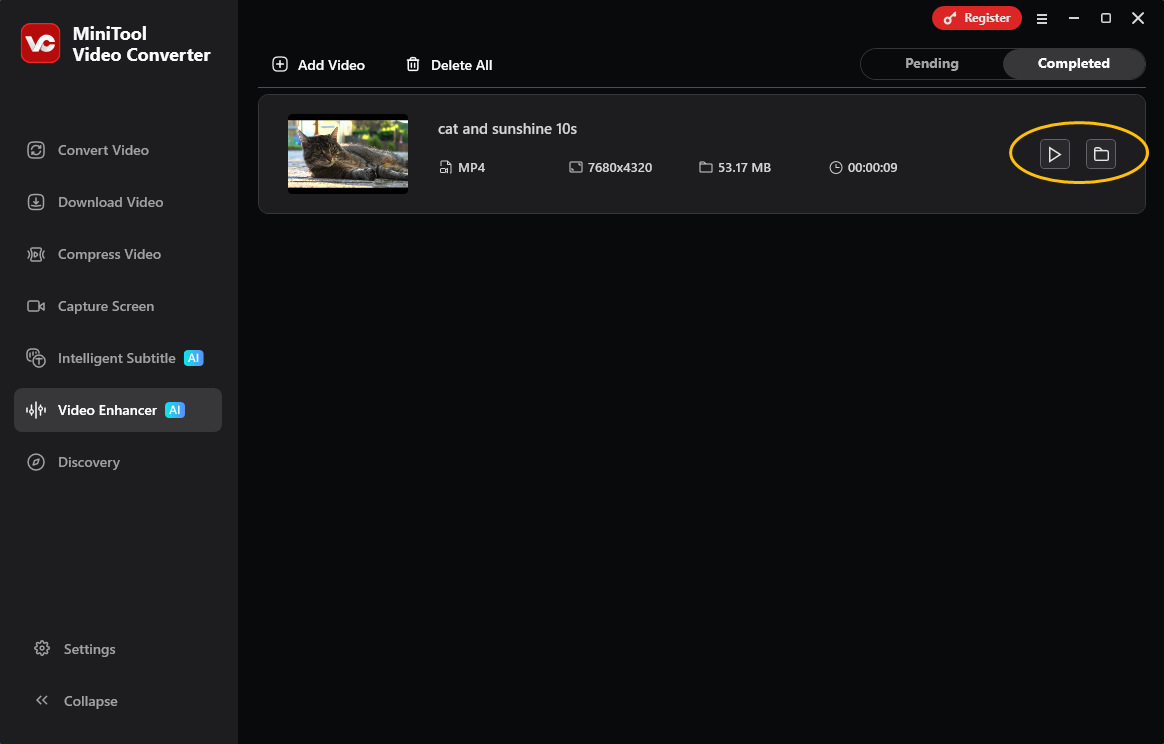
Step 7: Locate the Output Video
After export completes, the software automatically switches to the Completed tab, where I can find the finished tasks. I usually click the play icon to view the enhanced video, or click the folder icon to open the save location and view the file there.
Based on my personal experience, MiniTool Video Converter is an effective and user-friendly 8K video enhancer. I was also particularly impressed by its additional capabilities, such as video compression, file conversion, and audio/video transcription.
MiniTool Video ConverterClick to Download100%Clean & Safe
Method 2: Use Premiere Pro
Premiere Pro is a well-known video editing software. It includes an upscale video feature, which can upscale low-quality videos to 8K resolution.
Here is a guide on how to upscale video with Premiere Pro:
Step 1: Create 8k Resolution Sequence
Click on the File tab, select New, choose Sequence, and select 8K (7680 x 4320).
Step 2: Scale the Footage
Drag the target footage into the timeline. Then, right-click the video clip in the timeline and select Scale to Frame Size or Set to Frame Size to instantly scale the video to the 8K frame.
Step 3: Adjust Scale Manually
If the video does not fill the screen, open the Effect Controls panel, and then increase the Scale value until the black bars disappear.
Step 4: Enhance Detail
Go to the Effects Panel, search for the “Unsharp Mask”, and drag this effect onto the video clip. Then, adjust the amount and radius to improve the sharpness lost during upscaling.
Step 5: Export the 8K Video
Go to the File option, choose Export, and select Media. Choose an output format, and ensure the resolution is set to 8K to finalize the upscale.
Premiere Pro makes upscaling convenient for those who already have it installed. However, even at 8K resolution, I found that the output video was still unclear. This may be because Premiere Pro stretches pixels rather than using AI to generate new ones. Therefore, I also tried MiniTool Video Converter, which uses AI to enhance and upscale videos.

Advantages of Upscaling Video to 8K
Upscaling video to 8K offers many benefits. Here are the three I find most significant.
1. High-Resolution Monitor Compatibility
8K displays are becoming increasingly common. Upscaling video to 8K ensures it remains sharp on these high-resolution screens. Without matching the monitor’s native resolution, the video will be automatically stretched, resulting in a blurry image.
2. Professional Video Editing
High-resolution footage gives editors more flexibility. When cropping, scaling, or reframing, sufficiently high source resolution ensures the image stays sharp even after extensive post-production.
3. Old Video Restoration
Old videos from years ago often look blurry because early cameras lacked resolution. AI enhancers restore these precious memories by rebuilding faded details. After upscaling, facial features sharpen, colors become more natural, and overall clarity improves significantly.
Why Upscaled Videos Look Blurry
When trying to upscale video, I also encountered situations where the final video was still blurry. This may be because the original video resolution is too low.
The AI algorithm analyzes the original video and generates new pixels based on existing pixels. If the desired resolution differs significantly from the original video, AI tools need to fill in more pixels. It’s impossible to create truly high-definition details out of thin air that weren’t originally present in the recording. Therefore, it’s recommended that the difference between the original video and the ideal resolution not be too large.
Conclusion
This article demonstrates how to upscale video to 8K using Premiere Pro and MiniTool Video Converter. For truly high definition, the latter is the better choice. Additionally, it’s crucial that the original video’s resolution doesn’t differ too much from the ideal resolution. Otherwise, the optimized video quality won’t meet expectations.
To reach the MiniTool official team for help with MiniTool Video Converter, send an email to support@minitool.com.
User Comments :