Still bothered by noise in videos? This article demonstrates how to use MiniTool Video Converter to denoise video. Additionally, this article covers the difference between noise and grain and how to avoid noise in videos.
Video noise refers to grainy or static-like patterns appearing in video frames. It is typically caused by insufficient light received by the camera sensor, excessively high ISO (International Organization for Standardization) settings, or internal electronic interference within the sensor. Noise becomes particularly noticeable when the sensor cannot capture enough photons to generate a sharp signal, especially in shadow areas.
Video noise significantly degrades overall video quality and clarity, distracting viewers. Fortunately, modern AI-powered video noise reduction technology can intelligently analyze video and remove noise while preserving detail, thus restoring the video quality.
What Is Video Denoise and Video Denoiser
Video denoising refers to the process of removing unwanted noise and grain from videos to create cleaner, sharper, and more professional-looking videos. Modern video denoising technology relies on artificial intelligence. Video denoisers are software or plugins that use these advanced AI technologies to remove video noise.
How to Denoise a Video
This section outlines the key considerations for choosing an AI video denoiser and explains how to use MiniTool Video Converter (a free video denoise software) to remove video noise.
How to Choose the Right Video Denoiser
Choosing the right video noise reduction tool can streamline the workflow and improve efficiency. Here are several factors worth evaluating during the selection process:
- High Detail Retention: High-quality noise reduction tools remove noise while preserving texture details such as hair and skin tone. Avoid tools that produce overly smooth effects.
- Performance and Speed: Fast processing speed is crucial for video denoising. Insufficient processing speed will reduce overall efficiency.
- Price: Evaluate whether the video enhancer is free or if a subscription fits your budget. It’s best to choose a tool that offers free video enhancement options.
Taking the above three aspects into account, I ultimately chose a video enhancer that preserves the original details and has a fast processing speed: MiniTool Video Converter.
How to Denoise Video with MiniTool Video Converter
MiniTool Video Converter is a versatile, all-in-one audio and video processing application designed to handle a wide range of media tasks with ease. It can enhance video quality, convert file formats, compress videos, and much more besides.
MiniTool Video Converter’s Video Enhancer feature can improve video quality through three modes, including noise reduction, video upscaling, and more. This AI video denoiser employs advanced algorithms to significantly reduce and eliminate annoying digital noise, thereby enhancing video clarity.
Whether the video exhibits graininess due to insufficient lighting or high ISO settings, MiniTool Video Converter can intelligently eliminate it to deliver a clearer, more professional video. Furthermore, this tool does not add watermarks to videos.
Below is a step-by-step guide on how to denoise video with MiniTool Video Converter:
Step 1: Download and Install MiniTool Video Converter
Get the installation package of MiniTool Video Converter. Then, follow the prompts to install it on the computer.
MiniTool Video ConverterClick to Download100%Clean & Safe
Step 2: Import Target Video
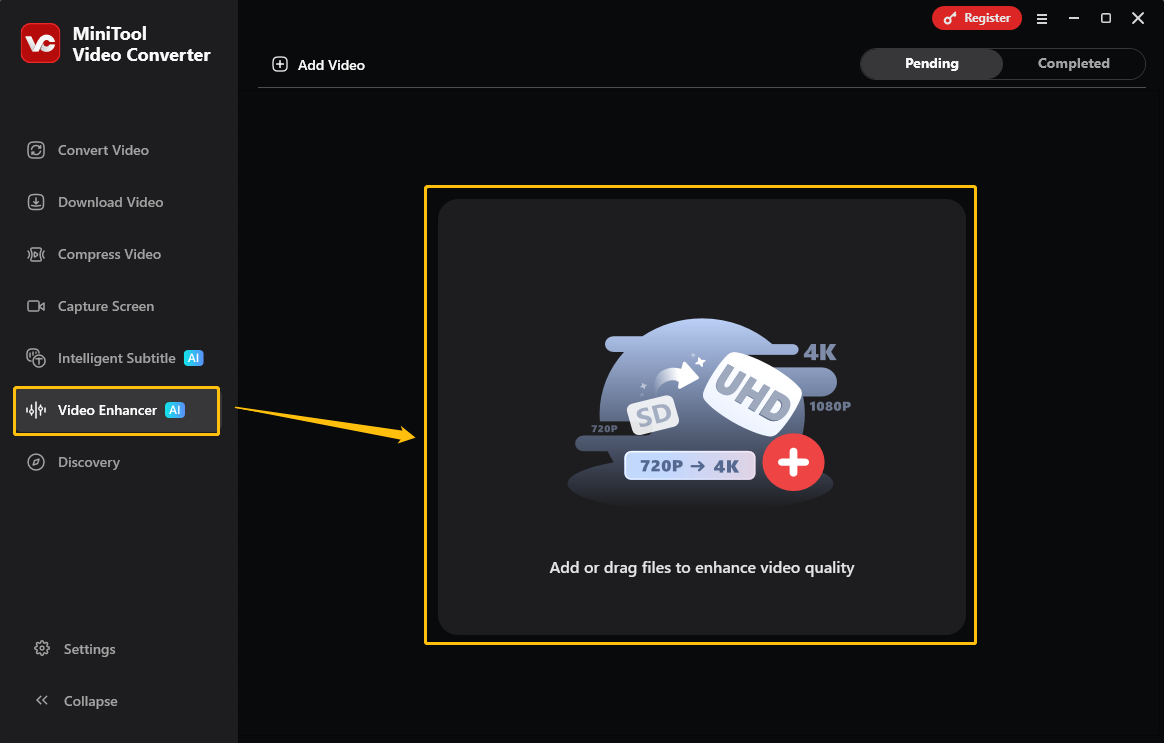
Open this free video denoise software. Then, choose the Video Enhancer tab, and click the Add or drag files to enhance video quality area to import the target video.
Step 3: Choose the Video Enhance Mode
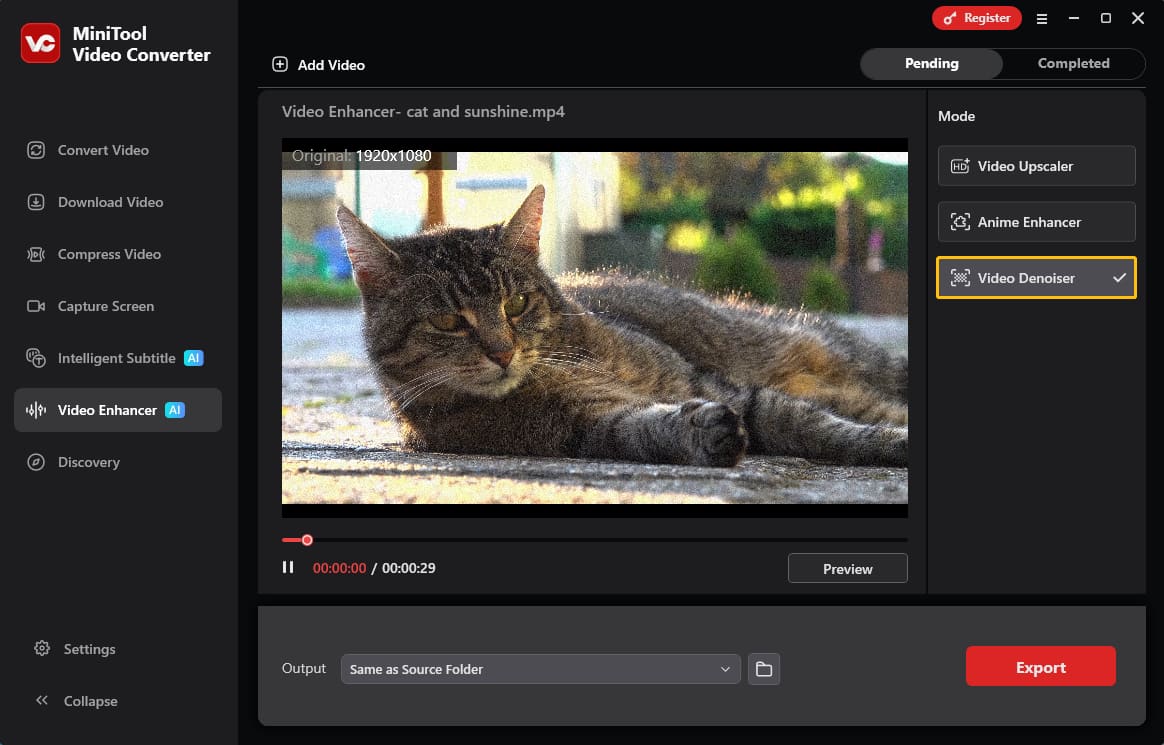
Choose the Video Denoiser option in the Mode section.
Step 4: Check the Noise Reduction Effect
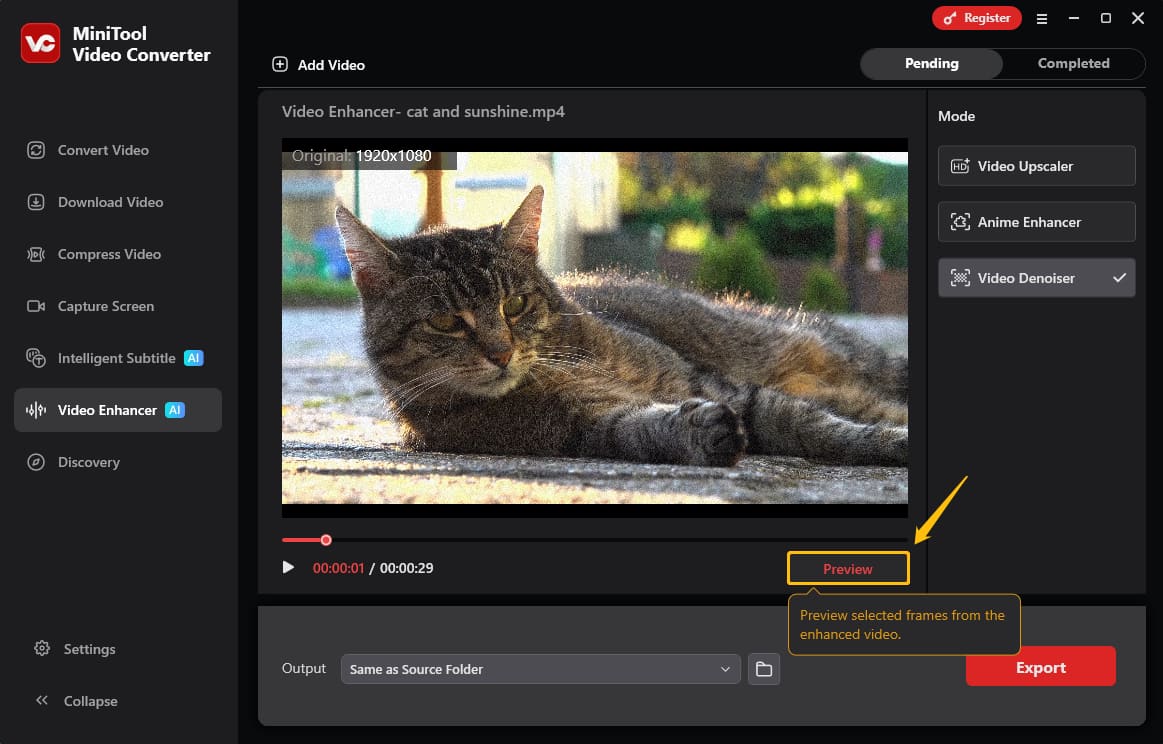
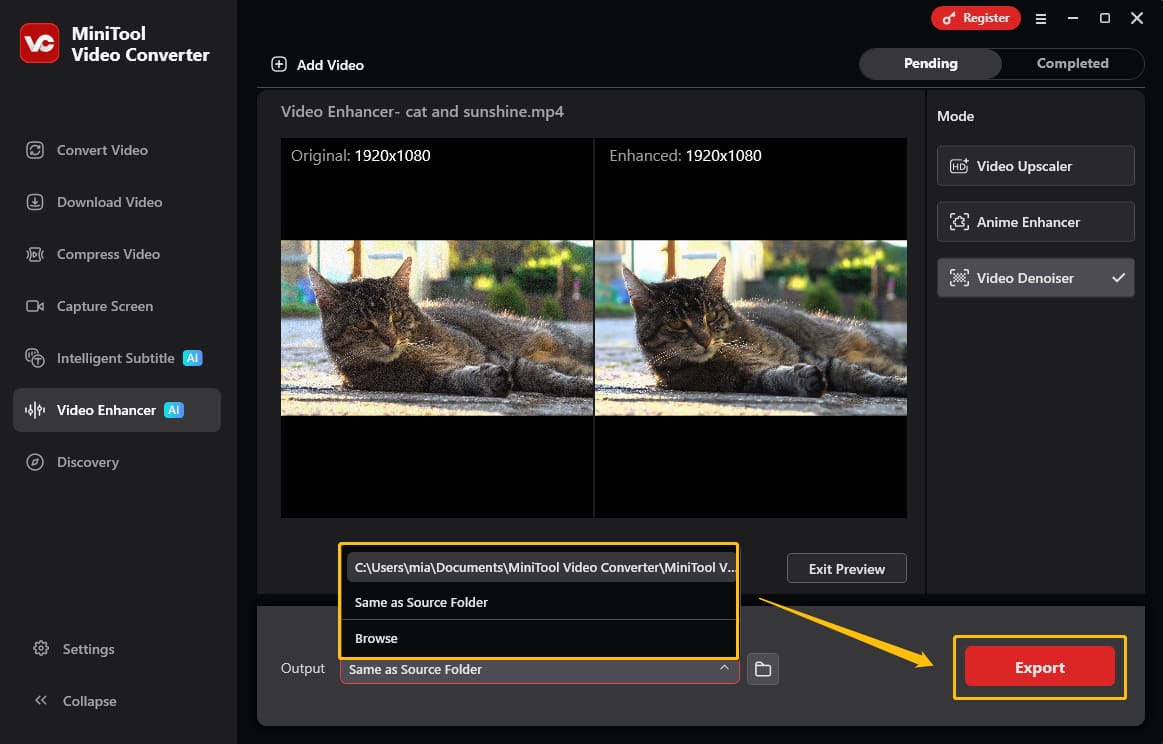
To check the noise reduction effect, I click the Preview option to view the selected frames from the enhanced video.
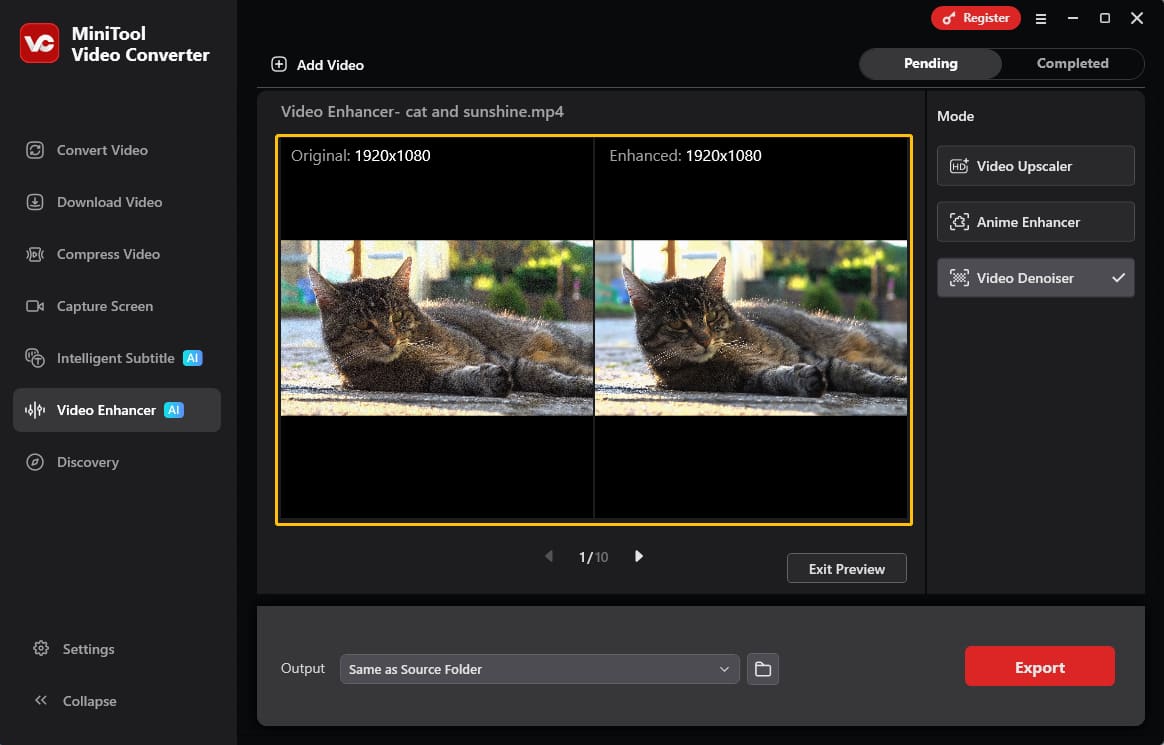
Then, MiniTool Video Converter will display a side-by-side comparison of the original and enhanced video frames.
Step 5: Set Save Location
Expand the Output option and select a folder as the save destination. Once selected, click Export to begin the denoising process.
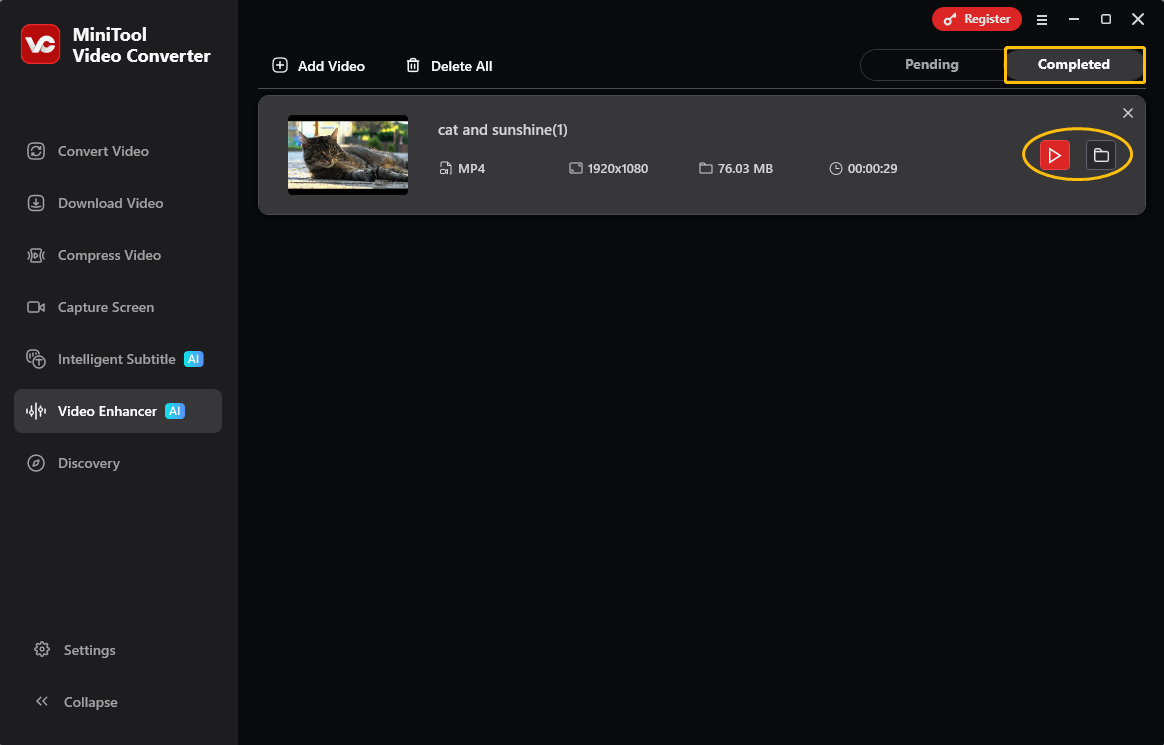
Step 6: Play the Denoised Video
Once video processing is complete, the software will switch to the Completed interface. Click the play icon to play the noise-reduced video directly. Alternatively, click the folder icon to locate the exported video, double-click to open and play it.
After using the Video Enhancer feature of MiniTool Video Converter, the video noise was significantly reduced.
Difference Between Noise and Grain
When discussing video denoising, many people confuse noise and grain. Visually, both of them appear grainy, but they are not the same thing.
Noise refers to unwanted digital interference that occurs when recording video in low-light conditions. It usually appears as colored specks. Grain, also called film grain, is a visible grainy texture in video. These grains often resemble fine organic grains or sand grains and are generally considered more aesthetically pleasing. Noise degrades image quality, while film grain is often associated with a vintage style.
Besides, the sources and distribution of noise and film grain are quite different. Digital noise originates from sensor interference and is often concentrated in shadow areas, while film grain is caused by physical silver halide particles formed during the developing process, which are usually more noticeable in midtones and highlights.
Tips on How to Avoid Video Noise
To minimize video noise during recording, keep the following key points in mind.
1. Increase Lighting
Ensure sufficient lighting during shooting. A well-lit environment allows the sensor to capture clear, detailed images, reducing the need for camera light compensation.
2. Lower ISO
ISO determines the sensor’s sensitivity to light, but higher ISO values result in significant image quality loss. Therefore, lowering the camera’s ISO setting as much as possible can reduce digital noise.
3. Use a Wide Aperture
In low-light conditions where adding additional lighting is inconvenient, open the lens aperture to increase the amount of light entering the camera, thereby lowering the ISO setting. This is also a way to reduce digital noise.
Bottom Line
This short video demonstrates how to use MiniTool Video Converter to denoise video. This tool is free, watermark-free, and perfect for beginners. Whether it’s digital noise or visual grain, MiniTool Video Converter can easily eliminate it. To reduce noise in the video, adjusting the camera’s aperture and ISO settings during recording is also a good approach.
If any difficulties arise when using the video denoiser function in MiniTool Video Converter, contact support@minitool.com.
User Comments :