WebM is a royalty-free audiovisual container format sponsored by Google. It adopts Opus or Vorbis audio codecs and utilizes VP8, VP9, or AV1 video codecs. Besides, its container structure is similar to MKV. WebM is designed for online sharing and playback.
H.264, also called AVC (Advanced Video Coding), is one of the most widely used codecs, providing high-quality video at a low bitrate. It boasts strong compatibility, suitable for various streaming media, Blu-ray discs, and broadcasting.
WebM vs H264: Detailed Differences
What are the core differences between WebM and H264? After using them, I found 4 different aspects.
1. Format Compatibility
Format compatibility refers to the ability of different systems, software, or devices to open, edit, and save files without losing or corrupting data. It ensures that the formatted information is recognized and understood in different environments.
H.264 is better than WebM in terms of compatibility. H.264 is an industry-standard video codec that receives strong support in software, hardware, and browsers. While WebM is a web page video format that implements the HTML5 standard and is compatible with most browsers, such as Firefox and Google Chrome.
2. Compression Efficiency
Compression efficiency refers to how much a codec can reduce the file size of a video without sacrificing video quality as much as possible. It directly impacts the efficiency of video storage, transmission, and playback.
In compression efficiency, WebM and H.264, which one is better? It depends on whether WebM uses a more advanced codec, such as the VP9 video codec. VP9 is a more efficient codec than H.264. VP9 can reduce file size with the same visual video quality. Therefore, if WebM adopts the VP9 codec, it will outperform H.264.
3. Video Quality
Video quality refers to the detail and clarity of a video, directly impacting its visual appeal. Video quality is determined by factors such as resolution, frame rate, color depth, and compression artifacts.
Generally, both WebM and H.264 provide good and watchable visuals for everyday use. H.264 usually delivers stable, clear, smooth images and natural colors in most common videos. WebM, especially when using the VP9 codec, retains more detail, resulting in a cleaner image. Overall, H.264 provides a stable and satisfactory video quality for the vast majority of users. However, WebM offers better video quality.
4. Patent and Cost
Regarding patents, WebM was developed by Google and uses royalty-free video codecs (VP8 and VP9). H.264 is a proprietary and patented encoding standard. Therefore, any use of it in commercial products typically requires a legal license.
In terms of cost, WebM is an open-source format. Therefore, its cost is relatively low. H.264 requires patent licensing fees in many professional and commercial applications. Therefore, the cost of use is higher than that of WebM.
Why Convert WebM to H264
H.264’s better compatibility makes it compatible with more devices, such as older media players, TVs, and surveillance equipment that don’t support WebM. Additionally, it is more easily accepted by video editing tools and social media platforms. For better playback and easier sharing, I have converted videos from my old phone to MP4 that are encoded by H.264.
How to Convert WebM to H264
Is there any suitable WebM to H264 converter? Of course! I’ve used a lot of video converters. Therefore, I can recommend one that is free and easy to use: MiniTool Video Converter. Firstly, it doesn’t include ads, watermarks, or additional plugins, allowing me to maintain an uninterrupted workflow.
Secondly, MiniTool Video Converter supports converting among 1,000+ formats, including WebM to H.264 encoded formats, such as MP4, MOV, MKV, M4V, FLV, F4V, and more. It also empowers me to convert videos in batches, up to 5 tasks at the same time.
What’s more, MiniTool Video Converter also supports one-click adjustment of quality or specifying fine-tuning of the resolution, frame rate, encoder, and bitrate for the converted video. In addition, MiniTool Video Converter also enables me to convert videos to be compatible with various social media platforms, such as Vimeo, Instagram, Facebook, and YouTube.
Here is a step-by-step guide on how to convert WebM to H264 encoded videos. I just take WebM to H.264-encoded MP4 as an example.
Step 1. Download and Set Up MiniTool Video Converter
Download MiniTool Video Converter by simply clicking on the download button I embedded below. Then, follow the on-screen prompts to install it.
MiniTool Video ConverterClick to Download100%Clean & Safe
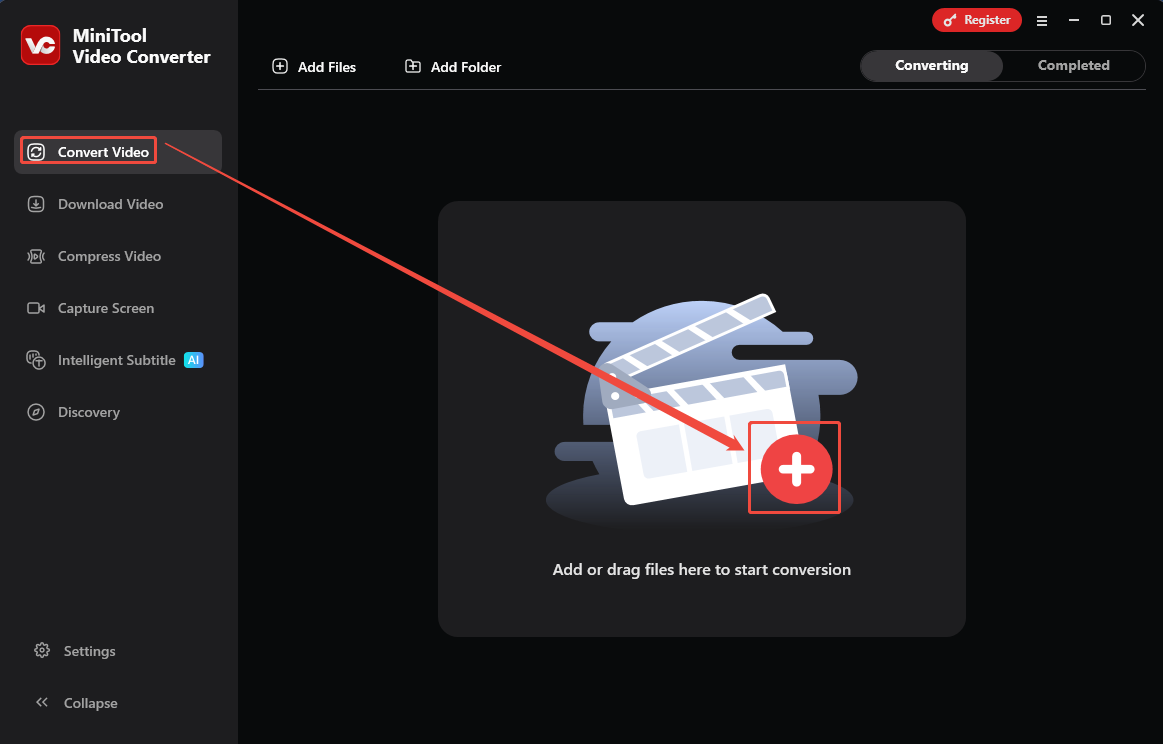
Step 2. Import WebM Video
I click on the Plus icon in the default Convert Video interface to import the WebM video.
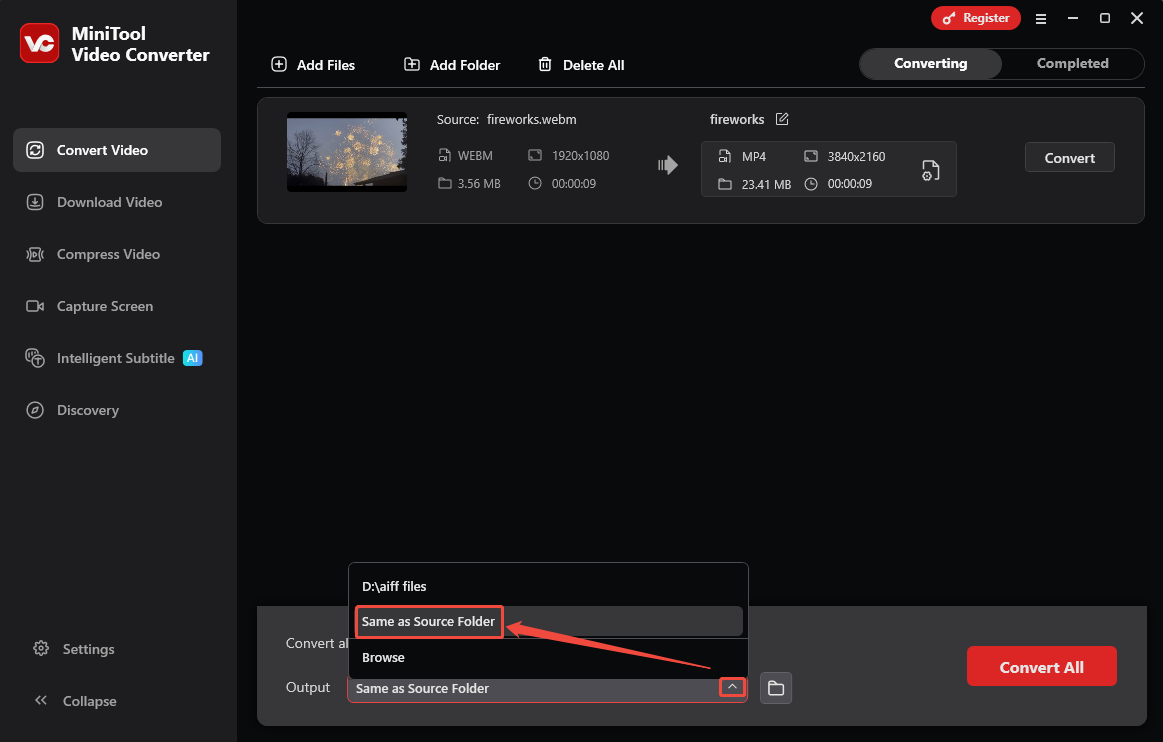
Step 3. Set a Saving Path for the Converted Video
I expand the Output option at the bottom of the main interface. Here, choose the Same as Source Folder option to save my output files.
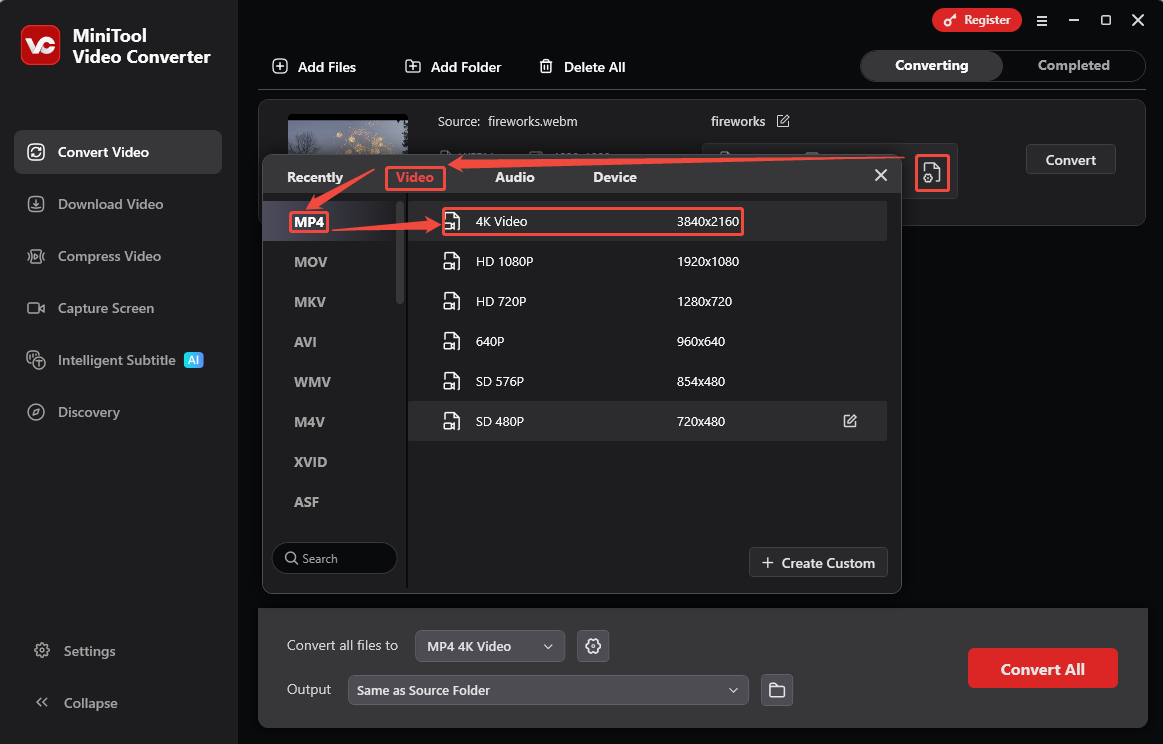
Step 4. Choose MP4 as the Output Format
Click on the Gear icon on the conversion task to open the output format settings window. From there, I switch to the Video tab and choose the MP4 format that was encoded by the default H.264. Then, select a resolution as needed. I want a high resolution. Therefore, I pick 4K Video.
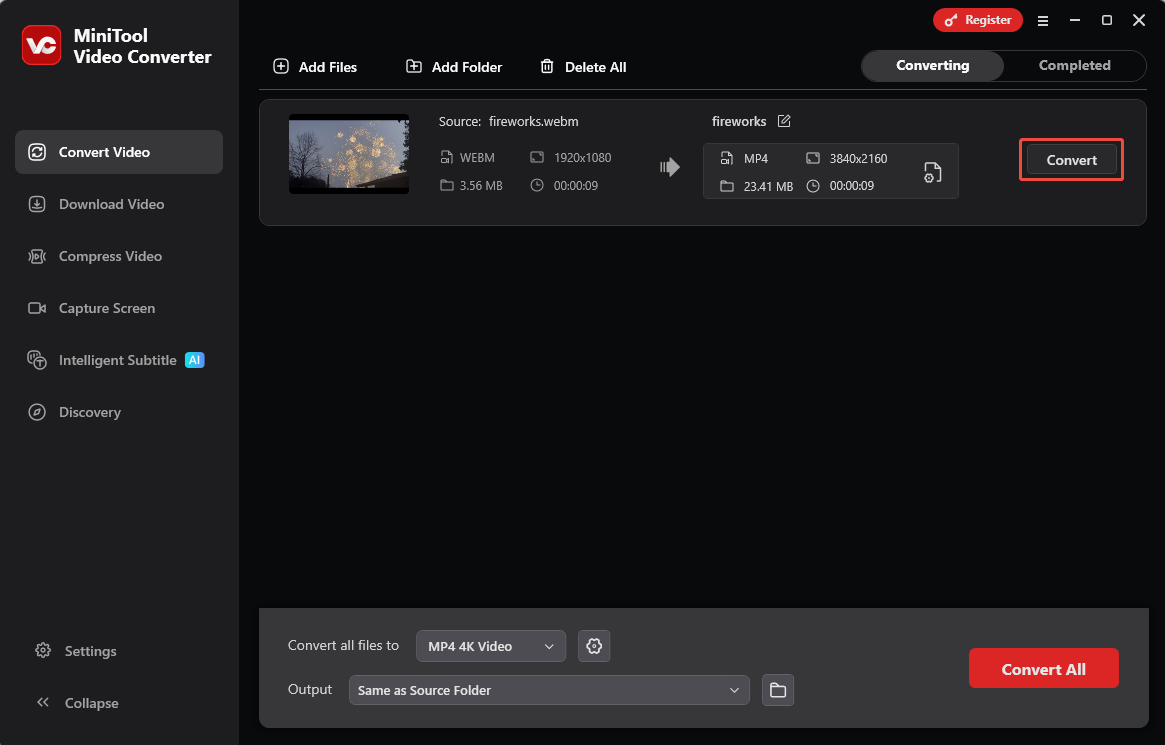
Step 5. Start the Conversion Process
After completing the H.264 encoded format set, the video converter will take me back to the main interface. Here, I click on the Convert button to start the conversion.
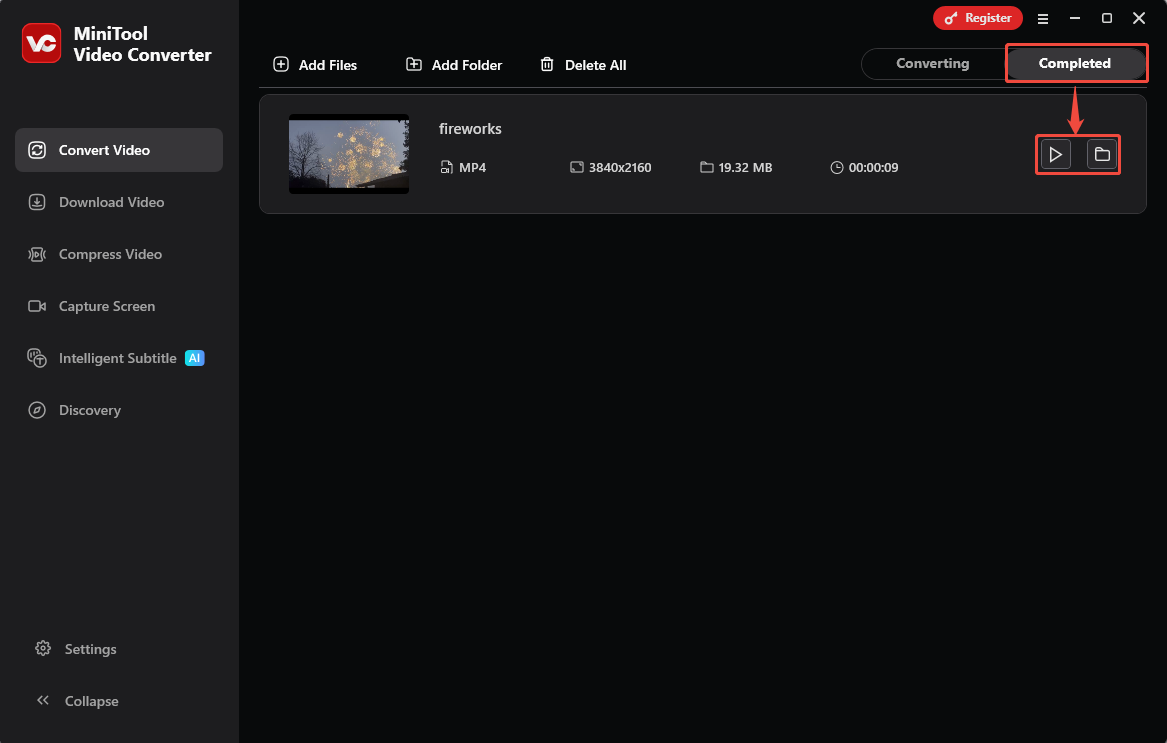
Step 6. Check and Locate the Converted Video
Once the conversion process finishes, the converted video will appear under the Completed tab. Here, click on the Play icon to preview it. Or click on the Folder icon to locate the converted video.
MiniTool Video Converter is the most practical video converter I have used for converting formats in recent years. I highly recommend giving it a try.
Conclusion
WebM vs H264, this article explores 4 different aspects between them. It explains that converting WebM to H.264 encoded video is for gaining better compatibility. It also shows a step-by-step guide on how to do it with MiniTool Video Converter. If you are interested in MiniTool Video Converter, please contact us via email at support@minitool.com. Also, directly sending me a message on X is available. I will reply to you as soon as possible.
User Comments :