Platform upload limits often force us to compress videos to specific sizes. This guide walks through how to compress video to desired size using MiniTool Video Converter and FreeConvert. Additionally, learn about some important considerations regarding video compression.
We know that many factors determine video file size, including bitrate, resolution, duration, frame rate, and codec. Generally, higher bitrates, higher resolutions, longer durations, and higher frame rates all increase file size. Therefore, to reduce video file size, we need to start with these parameters.
Currently, many social media and streaming platforms have relatively strict video file size limits. For example, when uploading videos to Pinterest, I found that it doesn't support videos larger than 32MB. Therefore, I had to think about how to compress video to a size no larger than 32MB. Finally, I discovered two tools that allowed me to adjust the compression level to achieve the desired file size after compression.
How to Compress Video to Desired Size
Here are two compression tools that I found particularly useful. Through testing, both were able to compress my videos to the size I wanted. Before I compress any video, I first confirm the file size requirements of my target platform so I can adjust my compression level accordingly.
1. Use MiniTool Video Converter
MiniTool Video Converter is my go-to solution to compress video to desired size. This application integrates a variety of functions into a single package. Its video compression feature allows me to freely adjust the compression level. Moreover, as I make these adjustments, I can view the estimated file size in real time.
Furthermore, I have found that MiniTool Video Converter supports a wide range of export formats, including MP4, WebM, and MKV, all of which are popular and highly compatible formats. Additionally, this video compression software includes a batch compression function that enables me to compress up to 5 video files at once.
I have used numerous compression tools, but I have found that most impose file-size limitations on source files. MiniTool Video Converter, however, is one of the few compressors that does not have restrictions on imported file size.
Here are 2 options on how to shrink video to target size with MiniTool Video Converter.
Option 1: Set the Compression Level Directly
Follow the steps below to compress a video by adjusting compression level:
Step 1: Download and Install MiniTool Video Converter
Get the latest version of MiniTool Video Converter by clicking the button below.
MiniTool Video ConverterClick to Download100%Clean & Safe
Step 2: Launch the Compressor and Upload Files
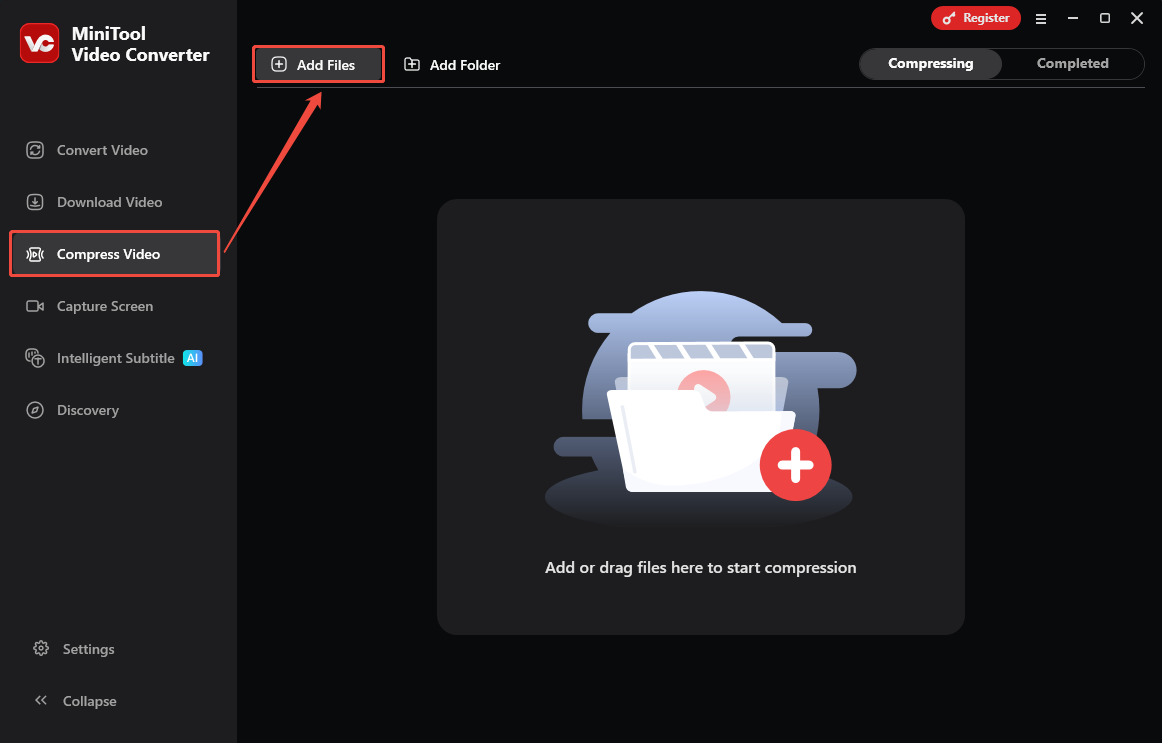
Launch this free video compressor. Then, I switch to the Compress Video tab, and click the Add Files option to upload my video.
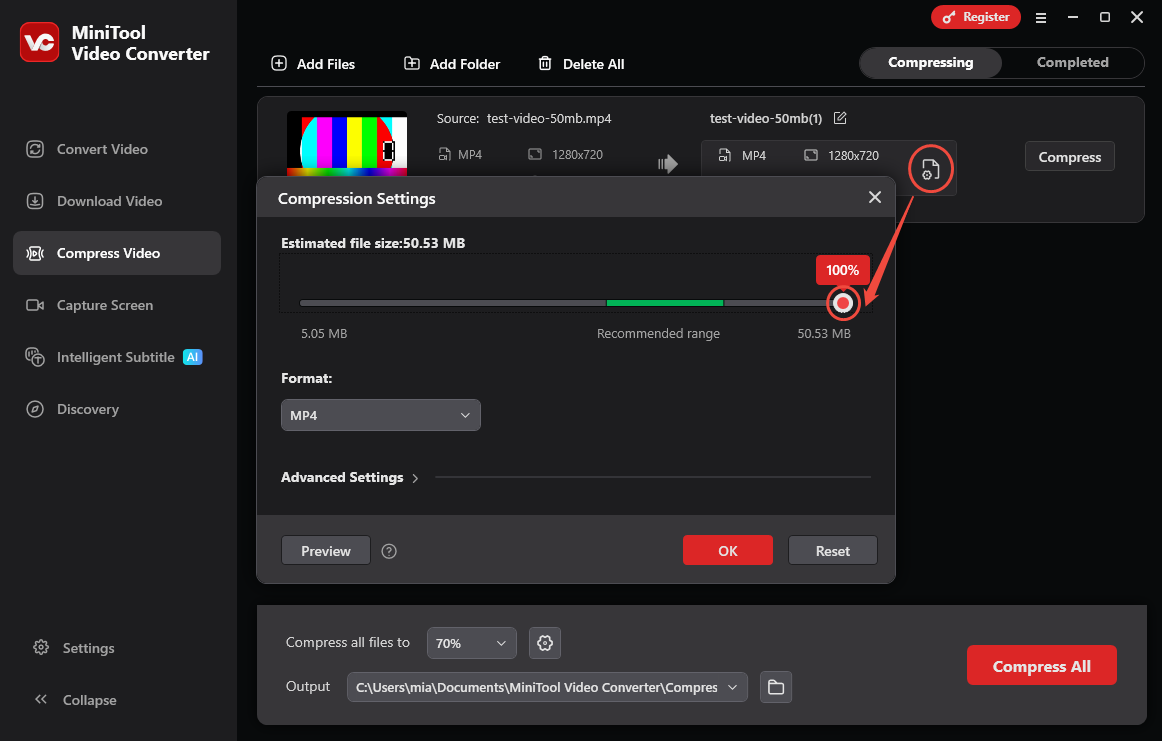
Step 3: Adjust Compression Level
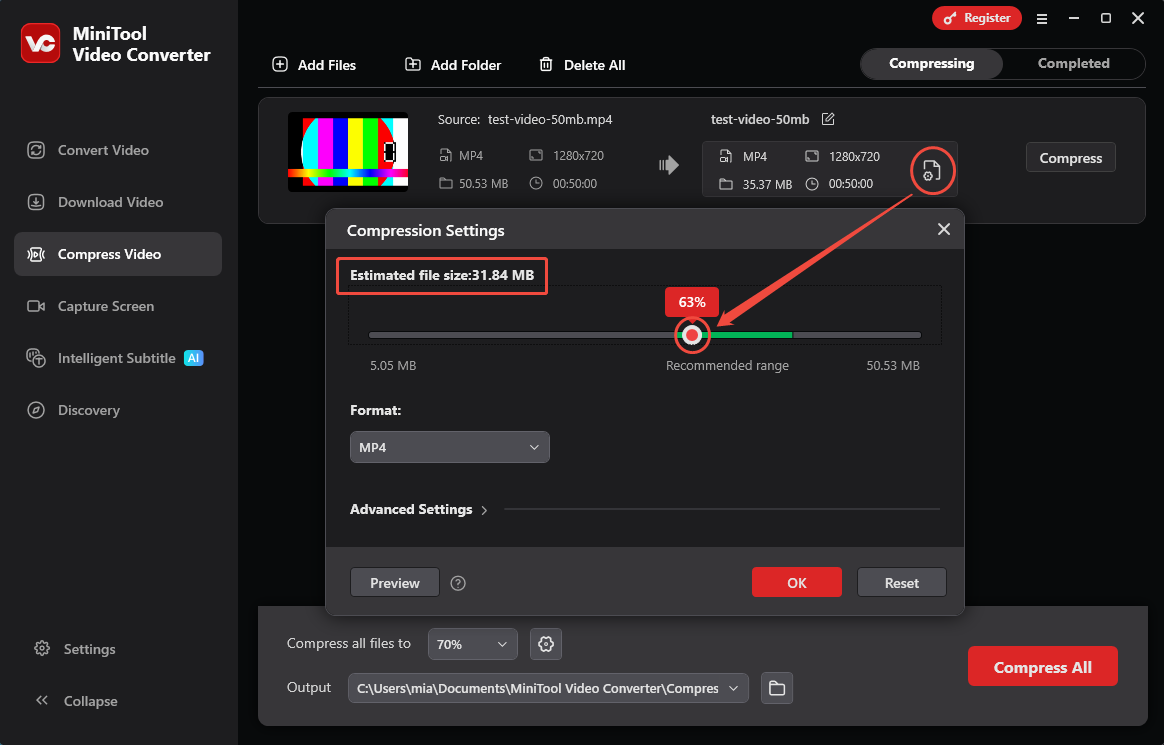
Once my video is uploaded, I click the gear icon to open the Compression Settings window. Then, I can adjust the compression level. Since I want to compress the video to a specific size, I adjust the compression level based on the estimated file size displayed in the top-left corner of the window.
Step 4: Choose the Output Format
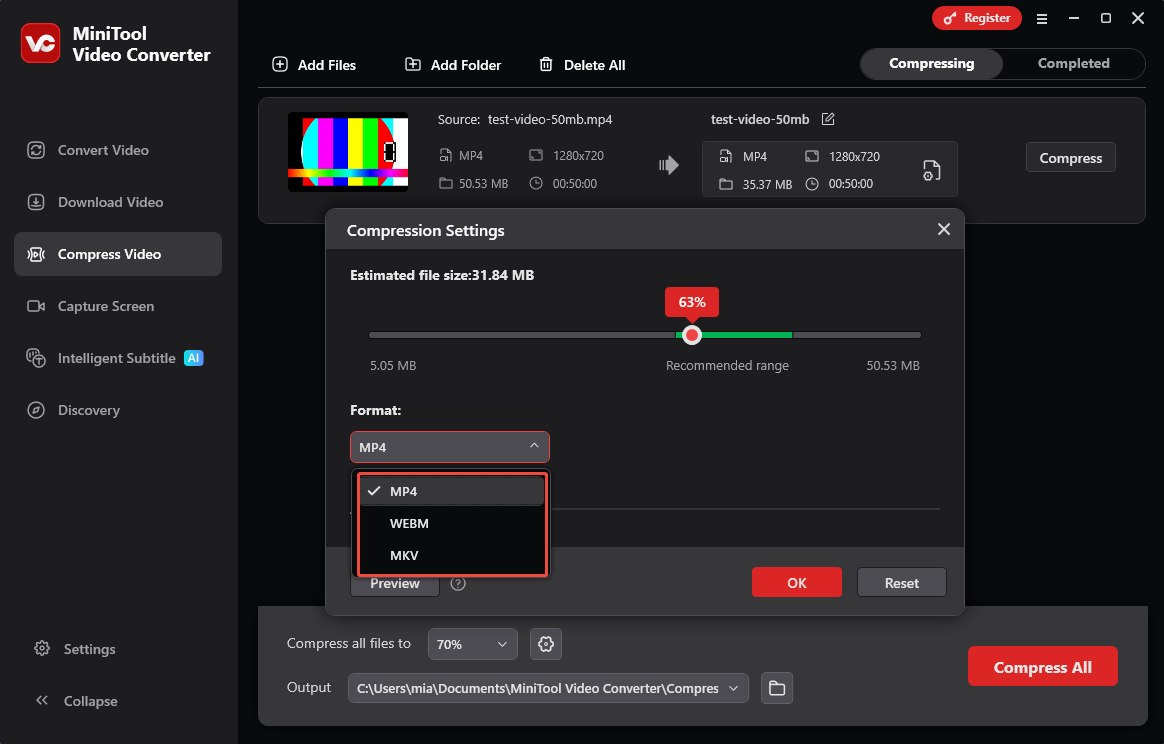
Next, I will expand the Format option and select the output format.
Step 5: Preview the Video
MiniTool Video Converter supports previewing compressed videos. Therefore, I typically click the Preview option to view the video. Then, I click the OK button to confirm my adjustments.

Step 6: Set Save Location and Start Compression
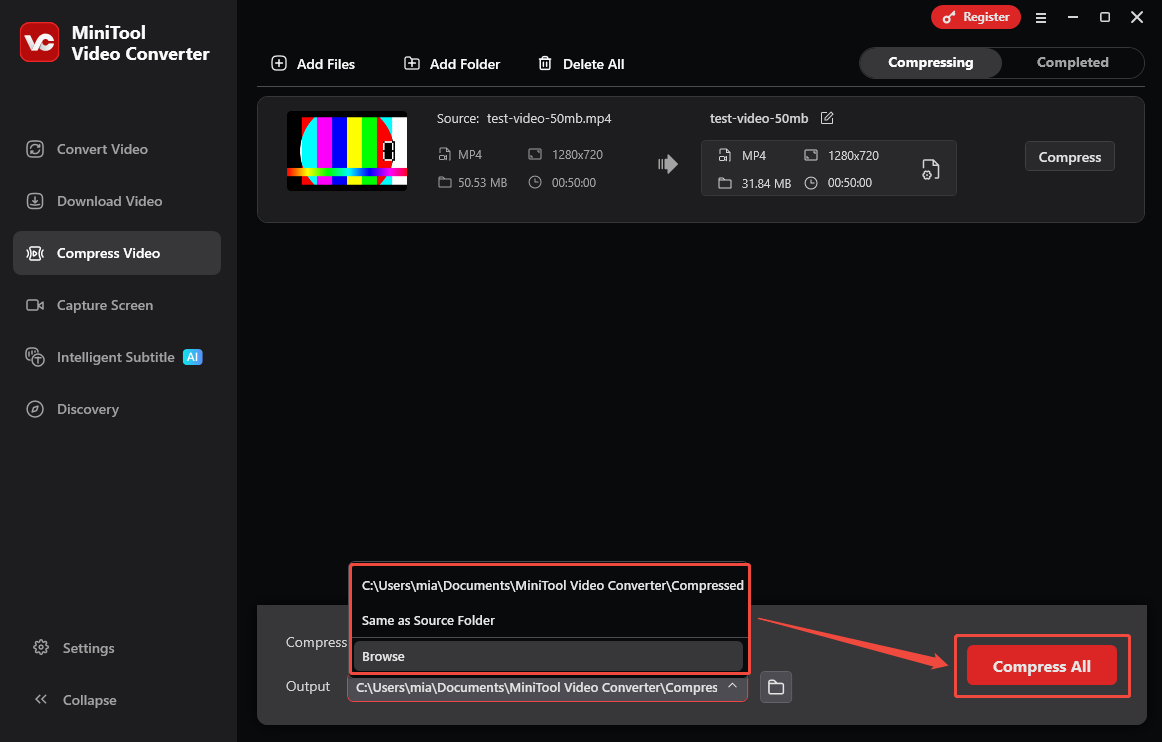
At the bottom of the interface, I expand the Output option and select a folder to save the output video. Then, I click the Compress All button to start the compression process.
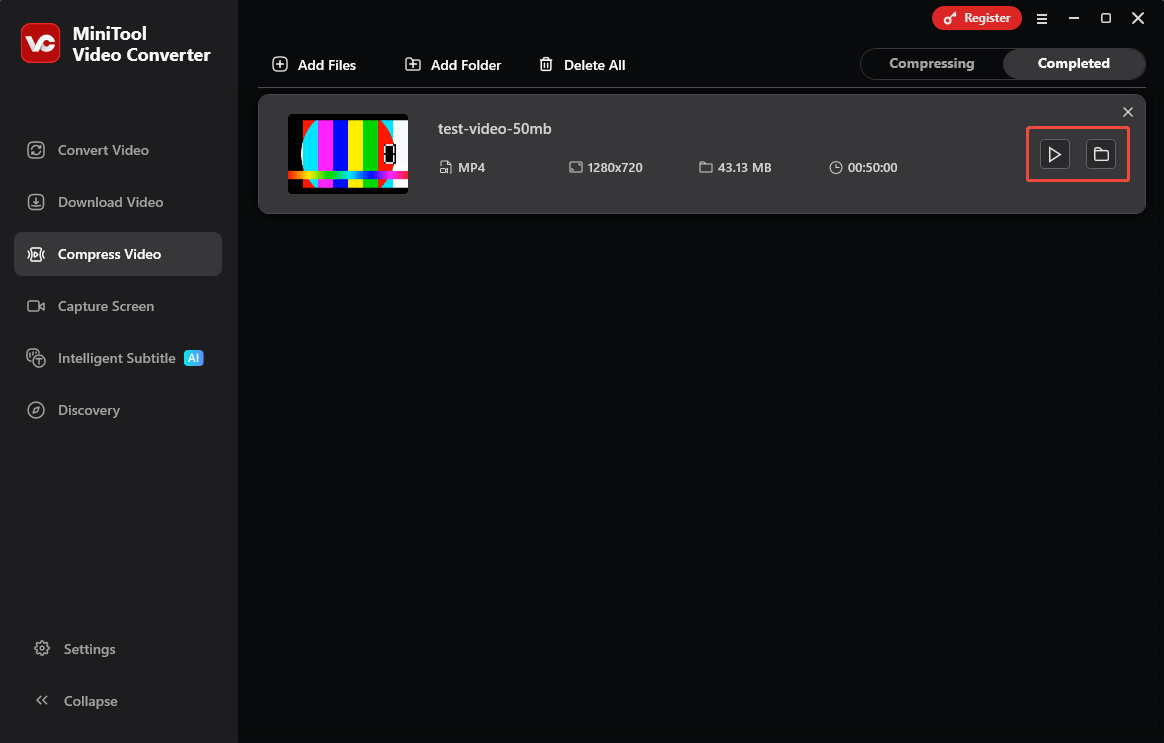
Step 7: Play and Locate the Compressed Video
Once my video is compressed, I'll be taken to the Completed section. From there, click the folder icon to find my video, or click the play icon to watch it right away.
If you want to reduce video file size while preserving video quality as much as possible, you can try adjusting only specific video parameters. The Advanced Settings for video compression in MiniTool Video Converter can help you do just that.
Option 2: Adjust the Video Parameters
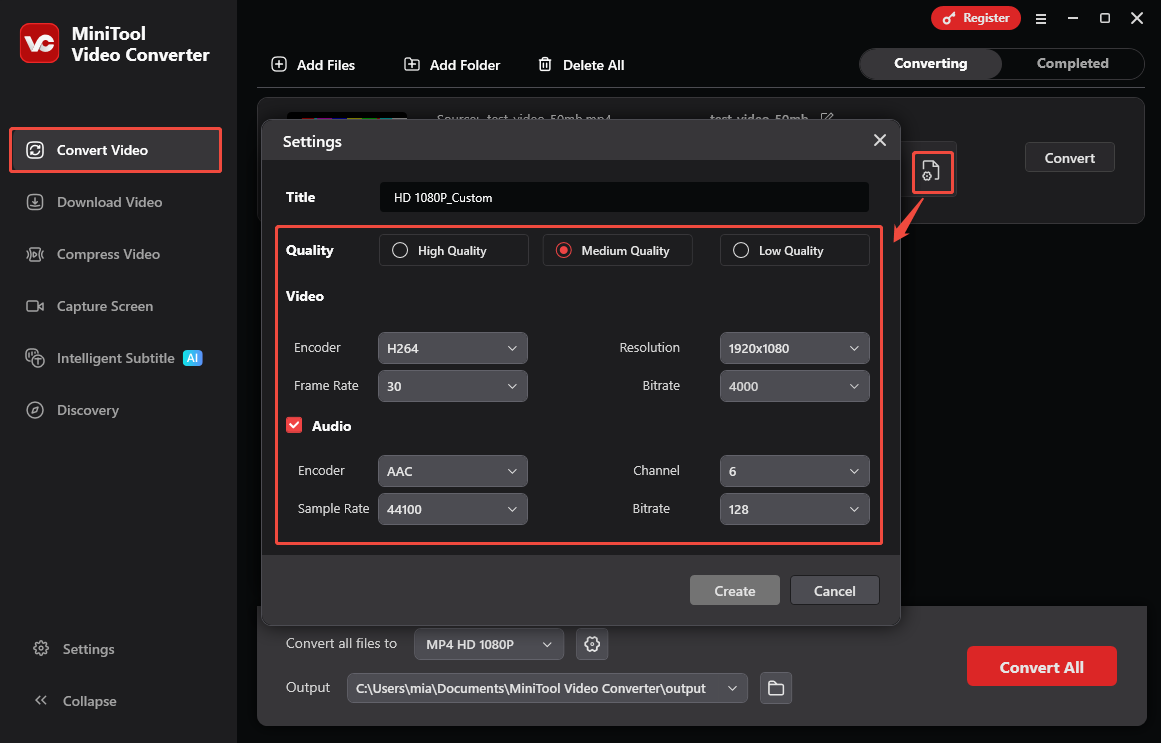
MiniTool Video Converter's video compression feature offers a wide range of customization options, allowing users to adjust various video parameters, including video encoder, resolution, and frame rate, as well as audio settings such as encoder, channels, and sample rate. By strategically lowering these settings, users can significantly reduce file size.
For instance, I can use MiniTool Video Converter to downscale the resolution from 4K to 1080p, reduce the frame rate from 60fps to 30fps, or switch to a more efficient encoder like H.265. This allows for a substantial reduction in file size without severely compromising video quality.
Here is how I adjust the video parameters with MiniTool Video Converter’s video compression feature:
Step 1: Go to the Compression Settings
After uploading the video to MiniTool Video Converter, click the gear icon to open the Compression Settings window.
Step 2: Confirm the Compression Level Is 100%
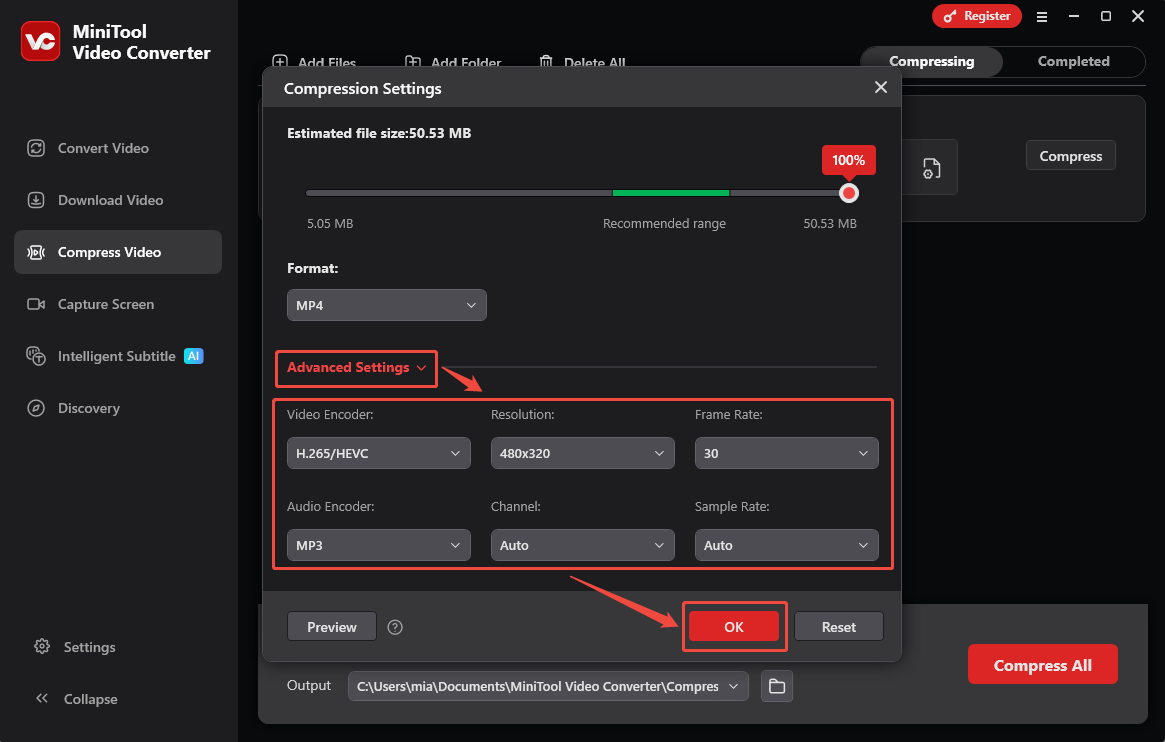
To ensure that the reduction in file size was governed exclusively by the parameters I manually adjusted, I dragged the red dot to the far right of the slider until the compression level displayed 100%. This action eliminated any interference from built-in compression mechanisms, thereby enabling me to precisely control the impact of the parameters on the final file size.
Step 3: Adjust Video Parameters in Advanced Settings
Expand the Advanced Settings. Here, I selected H.265 as the video encoder, and slightly reduced parameters such as the resolution and frame rate. Finally, clicked OK to save these adjustments.
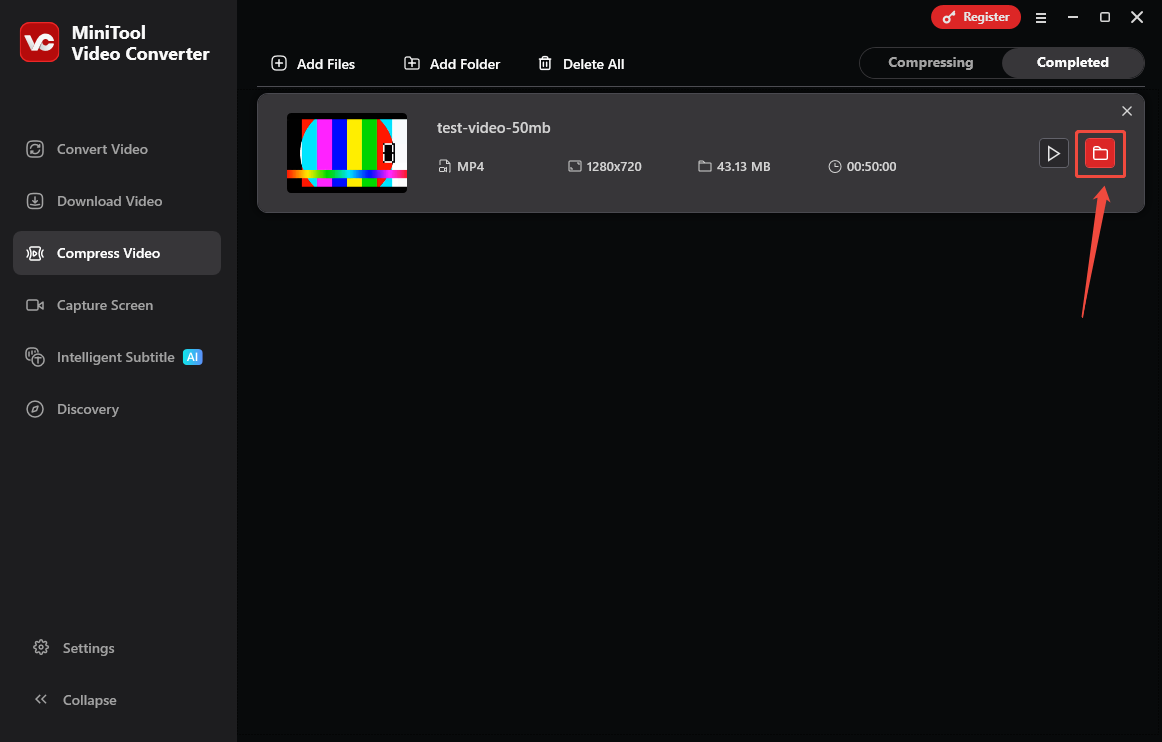
Step 4: Start Compression and Locate the Video
Click the Compress option to start compression. Then, locate the compressed video by clicking the folder icon.
In addition to its powerful video compression capabilities, MiniTool Video Converter also serves as an exceptional tool for converting audio and video formats. During the conversion process, the software offers a wealth of customization options, enabling users to fine-tune video parameters precisely.
Users can not only modify key video settings, such as encoder type, resolution, and frame rate, but also adjust audio attributes, including the encoder, audio channels, and sample rate. Furthermore, the tool supports advanced adjustment of bitrate and video quality, helping users strike the optimal balance between file size and output quality.
To shrink video to target size, MiniTool Video Converter is recommended. Alternatively, some online video compression tools are also available.
2. Use FreeConvert
FreeConvert is a web-based tool that allows me to compress videos to a specific size. I can reduce the size of video files by adjusting the compression percentage. Furthermore, the tool supports mainstream formats such as MP4, MOV, and AVI.
To do a target size compression with FreeConvert, follow the steps below:
Step 1: Go to the FreeConvert Compression Interface
Visit https://www.freeconvert.com/video-compressor.
Step 2: Upload Video from the Device
I click the Choose Files to import the video I want to compress from my computer.

Step 3: Set Output Format and Compression Level
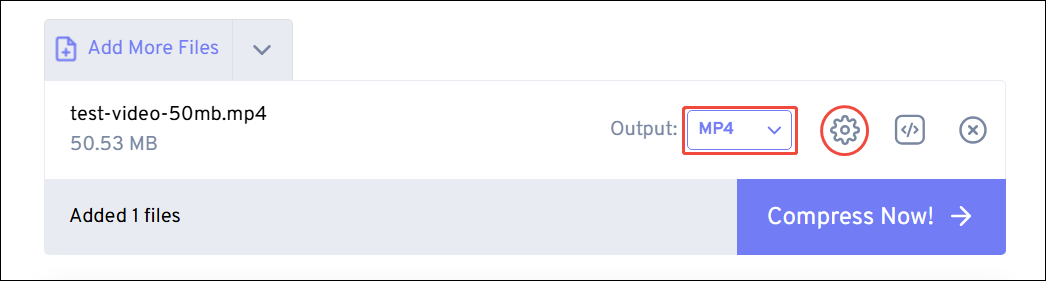
Expand the Output option and select the output format. Then click the gear icon.
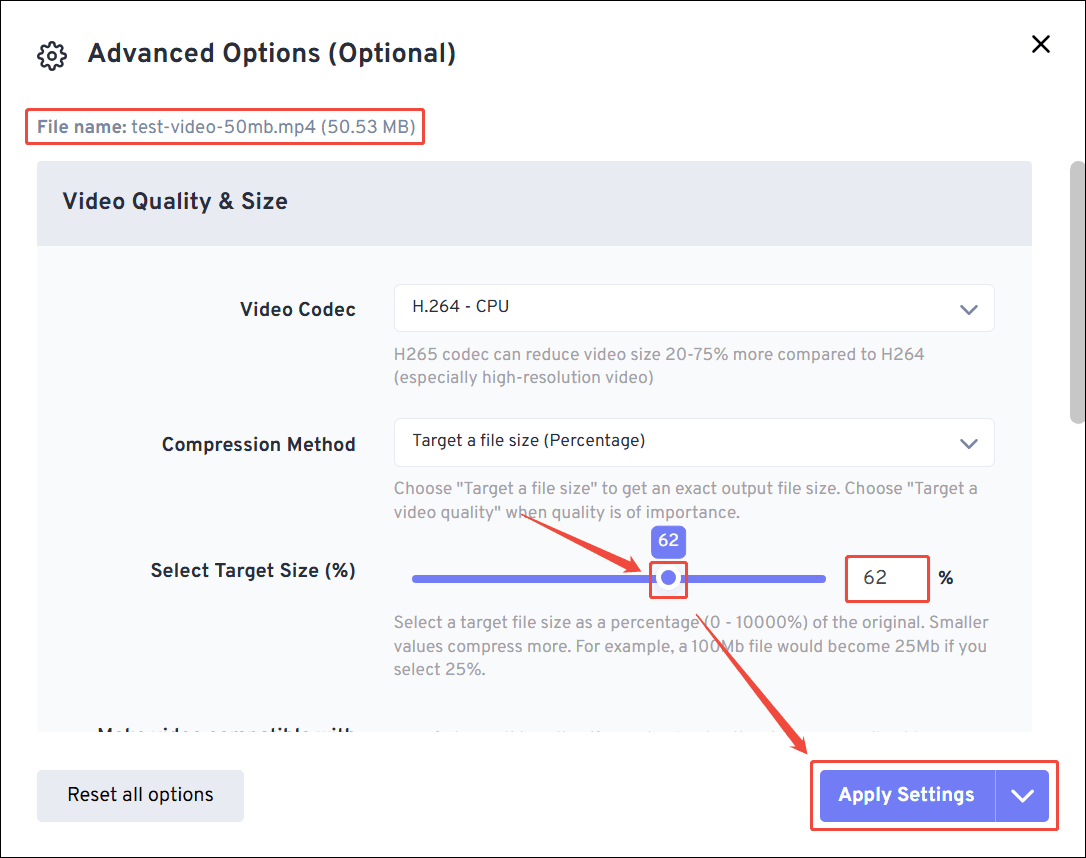
In the Advanced Options (Optional) window, I adjust the compression level in the Select Target Size section. Because FreeConvert doesn't display the estimated file size, I need to adjust the compression percentage by calculating based on the desired file size. After setting it, click Apply Settings.
Step 4: Start Compression and Download the Output Video
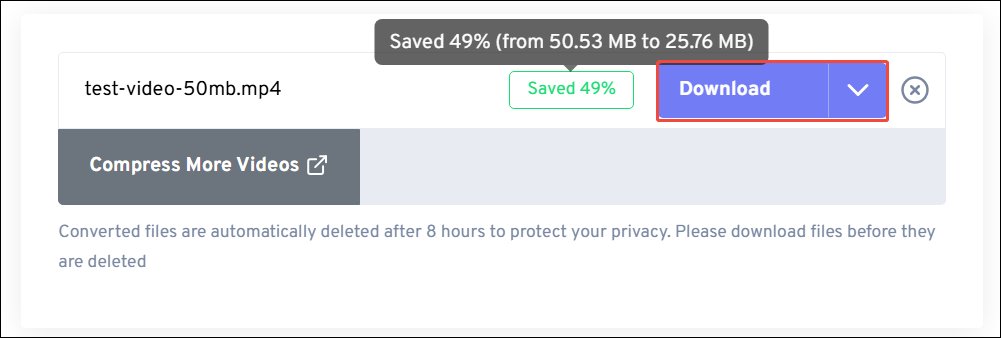
Next, I click the Compress Now option to start compression. Once compression finished, I clicked Download to save the compressed video on my computer.
For users who don't want to download software, FreeConvert is indeed a good choice. However, the free version limits you to compressing a single file of no more than 1 GB at a time.
Which Compressor Is Right for You
I found MiniTool Video Converter and FreeConvert to be quite good compression tools. After using them, each of them has its advantages and disadvantages. I will list them below for your reference so you can choose the one that best suits you.
1. Compression Speed
Based on my own experience, MiniTool Video Converter is faster than FreeConvert. Online tools like FreeConvert rely on shared internet resources rather than directly utilizing your personal computer's high-performance hardware. Therefore, they are not as fast as compression software like MiniTool Video Converter.
2. Compression Settings
When it comes to compression controls, I prefer MiniTool Video Converter. I like that it displays the estimated video file size in real time as I adjust the compression level, enabling me to make precise adjustments to suit my needs. Although FreeConvert also allows you to modify the compression ratio, I have to calculate the result myself, which feels less convenient.

3. Device Compatibility
Since FreeConvert is online software, I can theoretically access it through any device with a browser and search engine. I have personally used the FreeConvert website to compress videos on my computer, tablet, and phone without any problems. In contrast, MiniTool Video Converter is less compatible. It can only be installed and run on my Windows computer.
Common Pitfalls in Video Compression
Here are three points that I think are important in video compression:
- Over-Compression: While ensuring the video file size meets platform limits, avoid over-compressing the video. Excessive compression can lead to severe quality loss.
- Incompatible/Outdated Export Formats: The compression output format must meet the platform requirements. Furthermore, older formats may cause playback failures on some modern devices and should be avoided.
- Ignore Audio: Audio parameters need careful adjustment. Even with flawless visuals, compressed or distorted audio can ruin the professional look.
Conclusion
Both MiniTool Video Converter and FreeConvert help me compress video to desired size. Through an analysis of their advantages and disadvantages, I found the former one to be more suitable for my needs. Furthermore, issues such as over-compression, format incompatibility, and audio quality degradation also require attention.
If you encounter any difficulties while using MiniTool Video Converter, please email support@minitool.com for help.
User Comments :