This article will explain what video compression is. It will also tell you how to compress video for storage in 3 ways, including using a video compressor, zipping the video, and reducing the video quality.
As your collection of videos, audio, photos, and documents keeps growing, your storage space shrinks. Don’t worry, there’s no need to delete your favorite videos. Just compress them to free up some space.
Why Compress Video for Storage
Video creators often accumulate large amounts of video footage or backup videos, and as these files grow, the available hard drive space gradually decreases. Furthermore, creators may also upload some videos to cloud storage services such as iCloud, pCloud, and Google Drive for backup. These platforms also have limited storage space.
Whether the storage space is insufficient on your device or on cloud storage platforms, you can solve this problem by compressing your videos.

Understanding the Basics of Video Compression
Before learning how to compress videos, let’s understand what affects the size of video files.
1. Codecs
A codec is a technology used to compress and decompress video data. It includes both an encoder and a decoder. Common video codecs include H.264 (AVC), H.265 (HEVC), VP9, and AV1. Audio codecs include AAC, FLAC, and Opus, among others. These codecs provide efficient compression.
2. Bitrate
Bitrate refers to the amount of data processed or transmitted per unit of time (per second). A higher bitrate results in clearer video and richer audio. However, the video file size also increases.
3. Frame Rate
Frame rate is the number of still images a video contains per second. Higher frame rates result in smoother visuals but larger video file sizes. In general, frame rates of 60 and 120 fps are sufficient for creating smooth, natural motion effects.

4. Resolution
Resolution refers to the number of pixels that make up a video image. It also affects the size of the video file. The higher the video resolution, the clearer the image, but the larger the video file size. Resolution is expressed as width multiplied by height. Common resolutions include 3840×2160 (4K), 1920×1080 (1080p), and 1280×720 (720p).
Best Method to Compress Your Video File
If you want to compress video to free up storage, you can try MiniTool Video Converter. This application supports compressing video up to 8K. It can help you compress videos without sacrificing quality.
MiniTool Video Converter can compress videos to between 10% and 100% of their original size. The compression percentage is adjustable. This software supports exporting videos in three formats: MP4, WebM, or MKV. In addition, it also supports batch video compression.
I’ve tried many online video compressors before. However, I found that the videos were watermarked after compression. MiniTool Video Converter, on the other hand, does not add watermarks to videos. Furthermore, most online compressors limit the video file size. MiniTool Video Converter does not limit video file size or video duration.
If you want to know how to use MiniTool Video Converter to compress video for storage, follow the steps below:
Step 1: Download and Install MiniTool Video Converter
To get started with MiniTool Video Converter, click the button below to download and install it on your computer.
MiniTool Video ConverterClick to Download100%Clean & Safe
Step 2: Import Your Video
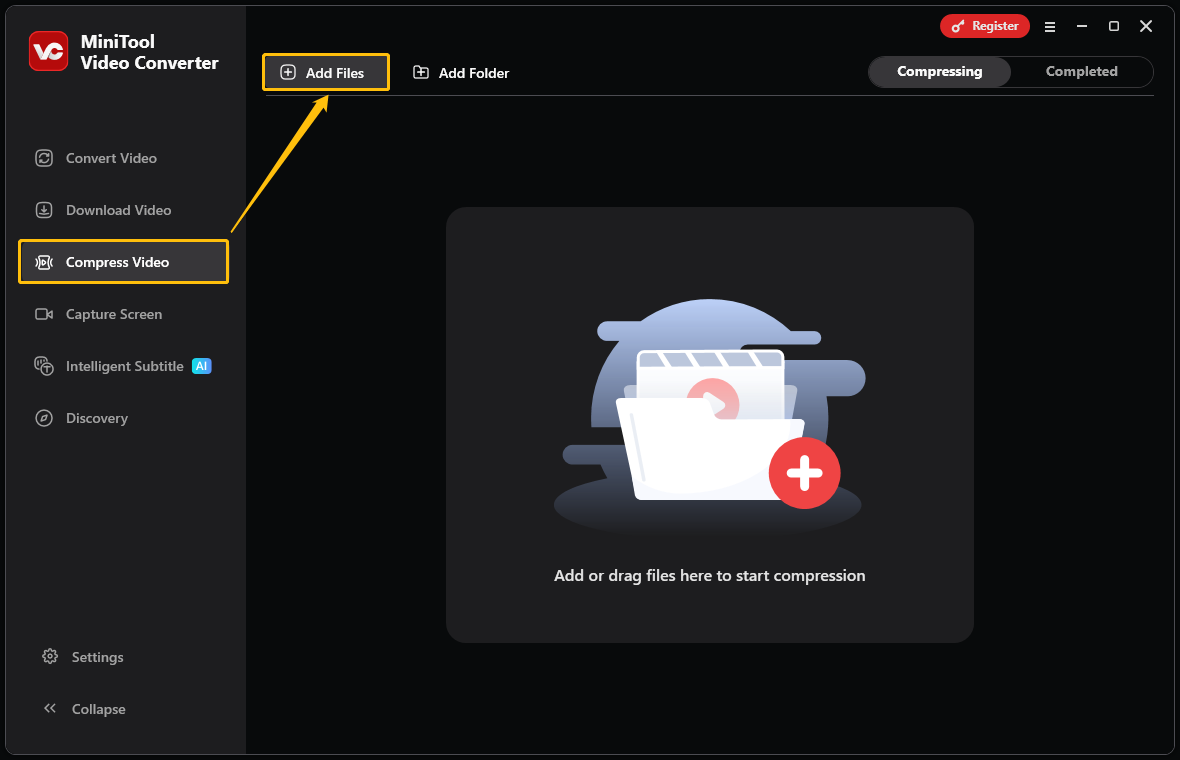
Launch this free video compressor. Then, switch to the Compress Video tab. Here, click Add Files at the upper-left of the workspace to import the video you want to compress.
Step 3: Modify the Compression Options
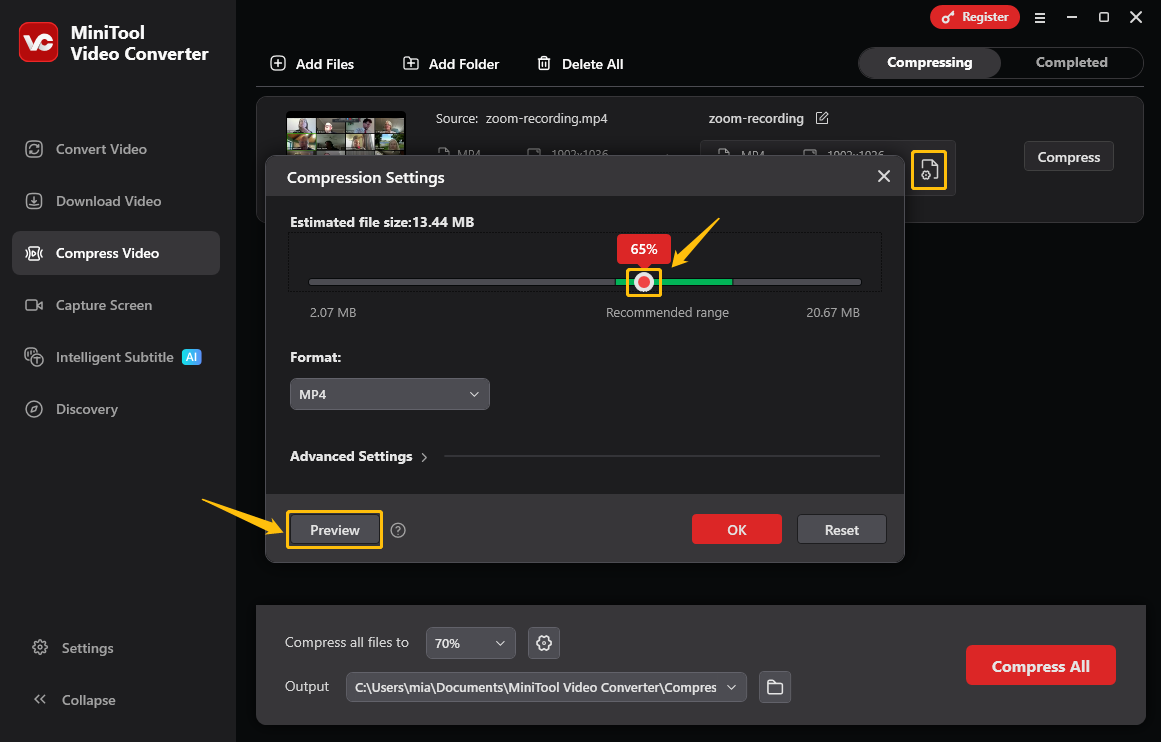
Click the settings icon to access the Compression Settings window. Then, you can drag the red dot on the slider to choose a desired compression percentage. If you’re unsure whether the compression level is appropriate, you can click the Preview button to check the video quality. If the video image is blurry, lower the compression level.
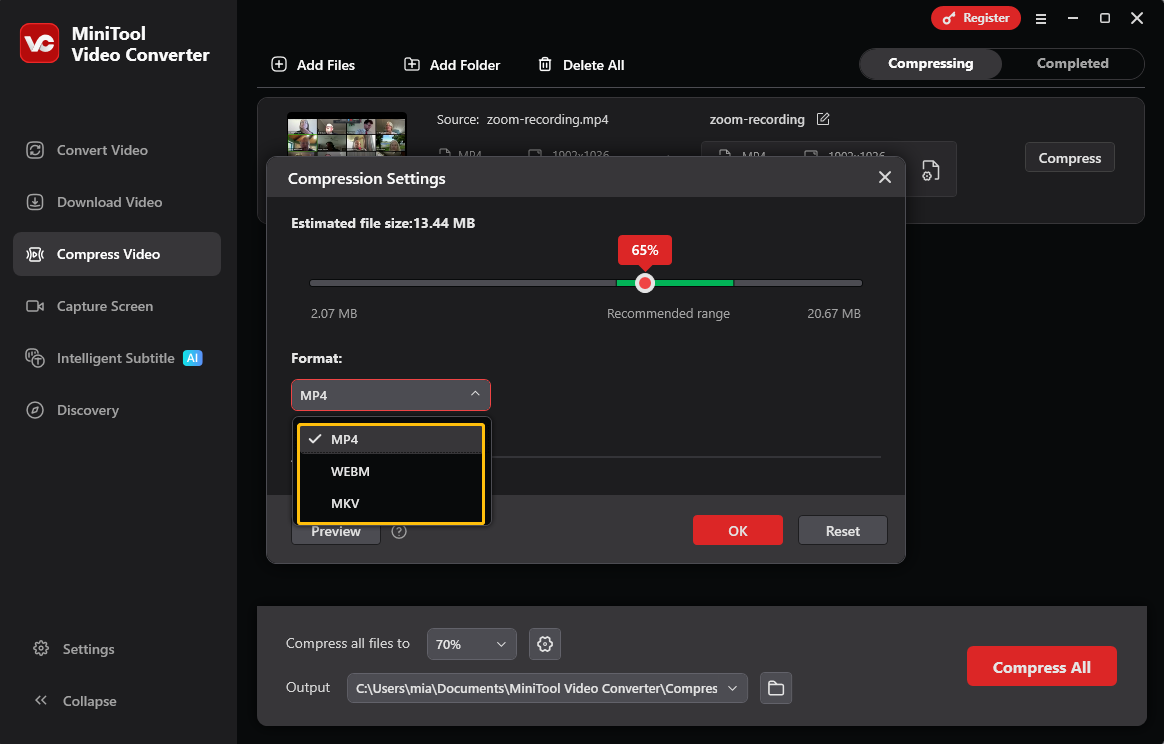
After that, expand the Format option and select the output format (MP4, WebM, or MKV).
Step 4: Adjust the Video Parameters (Optional)
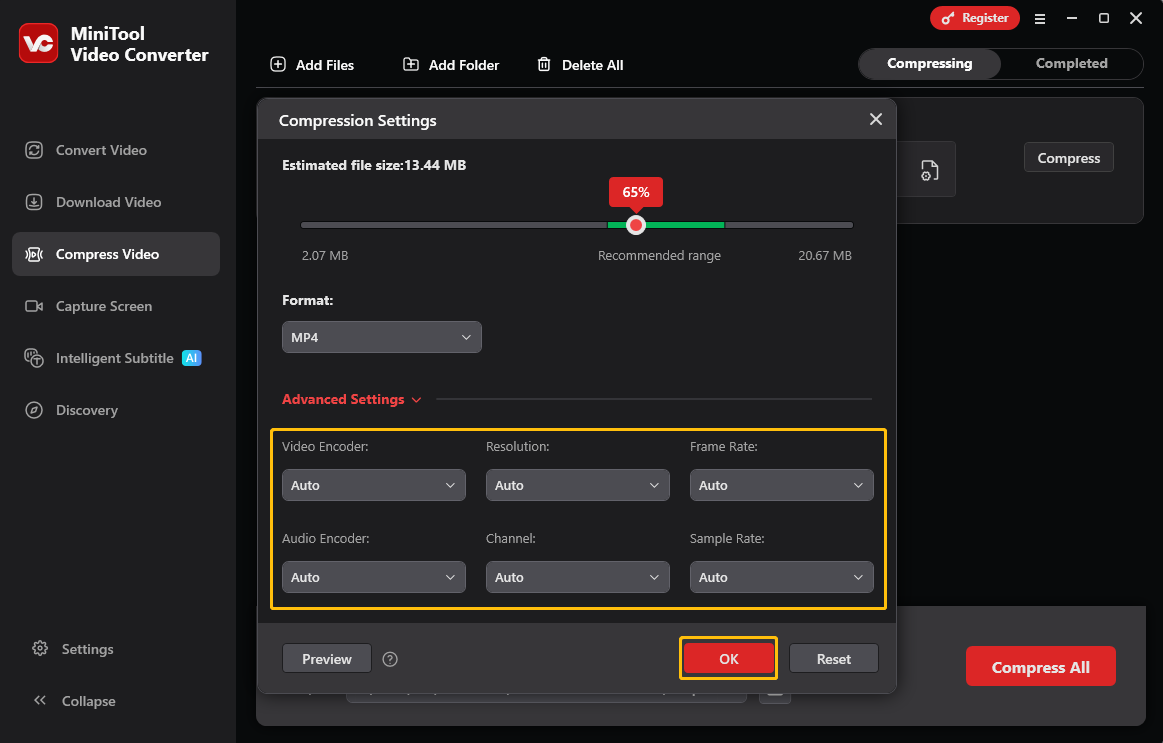
Expand the Advanced Settings option. Then, you can adjust the video encoder, resolution, frame rate, audio encoder, channel, and sample rate. Once you have made your selections, click OK to confirm.
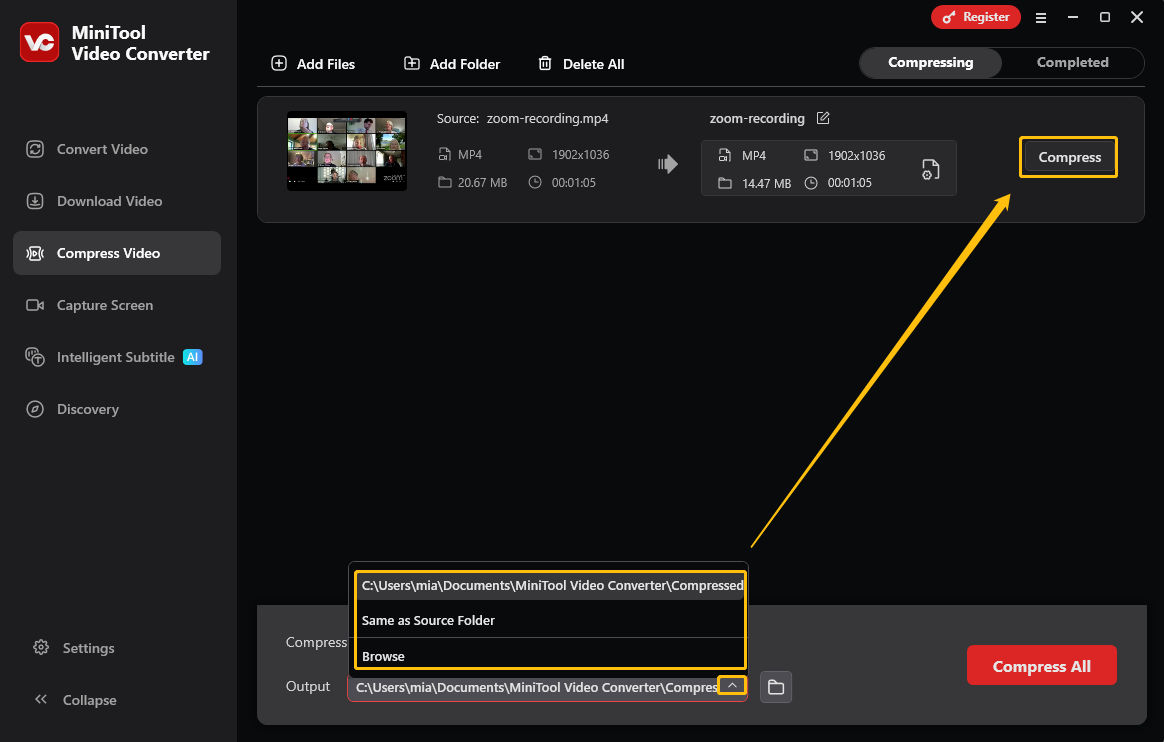
Step 5: Set the File Storage Location
Expand the Output option at the bottom of the interface. Then, select a folder to save the compressed video.
Step 6: Start Compression
Click the Compress button to start the compression process.
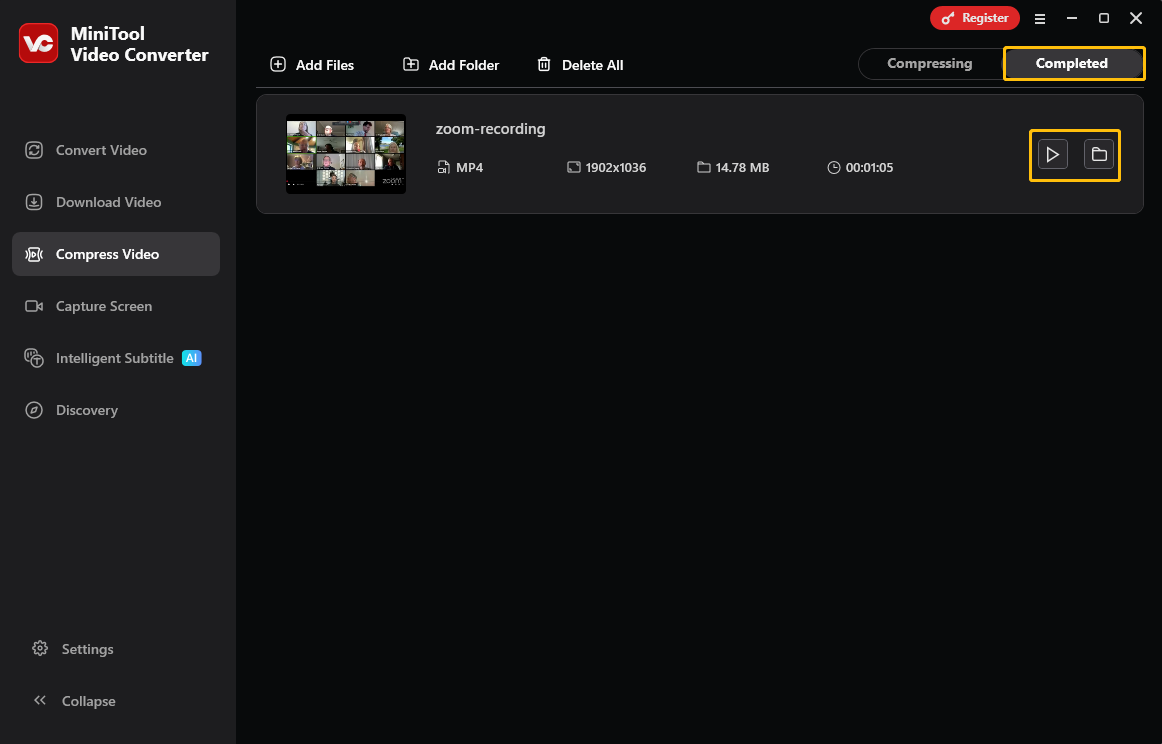
Step 7: Locate the Compressed Video
Once the compression process ends, the application jumps to the Completed tab. There, you can click on the play icon to view the compressed videos, or click the folder icon to open it in Explorer.
MiniTool Video Converter shrinks clips in seconds. It can also generate subtitles for your video, convert your video to other formats, or turn speech into text while you’re at it.
Conclusion
This article explains the impact of codecs, bitrate, resolution, and frame rate on video file size. It also demonstrates in detail how to compress video for storage using MiniTool Video Converter. With this software, you can significantly shrink video size, saving space on your device.
User Comments :