YouTube TV offers many popular channels with a wide range of movies and shows. Can you record them all? How to record on YouTube TV? All these questions are discussed in this free file converter post from MiniTool.
YouTube TV is an over-the-top streaming television subscription service in the United States run by YouTube. It boasts more than 8 million subscribers and offers over 85 of the best entertainment, news, and live sports channels. Can you record on YouTube TV? How to record on YouTube TV? You can find the answers in this article.
Why Record on YouTube TV
YouTube TV allows its users to record shows, and it has unlimited space for your recordings so that you can record movies and shows without any limitations.
There are some pros of recording on YouTube TV:
- While recording sports, YouTube TV automatically extends the scheduled recordings by up a half an hour if it detects that the game is taking more than expected time to finish.
- After recording, you can skip ads in most recordings, like DVR recordings.
- You can save recordings on your devices for offline watching anywhere and anytime.

How to Record YouTube TV with DVR
YouTube TV offers multiple channels with a full lineup of movies and shows. However, the channels that YouTube TV has depend on where you live. Generally, there are 70 channels available, and you can record shows on many channels like Fox TV, NBC, ABC, etc.
Can you record these shows on YouTube TV? How to record on YouTube TV? Fortunately, YouTube features a built-in recording tool: the cloud DVR, which allows users to record and keep shows for up to nine months.
Now, let’s see how to record on YouTube TV.
1: Open your YouTube TV and log in to your YouTube TV account.
2: Use the Search box at the top to search for the TV show you want to record.
3: You will see a + icon on the right side of the show. Click this icon to start recording.
4: Check the record process and result.
- Go to your YouTube TV account.
- Click the LIBRARY tab at the top.
- Click to play the recorded show.
If you do not want to record the show, you can remove it from YouTube TV’s library by clicking the Remove button next to the show.
Although screen recording on YouTube with DVR is quite convenient, it has some limitations. The recordings can only be saved for nine months, so you can’t keep them for later viewing indefinitely. Additionally, the recordings can’t be shared with people who don’t have a YouTube TV account. Furthermore, the recorded videos become inaccessible after your billing cycle expires if you decide to terminate your YouTube TV subscription.
To address these issues, I suggest using some third-party screen recorders to capture your favorite YouTube TV content and save it on any device permanently. Therefore, in the following content, I have listed some reliable screen recorders that can help you screen record on YouTube TV for free. Read on for more.
How to Record YouTube TV on Windows
To record YouTube TV on Windows, the 3 screen recorders below can do you a big favor.
Option 1: MiniTool Video Converter
The first screen recorder for Windows PCs is MiniTool Video Converter.
What Is MiniTool Video Converter
MiniTool Video Converter is a professional and user-friendly screen recorder that I want to recommend most. Its intuitive interface always empowers you to record computer screens without any hassle. Plus, this free application comes with no ads, bundles, watermarks, or time limits, allowing you to record for as long as you wish.
More than that, MiniTool Video Converter can capture any on-screen activity, such as TV shows, movies, games, online meetings, video/audio calls, presentations, and so on. It gives you the option to record the whole screen or just part of it.
Furthermore, MiniTool Video Converter enables you to record with system audio and microphone sound simultaneously or separately. You can change the output frame rate, quality, hotkeys, and other settings based on your needs.
Just click the download button and have a try!
MiniTool Video ConverterClick to Download100%Clean & Safe
Additional highlights of MiniTool Video Converter:
- It can be used as a file converter to finish a wide range of format conversions quickly, such as MOV to MP4, TS to MKV, DV to FLV, MPG to ASF, WAV to AIFF, AAC to MP3, etc.
- It provides formats for devices and platforms, like Apple, Samsung, Vimeo, YouTube, Facebook, etc.
- It lets you customize the output parameters according to your needs, like encoder, sample rate, bitrate, resolution, frame rate, and more.
- It can function as a file compressor, allowing you to reduce file size by changing resolutions, formats, etc.
- It allows you to convert up to 5 files at once.
- It enables you to download YouTube videos, music, playlists, etc. effortlessly.
Step-by-Step Guide on How to Record on YouTube TV Using MiniTool Video Converter
Some of you may not have used this software before, so you don’t know how to handle it. Don’t worry. Here’s a specific and clear guide:
Step 1: Download and install MiniTool Video Converter for free.
Click the download button below to download and install MiniTool Video Converter on your computer.
MiniTool Video ConverterClick to Download100%Clean & Safe
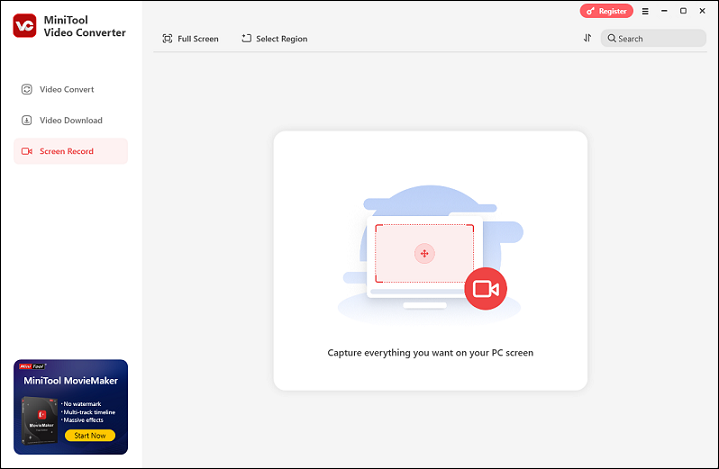
Step 2: Open the MiniTool Screen Recorder window.
Launch MiniTool Video Converter and click the Screen Record tab. Next, click the Capture everything you want on your PC screen region to open the MiniTool Screen Recorder window.

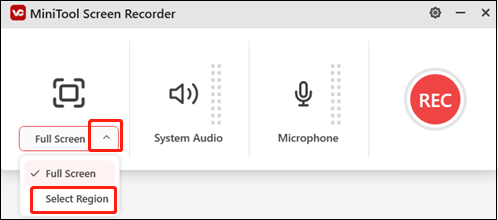
Step 3: Select the recording area.
You can record the full screen by default. If you want to select a recording area, expand the Full screen option, click Select Region, and then drag and move the mouse cursor to choose the area you want to record.
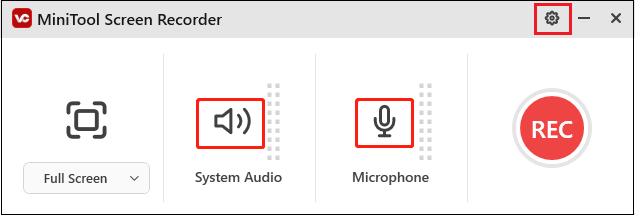
Step 4: Manage the audio source.
Click the System Audio icon and the Microphone icon to turn them on or off according to your requirements. If you want to change the quality, frame rate, hotkeys, and more settings, click the gear icon on the top right to open the Settings window.
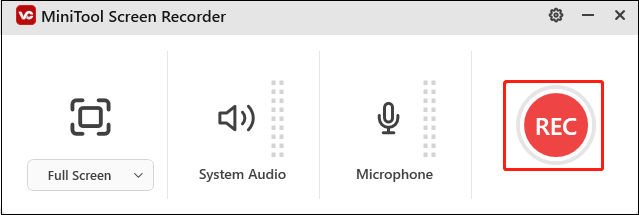
Step 5: Start recording.
Enter YouTube TV’s official website, log in, and let the show you want to record be ready. After that, click the red REC button to start recording. After a three-second delay, the recording will begin.
Step 6: Stop the recording.
In the process of recording, you can press F9 to pause or resume the recording. When you want to end the recording, press F6 on your keyboard. Then, you can check the recorded video in the Screen Record section.
With MiniTool Video Converter, recording YouTube TV on Windows is a breeze!
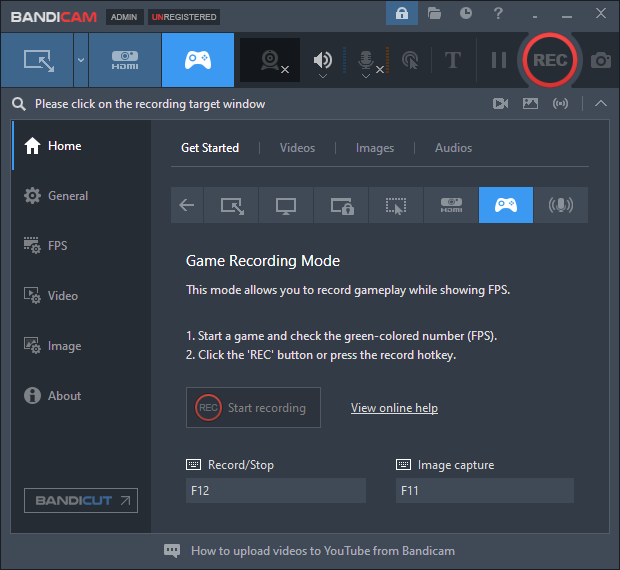
Option 2: Bandicam
Bandicam is a powerful screen recording software that can capture anything on your PC screen as a high-quality video. It offers several recording options, such as full screen, capturing a selected area, a specific window, and more. Additionally, Bandicam allows you to include your face in a corner of your video, enabling you to record both your screen and webcam.
Moreover, Bandicam utilizes a hardware-accelerated H.264/HEVC/AV1 (NVIDIA, Intel, AMD) codec to maximize recording performance, which enables seamless, high-speed, high-compression-ratio, and high-quality recording.
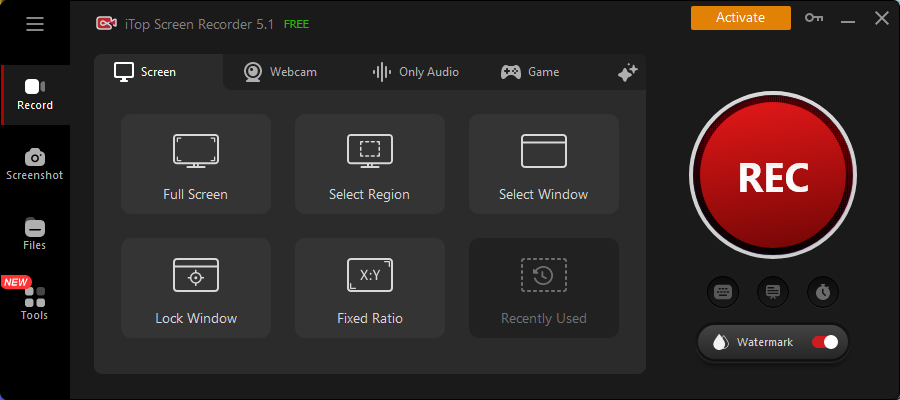
Option 3: iTop Screen Recorder
iTop Screen Recorder is also a robust screen recording tool supported by Windows. This software features a simple interface that enables every user to become familiar with it quickly. It lets you record any area of your screen, full screen, and a window with audio and webcam.
Plus, with iTop Screen Recorder, you can record 4K/1080p, 120fps videos without lag or dropped frames. Moreover, before recording, you can adjust output parameters for recording, like frame rate, resolution, quality, and more.

How to Record YouTube TV on Mac
How can you record YouTube TV on Mac? There are 2 effective methods.
Option 1: QuickTime Player
QuickTime Player is a feature-rich software developed by Apple Inc. It works with a variety of digital videos, images, sounds, panoramas, and more. Additionally, it can record screen, audio, videos, and webcam footage. It is free and can capture almost everything on a Mac computer.
Here’s how to screen record on YouTube TV with QuickTime Player:
1: Launch QuickTime Player on your Mac. From the menu bar, click File, and choose New Screen Recording.
2: You can click the arrow icon next to Record to adjust some settings, like capturing the microphone sound or other audio.
3: Click the Record button. Then you have two options:
- Click anywhere on the screen to start recording the full screen.
- Drag the mouse cursor to select the recording area and click Start Recording.
4: When you want to stop the recording, click the Stop button in the menu bar.
The recording will start up automatically in QuickTime Player. It is playable, editable, and shareable.
Option 2: EaseUS RecExperts
EaseUS RecExperts is a powerful Mac screen recorder that is user-friendly for novices, thanks to its straightforward interface. It can function as a full-screen recorder for YouTube TV shows and allows you to flexibly select the capturing zone when you want to record just a portion of the screen.
Additionally, EaseUS RecExperts can capture any activity on your Mac computer screen, including games, online chats, online lectures, and more. It also enables webcam recording. Once recorded, you can export the video in various formats.
Now, follow the step-by-step guide below to record YouTube TV on Mac:
1: Head to EaseUS RecExperts’ official website to download and install this program.
2: Open the video you want to record on YouTube TV. Then launch EaseUS RecExperts to enter its main interface.
3: In EaseUS RecExperts, if you wish the record the entire screen, click the Full Screen option; if you want to specify a recording area, click the Region option and choose the area you want.
4: Based on your needs, you can choose to record with system audio and microphone sound or not.
5: To access more settings, open the Settings option, and then you can change the output format, quality, etc.
6: Finally, click the REC button to start recording.
7: To stop the recording process, click the Stop icon. Then, you can view the recording in the Recordings section.
You can record YouTube TV on Mac smoothly with EaseUS RecExperts!
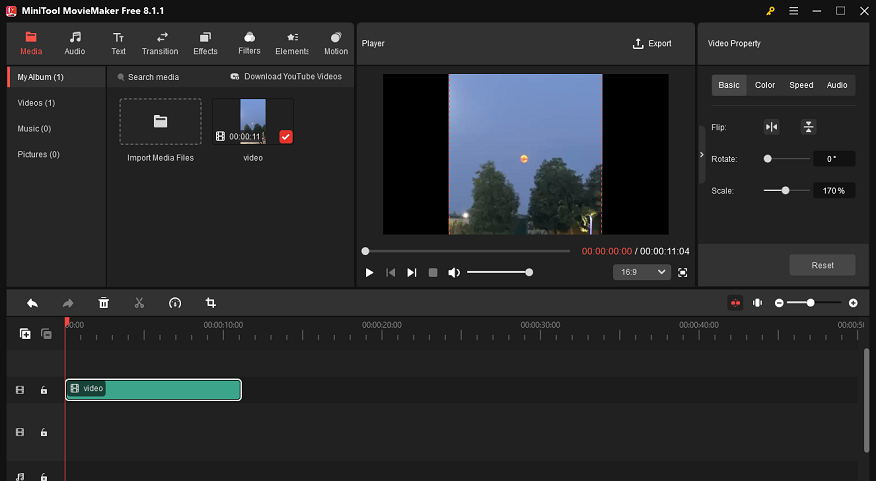
Bonus: Excellent Video Editor
In this section, I’d like to introduce a powerful and versatile video editor – MiniTool MovieMaker, designed to enhance the appeal of your videos. MiniTool MovieMaker offers numerous editing functions, allowing you to edit videos by trimming, cropping, splitting, reversing, rotating, and more. Additionally, you can add transitions, filters, motions, effects, text, music, and more to your videos.
More than that, this free video editor without watermark can function as a media player, supporting playback of various video/audio formats, including MP4, MOV, MKV, AVI, WMV, FLV, MP3, M4A, WAV, etc. It can also be a file converter, finishing format conversion in a flash.
Furthermore, MiniTool MovieMaker can be used as a file compressor. It can reduce file size by adjusting frame rate, resolution, quality, and more. As well, this free application allows you to merge multiple video/audio files into one.
MiniTool MovieMaker is completely free of ads, bundles, or watermarks. Just click the download button below and have a try!
MiniTool MovieMakerClick to Download100%Clean & Safe
![[Solved] How to Record on Xfinity Smoothly and Effortlessly?](https://images.minitool.com/videoconvert.minitool.com/images/uploads/2024/10/how-to-record-on-xfinity-thumbnail.png)
Conclusion
How to record on YouTube TV with no effort? This post offers a comprehensive guide to help you screen record on YouTube TV. By following the specific instructions above, you can record YouTube TV content on Windows/Mac smoothly. In addition, as a bonus, I recommend an excellent movie maker, MiniTool MovieMaker, for video editing. Hope this article is helpful!
You can get in touch with us via support@minitool.com if you have any questions while using MiniTool Video Converter or MiniTool MovieMaker. Also, you can send me messages directly on Twitter. I’ll reply to you as quickly as I can.
User Comments :