ShareX is a Windows screen recorder and it may not be able to record screens for some reasons. How to fix that problem? In this post from MiniTool Video Converter (a free file converter), we will analyze the reasons for why ShareX screen recording doesn’t work and how to troubleshoot the ShareX screen recording not working issue.
ShareX is a free and open-source screen recorder for Windows. You can use it to make screenshots and record any activities happening on your screen. Also, it is a screen recorder with annotation tools. Have you ever encountered the issue of ShareX screen recording not working? What causes that issue and how to fix it? Read the following content and you’ll find the answer.
Causes of ShareX Screen Recording Not Working
Do you know the reasons why ShareX screen recording is not working properly? That problem arose from various causes. Among them, the built-up cache and drivers are the main reasons. Because the outdated driver can prevent ShareX from accessing the GPU and the build-up of cache and junk files can affect the performance of ShareX.
In addition to those two main reasons, other causes can also cause ShareX screen recording not to work, such as wrong microphone configuration, corrupted ShareX installation, or wrong video codec.
How to Fix ShareX Screen Recording Not Working
In this part, we have compiled 7 feasible solutions to solve the issue of ShareX screen recording not working. Now, let’s check them one by one.
Solution 1. Check the Microphone
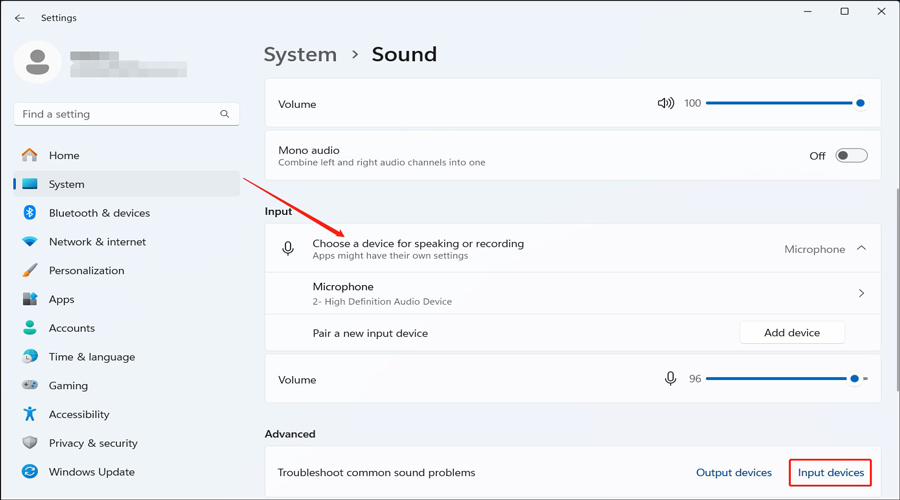
Why is ShareX not recording audio? The first thing you need to do is to check the microphone. Making the proper microphone detection for ShareX screen recording is a possible way to troubleshoot that issue. You can navigate to Settings > System > Sound > Input. Then choose the right microphone. If your microphone is not detected, click the Input device option behind Thoubleshoots common sound problems.

Solution 2. Install Recorder Devices
You can also try to install Recorder Devices if your ShareX screen recording not working. Here’s how:
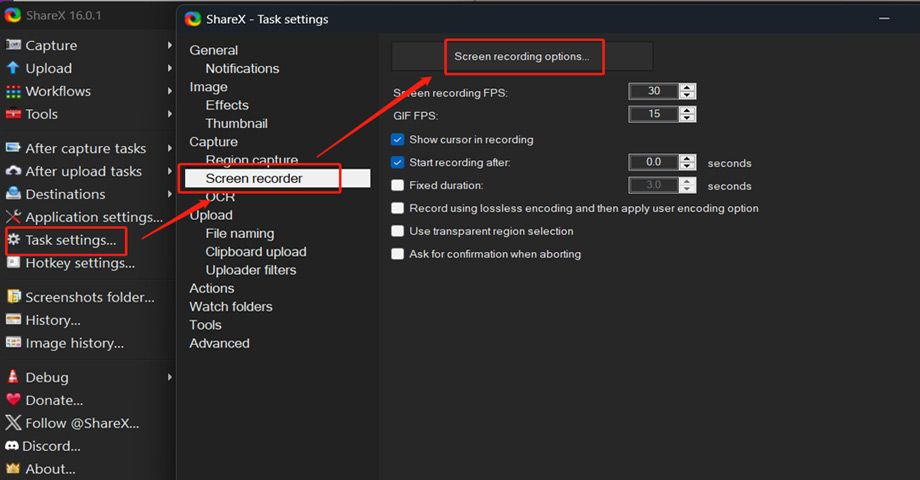
1. Open ShareX, click the Task Settings, choose Screen recorder, and click the Screen recording options button.

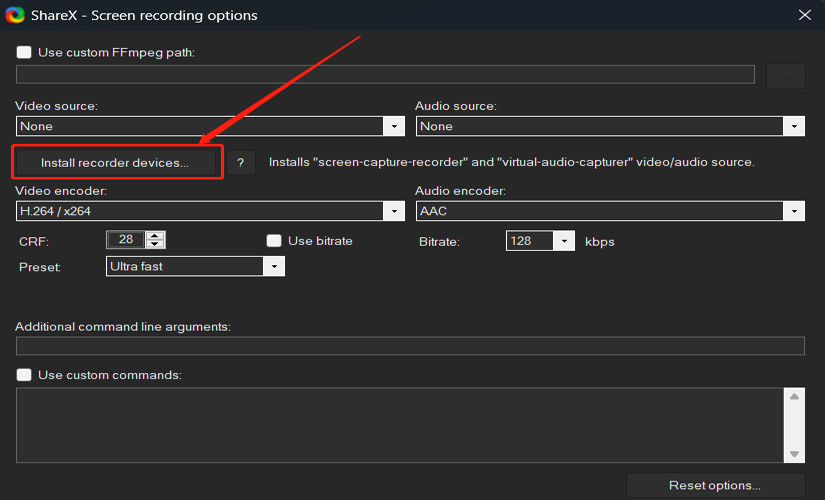
2. Click the Install recorder devices option.

Solution 3. Restart ShareX
Sometimes, you can also try to restart ShareX to solve the ShareX not recording audio or screen recording not working issue. What should you do is go to Task Manager on your PC and find ShareX in the Processes section. Next, right-click on it and select the End Task option to close ShareX. Later, restart it.
Solution 4. Reinstall ShareX
It is also a good way to reinstall ShareX when your ShareX screen recording doesn’t work. Your ShareX may be outdated and has some bugs. When you reinstall it to the latest version, the problem can be solved.
Solution 5. Change FFmpeg Path
ShareX screen recording not working can also be caused by the limited storage space. The ShareX screen recording will be saved in FFmpeg path. If this area doesn’t have much storage space, you may not be able to record screens successfully. In that case, you can try to change the FFmpeg path.
1. Navigate to Task Settings > Screen recorder > Screen recording options.
2. In the Use custom FFmpeg path section, click the three-dot icon to change its path.
Solution 6. Change the Video Codec
Why did the screen recording process crash? It may be caused by the inappropriate video codec. You can also try to change the video codec in the Screen recording options window.
Solution 7. Use a ShareX Alternative for Screen Recording
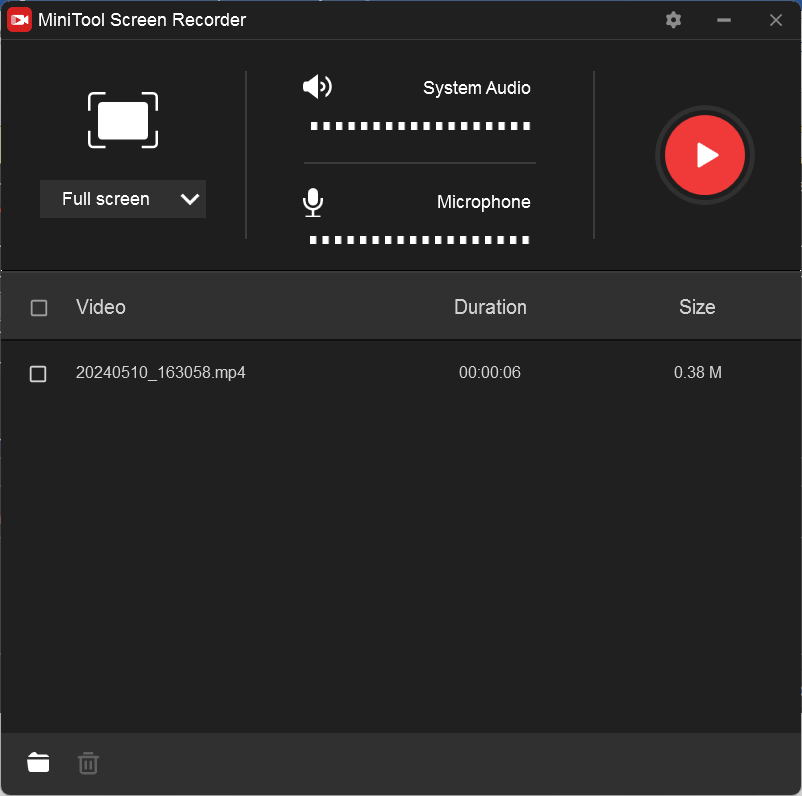
If you find the above solutions don’t work, you’d better try a ShareX alternative for screen recording. MiniTool Video Converter is a good choice, which is a free and easy-to-use screen recorder without time limits. It can record the full screen and selected region according to your needs with a microphone and system audio. Furthermore, it enables you to record mouse movements and save recordings in various formats like MP4, FLV, MOV, MKV, etc.
MiniTool Video ConverterClick to Download100%Clean & Safe

To Wrap Things Up
Why ShareX screen recording not working? Try to check the microphone, install recorder devices, change the FFmpeg path, use MiniTool Video Converter, or other solutions. Hopefully, this post is helpful to you!


User Comments :