Muvi Live is a reliable live-streaming platform provider. This article, which is from the best free file converter, aims to guide you to record Muvi Live on Windows, Android, and iOS.
What Is Muvi Live
Designed for mobile phone and PC users, Muvi Live enables users to begin instant live streaming effortlessly. As a powerful live-streaming application, it also has a versatile nature. In recent years, Muvi Live has won great popularity among users. In the next, you will learn a method to screen record on Muvi Live.
How to Record Muvi Live on Windows
If you want to record Muvi Live on Windows, MiniTool Video Converter, which is a remarkable screen recorder, can be a must-have choice for you.
An In-Depth Tutorial
Below is a step-by-step tutorial on how to record Muvi Live.
Step 1. Download and install MiniTool Video Converter on your PC.
MiniTool Video ConverterClick to Download100%Clean & Safe
Download MiniTool Video Converter by clicking on the download button above. Then follow the on-screen instructions to install it on your computer. Then run MiniTool Video Converter to enter its main interface.
Step 2. Access the MiniTool Screen Recorder and select the recording area.
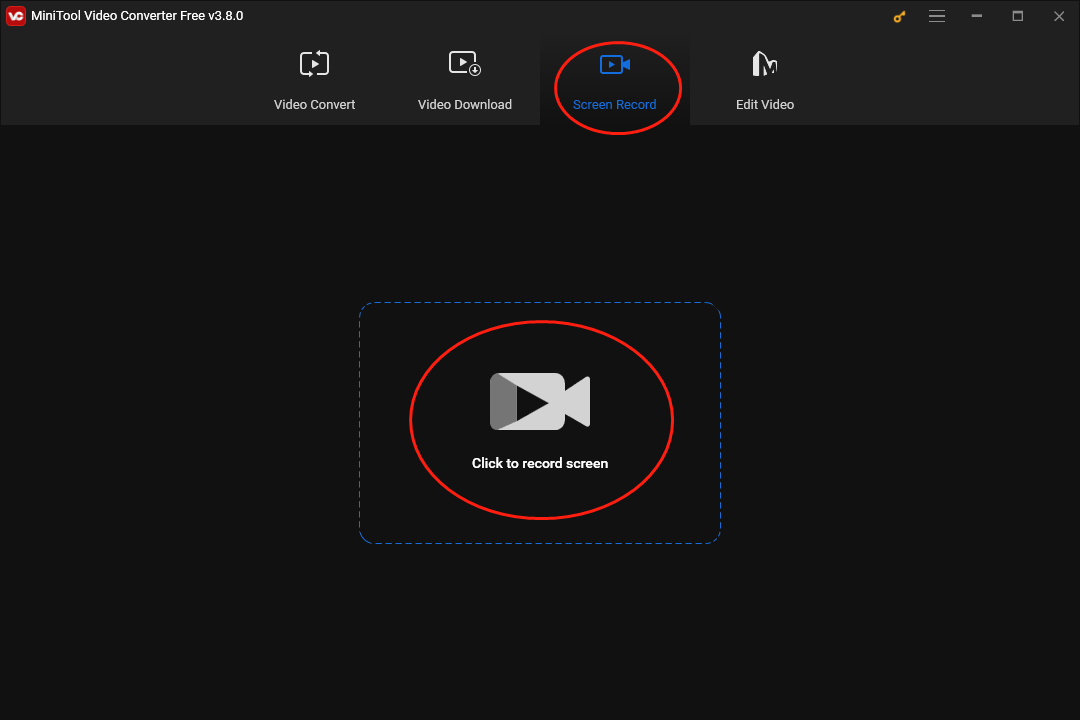
In the main interface of MiniTool Video Converter, switch to the Screen Record module and click on Click to record screen to access the MiniTool Screen Recorder. The recorder will record the whole screen by default. If you want to choose the recording area based on your needs, please press the Alt + R keys.
Step 3. Customize the recording settings.
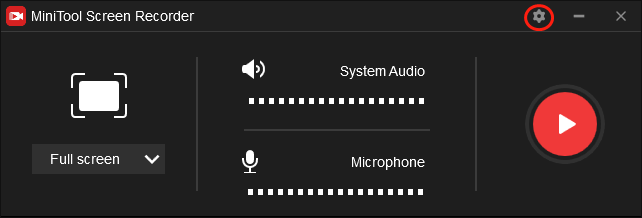
Click on the gear icon to access the setup interface of the screen recording.
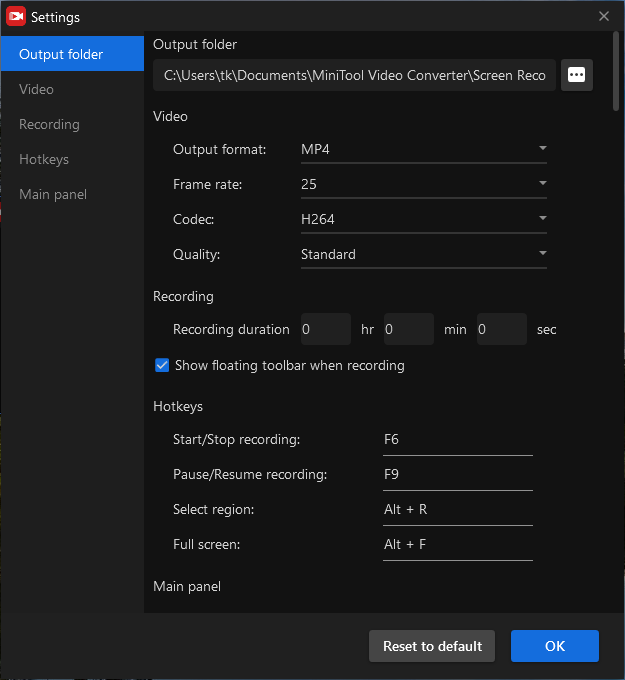
In the pop-up interface, you are free to choose different frame rates, such as 15fps, 20fps, 25fps, 30fps, and 50fps. Simultaneously, you can set the recording quality as high quality, original quality, and standard quality. In addition, you have the freedom to choose a saving path as you want. Finally, click on the OK button to save the changes that you have made.
Step 4. Control the recording audio and begin your recording.
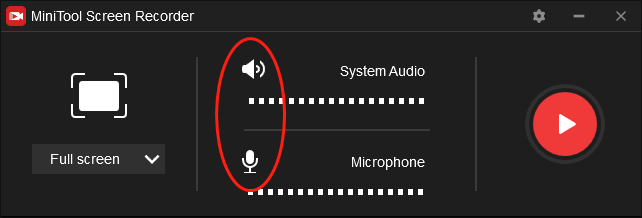
Considering that you want to record Muvi Live, you can turn on/off the system and microphone sound by clicking on the System Audio icon and the Microphone icon respectively. In the next, press the F6 key to begin your recording. After a 3-second countdown, launch Muvi Live.
Step 5. End your recording and check your recording file.
Once your recording is over, press the F6 key to end it. Then go to the location that you have chosen before to check your recording file.
With the detailed instructions above, Windows users can record Muvi Live easily and quickly. In addition, MiniTool Video Converter is more than a screen recorder. Please read on for more features of MiniTool Video Converter.
Other Features of MiniTool Video Converter
- It empowers you to download playlists, videos, and subtitles from YouTube.
- It enables you to convert your audio/video files to a wide range of formats such as MP4, WMV, WAV, MP3, M4A, AVI, and so on.
- It allows you to convert your files to many device-supported formats, including Android, Huawei, Samsung, and Apple.
- It is capable of converting your files to multiple platform-supported formats such as Vimeo, Instagram, YouTube, and Facebook.
MiniTool Video ConverterClick to Download100%Clean & Safe
How to Record Muvi Live on Android
Below are the detailed steps to help Android users.
Step 1. Download and install AZ Screen Recorder from Google Play app store. Then launch it.
Step 2. Begin your recording by hitting the orange camera button. Then go to Muvi Live and start your activities.
Step 3. Once your recording is over, click on the bubble icon on your screen to end it. Then go to view and check your recording file.
With the guidance above, it will never be difficult for Android users to record Muvi Live.
How to Record Muvi Live on iOS
If you are an iOS user and want to record Muvi Live, the following tutorial will do you a big favor.
Step 1. Download and install DU Recorder on your iOS device. Next, go to the Settings app and select Customize Controls under the Control Center section. Then hit the green plus icon to enable the Screen Recording option.
Step 2. Navigate to the Control Center. Then press and hold the Record icon. Under the Screen Recording option, click on DU Recorder Live to begin your recording.
Step 3. Run Muvi Live and start the content that you want to record.
Step 4. Once the recording is done, go to the Control Center and click on the Record icon again to end it. Then go to the Photos app to check your recording file.
With the instructions above, iOS users can record Muvi Live effortlessly.
In Summary
To conclude, this article has offered a comprehensive guide to record Muvi Live on Windows, Android, and iOS. Just follow the above tutorials.




User Comments :