OBS Studio is one of the best screen recording applications. Its Virtual Camera feature can create a camera input on your computer and can present it as a webcam in applications like Zoom, Skype, Discord, Teams, etc.
However, sometimes the camera is not showing up or detected in OBS in Windows 11/10. In this post, you’ll learn effective solutions to the OBS virtual camera not showing up/working problem.
Tip 1: Check If Your OBS Has the Virtual Camera Button
In the bottom right corner of OBS, you should see the Start Virtual Camera option. However, if you can’t see it, it means you’re using an older version of OBS Studio. To fix the no virtual camera button issue, you should update OBS Studio to the latest version.
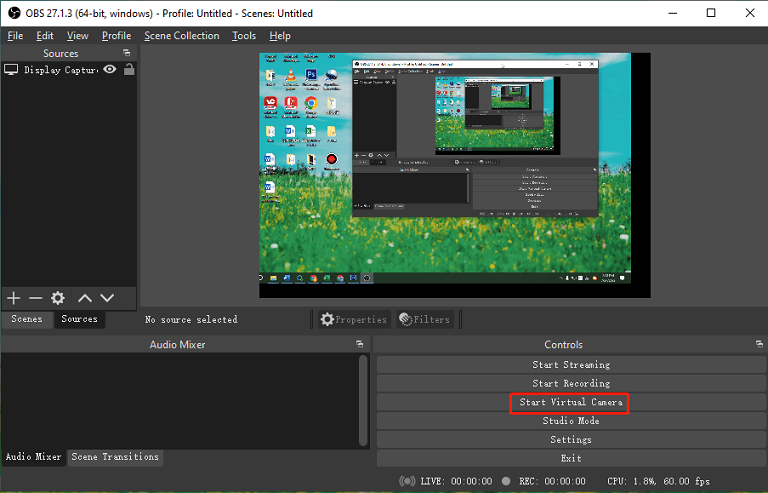
Click Help at the top, select the Check For Updates option, and click Update Now to install the latest version of OBS. Then, you’ll find the Virtual Camera will be included in the default installation.
Tip 2: Make Sure OBS Virtual Camera Is Enabled
If you see an error screen that has a crossed-out camera in Zoom or other applications, this indicates the Virtual Camera is not turned on in OBS. To fix the OBS Virtual Camera not showing up, go back to OBS and click on the Start Virtual Camera button and see if you have the scene created in OBS. Also, make sure that OBS Virtual Camera is selected inside Zoom or other applications. If you select the wrong camera, only the normal webcam is visible.
Tip 3: Restart Your Computer
Also, you can restart your computer to fix OBS virtual camera not working because this issue might be caused by a temporary glitch with your system. Restarting your PC is a simple fix. After that, launch OBS and check if the problem is solved.
Tip 4: Run OBS as Administrator
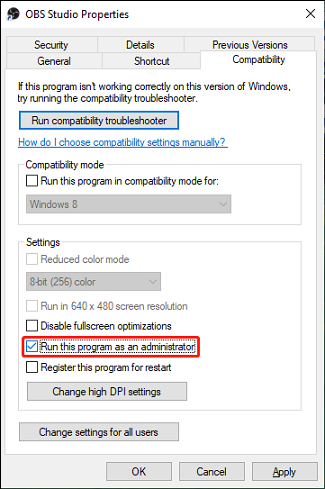
Another solution to OBS camera not working is to run this application as an administrator. To do this, right-click the OBS Studio shortcut on your desktop, select Properties, go to the Compatibility tab, check the box for Run this program as an administrator, and click Apply > OK to save changes.
Tip 5: Reinstall OBS
If these tips can’t help you fix the OBS virtual camera not showing up issue, it’s time to uninstall and reinstall OBS Studio on your computer. To uninstall OBS, press Win + I to open Settings, click Apps, scroll down to find OBS Studio, click on it, and select Uninstall.
Once done, go to the OBS website to download it, and then install it on your computer.
A Free OBS Alternative for Screen Recording
If you need a free alternative to OBS for recording your computer screen, you can try MiniTool Video Converter. It’s a free video and audio converter that includes a screen recorder feature. Hence, this application can be regarded as a replacement for the OBS screen recorder. With MiniTool Video Converter, you can easily record all activities on your screen.
MiniTool Video ConverterClick to Download100%Clean & Safe
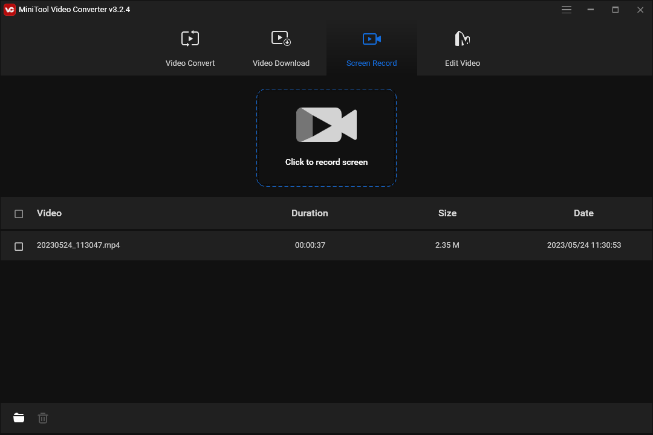
Before recording, you can set the recording frame rate, video format, quality, etc. More importantly, MiniTool Video Converter doesn’t have watermarks or time limits.
Conclusion
This post gives you 5 methods to fix the OBS Virtual Camera not showing up issue. Hopefully, these ways can solve your problem so you can use the virtual camera in your video conference applications.


User Comments :