When we download videos from websites or record videos with phones or cameras, we can know what video formats they are. Do you know what video codecs they use? H.264, AV1, or VP9? Most of us don’t know how to check the video codec. Sometimes, we experience the supported video formats can’t be played on certain media players or devices. This problem can be caused by unsupported video or audio codecs. How to check codec of video file? In the following content, I’ll present you 2 effective ways. What’s more, I’ll recommend the best free tool to change the video and audio codecs.
How to Check Codec of Video File via VLC
VLC is known as a versatile program with various features for playing multimedia files, transcoding videos, ripping DVDs, and more. Meanwhile, it is a cross-platform program that is available on Windows, Mac, Linux, iOS, Android, and other operating systems. How to check the codec of a video file using VLC? You can refer to the below detailed instructions.
Step 1. Go to the official website of VLC to download it and then install it on your computer.
Step 2. Run VLC to get to its main interface, click the Media tab from the top menu bar, choose the Open File option to locate the video you want to check, and click Open to import it.
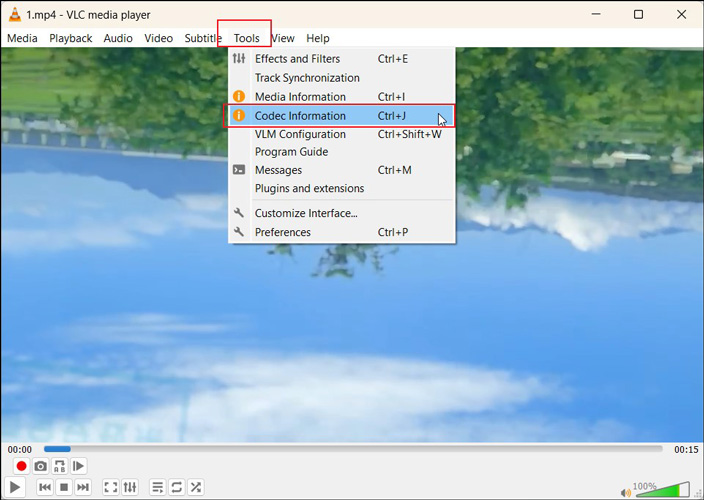
Step 3. Click the Tools tab from the top menu bar and select the Codec Information option.
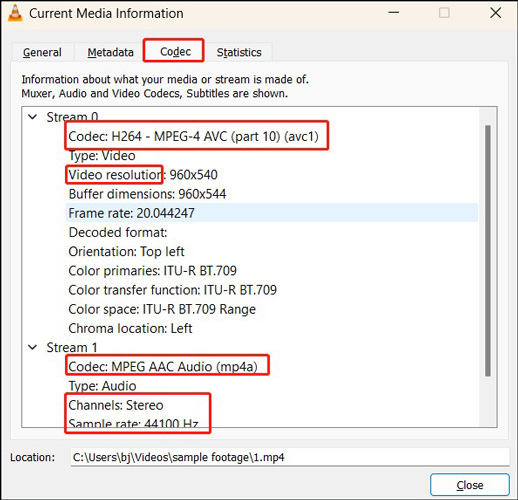
You will be guided to the Codec subtab of the Current Media Information window. Then you can check the video codec and other information like video resolution as well as the codec, channel, and sample rate of audio.

How to Check Video Codec with MediaInfo
MediaInfo is a free and open-source program that can aid you in checking the technical information about media files. It can display information, such as the codec, aspect ratio, frame rate as well as bitrate of video, number of chapters, and relative audio information. It supports most video and audio formats, including but not limited to MKV, AVI, WMV, OGG, MP3, WAV, and AIFF. Below is how to check codec of video file via MediaInfo.
Step 1. Download MediaInfo from its official website and install it. Then launch it.
Step 2. You can click the Media tab, move to Open, and choose File to import the target video. Or you can directly drag and drop the target video into the MediaInfo window.
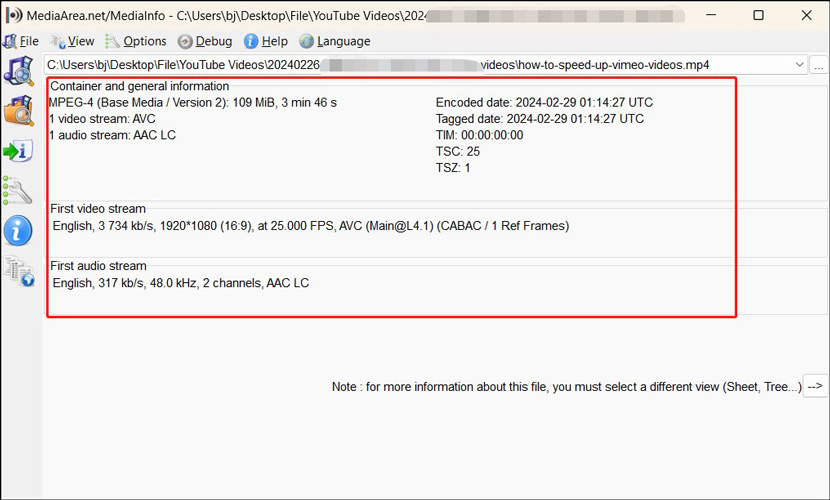
Then the video information will be displayed. You can get the video and audio codecs under the Container and general information section.
Furthermore, if you don’t want to download and install MediaInfo, you can use its online version called MediaInfoOnline.

Best Free Way to Change Video and Audio Codecs
When you encounter a video or audio problem caused by unsupported formats or codecs, you can use MiniTool Video Converter which is a completely free file converter without ads, watermarks, or bundles. It supports a wide range of formats and codecs, such as MKV, MOV, WebM, FLV, VOB, AVI, MP3, M4A, WAV, AV1, HEVC, AVC, VP9, Opus, and more. You can follow the below steps to change the codec of a video or audio file with MiniTool Video Converter.
Step 1. Click the button below to download MiniTool Video Converter and then install it on your Windows PC.
MiniTool Video ConverterClick to Download100%Clean & Safe
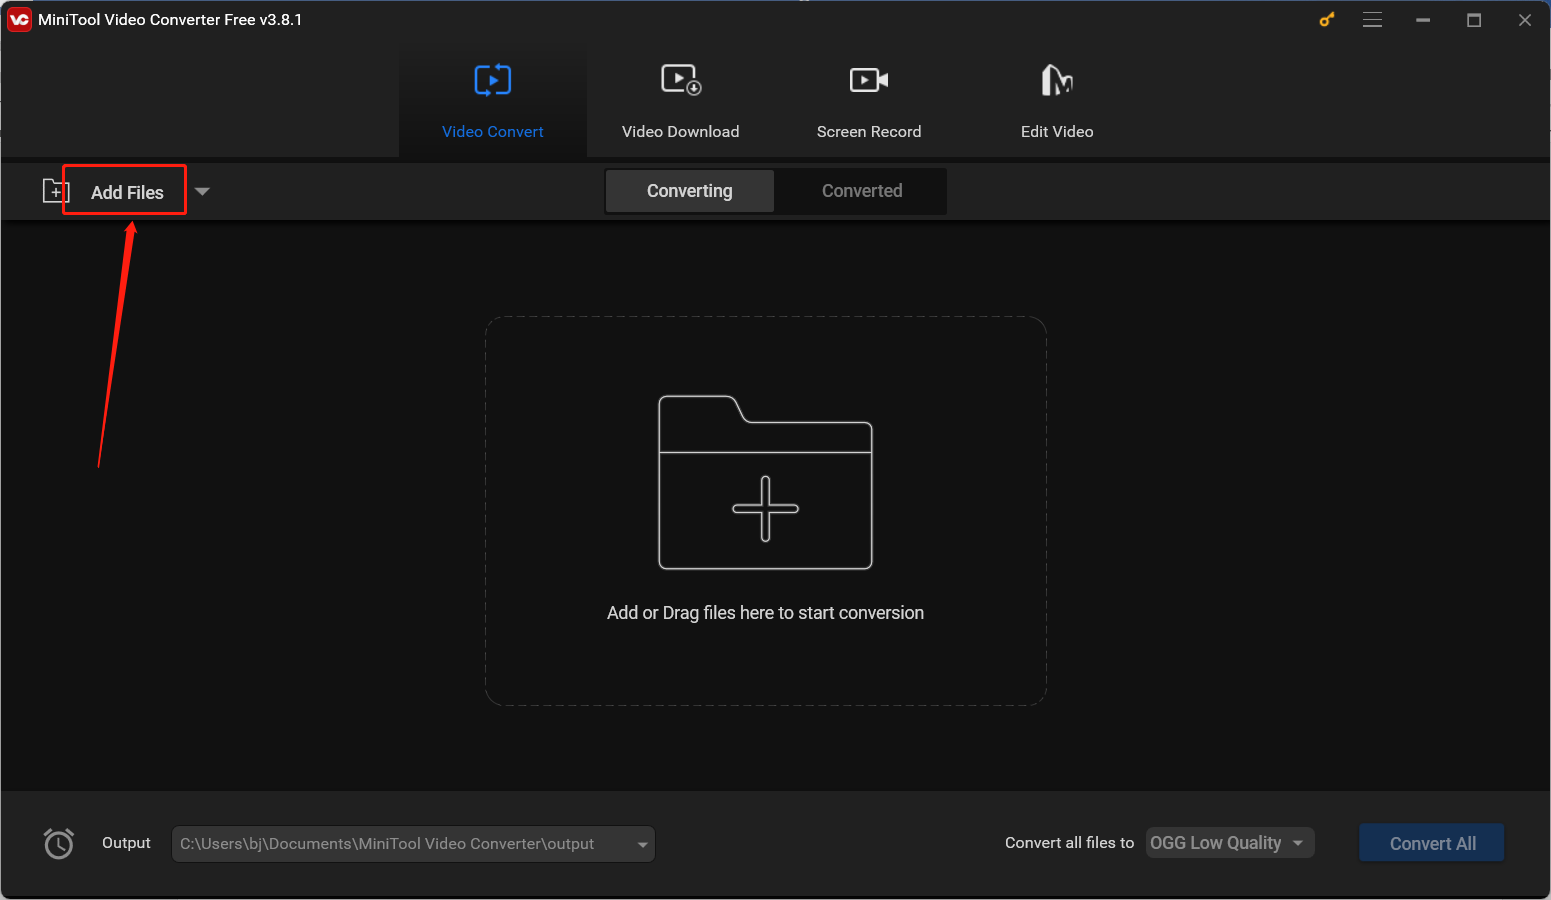
Step 2. Run this free program and click Add Files to import the target file that you want to change the codec.
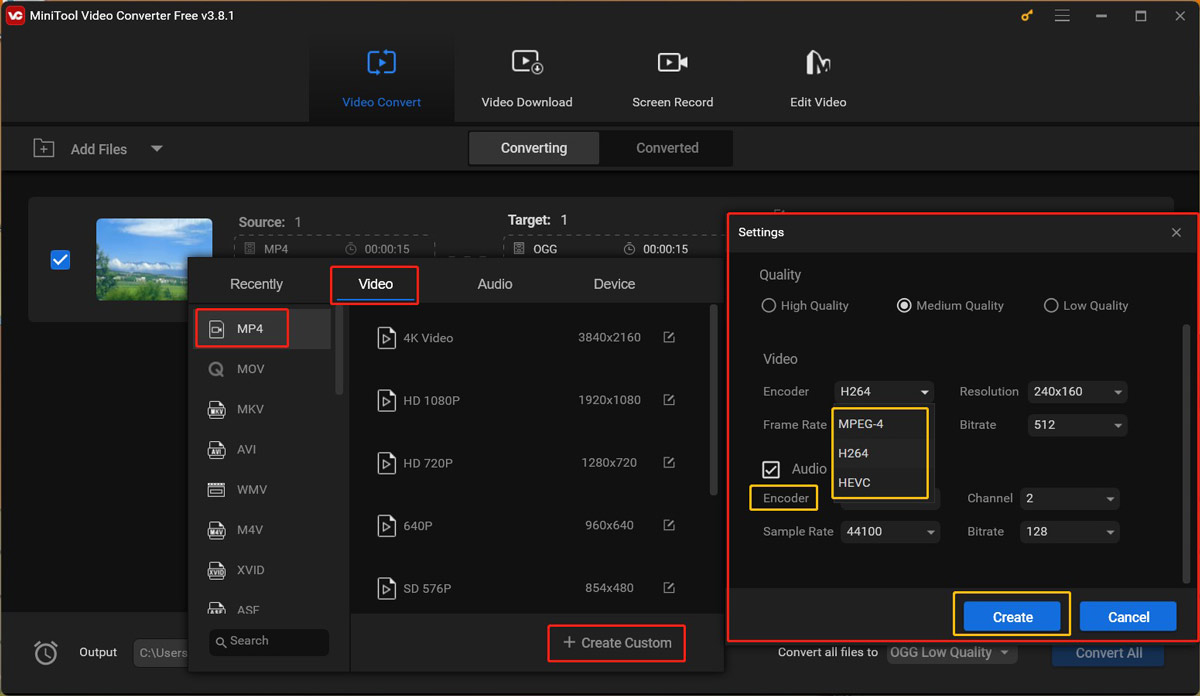
Step 3. Click the diagonal arrow in the Target section, switch to the Video tab, and choose the needed format as the output format. Next, click the + Create Custom option from the right panel. Open the Encoder list and choose the one you need. Meanwhile, you can customize the resolution, frame rate, and sample rate. If your video file has an audio track, you can also change the audio encoder and customize other parameters. Click Create to save the changes and choose the newly created format.
Step 4. Optionally, click the pen icon next to Target to rename the converted file and choose its saving path. Then click OK to confirm the operations.
Step 5. Click the Convert button to start the conversion process. Once done, go to the Converted section and click Show in folder to locate and check the converted file.

Conclusion
How to check codec of video file? It is quite easy to use VLC and MediaInfo to check the video and audio codecs of a file. If you need to change the video and audio codecs, MiniTool Video Converter is worth a try.
About The Author

Position: Columnist
Olivia is always full of enthusiasm for life and loves to record. She often records beautiful and memorable moments of life with her camera and then uses some editing tools to put the photos, videos and audio together. She also has a passion for writing and offers suggestions to readers on images, audio, videos and news. To provide more professional articles and solve problems for readers, she is continuing to learn multimedia as well.
User Comments :