PowerPoint in Office 2010 and later versions enables you to convert PowerPoint to MP4. But the PowerPoint 2007 and earlier versions don’t support exporting in video format. In the following content, we will show you how to turn PowerPoint into MP4 in Office 2010 (and later versions) and Office 2007 (and earlier versions). Please continue reading.
Convert PowerPoint to MP4 in Office 2010 and Later
In this part, we will display how to turn PowerPoint into MP4 on both Windows and Mac.
#On Windows
Step 1. After creating your presentation, you can directly export it to MP4. For PowerPoint 2010, you need to go to File > Save & Send > Create a video. For PowerPoint 2013 and later versions, you need to navigate to File > Export > Create a Video.
Step 2. Open the first dropdown list to choose the video quality. The higher the resolution, the better the video quality.
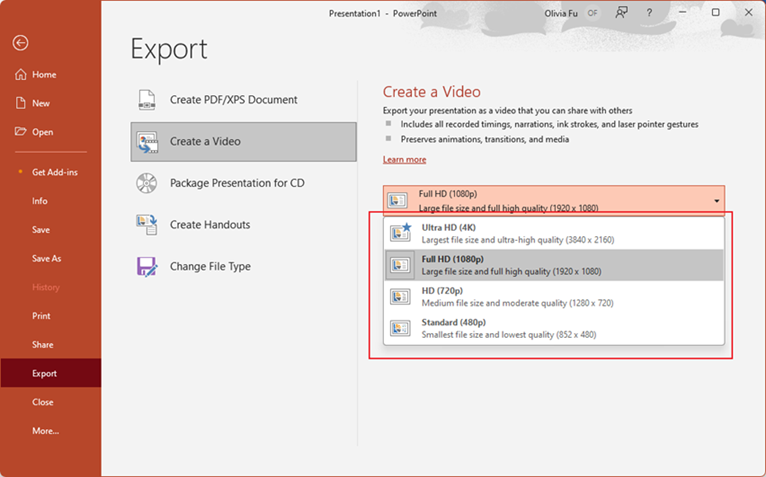
Step 3. Expand the second dropdown list and you can select whether to use Recorded Timings and Narrations.
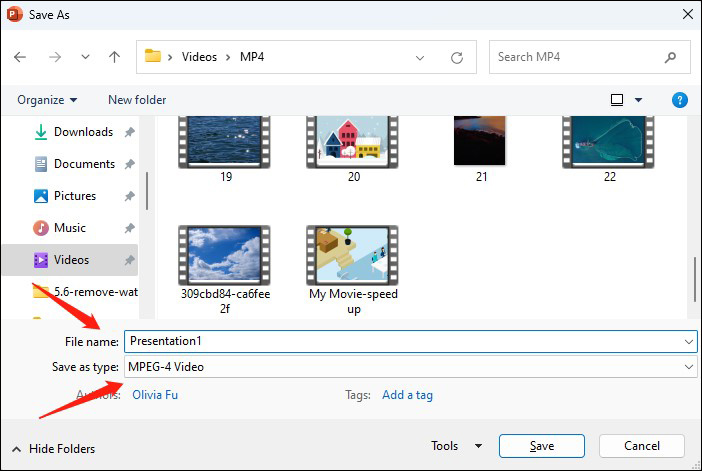
Step 4. Click the Create Video button, name the file, select MPEG-4 Video, and choose its saving path. Finally, click the Save button to start the process of converting PowerPoint file to MP4.
#On Mac
Step 1. Open the PowerPoint file that you want to convert to MP4, click File, and choose the Export option.
Step 2. Expand the File Format dropdown and choose MP4 as the output format.
Step 3. Open the Quality menu to choose the video quality.
Step 4. Click the Export button to save the MP4 video.
Convert PowerPoint to MP4 in Office 2007 and Earlier
Can you convert PowerPoint to MP4 in Office 2007 or earlier versions? The answer is no! There is no built-in support for exporting PowerPoint files as MP4 videos directly in PowerPoint 2007 and earlier versions.
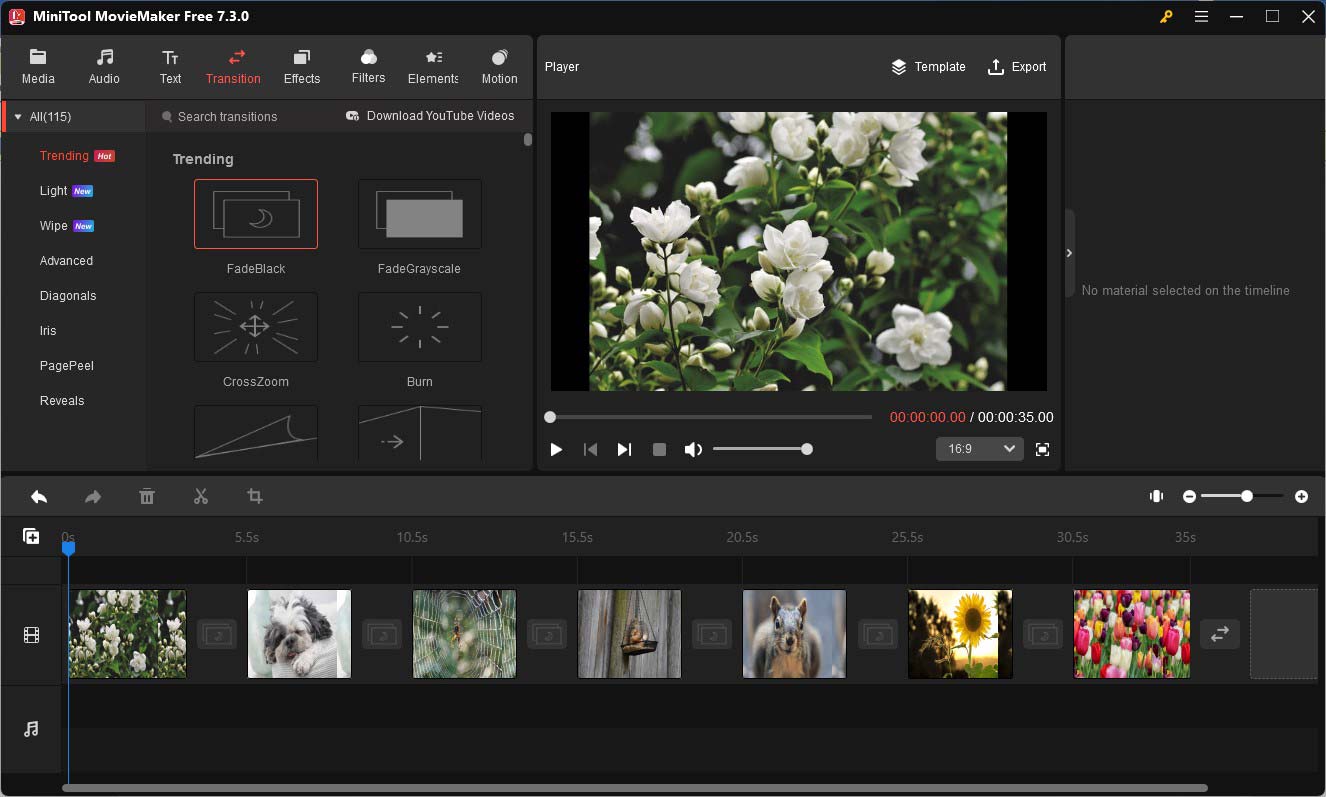
Fortunately, it supports exporting image files for each individual slide. Hence, you can use a good photo video editor to create a wonderful MP4 video with those image files. MiniTool MovieMaker is a good choice you can try.
MiniTool MovieMakerClick to Download100%Clean & Safe
How to Convert PowerPoint to MP4 via Screen Recording
Besides, you can also choose to use a screen recording to turn your presentation into MP4 video. Which screen recorder should you choose? It is better to choose a free screen recorder without watermarks and time limits. MiniTool Video Converter is one of the best choices. It can record any activities happening on the screen with the microphone and system audio. Moreover, it supports saving recordings in various formats including MP4, MKV, FLV, and more.
You can refer to the below guidance on how to convert PowerPoint to MP4 using MiniTool Video Converter.
Step 1. Download and install MiniTool Video Converter and then launch it.
MiniTool Video ConverterClick to Download100%Clean & Safe
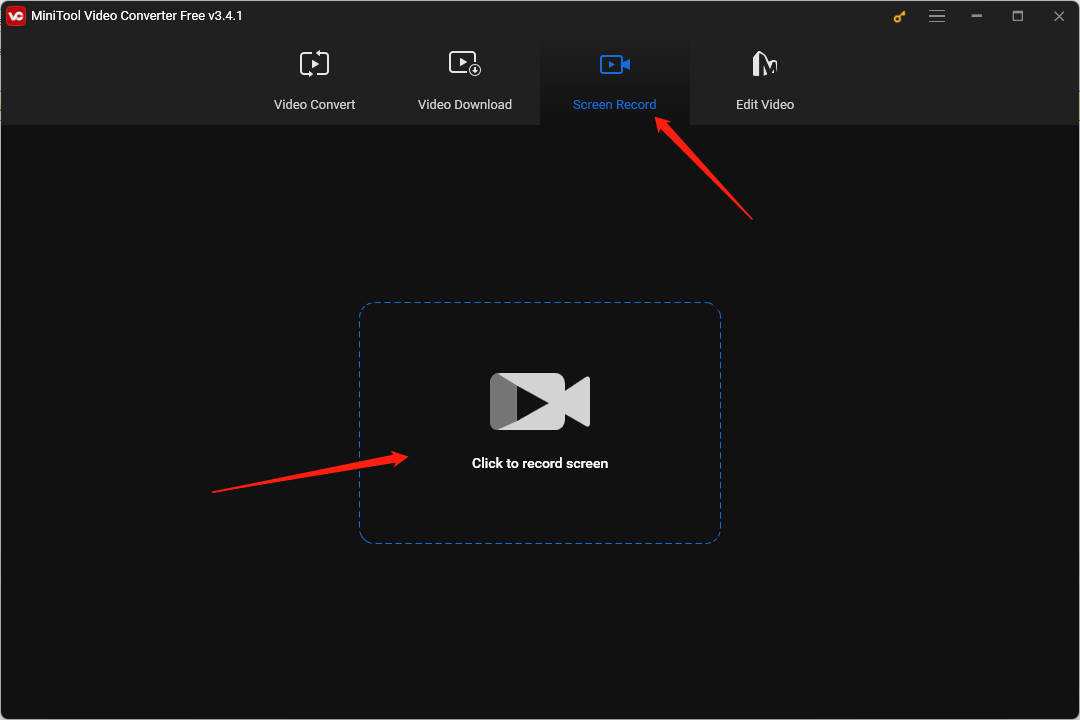
Step 2. Click the Screen Record tab and click the Click to record screen area to access MiniTool Screen Recorder.
Step 3. Open the PowerPoint presentation, return to the screen recorder, and customize the recording area according to the presentation. Choose whether to record the system audio and microphone audio.
Step 4. Click the Settings icon, expand the Output format list, and choose MP4. Adjust other settings like recording mouse movement, setting recording duration, etc. Then click OK to save the changes.
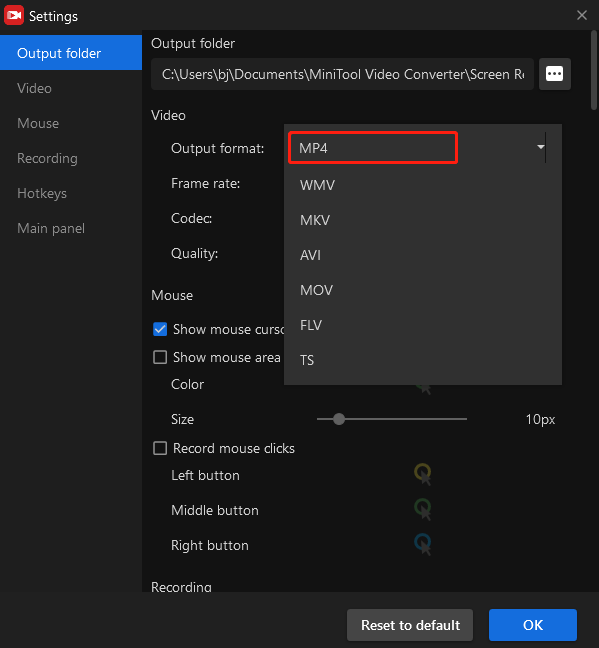
Step 5. Click the Record button or press F6 to start recording. After the presentation is finished, you can press F6 again to end the recording.
How to Convert PowerPoint to MP4 Online
In addition to the above methods, you can also try online PowerPoint to MP4 converters. They allow you to use them on your browser and without downloading any software. There are various good converters like Flixier, VEED.IO, Simplified, and more.
Final Words
How to convert PowerPoint to MP4? It’s not a hard thing to do, you can refer to the guide above and have a try!


![3 Ways to Convert iTunes Movies to MP4 [Detailed Guide]](https://images.minitool.com/videoconvert.minitool.com/images/uploads/2024/04/convert-itunes-movie-to-mp4-thumbnail.jpg)
![How to Record a Presentation on Google Slides [Detailed Guide]](https://images.minitool.com/videoconvert.minitool.com/images/uploads/2024/03/how-to-record-a-presentation-on-google-slides-thumbnail.jpg)
User Comments :